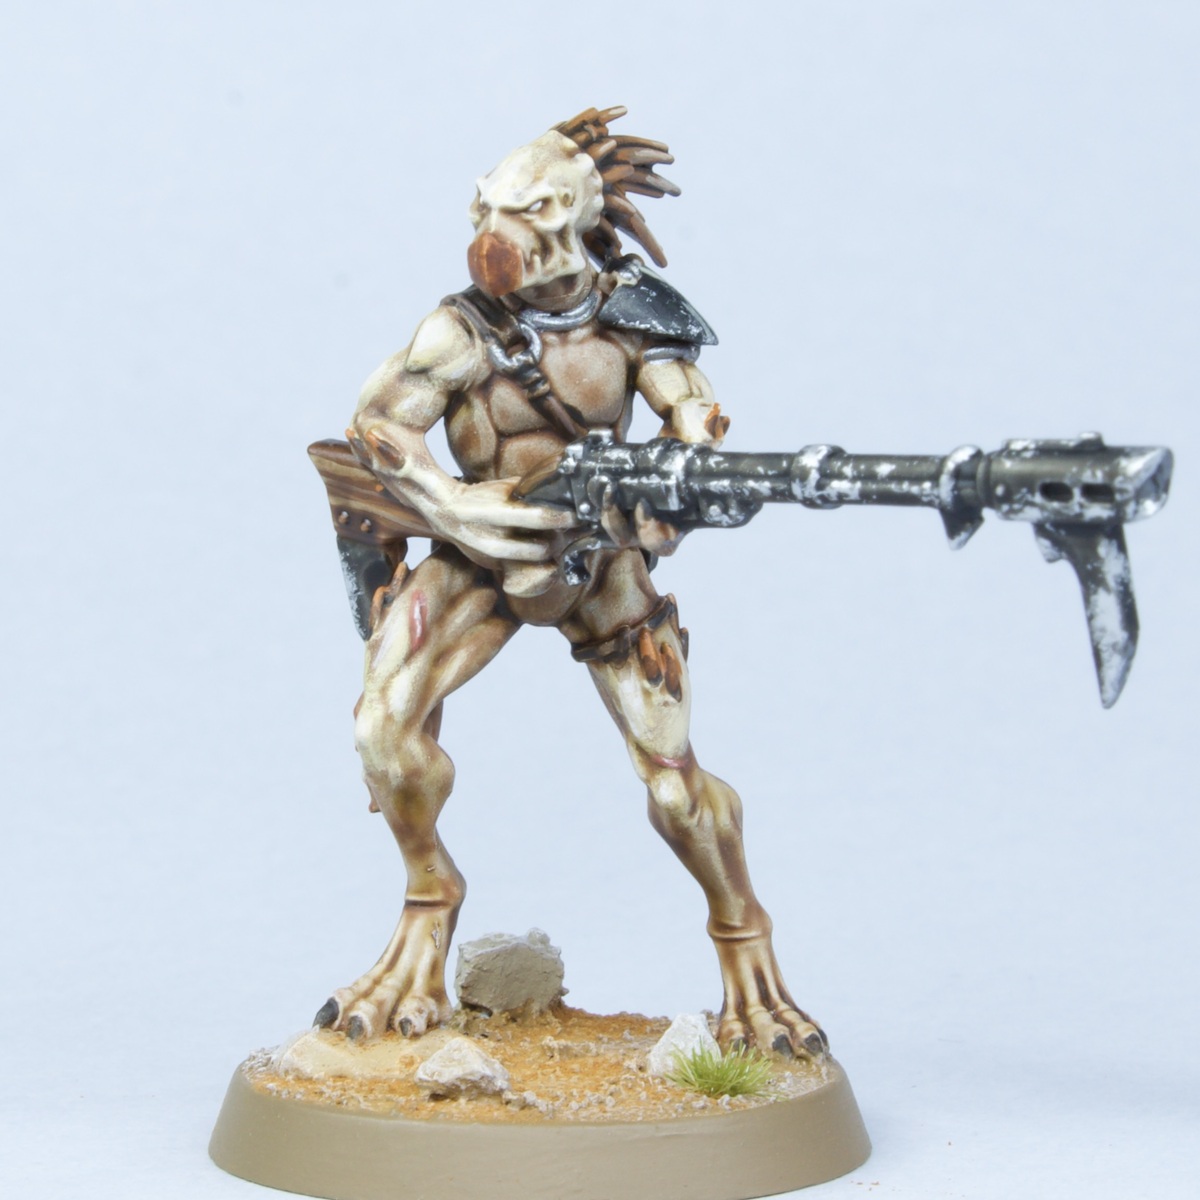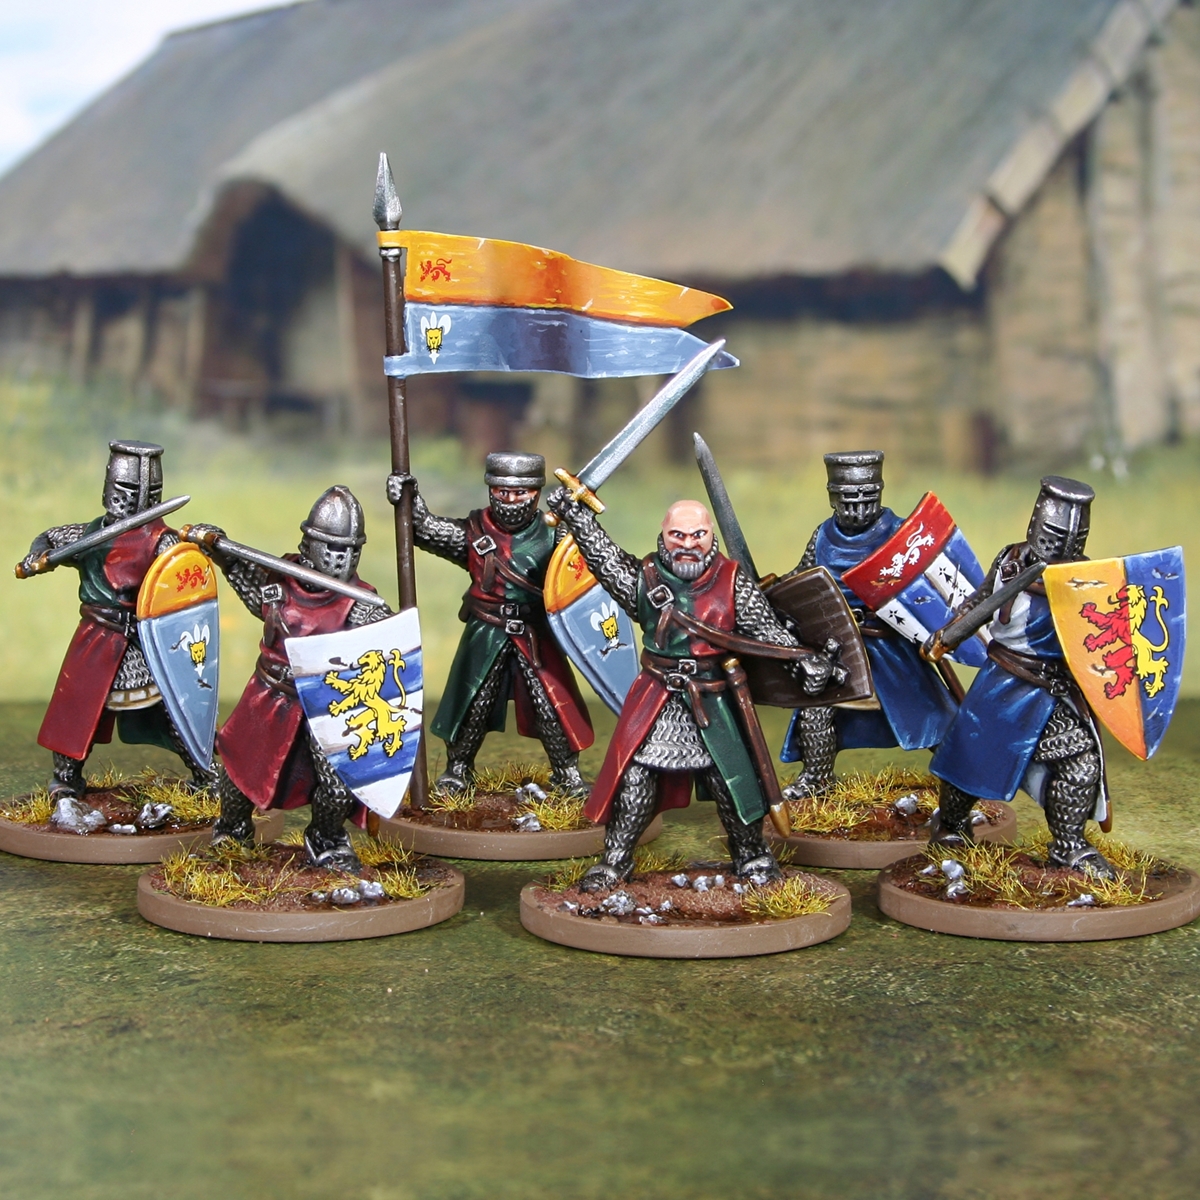
Barons' War: Foot Knights (1150-1320)

How I painted the main elements and the heraldry of my medieval knights. This guide has been broken down into sections so you can either replicate the schemes of my specific knights or use them to design your own. Please do not follow this as a step-by-step, but just take what you need or are interested in.
I've published this guide, but it is still somewhat of a work in progress. Anything that is fully fleshed out (and has a photo) is good to go.
I do however have plans to expand the range of colours used for clothing and heraldry.
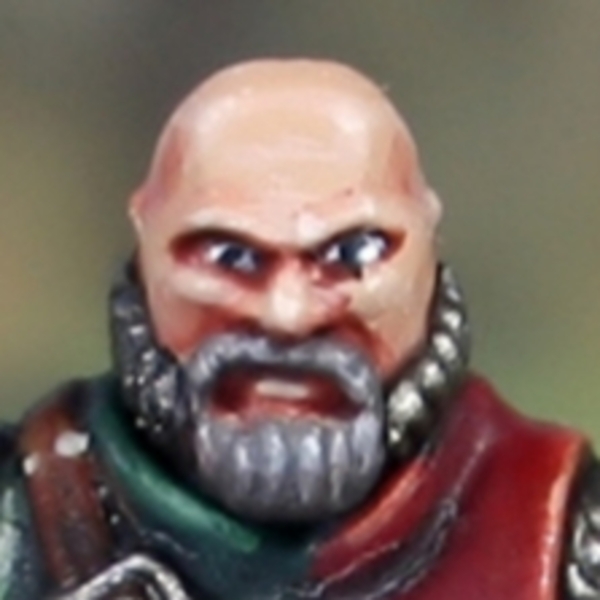 Skin
Skin
- Basecoat the skin with 4 parts Cadian Fleshtone , 4 parts Ushabti Bone and 1 of White . This sounds more complicated than it is, but its just an equal parts mix of two paints and a touch of white. Feel free to wing it.
- Take a little of the base colour and mix it 3:1 with Doombull Brown . Use this colour to add soft shading to the skin.
- Add more select shading with 5:1 Doombull Brown and Abaddon Black .
- Take a little of the base colour and mix it 2:1 with White . Use this colour to add highlights to the skin.
- Now mix the base colour 1:1 with White and add selective highlights.
 Chainmail and Steel
- Basecoat with Leadbelcher .
- Wash with Nuln Oil .
- I also like to enhance the shading in recesses and where areas of steel need separating. For this I typically use glazes of Agrax Earthshade .
- Overbrush and highlight using Ironbreaker .
- Finish with selective highlights of Silver RLM01 Metallic .
 Blades
- Basecoat with Vallejo Metal Color Silver .
- Glaze shading over half of the blade with Gryph-charger Grey . I would recommend keeping this thin and doing a couple of passes.
- Repeat on the half furthest from the pure silver, creating a rudimental gradient. This time I use Nuln Oil straight from the pot.
- Ensure tall edges are highlighted, where the previous two sets of glazes may have over spilled. For this I like to use Ironbreaker , simply because I find it catches edges easier than Vallejo Metal Color paints.
- Finish with selective highlights of Silver RLM01 Metallic on edges that still have the solid Silver basecoat. Focus more highlights towards the tip.
 Gold Details
- Basecoat using Retributor Armour .
- Shade selectively with Reikland Fleshshade where there are details or recesses that need more definition.
- Add some Silver RLM01 Metallic to the Retributor Armour , and highlight selectively.
- Finish with a few dots of pure Silver RLM01 Metallic .
 Dark Brown Leather
- Basecoat with Rhinox Hide .
- Add edge highlights to everything and volumetric highlights with Doombull Brown .
- Selectively highlight with XV-88 , using the big highlights from the previous stage as a guide.
- Finish with very small Screaming Skull highlights.
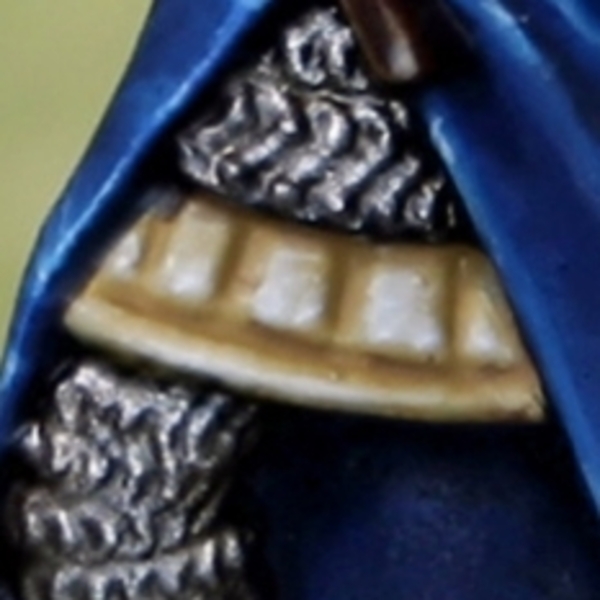 Padded Armour
- Basecoat with 1:1 Karak Stone and White .
- Wash with Tallarn Sand . To make this I simply mixed it 1:1 with Lahmian Medium .
- Shade selectively with Steel Legion Drab .
- Highlight with the 1:1 Karak Stone and White mix from earlier.
- Highlight selectively with White .
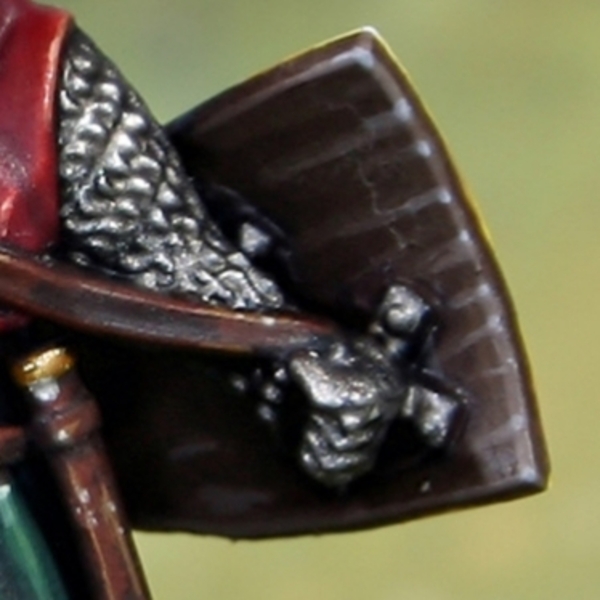 Wood
Wood
- Basecoat with Thondia Brown .
- Shade with Rhinox Hide .
- Highlight and add woodgrain with a mix of 2:1 Thondia Brown and Steel Legion Drab .
- Take the above paint and mix it 1:1 with Administratum Grey . Now use this for fine highlights.
- Increase the amount of Administratum Grey again, then add selective highlights.
- Finish with a few specular highlights of pure Administratum Grey .
Tinctures
I decided to stick to traditional heraldic colours for my knights, and locked down some standard recipes. Hopefully this results in their shields looking pretty authentic.
These first two recipes are "metals" and should be applied either on or under the colours that follow them. Generally speaking, "metals" should not be placed on "metals" and colours shouldnot be placed on "colours".
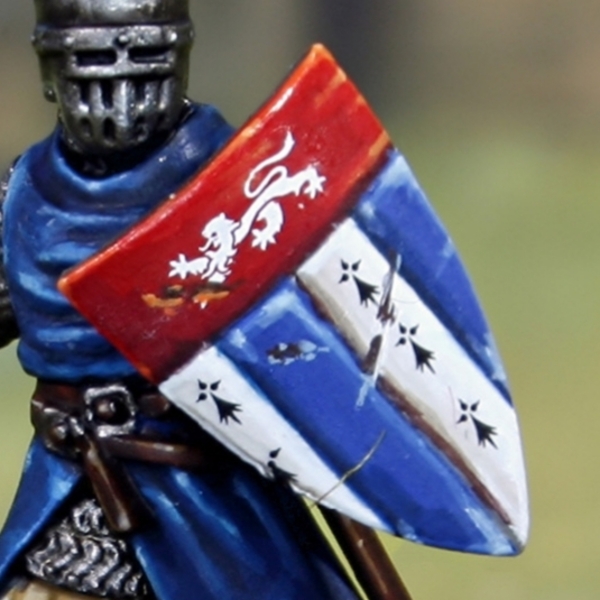 Argent (Silver/White)
- Basecoat with 1:2 Corax White and White .
- Glaze some shading in with Corax White . This shading should be very general, and leave plenty of room for extra shading.
- Enhance the above shading with Administratum Grey , covering a smaller area.
- Shade the very deepest recesses with Stormvermin Fur .
- Highlight edges with White .
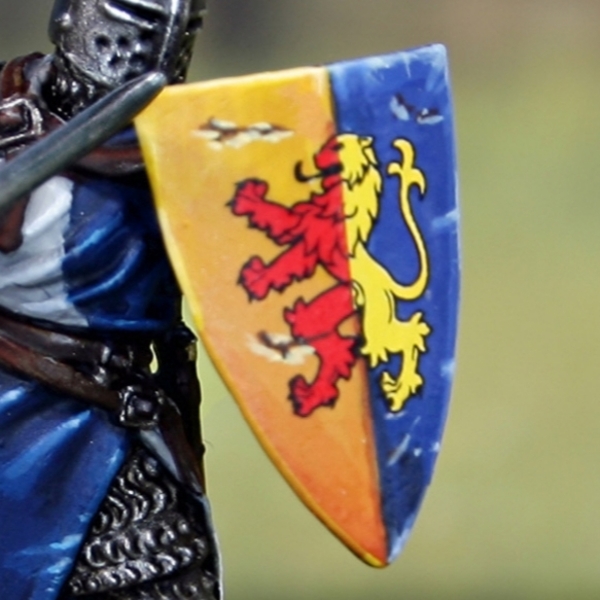 Or (Gold/Yellow)
- Basecoat with Averland Sunset .
- Glaze shading in with Skrag Brown . Be careful and consider doing multiple passes. This will be very powerful over the base colour.
- Enhance this shading with smaller amount of Doombull Brown .
- Add chunky highlights with Yriel Yellow .
- Highlight everything again, this time with fine lines of Flash Gitz Yellow . Now is also a good time to add in a few fine scratches.
- Selectively highlight with Ice Yellow .
- Finish with a few specular highlights of White on upward facing curves and corners.
...and now for the "colours". this will probably make up the majority of your heraldry in most instances.
 Gules (Red)
- Basecoat with 1:1 Mephiston Red and Evil Sunz Scarlet .
- Glaze some general shading in with Khorne Red .
- Enhance the above step with a smaller amount of Khorne Red mixed 1:1 with Abaddon Black .
- Add chunky highlights of Evil Sunz Scarlet .
- Apply fine edhe highlights of Troll Slayer Orange . Now is also a good time to add in a few fine scratches.
- Selectively highlight with Tau Light Ochre .
- Finish with a few specular/very small highlights of 1:1 Tau Light Ochre and White on upward facing curves and corners.
Sable (Black)
- Basecoat: Black
Chunky Highlight: Stegadon Scale Green & Black 1:1
Chunky Highlight: Stegadon Scale Green
Highlight: Stegadon Scale Green & Wraithbone 1:1
Highlight: Celestra Grey
Dot Highlight: White
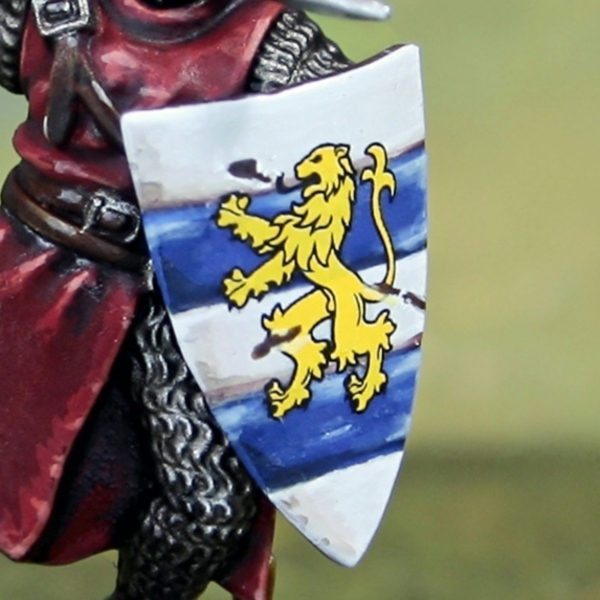 Azure (Blue)
- Basecoat with Macragge Blue .
- Glaze some general shading in with Kantor Blue .
- Enhance the above step with a smaller amount of with smaller amount of Kantor Blue mixed 1:1 with Abaddon Black .
- Add highlights with 1:1 Macragge Blue and Calgar Blue .
- Apply fine highlights of Calgar Blue .
- Selectively highlight with Fenrisian Grey .
- Finish with a few specular/very small highlights of Blue Horror on upward facing curves and corners.
Vert (Green)
- Basecoat:Warpstone Glow
Soft Shade: Warpstone Glow + Rhinox Hide
Recess Shade: Warpstone Glow + Black
Chunky Highlight: Warpstone Glow + Moot Green 2:1
Highlight: Warpstone Glow + Moot Green + Screaming Skull 2:2:1
Final Highlight: Moot Green + Screaming Skull
Dot Highlights: Screaming Skull
Purpure (Purple)
- Basecoat: Barak-Nar Burgundy
Wash: Naggaroth Night
Recess Wash: Black & Naggaroth Night 1:1
Highlight: Naggaroth Night & Screamer Pink 1:1
Glaze: Screamer Pink
Highlight: Naggaroth Night, Screamer Pink & Deepkin Flesh 1:1:2
Highlight: Naggaroth Night, Screamer Pink & Deepkin Flesh 1:1:8
Highlight: Deepkin Flesh
These next three are "stains". It seems likely that these are just variant of the reds and purples used above, but the term of stain for them seems to have stuck and seem to represent some sort of dishonour. If you were building a narrative around your force, they may be nice to include.
Murrey (Mulberry)
- Basecoat: Khorne Red & Screamer Pink 1:1
Shade: Khorne Red & Incubi 1:2
Chunky: Wazdakka & Screamer Pink 2:1
Edge: Wazdakka & Morghast Bone 1:1
Edge: Wazdakka & Screaming Skull 1:1
Corner: Add White to previous mix (edited)
Sanguine (Blood Red)
- Basecoat: Black & Khorne Red
Recess Shade: Black
Highlight: Khorne Red
Highlight: Wazdakka Red
Highlight: Squig Orange
Highlight: Tau Light Ochre
Tenné (Tawny)
- Basecoat: Balor Brown
Soft Shade: XV-88
Deep Shade: Doombull Brown
Highlight: Averland Sunset
Highlight: Averland Sunset & Dorn Yellow 1:1
Highlight: Dorn Yellow - Here are some other colours I have used. There is no historical precedent for these, but thought I would share anyway...
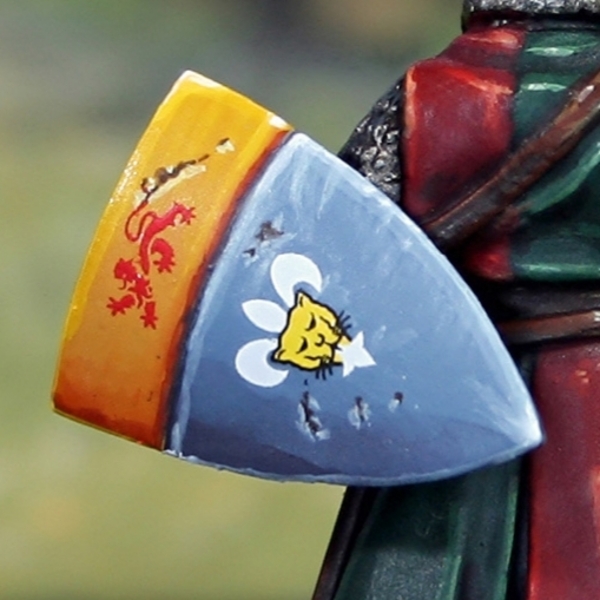 Blue-Grey
- Basecoat with Russ Grey .
- Mix some The Fang and Rhinox Hide 1:1 and leave it for the next stage. For now add a blob to your Russ Grey and shade your established basecoat.
- Further refine the shading with the 1:1 The Fang and Rhinox Hide mix from earlier.
- Apply chunky highlights of Fenrisian Grey .
- Add finer highlights using Blue Horror . Now is also a good time to add in a few fine scratches.
- Mix the Blue Horror 1:1 with White and selectively highlight.
- Finish with a few specular highlights of pure White .
Whilst you could use the recipes from the heraldry for the tabard, I mixed up the paints used (most of the time). My reasoning was that the cloth should read as a different material to the vibrant shield and would catch the light differently, due to its texture.
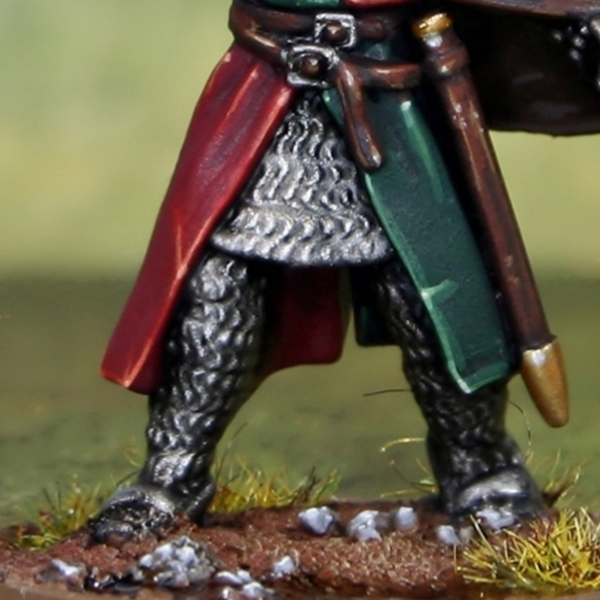
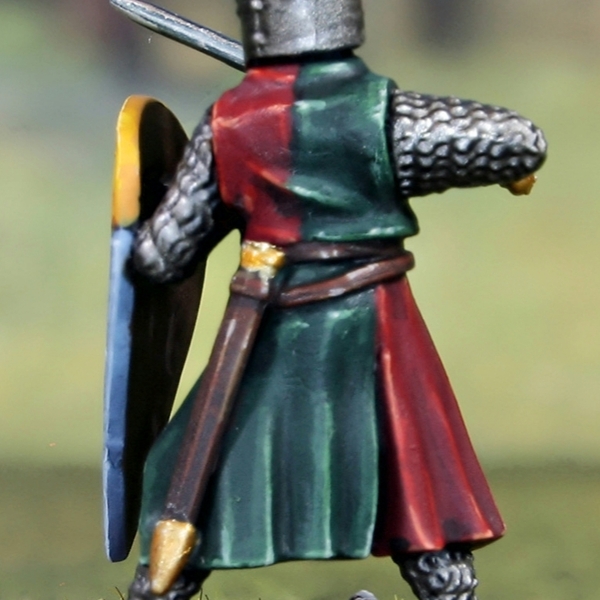 Dark Green Cloth
- Basecoat with Caliban Green .
- Shade between folds and the inside of the tabard with 1:1 Caliban Green and Abaddon Black .
- Add chunky highlights of 1:1 Caliban Green and Warboss Green .
- Take some of the previous colour and mix it 1:1 with more Warboss Green . Now use this colour for fine highlights.
- Mix the previous paint with an equal amount of Screaming Skull . This colour is great for selectively highlighting corners and curves.
- Finish with a few specular highlights of pure Screaming Skull .
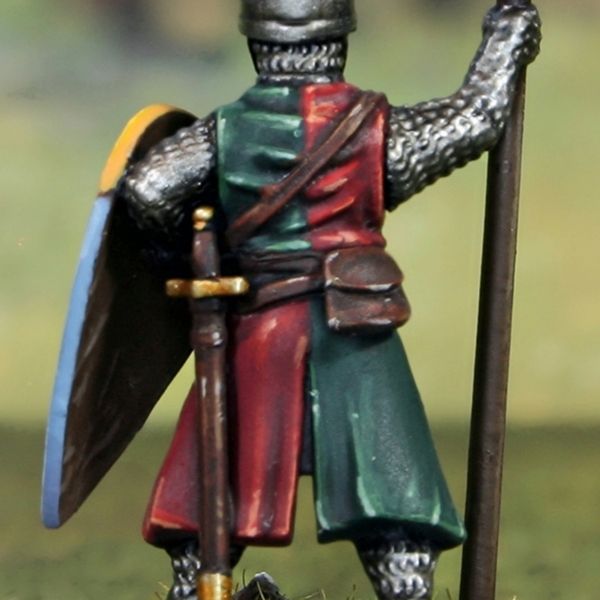 Dark Red Cloth
- Basecoat with Khorne Red .
- Shade between folds and the inside of the tabard with 1:1 Khorne Red and Abaddon Black .
- Add chunky highlights of 1:1 Khorne Red and Mephiston Red .
- Now apply fine highlights of Evil Sunz Scarlet .
- Selectively highlight with Fire Dragon Bright .
- Finish with a few specular highlights of Lugganath Orange , where needed.
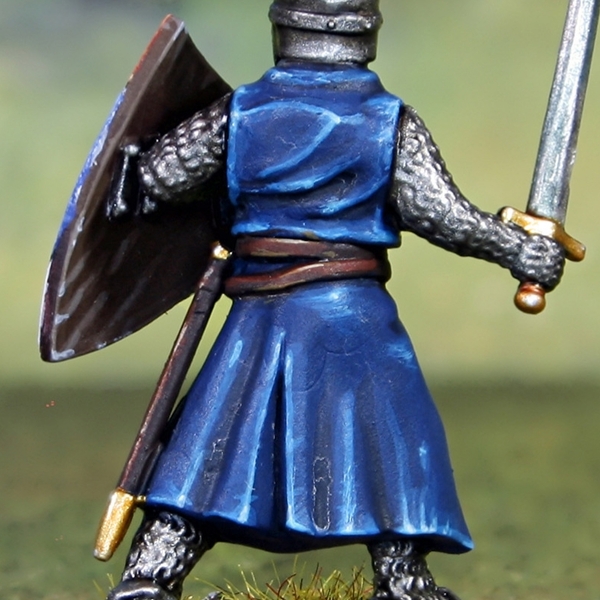 Dark Blue Cloth
- Basecoat with Kantor Blue .
- Shade recesses with a thin mix of 1:1 Kantor Blue and Abaddon Black .
- Highlight with 1:1 Kantor Blue and Teclis Blue .
- Apply fine highlights of Teclis Blue .
- Selectively highlight with Lothern Blue .
- Finish with a very small/specular highlights of Blue Horror .
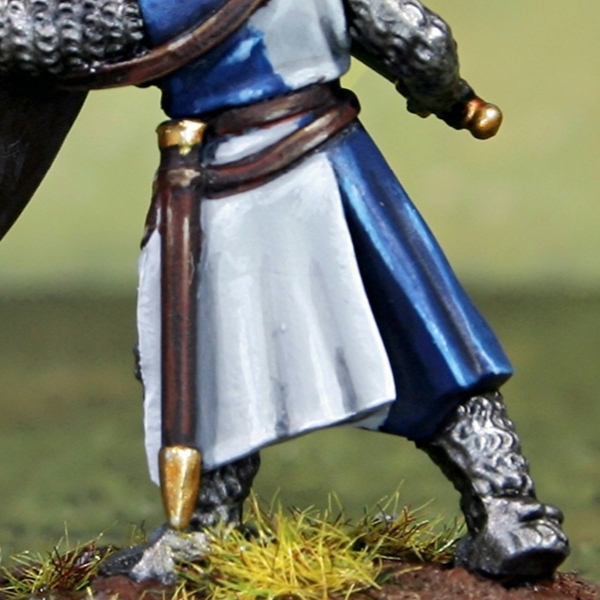
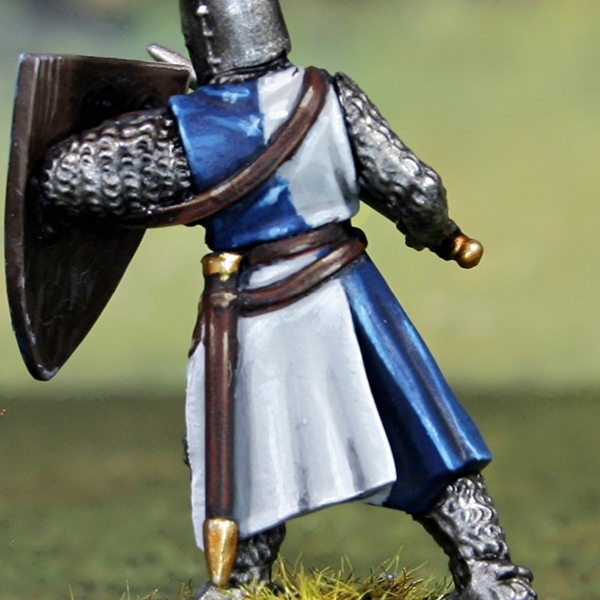 White Cloth (Neutral)
- Basecoat with Corax White .
- Wash with Administratum Grey . To make this I simply mixed it 1:1 with Lahmian Medium .
- Shade recesses with some thinned Dawnstone .
- Define breaks in material and shade very deep parts, using thinned Eshin Grey .
- Highlight raised areas with 1:1 Corax White and White .
- Finish with fine/selective highlights of pure White .
White Cloth (Cool)
- Basecoat with 1:1 Celestra Grey and White .
- Mix your basecolour 2:1 with Dark Reaper , then add some general shading to the cloth. Thin with a medium of your choice and be quite generous.
- Increase the amount of Dark Reaper in the above paint so it is now 1:2 basecolour and Dark Reaper . Use this colour to more selectively shade the cloth.
- Add extra definition with pure Dark Reaper in exceptionally deep recesses or where the cloth meets other materials.
- Mix the original basecolour 1:1 with White , then highlight.
- Finish with pure White highlights.
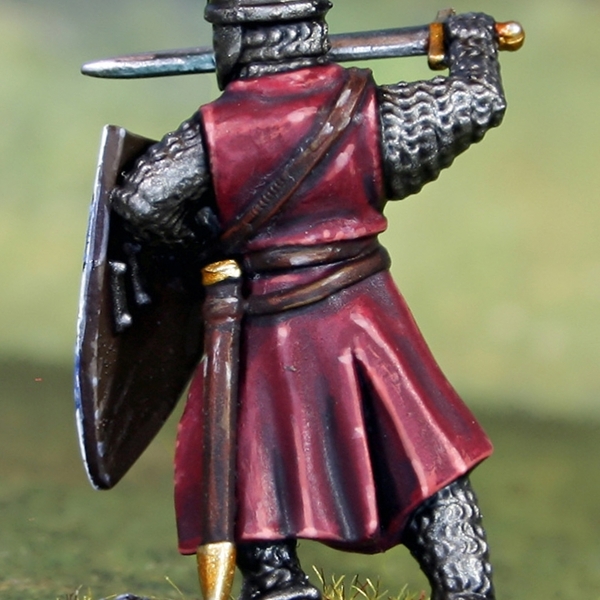 Burgundy Cloth
- Basecoat with Khorne Red .
- Shade recesses with a thin mix of 1:1 Khorne Red and Incubi Darkness .
- Enhance the shading by adding some Abaddon Black to the previous mix and shading more selectively.
- Apply highlights of Wazdakka Red .
- Now fine highlight everything with Squig Orange .
- Mix your Squig Orange 1:1 with Pallid Wych Flesh then selectively highligh.
- Take the above mix and add in more Pallid Wych Flesh . Use this for some final very small highlights.
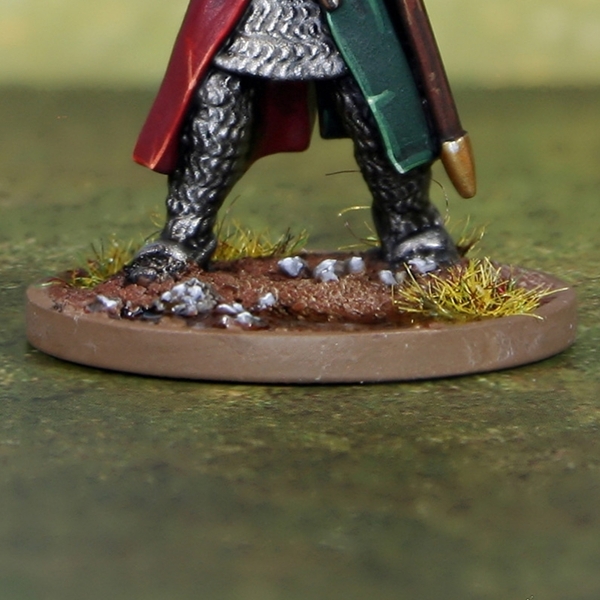 Bases
Bases
- Basecoat with Mournfang Brown . It is best to thin a little with water to ensure it flows into all of the recesses. Give it a couple of coats, until the colour is solid.
- Drybrush with Zamesi Desert , picking out all of the raised detail.
- Give the base a second dryrbush with Ushabti Bone . Make this drybrush a little lighter, so it only picks out the most raised points.
- Basecoat the rocks with Dawnstone .
- Wash the rocks with a little Agrax Earthshade .
- Highlight the rocks with Administratum Grey .
- Mix some White . into your Administratum Grey and more selectively highlight the rocks.
- Finally, finish off by painting the rim with Steel Legion Drab .
Now all that remains is to apply any turfs or flock that you wish. I like to use PVA glue and some flock from my local model shop.

Rookie Brushes
RookieBrushes
Aspiring miniature painter and biscuit enthusiast. Here to share my hobby and help where I can.
Citadel Painting System 54
Base 18
- Abaddon Black
- Averland Sunset
- Caliban Green
- Celestra Grey
- Corax White
- Incubi Darkness
- Kantor Blue
- Khorne Red
- Leadbelcher
- Macragge Blue
- Mephiston Red
- Mournfang Brown
- Retributor Armour
- Rhinox Hide
- Steel Legion Drab
- The Fang
- Thondia Brown
- XV-88
Shade 3
- Agrax Earthshade
- Nuln Oil
- Reikland Fleshshade
Layer 31
- Administratum Grey
- Blue Horror
- Cadian Fleshtone
- Calgar Blue
- Dark Reaper
- Dawnstone
- Doombull Brown
- Eshin Grey
- Evil Sunz Scarlet
- Fenrisian Grey
- Fire Dragon Bright
- Flash Gitz Yellow
- Ironbreaker
- Karak Stone
- Lothern Blue
- Lugganath Orange
- Pallid Wych Flesh
- Russ Grey
- Screaming Skull
- Skrag Brown
- Squig Orange
- Stormvermin Fur
- Tallarn Sand
- Tau Light Ochre
- Teclis Blue
- Troll Slayer Orange
- Ushabti Bone
- Warboss Green
- Wazdakka Red
- Yriel Yellow
- Zamesi Desert
Technical 1
- Lahmian Medium
Contrast 1
- Gryph-charger Grey
Vallejo Metal Color
Base 1
- 77.724 Silver
Vallejo Model Air
Base 1
- 71.063 Silver RLM01 Metallic
Vallejo Model Color
Base 2
- 70.858 Ice Yellow
- 70.951 White