Necron Kill Team

Step by step paint plan I used for my Necron Kill Team.
The Kill Team is made up of 3 Warriors, 2 Immortals with Gauss Blasters, 1 Immortal with Tesla Carbine and 1 Deathmark, for a total of 100 points (at the time of writing).
Unless noted otherwise, all of the paints are slightly thinned with a bit of water and used with a wet palette. I didn't thin the washes or technical paints at all and used a dry plastic plate as a palette.
Assembly & Basing
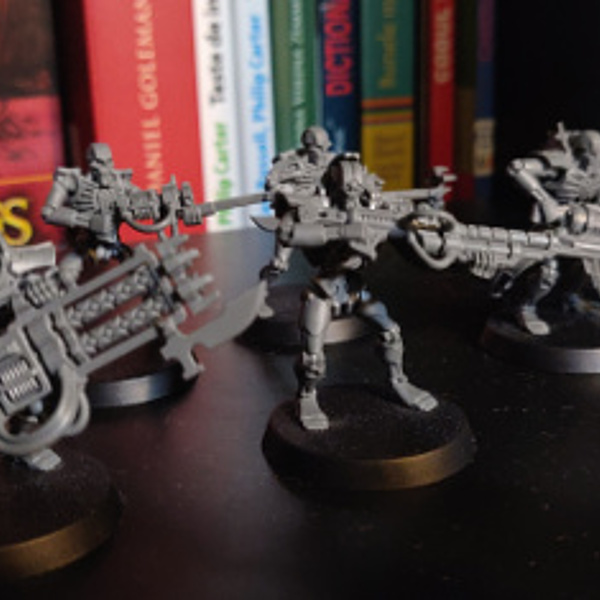 Assembled the miniatures according to the instructions booklet.
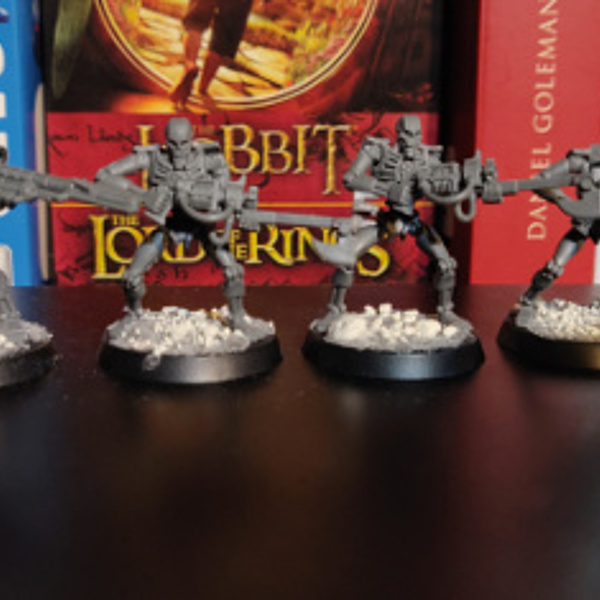 Based the miniatures using kitty litter, baking soda and super-glue, as described in one of Tabletop Minions' tutorial videos.
Assembling the ball-and-socket joins (such as for the shoulders and torso) took some getting used to. For the shoulders in particular, I would glue the hand holding the gun, using the cables for support if the model had any (Immortals did, the rest didn't). Then, while the glue was still wet, I would fit in the smaller hand and slightly move the weapon around until the smaller hand would fit. Fiddly, to say the least.
For the Warriors, I did not yet glue on the green tubes, as noted in the instruction booklet.
 Priming & Base Coating
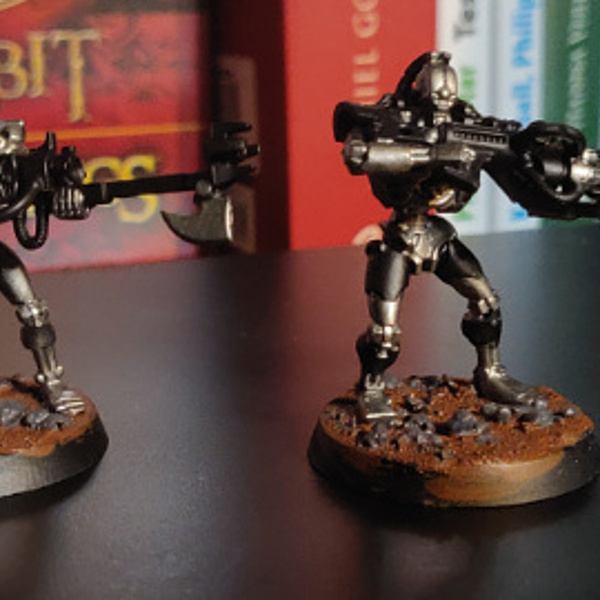
- Primed the miniatures using two layers of Abaddon Black .
- Added two layers of Leadbelcher for the armor and part of the weapons (such as the weapon blades on the Warriors).
- Applied a single layer of Mournfang Brown to the base, then a layer of Eshin Grey for the boulders.
Wash & Drybrush
- Applied a layer of Nuln Oil to both the miniatures and the bases.
- Applied a light drybrush of Ulthuan Grey to the base, trying to mostly highlight both large and tiny boulders (but not completely cover the Eshin Grey ). Ideally, you can still see the brown and both grays, as well as dark areas where the Nuln Oil gathered (such as under larger rocks).
- Applied a drybrush of Runefang Steel to the miniatures in order to bring back the metallic sheen of the more exposed areas of the armor, while maintaining a darker, non-reflective gray in the shadows.
Black Details
- Applied a layer of Moot Green to the indentations inside the weapons of the Immortals and Deathmark. Wasn't very precise about how I applied this, but I didn't get any green on anything that's not black.
- Re-applied Abaddon Black to the weapons and the Deathmark armor, repairing any errors I made in the previous steps and using the raised edges around the Moot Green areas in order to leave the insides green. This didn't work for the Gauss Blasters (the indentations weren't deep enough and I got black in them), so I repainted black over the Moot Green .
- Applied a layer of black to the base edges, cleaning up the previous work I did with the brown and gray.
- Highlighted all of the weapons and the Deathmark's armor with a drybrush of Eshin Grey , followed by a lighter drybrush on Ulthuan Grey on the most raised edges.
Green Details
- Applied three layers of multiple shades of green ( Caliban Green , Warpstone Glow , Moot Green , one layer each) to the weapon tubings and chest logos.
- Applied a layer of Yriel Yellow as a highlight to various areas of the weapon tubings and chest logos, as well as the eyes.
- Applied a coat of Ardcoat (without thinning it) to the weapon tubings, as well as the Deathmark's eyes and spheres around his armor.
- Cleaned up any mistakes I made at this point using Leadbelcher .
Finishing Touches
- Applied two layers of White Scar to the Immortal and Deathmark head stripes. Fixed any errors using Leadbelcher .
- Glued the green tubes for the Warrior weapons using Mod Podge. Had to file away the edges of the tubes in order for them to fit inside their slots. Took care to glue the spot where they were attached to the sprue toward the bottom of the slot, in order to hide the mark.
- Glued some Green Stuff World tufts and bushes to some of the bases using Mod Podge.
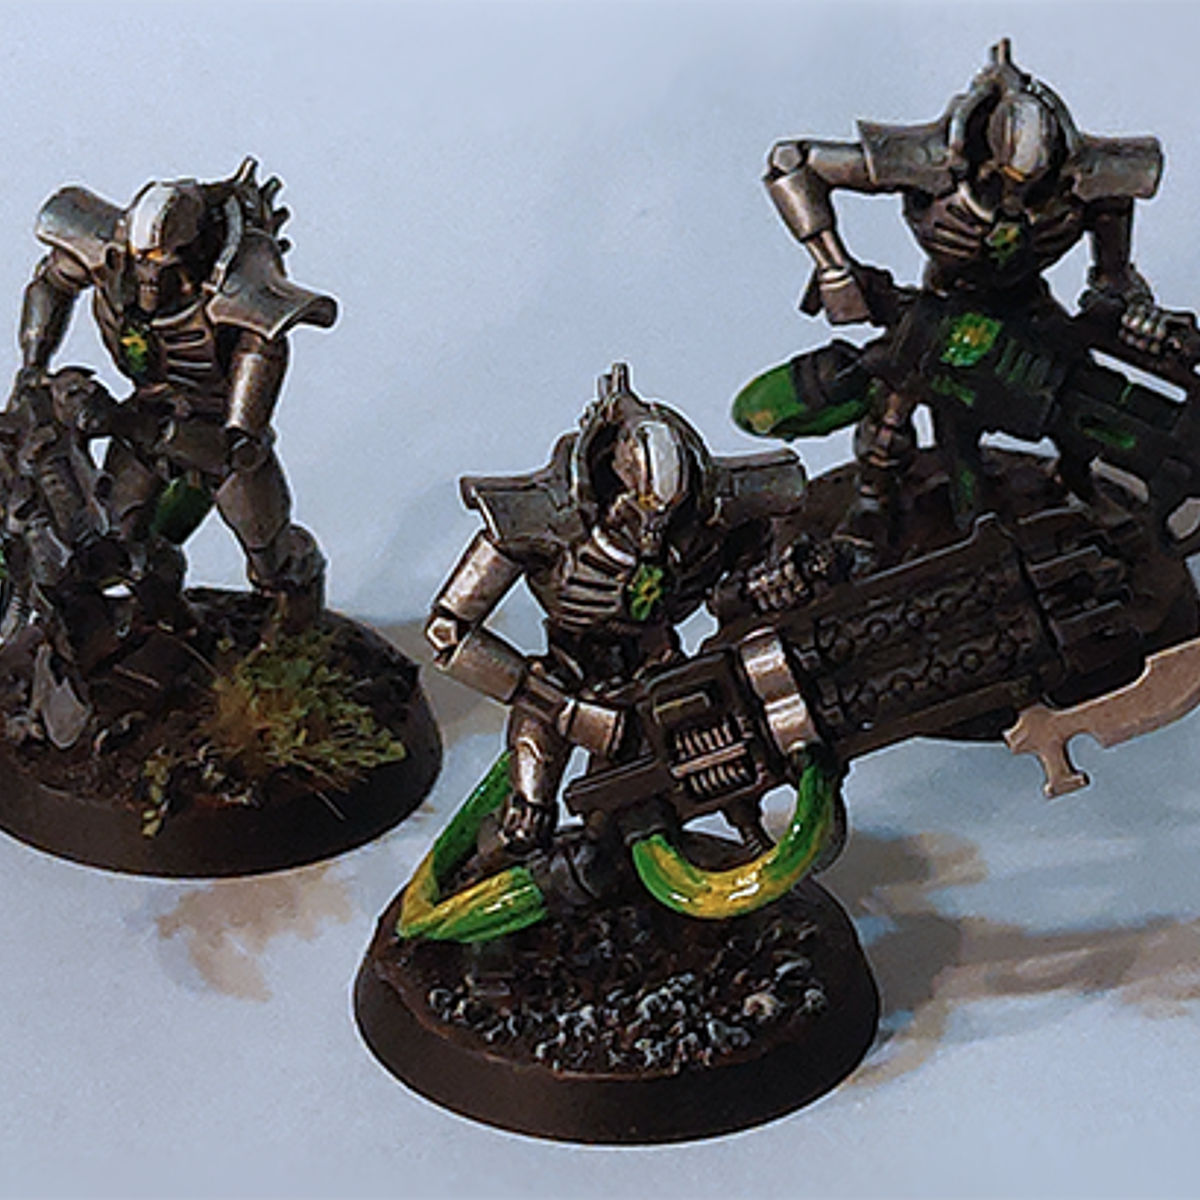
Final Results
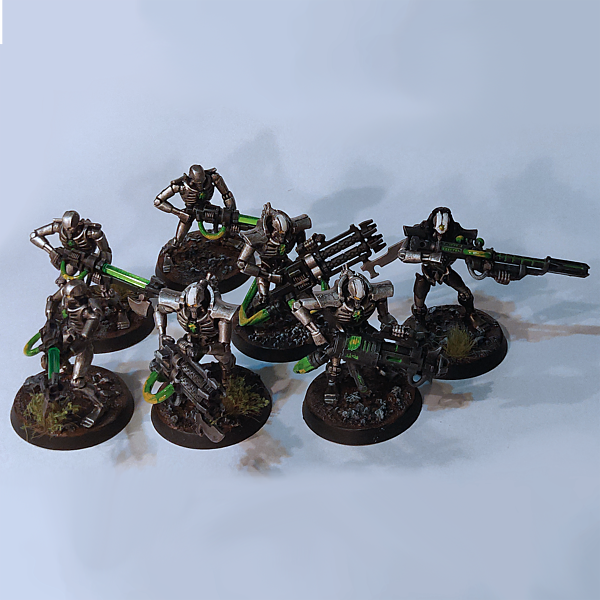 The complete team.
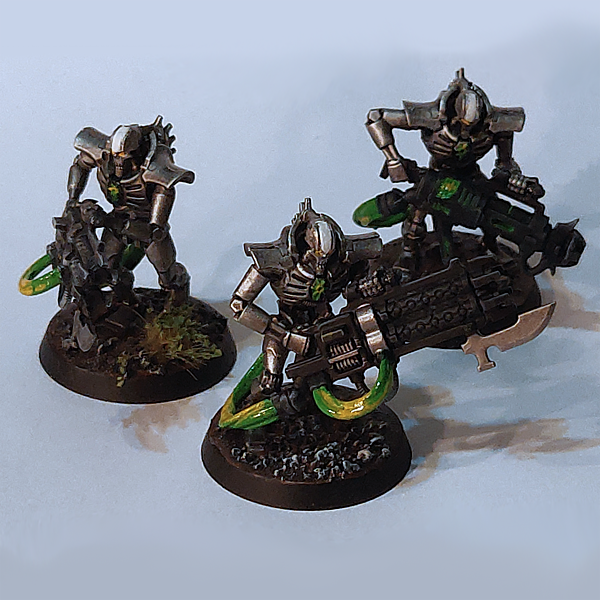 Immortals.
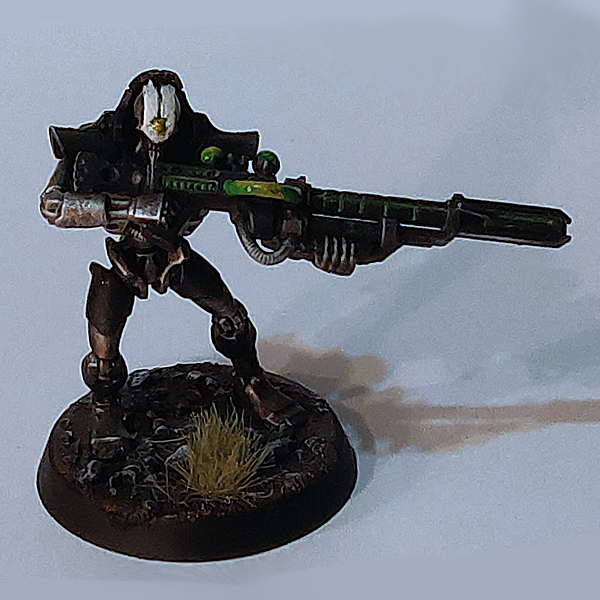 Deathmark.
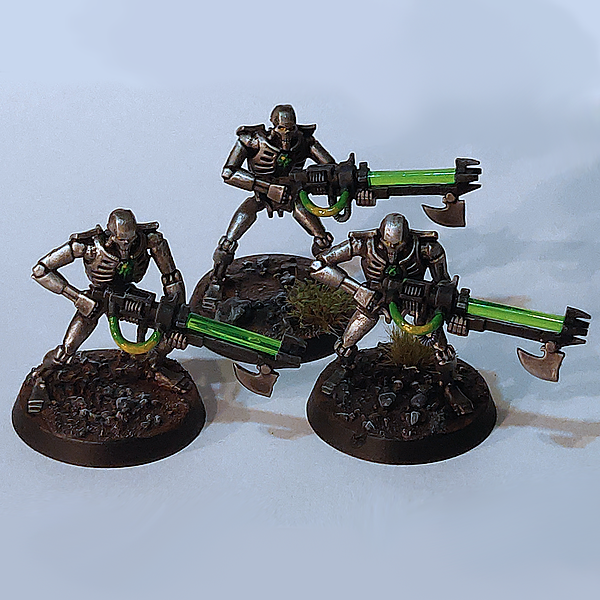 Warriors.

Andrei Cosoi
tokphobia
I code, I read and I eat
Citadel Painting System 13
Base 4
- Abaddon Black
- Caliban Green
- Leadbelcher
- Mournfang Brown
Shade 1
- Nuln Oil
Layer 7
- Eshin Grey
- Moot Green
- Runefang Steel
- Ulthuan Grey
- Warpstone Glow
- White Scar
- Yriel Yellow
Technical 1
- Ardcoat