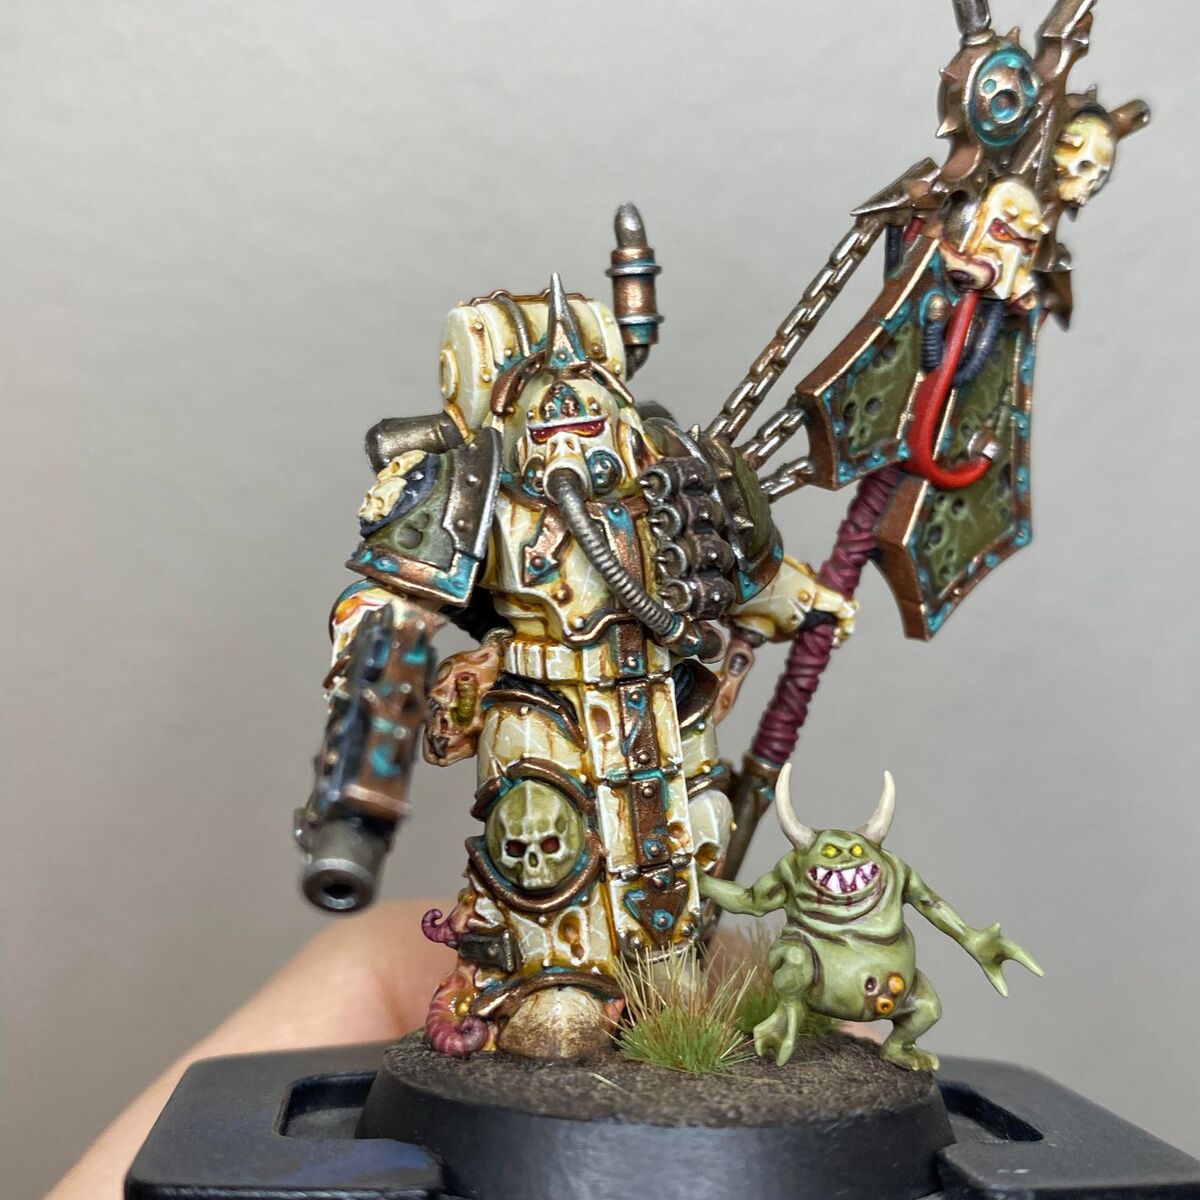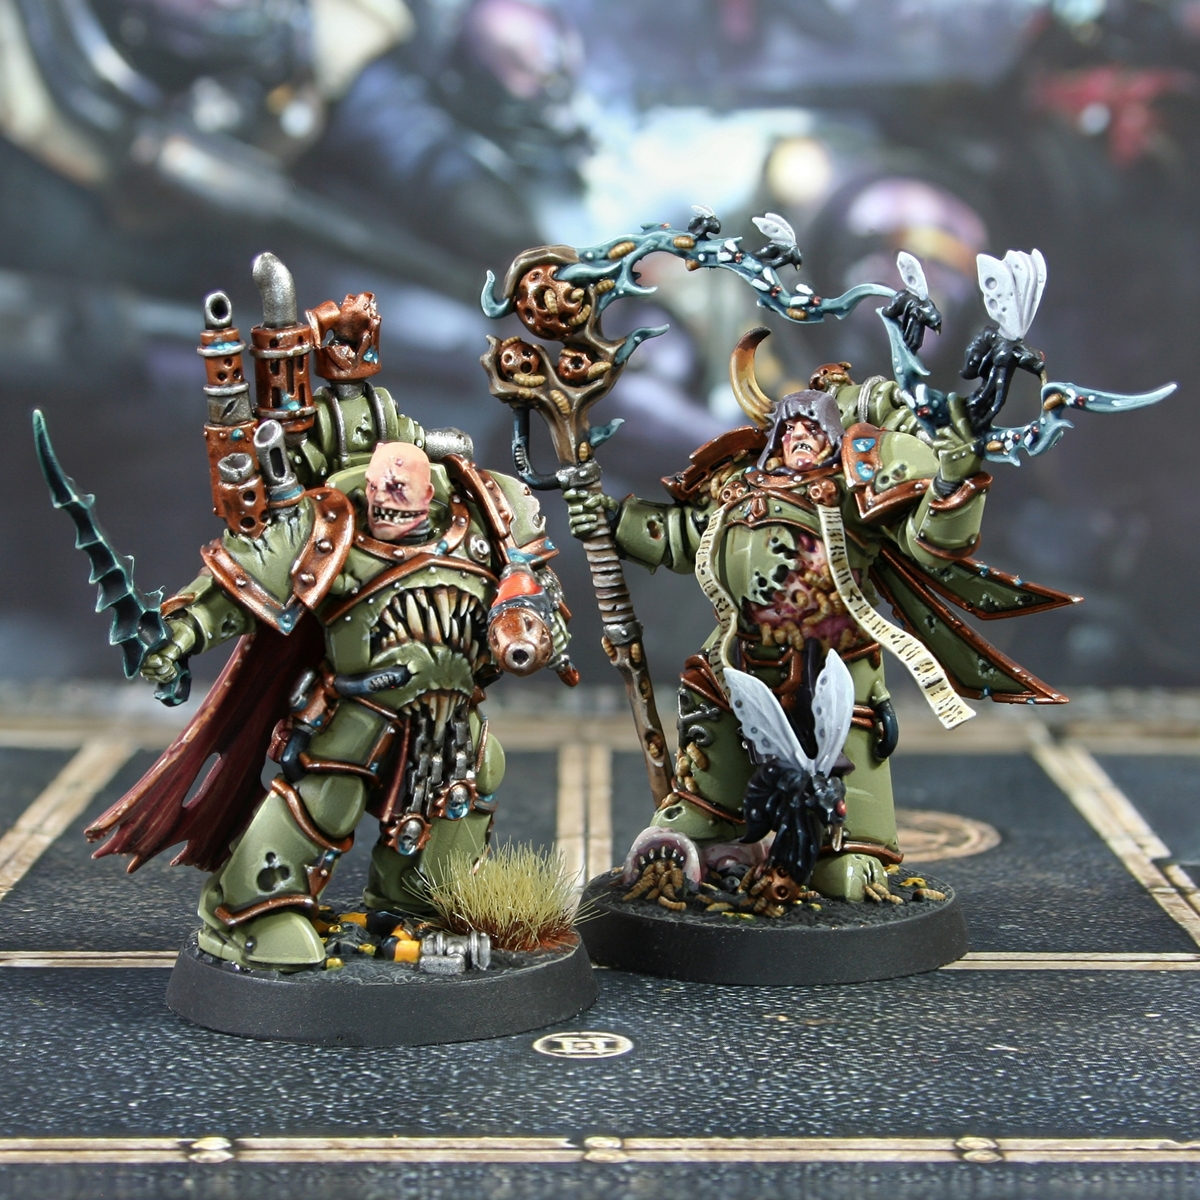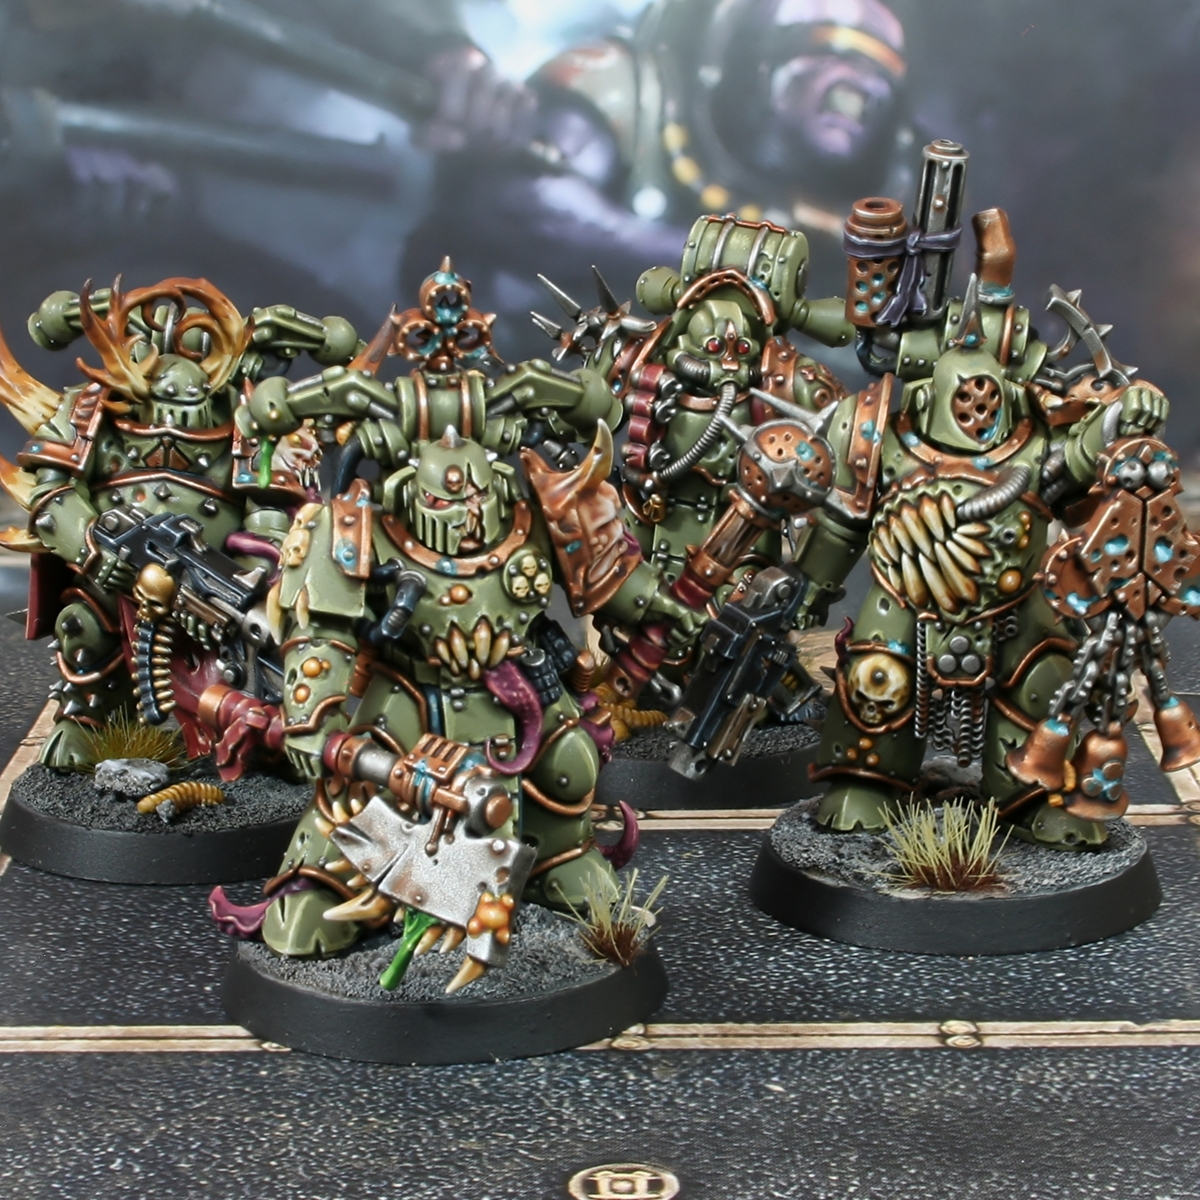
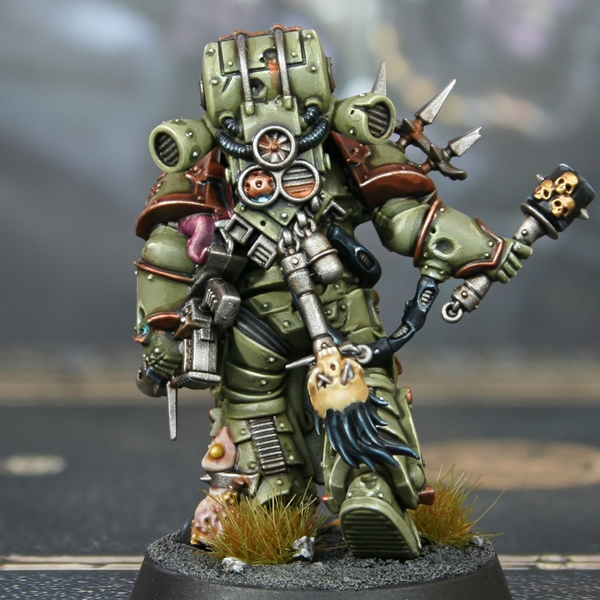
Death Guard Plague Marines

My attmept at replicating the Eavy Metal teams paint scheme for these Chaos Space Marines. The armour and trim recipes are based strongly upon a YouTube video from 'Infernal Brush'.
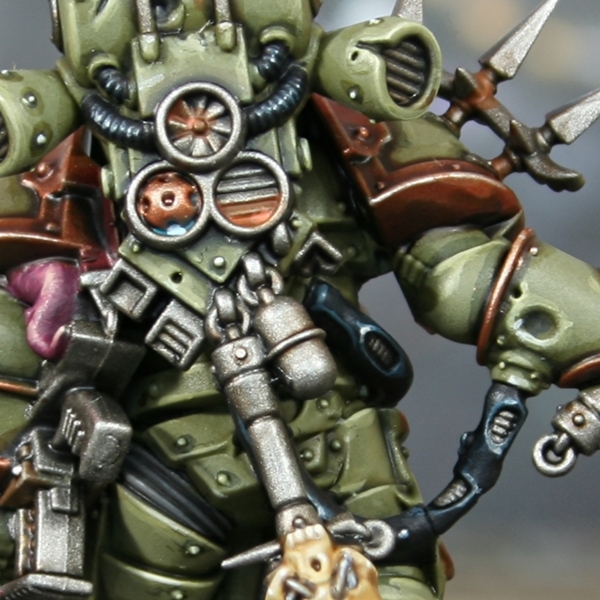
 Green Power Armour
- I started by priming with Vallejo Surface Primer Russian Green 4bo . You could use any colour and work your way up, but this is easier.
- Now basecoat the armour with Death Guard Green .
- Thin some Athonian Camoshade with an equal amount of water (or medium) and add some general shading to the recesses.
- Mix Rhinox Hide and Caliban Green 1:1 and shade deeper recesses with fine lines. I keep this mix pretty thin to control it easier.
- Add chunky highlights with Ogryn Camo , with a little Death Guard Green mixed in. Probably around 4:1.
- Add smaller, fine highlights with Krieg Khaki .
- Mix some White Scar (or another pure white) into the Krieg Khaki and selectively highlight corners.
- Finish the armour with specular highlights of White Scar where needed.
Undersuit
- Basecoat with Mechanicus Standard Grey .
- Wash with Nuln Oil .
- Pick out the majority of the easily accessible ridges with Dawnstone .
- More selectively highlight with Administratum Grey .
- On a few ridges where you really want to enhance the shape, mix a little White into the Administratum Grey , and apply small highlights.
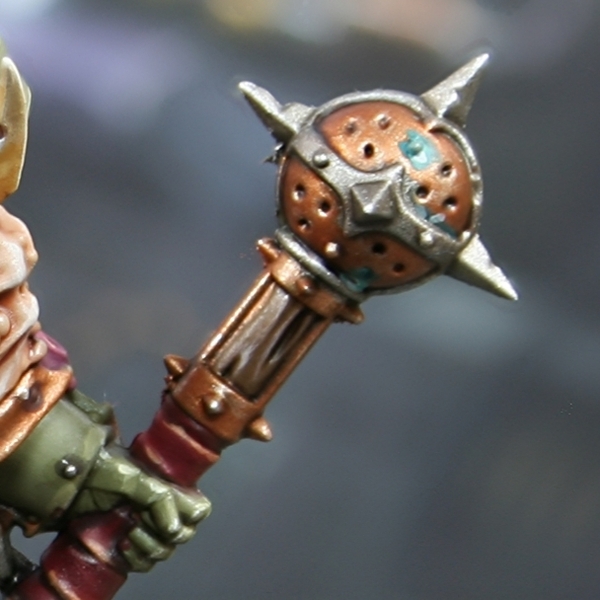
 Bronze Armour Trim
- Basecoat with Hashut Copper mixed with just a touch of Doombull Brown , about 9:1 if you wanted a ratio.
- Shade recesses and around recesses with Agrax Earthshade .
- In the very deepest parts, add line shading with a thin 1:1 mix of Khorne Red and Abaddon Black .
- Mix some light gold and silver into the base mix, so the paints are roughly in equal parts. If you wanted to use Citadel paints, I would recommend Liberator Gold and Stormhost Silver . Use this mix to add highlights to edges.
- Increase the amount of Stormhost Silver and add fine highlights.
- With pure Stormhost Silver add selective specular highlights. I prefer Vallejo Model Air Silver RLM01 Metallic .
- To add verdigris to the bronze, mix Sotek Green and Kabalite Green 1:1 and run it into recesses. To enhance the effect, mix in increasing amounts of White Scar and cover a small area.
Old Gold
- Basecoat with a dirty gold colour. I like to use Regency Gold , but a mix of Retributor Armour and Runelord Brass will work well. the exact colour isnt super important.
- Was with Agrax Earthshade .
- Add increasing amounts of :silver into the base colour and highlight smaller and smaller.
- Finish with a few select Silver RLM01 Metallic highlights.
 Bone Parts
- Basecoat with Ushabti Bone .
- Wash with Skeleton Horde thinned 1:2 with Contrast Medium . This is to both add a little colour into detail and begin shading around the base of the horns.
- Run a thin line of Agrax Earthshade into deep cracks.
- Glaze XV-88 upwards, covering roughly two thirds of spikes.
- Repeat the process covering less area with a glaze of Mournfang Brown . This colour is so rich, I kept it thin and did two passes in the end.
- Mix the Mournfang Brown with Rhinox Hide and glaze again. At this point you should be coverring less than one thirds of it (roughly).
- Finally, glaze the tip with Rhinox Hide .
- Highlight lighter bone parts with Skeleton Horde and even smaller highlights with Pallid Wych Flesh and White Scar .
 Old Wood
- Basecoat with Steel Legion Drab .
- Wash with Agrax Earthshade .
- Add edge highlights with Baneblade Brown , both to edges and areas where you want to add the effect of woodgrain.
- Use Karak Stone to add smaller highlights, towards points.
- Mix some :white into the Karak Stone and add specular highlights where needed.
 Steel
Steel
- Basecoat with Leadbelcher .
- Wash with Nuln Oil .
- Edge highlight with Ironbreaker .
- Add fine highlights with small amounts of Vallejo Model Air Silver RLM01 Metallic .
To dirty up the metal work I did a mix of things, mostly glazes to tint areas. For this I used Wyldwood for general shading, Aggaros Dunes to add richness, then Cygor Brown and finally Ratling Grime to darken areas. Where I wanted specific patches of gathered rust, I ran in watered down Skrag Brown .
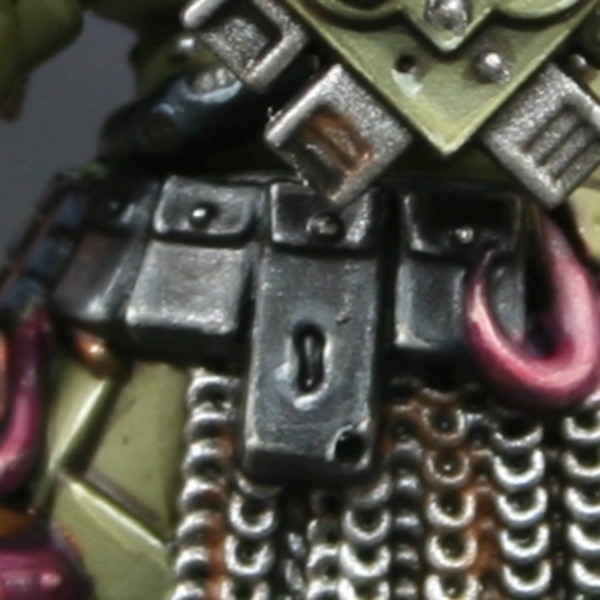 Black Leather
- Basecoat with Abaddon Black .
- Chunky highlights of 1:1 Abaddon Black and Skavenblight Dinge .
- Fine highlights of Skavenblight Dinge .
- Selective highlights of Stormvermin Fur .
- Specularhighlights of Karak Stone .
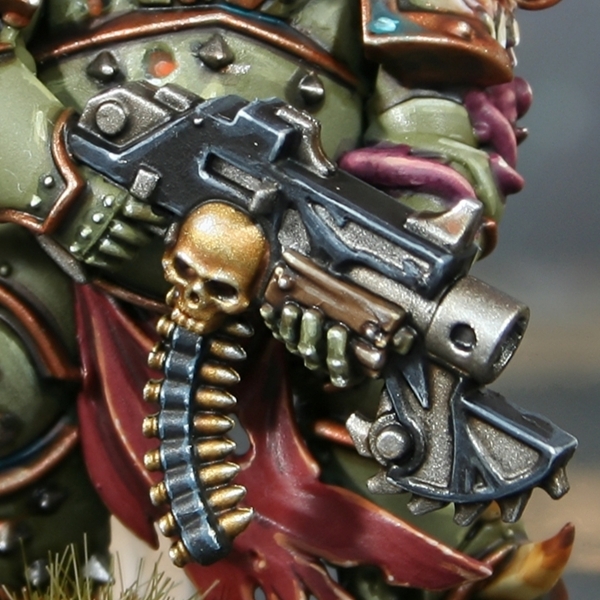 Black Gun Casing
- Basecoat with Abaddon Black .
- Chunky highlight with Dark Reaper .
- Fine highlights of 1:1 Dark Reaper and Administratum Grey .
- Selective highlights of Administratum Grey .
- Specular highlights of Administratum Grey and White Scar .
 Black Rubber Tubing
- Basecoat with Abaddon Black .
- Paint chunky highlights of Incubi Darkness onto raised details.
- Mix the Incubi Darkness 1:1 with Deepkin Flesh and add fine highlights onto edges.
- Add selective hihglights of Deepkin Flesh on courners and points that would catch the light.
- Mix a little Ivory or Pallid Wych Flesh into your Deepkin Flesh and add specular highlights where needed.
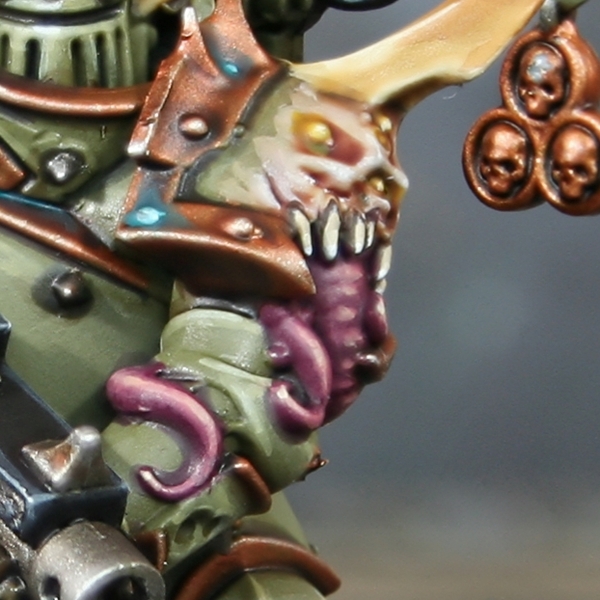 Fleshy Tentacles
- Basecoat with Screamer Pink .
- Wash the tentacle with Druchii Violet . Don't let it pool too much.
- With a 1:1 mix of Screamer Pink and Pink Horror Horror cover most of the flesh with a thick glaze. Pulling paint towards the centre always. Paint everything just outside of recesses where the dried shade has dried.
- Paint a smaller area with pure Pink Horror . Use the same technique as above to ensure a smooth transition. This time go over around two thirds of the area, painting higher to simulate where light would hit and adding the illusion of depth below.
- With a 1:1 mix of Pink Horror and Kislev Flesh flesh paint an even smaller area, pulling even closer to the centre and higher.
- With pure Kislev Flesh paint a very small area. For some tentacles I add this highlight as multiple small lines to add texture.
- Optionally, add dot highlights of Flayed One Flesh to the points of tentacles and the centre of the previous steps highlights.
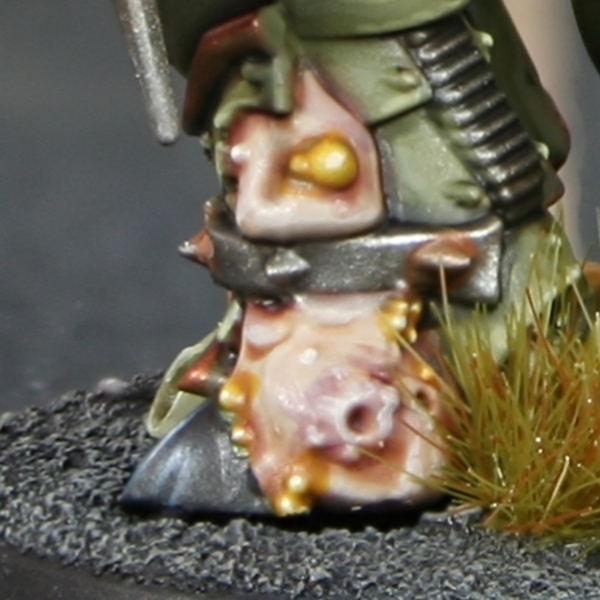 Undead Flesh
- Basecoat with an equal part mix of Rakarth Flesh , Ushabti Bone and White Scar .
- I now washed the flesh with Reikland Fleshshade , ensureing I pulled the pigment away from open areas.
- Use gentle glazes of Berserker Bloodshade , Druchii Violet and Drakenhof Nightshade to add interest/make areas look sore.
- Add a little White Scar to the base mix and add fine hihglights where appropriate.
- Finally, finish off with specular hightlights of White Scar .
For the boils, I just pop some Iyanden Yellow over the pre-highlighted skin and add a final Screaming Skull specular highlight.
 Green Slime
- Basecoat with a 1:1 mix of Waaagh! Flesh and Moot Green .
- Wash with Biel-Tan Green .
- Add highlights of Moot Green to all edges and raised detail.
- Mix some Vallejo Model Color Ice Yellow into the Moot Green and apply in smaller highlights. Dorn Yellow is a decent GW equivalent.
- Finally, apply specular highlights of pure Ice Yellow where relevant.
 Blue Cloth
- Basecoat with Incubi Darkness .
- Recess shade with a 1:1 mix of Incubi Darkness and Abaddon Black .
- Chunky highlights with 1:1 Incubi Darkness and Screaming Skull .
- Fine highlights with 1:2 Incubi Darkness and Screaming Skull .
- Selective highlights with Screaming Skull .
- Mix in a little White Scar and add a few specular highlights where needed.
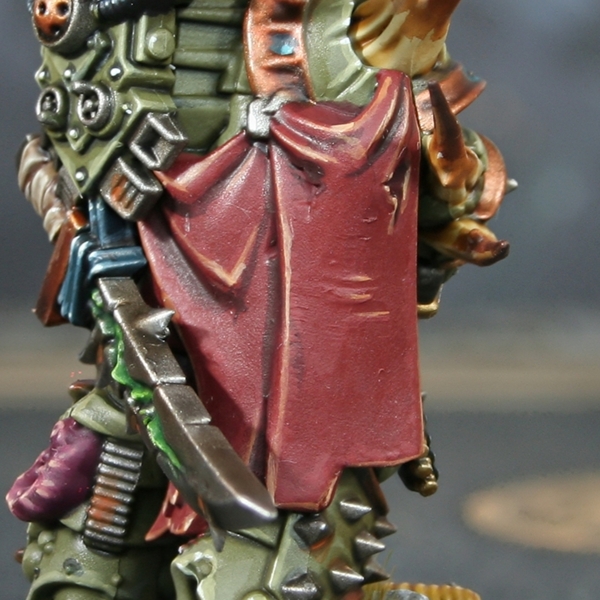 Red Cloth and Leather
- Basecoat with a 1:1 mix of Khorne Red and Doombull Brown .
- Shade with Khorne Red and Abaddon Black mixed. I mixed an equal amount and then increased the black for very deep folds.
- Add Jokaero Orange into the base mix and apply chunky highlights.
- Highlighting within the last stage, go over the area again with small amounts of pure Jokaero Orange .
- Add some Vallejo Model Colour Ivory (or Screaming Skull ) into the Jokaero Orange and selectively highlight, increasing the amount and making the highlights smaller as you go.
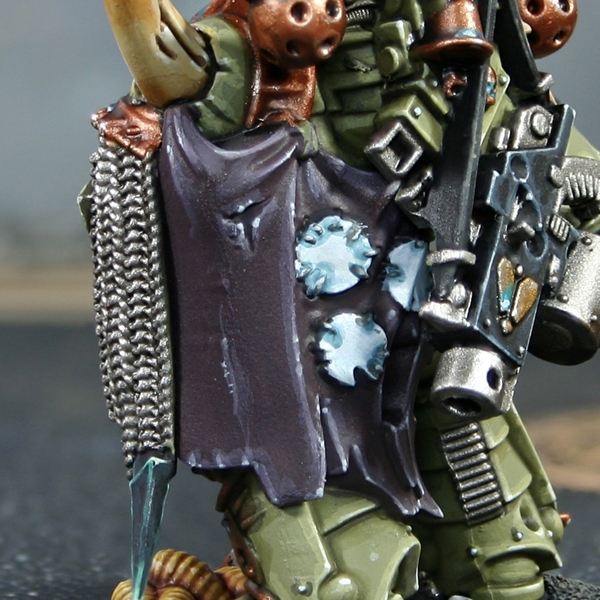
 Purple Cloth
- Basecoat with a mix of Khorne Red and Incubi Darkness mixed 1:1. Maybe lean slightly more towards the Incubi Darkness to ensure it reads as purple.
- Add Administratum Grey to the base mix 1:1 and add chunky highlights.
- Increase the amount of Administratum Grey again, so it is now 1:2. Now add fine highlights to everything.
- Selectively highlight curves and corners with pure Administratum Grey .
- Add White Scar into the Administratum Grey 1:1 and add very small/specular highlights to upward facing points.
 White Cloth
- Basecoat with 1:3 Celestra Grey & White .
- Mix you basecoat colour 1:1 with Thunderhawk Blue and add some general shading.
- Shade the deepest recesses with pure Thunderhawk Blue .
- Mix some of the base colour 1:1 with White and add some highlights.
- Highlight more selectively with pure White .
 Bandages
- Basecoat with Steel Legion Drab .
- Glaze raised areas and edge highlight with Karak Stone .
- Shade between bandages with thinned Rhinox Hide .
- Mix your Karak Stone 1:1 with Ushabti Bone , then apply fine edge highlights.
- Selectively highlight corners and edges with Screaming Skull .
- Specular highlights of Pallid Wych Flesh on corners, where needed.
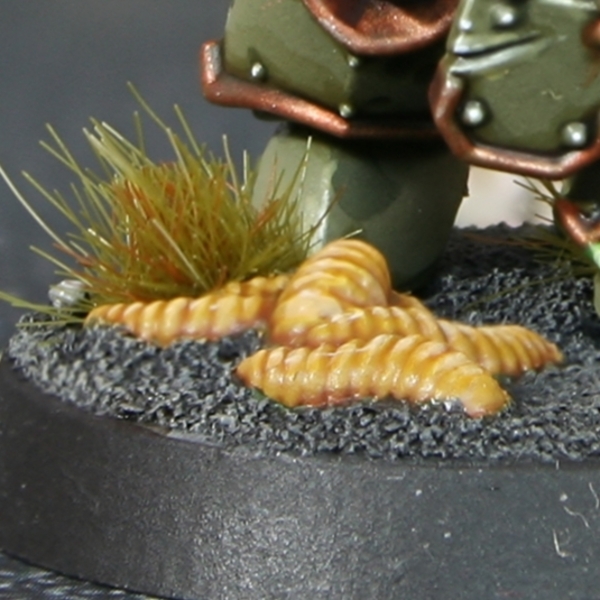 Grubs/Maggots
- Basecoat with Zandri Dust .
- Wash with Reikland Fleshshade .
- Highlight raised detail with 1:1 Zandri Dust and Zamesi Desert .
- More selectively highlight with 1:1 Zamesi Desert and Flayed One Flesh .
- Finish with specular Flayed One Flesh highlights, where needed.
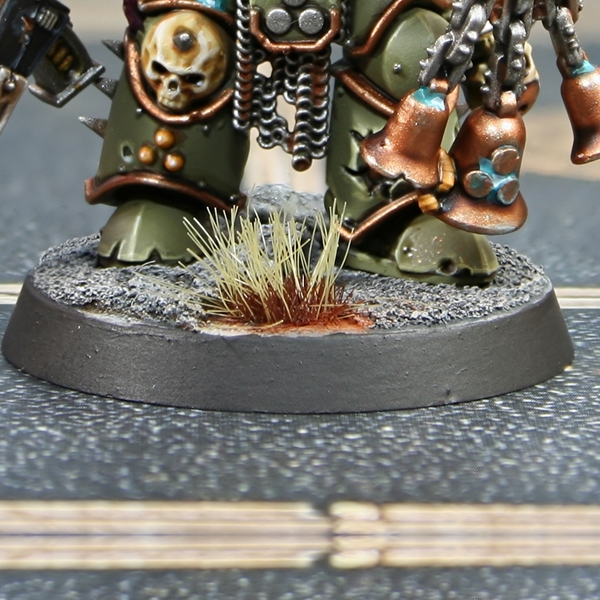 Ashy Bases
- Basecoat of Black .
- Heavily drybrush of Skavenblight Dinge .
- Drybrush with Stormvermin Fur .
- Lightly Drybrush with Karak Stone .
- Paint any rocks with Dawnstone .
- Highlight the rocks with Administratum Grey .
- Mix some White into the Administratum Grey , then more selectively highlight as needed.
- Add specular highlights of White to points of the rocks, if you like.
- Finish Painting with a Black base rim.
- For the tufts I used Wasteland Tufts from Army painter, then jabbed a little Vallejo Burnt Sienna pigment around them.
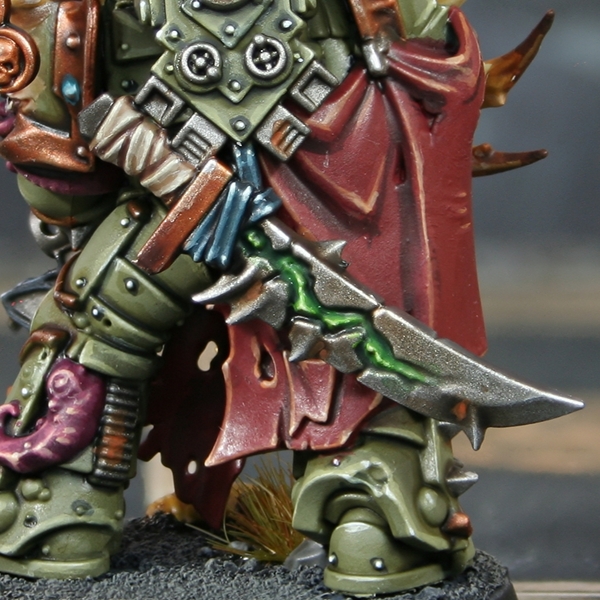
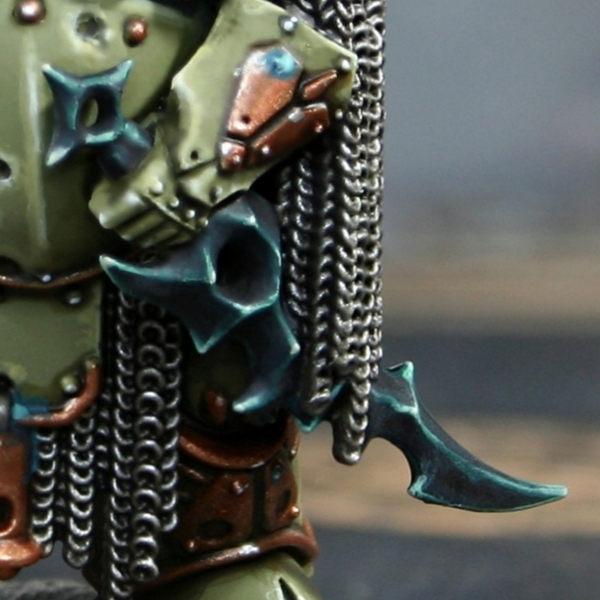 Plague Sword
- Basecoat with 1:1 Black and Incubi Darkness .
- Apply chunky highlights of Incubi Darkness .
- Now fine highlight all edges with Kabalite Green .
- More selectively highlight with 1:1 Kabalite Green and Ushabti Bone .
- Finish with a specular highlight of Screaming Skull .
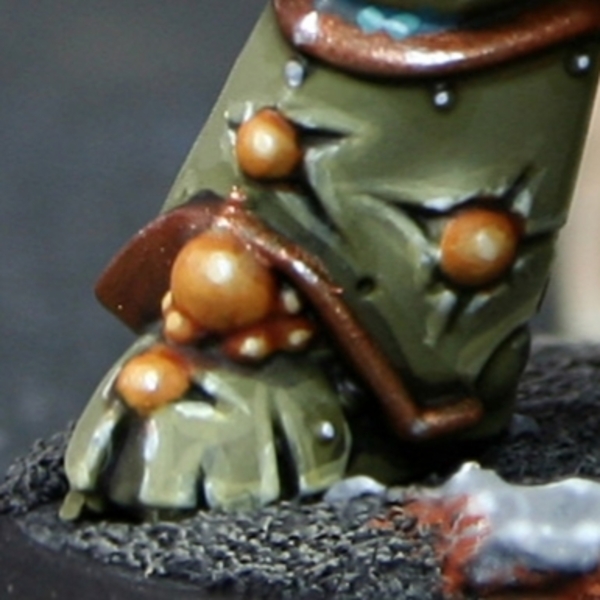 Yellow Boils/Pustules
- Basecoat with Averland Sunset .
- Wash with Reikland Fleshshade , pulling the wash away from the area you will highlight.
- Mix some Ushabti Bone into the previous colour and add chunky highlights.
- Add a little Screaming Skull into the previous paint and highlight a smaller area.
- Mix a little White in and apply a selective highlight.
- Finish with a specular highlight of pure White .
Exactly how many stages you highlight in will depend upon the size of the pustule. Feel free to skip out steps or even glaze them in gently, on very large ones.

Rookie Brushes
RookieBrushes
Aspiring miniature painter and biscuit enthusiast. Here to share my hobby and help where I can.
Citadel Painting System 64
Base 20
- Abaddon Black
- Averland Sunset
- Caliban Green
- Celestra Grey
- Death Guard Green
- Incubi Darkness
- Jokaero Orange
- Khorne Red
- Leadbelcher
- Mechanicus Standard Grey
- Mournfang Brown
- Rakarth Flesh
- Retributor Armour
- Rhinox Hide
- Runelord Brass
- Screamer Pink
- Steel Legion Drab
- Waaagh! Flesh
- XV-88
- Zandri Dust
Shade 8
- Agrax Earthshade
- Athonian Camoshade
- Berserker Bloodshade
- Biel-Tan Green
- Drakenhof Nightshade
- Druchii Violet
- Nuln Oil
- Reikland Fleshshade
Layer 29
- Administratum Grey
- Baneblade Brown
- Dark Reaper
- Dawnstone
- Deepkin Flesh
- Doombull Brown
- Dorn Yellow
- Flayed One Flesh
- Hashut Copper
- Ironbreaker
- Kabalite Green
- Karak Stone
- Kislev Flesh
- Krieg Khaki
- Liberator Gold
- Moot Green
- Ogryn Camo
- Pallid Wych Flesh
- Pink Horror
- Screaming Skull
- Skavenblight Dinge
- Skrag Brown
- Sotek Green
- Stormhost Silver
- Stormvermin Fur
- Thunderhawk Blue
- Ushabti Bone
- White Scar
- Zamesi Desert
Technical 1
- Contrast Medium
Contrast 6
- Aggaros Dunes
- Cygor Brown
- Iyanden Yellow
- Ratling Grime
- Skeleton Horde
- Wyldwood
Darkstar
Molten Metal 1
- Regency Gold
Vallejo Model Air
Base 1
- 71.063 Silver RLM01 Metallic
Vallejo Model Color
Base 4
- 70.858 Ice Yellow
- 70.918 Ivory
- 70.950 Black
- 70.951 White
Vallejo Surface Primer
Base 1
- 70.609 Russian Green 4bo