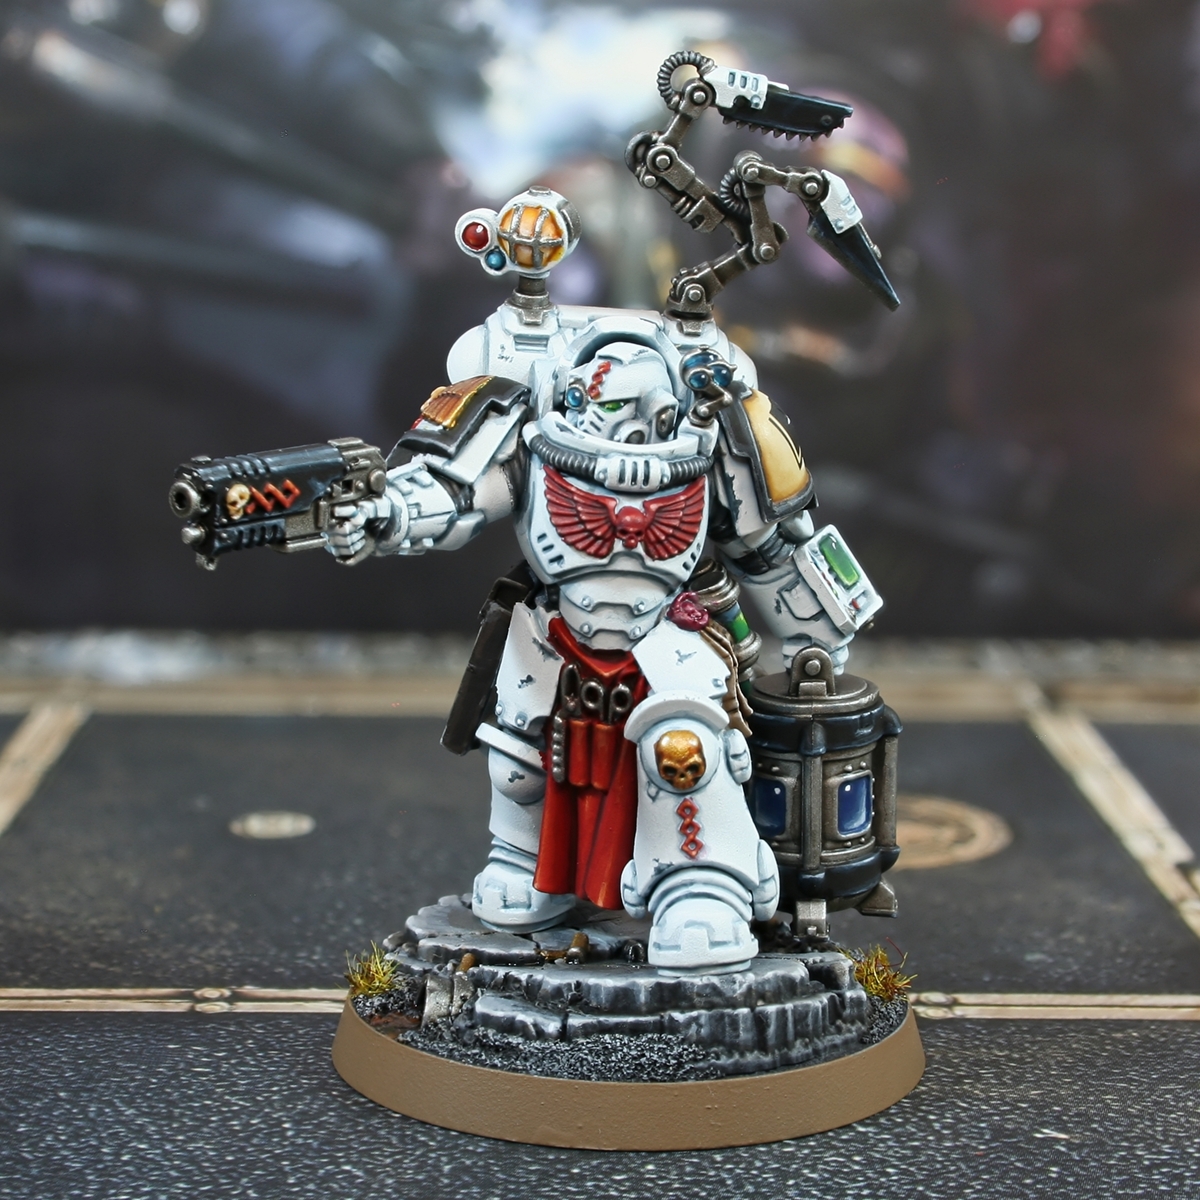
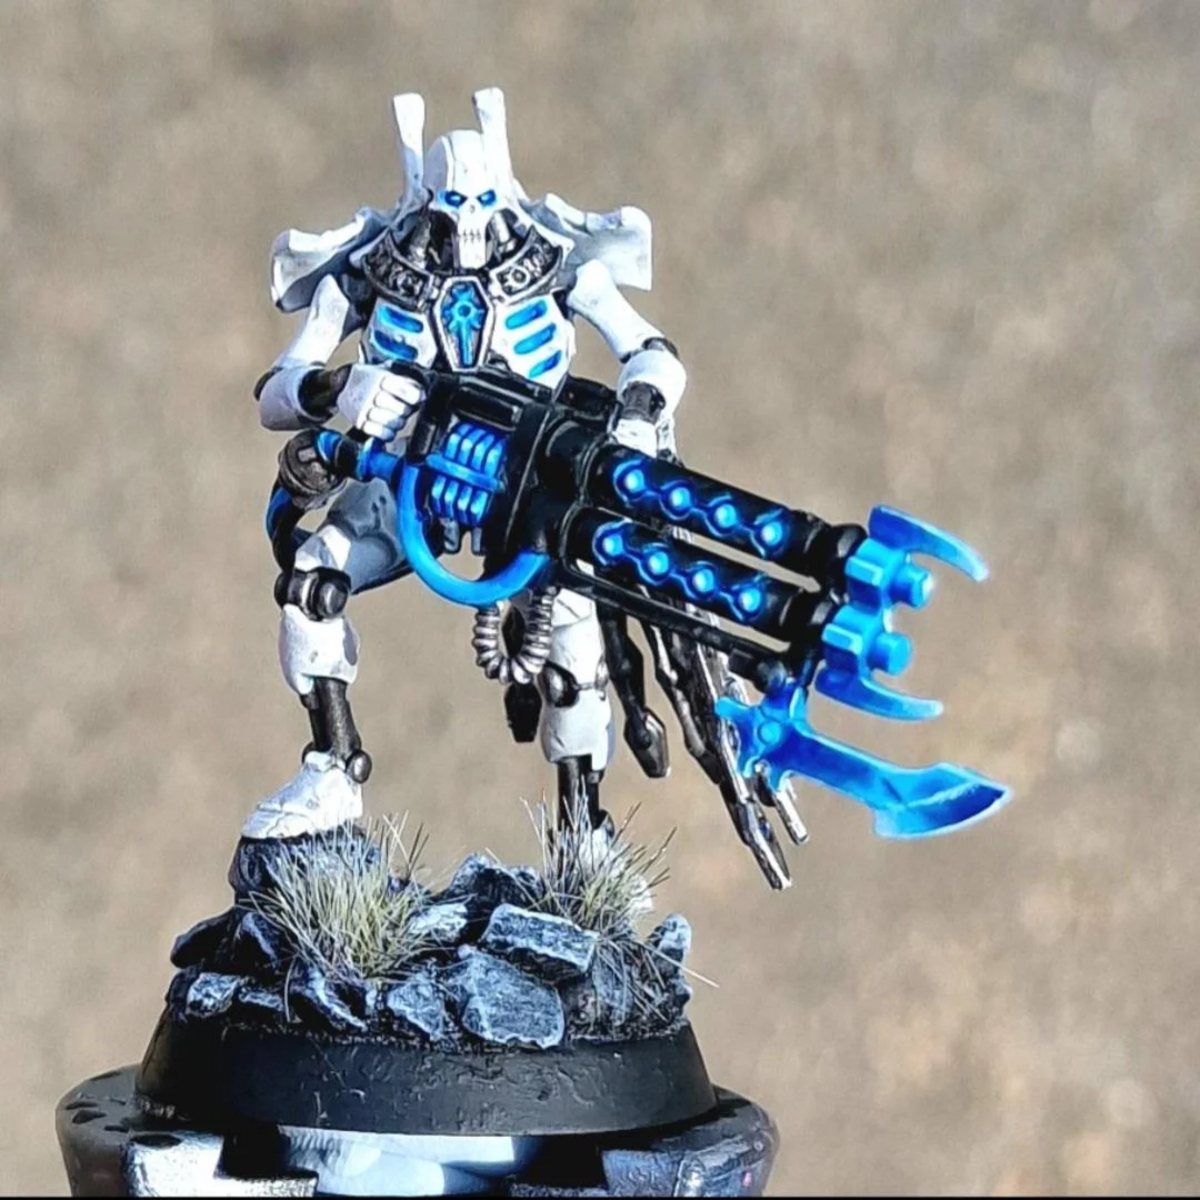
Space Marine Apothecary Biologis

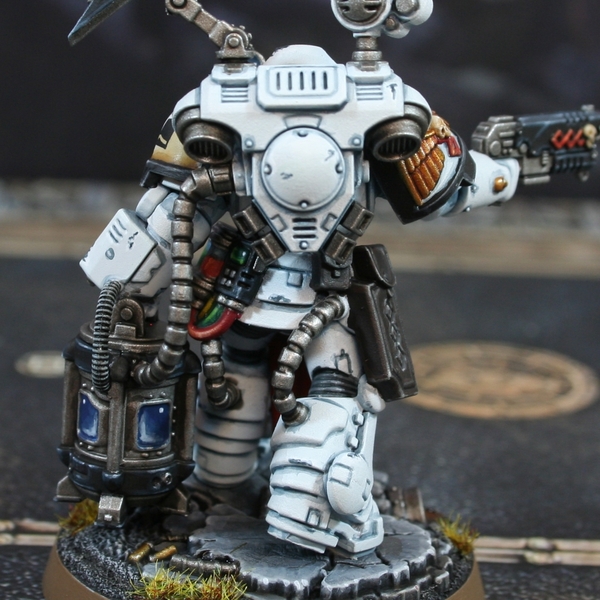 White Power Armour
- Basecoat with an equal parts mix of Ulthuan Grey , Blue Horror and a pure :white of your choice. I used a paint by Vallejo Model Colour, but use whatever you prefer.
- Now introduce some Dark Reaper to the base mix. I mixed a fresh batch, to ensure each paint was present in roughly the same amount. Now thin the paint with a little water and soft shade recesses all over the armour. Make this shading quite general and don't worry about your lines being too thin. You can even use this mix to glaze additional shading where needed too.
- Now increase the amount of Dark Reaper in the base mix, so it is roughly 50% of the colour. Use this darker colour to shade a thin line in deep recesses.
- Finally, take some thin Dark Reaper and add additional shading in very deep recesses.
- Glaze White on exposed edges andon areas where light would hit.
- Finally, finish off by edge highlighting with the same pure White .
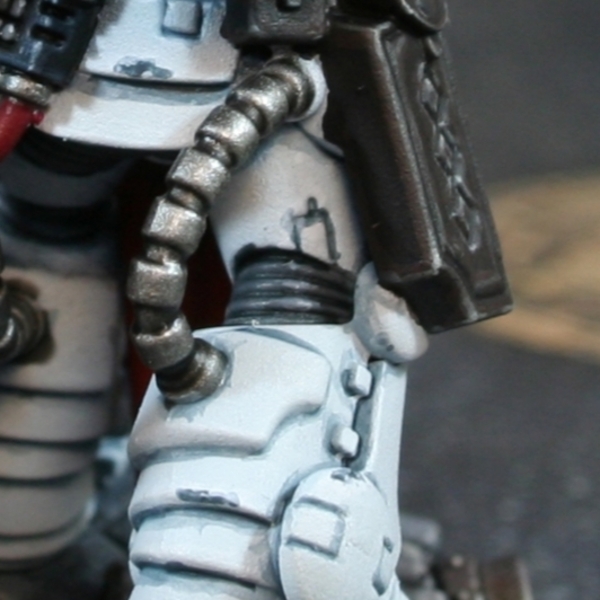 Dark Grey Undersuit
- Basecoat with Mechanicus Standard Grey .
- I thn washed the tubing using Contrast Medium , with just a touch of Black Templar . I prefer this method, but you could just use Nuln Oil .e
- Pick out raised edges with thin lines of Dawnstone .
- :selectively highlight with Administratum Grey .
- Mix some White into your Administratum Grey and apply very small highlights, where needed.
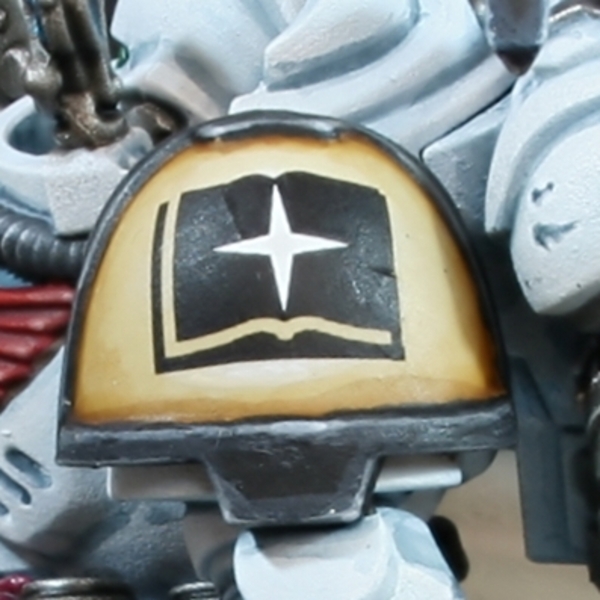 Tome Keepers Pauldron
- Basecoat with Ushabti Bone .
- Thin Skeleton Horde 1:1 with Contrast Medium , then recess shade the shoulder.
- Drybrush a highlight onto the curve with Screaming Skull .
- Add a smaller highlight with Pallid Wych Flesh .
- Finish with a very small highlight of White .
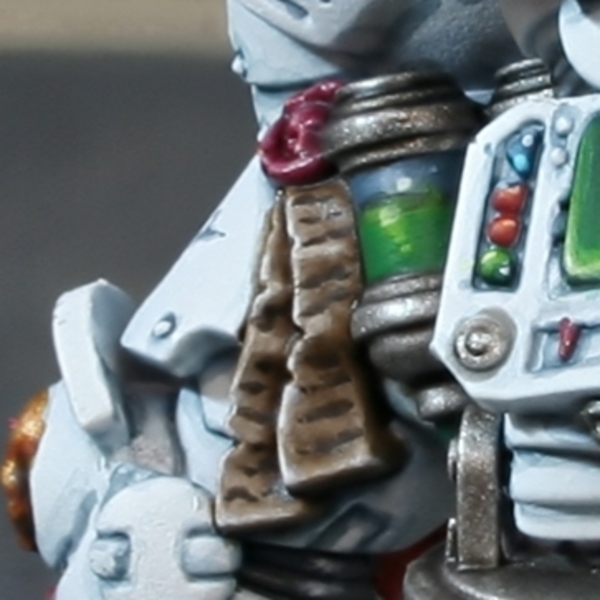
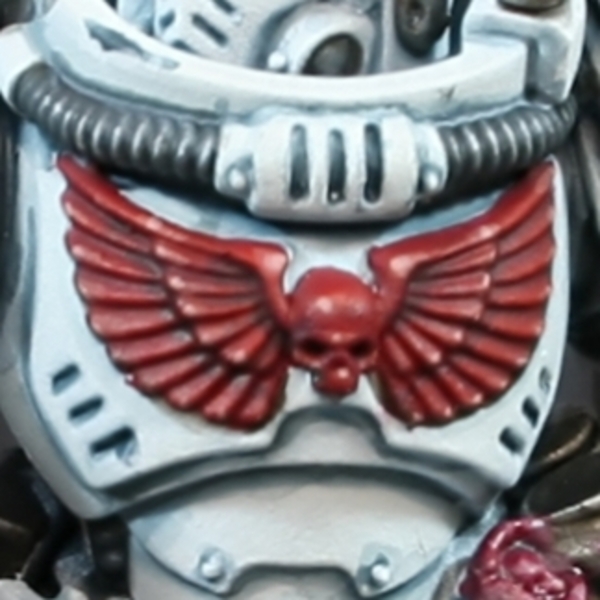 Red Chest Device
- Basecoat with Khorne Red .
- Mix an equal amount of Incubi Darkness into your Khorne Red , thin it quite a lot and wash the device, trying to pull pigment into details.
- Add some Black to the mix and repeat for the very deepest points. You can always tidy up your basecoat in points, if you are unhappy.
- Add general highlights with Wazdakka Red .
- Selectively highlight raised details with Squig Orange .
- Finally, mix some Pallid Wych Flesh into your Squig Orange and add specular highlights to points/corners.
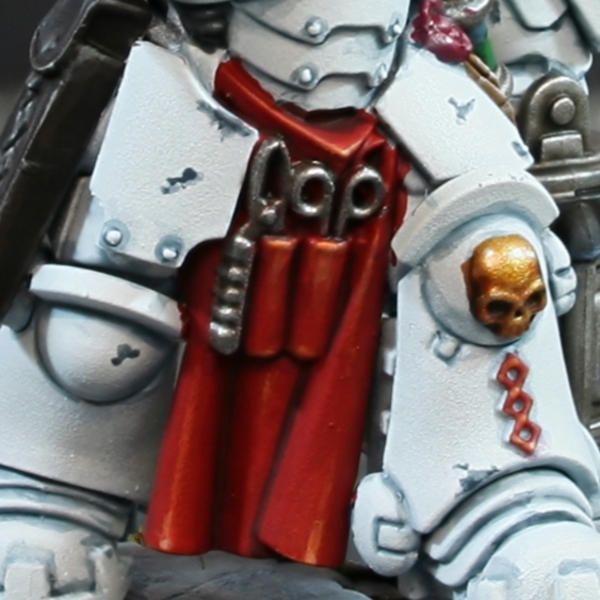 Red Apron
- Basecoat with Mephiston Red .
- Shade recesses with Khorne Red .
- Add some Black into your Khorne Red and shade the deepest parts.
- Add chunky highlights with Evil Sunz Scarlet .
- Apply fine highlights with Troll Slayer Orange .
- Selectively highlight with Fire Dragon Bright .
- Finish with small highlights of Fire Dragon Bright , mixed with White .
I used this same red for the apothecary symbol helix, but focused on making the highlights sharper on the many corners.
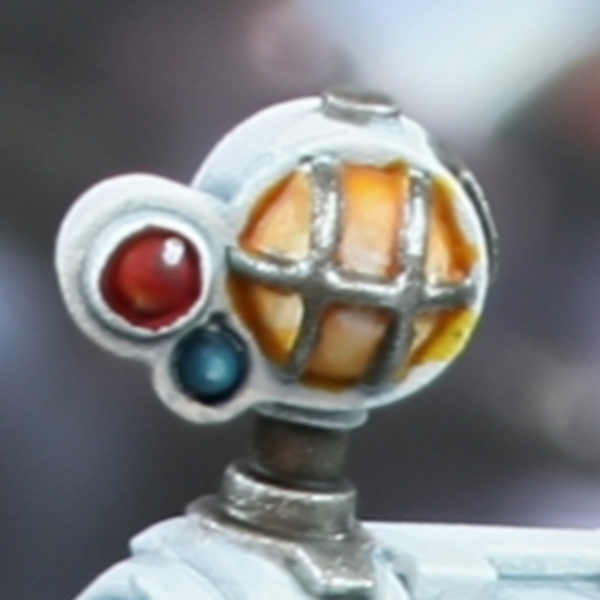
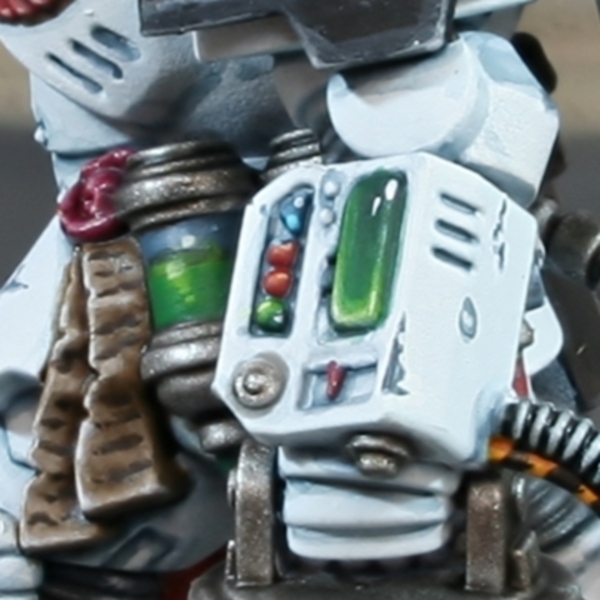 Green Screens & Eye Lenses
- Basecoat with Caliban Green .
- Paint the lower left or right portion with a layer of Warpstone Glow , leaving enough room for reducing its size 2 or 3 more times.
- Paint a smaller area with Moot Green .
- Add some Ice Yellow to your Moot Green and paint an even smaller patch, working further into your chosen side.
- If you have enough room, paint an even smaller patch with pure Ice Yellow .
- Finally, add a dot of white on the same side as the black, mirroring your brightest green/yellow highlight.
 Black Armour Trim
- Basecoat with Abaddon Black .
- Edge highlight everything with Eshin Grey .
- Edge highlight most of the edges again with Dawnstone .
- Selectively edge highlight curved edges and corners with Administratum Grey .
- Add dot highlights of White Scar to points corners and more exposed edges that were highlighted in the last step.
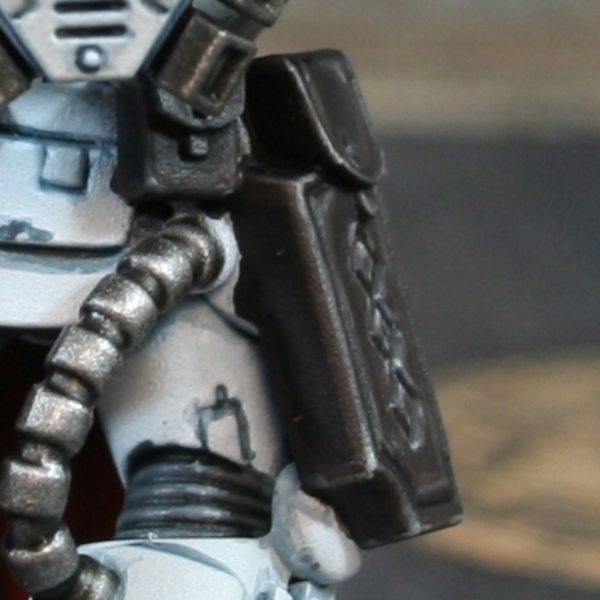 Dark Brown Leather
- Basecoat with 1:1 Dryad Bark & Black .
- Shade recesses with thinned Black .
- Add chunky highlights of Dryad Bark .
- Now do fine edge highlights with Stormvermin Fur .
- Selectively highlight corners and curves with 1:1 Stormvermin Fur and Deepkin Flesh .
- Finish of with specular highlights of Deepkin Flesh .
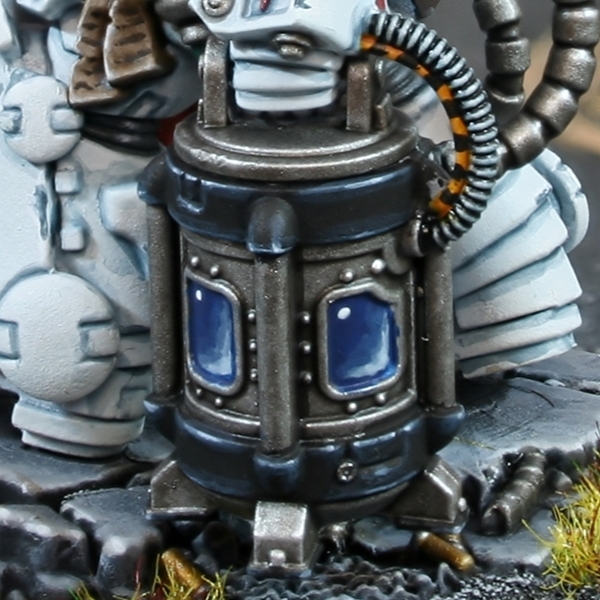
 Yellow Lamp
- Basecoat with Averland Sunset .
- Cover the area with Iyanden Yellow , pulling pigment away from the source of light, where possible.
- Highlight with Yriel Yellow towards the bulb, covering about two thirds of the lamp.
- Now start adding White to your Yriel Yellow and gradually highlight towards the centre. By the time you reach the centre, where the bulb would be brightest, aim to be adding a small highlight of pure White .
 Steel
Steel
- Basecoat with Leadbelcher .
- Wash with Nuln Oil .
- Edge highlight with Ironbreaker .
- Add fine highlights with small amounts of Vallejo Model Air Silver RLM01 Metallic .
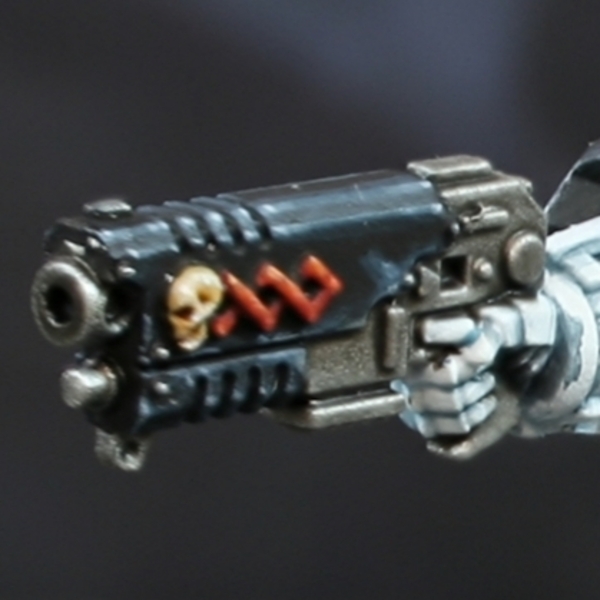 Black Weapon Casing
- Basecoat with Abaddon Black .
- Edge highlight everything with a thick line of Dark Reaper .
- Highlight everything again, this time with a thin line of Thunderhawk Blue . This colour is a good place to put in some scratches too.
- With Fenrisian Grey , selectively highlight upward facing edges, corners and prominent edges. Stick primarily to edges where the light would hit and always drag your brush towards the brightest point. If you added scratches previously, reinforce them with a smaller, thinner line underneath.
- Finally, edge add small highlights to the centre of the previous highlights and corners with Blue Horror . Try to make them very small, dots if at all possible.
 Blue Glass
- Basecoat with Kantor Blue .
- Mix some Russ Grey into your Kantor Blue and paint the lower left or right portion, leaving enough room for reducing its size 2 or 3 more times.
- Paint a smaller area with pure Russ Grey .
- Add some White to your Russ Grey in a 1:2 ratio and paint an even smaller patch, working further into your chosen side.
- If you have enough room, paint an even smaller patch with pure Russ Grey and White mixed 2:1.
- Finally, add a dot of white on the same side as the black, mirroring your brightest light blue highlight. Keep this tucked close to the edge, to prevent it looking too much like a gem.
If needs be, thin some of your Abaddon Black and Kantor Blue mix and carefully recess shade a thin line around the outside of the glass. This is to ensure is contrasts nicely with any surrounding metal.
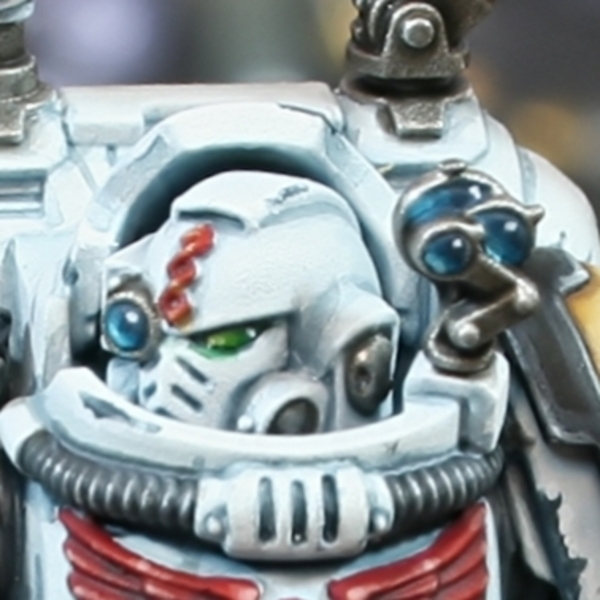 Blue Lens
- Basecoat with Stegadon Scale Green .
- Paint the lower left or right portion with a layer of Sotek Green , leaving enough room for reducing its size 2 or 3 more times.
- Paint a smaller area with Temple Guard Blue .
- Use some Baharroth Blue to paint an even smaller patch, working further into your chosen side.
- Add some White to your Baharroth Blue and paint very small patch, if you have room.
- Finally, add a dot of white on the same side as the remaining Stegadon Scale Green , mirroring your brightest blue highlight.
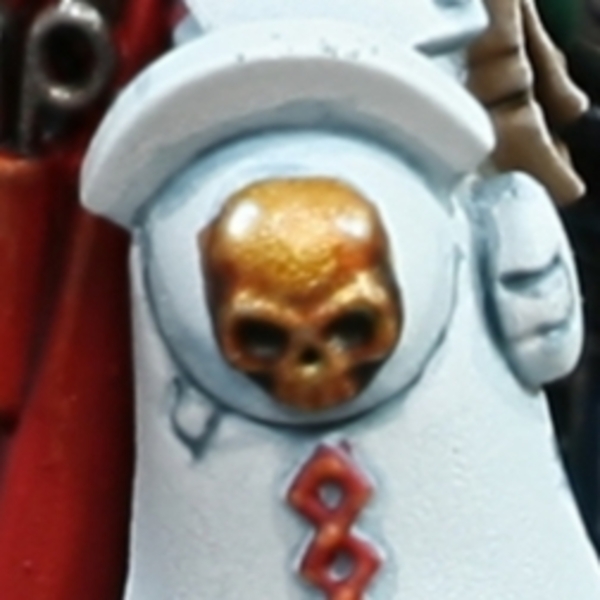 Gold Details
- Basecoat with Retributor Armour .
- Glaze shading in, using Gore-grunta Fur .
- If you need to darken the shading, mix some Rhinox Hide into it and do another (more selective) pass.
- Dhighlight raised details with Liberator Gold .
- Finish with selective highlights of Silver RLM01 Metallic .
 Parchment and Text
- Basecoat with Steel Legion Drab .
- With Karak Stone paint all of the parchment, apart from the recess between the two pieces. Do a few coats for full coverage.
- Use Rakarth Flesh and paint in horizontal lines, picking out the raised details.
- Highlight the detail more selectively, aiming for most extreme folds and points. Use Pallid Wych Flesh for this.
- Glaze towards the "wax" with Agrax Earthshade . Also use this for a recess shade between the parchment an in cuts and splits.
- Selectively highlight edges with small amounts of White Scar or another pure white.
For the text, mix Abaddon Black and Rhinox Hide 1:1 then paint in the text with a very fine brush. I find the best way is to randomly paint in dots and dashes in lines, moving my hand along slowly. Do a secondary pass refining for the best results.
 Purple Wax
- Basecoat with Screamer Pink .
- Wash detail with Nuln Oil .
- Highlight raised details with Pink Horror . Highlight using dots and dabs to make it look irregular and let the colours below show.
- With a 1:1 mix of Screamer Pink and Ushabti Bone , add smaller highlights, covering even less area.
- If you are feeling brave, add small specular highlight of pure Ushabti Bone within the previous highlights.

Rookie Brushes
RookieBrushes
Aspiring miniature painter and biscuit enthusiast. Here to share my hobby and help where I can.
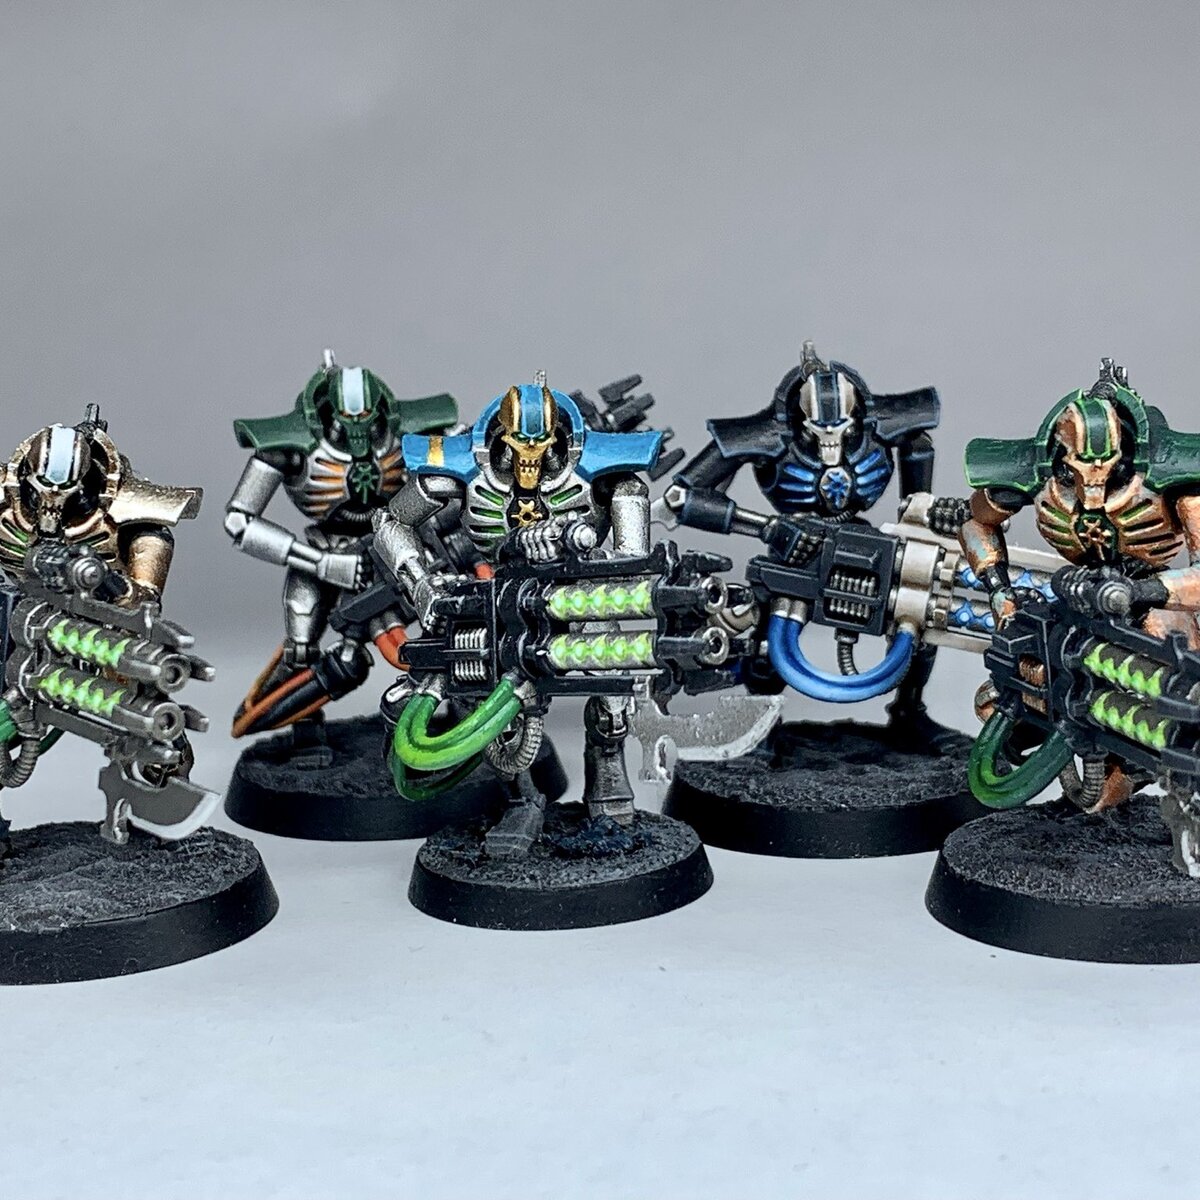
Citadel Painting System 53
Base 16
- Abaddon Black
- Averland Sunset
- Caliban Green
- Dryad Bark
- Incubi Darkness
- Kantor Blue
- Khorne Red
- Leadbelcher
- Mechanicus Standard Grey
- Mephiston Red
- Rakarth Flesh
- Retributor Armour
- Rhinox Hide
- Screamer Pink
- Steel Legion Drab
- Stegadon Scale Green
Shade 2
- Agrax Earthshade
- Nuln Oil
Layer 30
- Administratum Grey
- Baharroth Blue
- Blue Horror
- Dark Reaper
- Dawnstone
- Deepkin Flesh
- Eshin Grey
- Evil Sunz Scarlet
- Fenrisian Grey
- Fire Dragon Bright
- Ironbreaker
- Karak Stone
- Liberator Gold
- Moot Green
- Pallid Wych Flesh
- Pink Horror
- Russ Grey
- Screaming Skull
- Sotek Green
- Squig Orange
- Stormvermin Fur
- Temple Guard Blue
- Thunderhawk Blue
- Troll Slayer Orange
- Ulthuan Grey
- Ushabti Bone
- Warpstone Glow
- Wazdakka Red
- White Scar
- Yriel Yellow
Technical 1
- Contrast Medium
Contrast 4
- Black Templar
- Gore-grunta Fur
- Iyanden Yellow
- Skeleton Horde
Vallejo Model Air
Base 1
- 71.063 Silver RLM01 Metallic
Vallejo Model Color
Base 3
- 70.858 Ice Yellow
- 70.950 Black
- 70.951 White


.jpg)