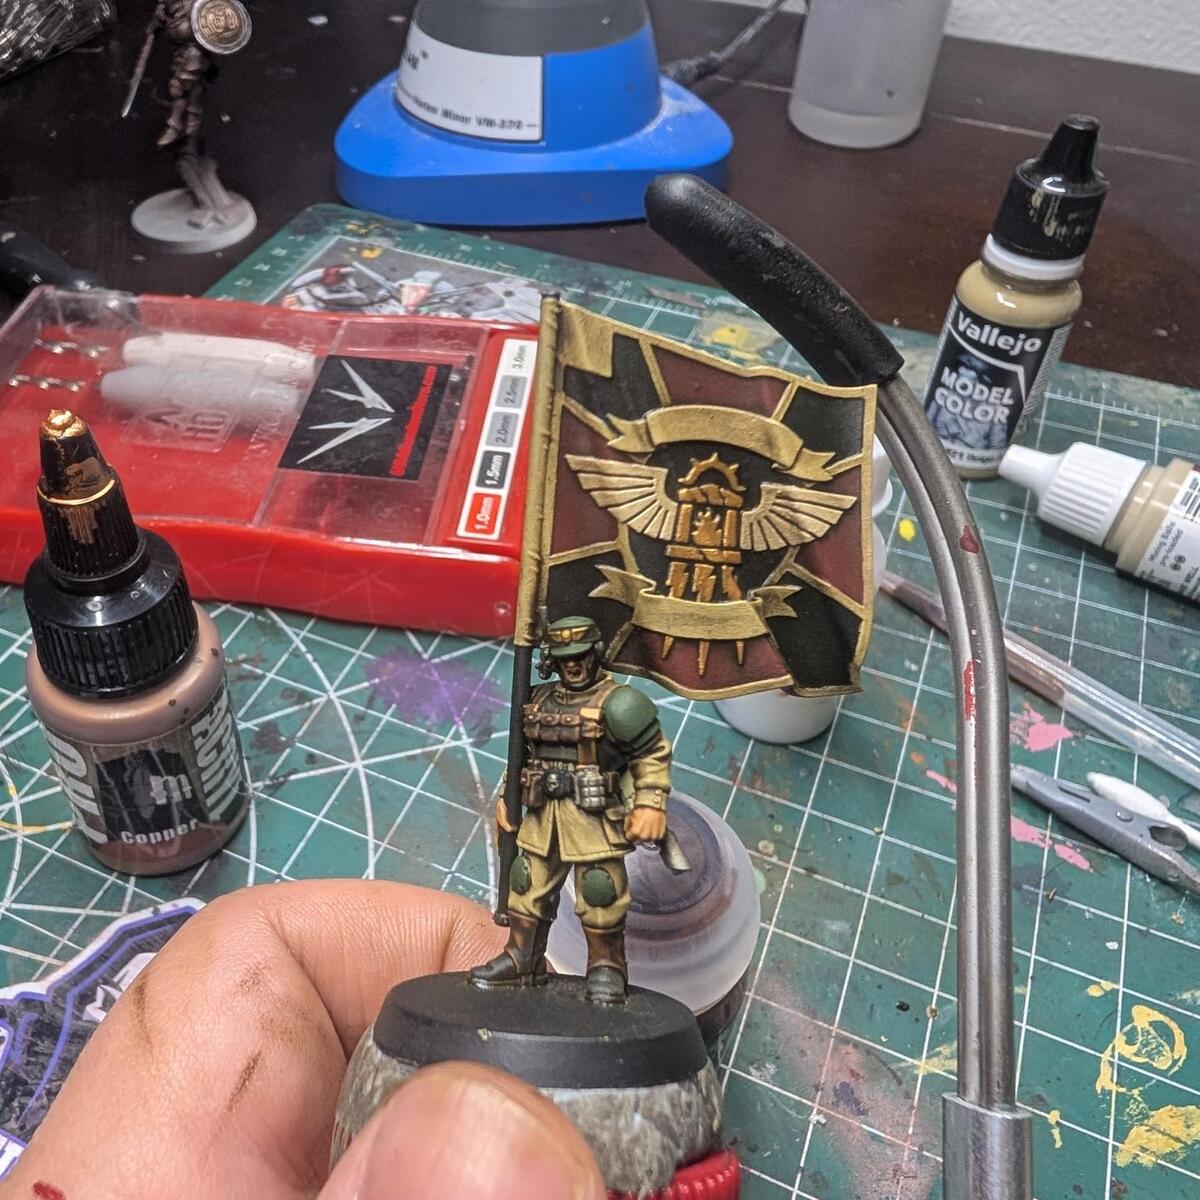
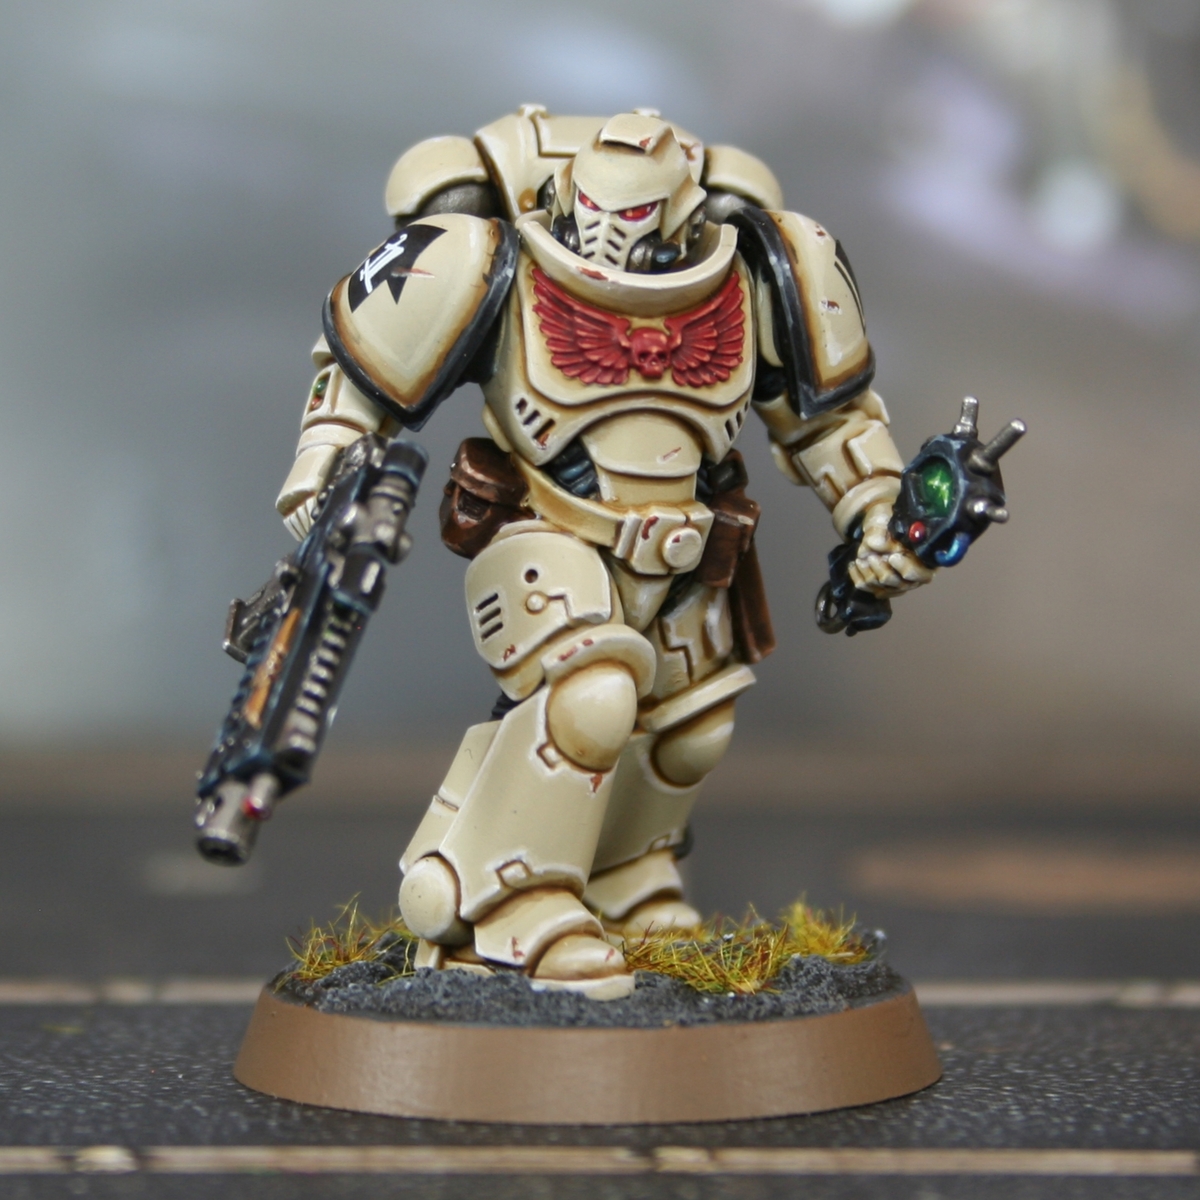
The most efficient cadians known to man
utilizing the least amount of paints, a solid natural drybrush highlight and leveraging an efficient textured base color scheme. Didnt really want this published, however i cant afford premium and i wanted this written down
- Before priming, lay down your basing texture, in my case it is a mixture of 1 part Pro Acryl Fine Earth, 1 part Pro Acryl Coarse Earth and 2 parts Vallejo Dark Earth.
Make sure to wipe the rim while the texture is still wet and utilize a wet brush to remove any texture that gets on the model - Prime and basecoat in Zandri Dust (I use the vallejo version in the equivalents)
- Heavy Drybrush of Pale Sand all over the model
- Basecoat armor, helmet and kneepads with Angel Green
- Basecoat boots, sleep roll, weapon, canteen, grenades, balaclava, belt buckle and helmet insignia in Black Legion (I am using pro acryl 1 step black but it is not cataloged in this app yet any black will do, even opaque non-contrast)
- Basecoat all leathers and backpack in Garaghak's Sewer (I am using pro acryl 1 step dark brown but it is not cataloged in this app yet any brown will do, even opaque non-contrast)
- Scratchy highlight leathers with Advanced Flesh Tone (this is intended, our later wash will soften out these highlights and tint the color to what we are looking for)
- Basecoat flesh with Advanced Flesh Tone
- Basecoat flesh with 1:1 mix of Advanced Flesh Tone and Pale Sand
- Basecoat Lasgun magazine light with Skorne Red (you can skip this step if you are aiming for the quickest possible paint job)
- Basecoat metallic lasgun parts and rivets with Silver
- Basecoat other on-person metallics with Silver
- Basecoat buckles, buttons and strap ends with Copper (you can skip this step if you are aiming for the quickest possible paint job)
- Fix up and areas as needed, including the base texture
- Apply Strong Tone to the whole model including the base texture. besides the flesh and black areas.
- Apply Dark Tone to the black areas and silvers
- Apply Reikland Fleshshade to flesh areas
- When dry, apply a heavy drybrush of Zandri Dust to the base
- Apply a normal drybrush of Pale Sand to the outer 20% of the base to simulate light
- If you hit the feet by accident then fix with Strong Tone
- Rim the base with Black
- Place tufts and seal in with Ultra Matte Varnish
- If you want battle ready then you can stop here
- I do think it is important to have the matte varnish, basing and tufts done now. The washes have a glossy finish which makes spotting your future highlights more difficult and the base itself will be glossy as well. The tufts will also benefit heavily from a matte coat. Since all of the other portions are taken care of, it takes the pressure off of getting finished. it also allows you to stop highlighting when you feel like the model looks good
- Edge highlight lasgun casing with Ironhull Grey then highlight only up-facing edges with a 1:1 mix of Pale Sand and Ironhull Grey
- Paint over main armor areas with Angel Green again and then highlight with a 1:1 mix of Angel Green and Pale Sand
AK Interactive
Varnish 1
- AK183 Ultra Matte Varnish
AK Interactive 3rd Generation Acrylics
Intense 1
- AK11029 Black
Citadel Painting System 4
Base 1
- Zandri Dust
Shade 1
- Reikland Fleshshade
Contrast 2
- Black Legion
- Garaghak's Sewer
Formula P3
Layer 2
- Ironhull Grey
- Skorne Red
Monument Hobbies Pro Acryl 2
Metallic 1
- 027 Copper
Signature Series: Ben Komets 1
- S17 Advanced Flesh Tone
Vallejo Game Color
Metallic 1
- 72.052 Silver
Vallejo Model Color
Base 1
- 70.837 Pale Sand