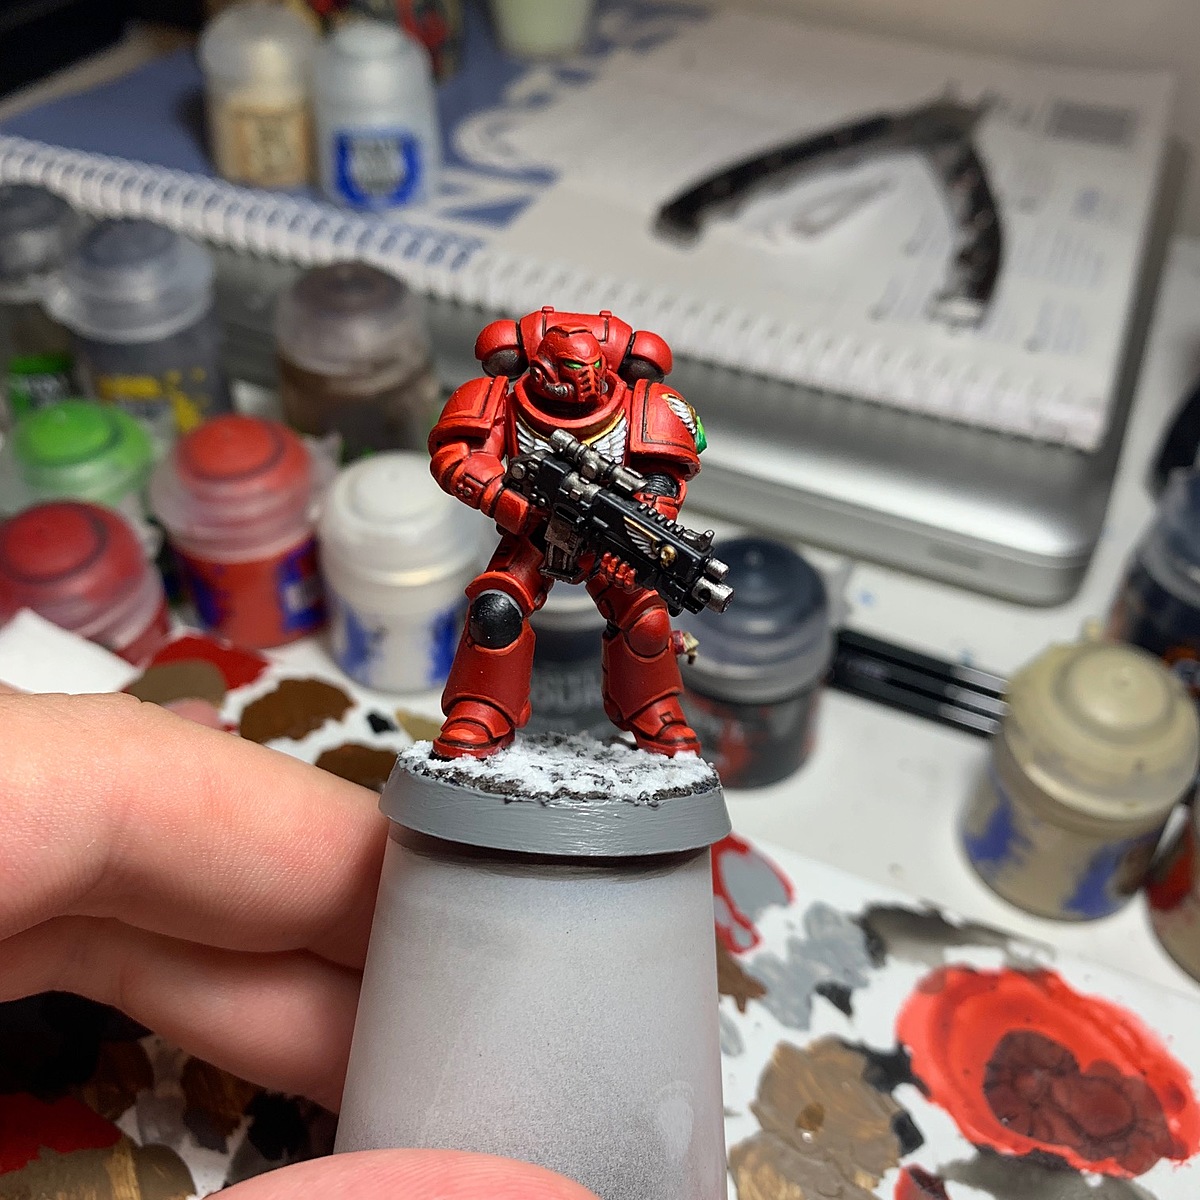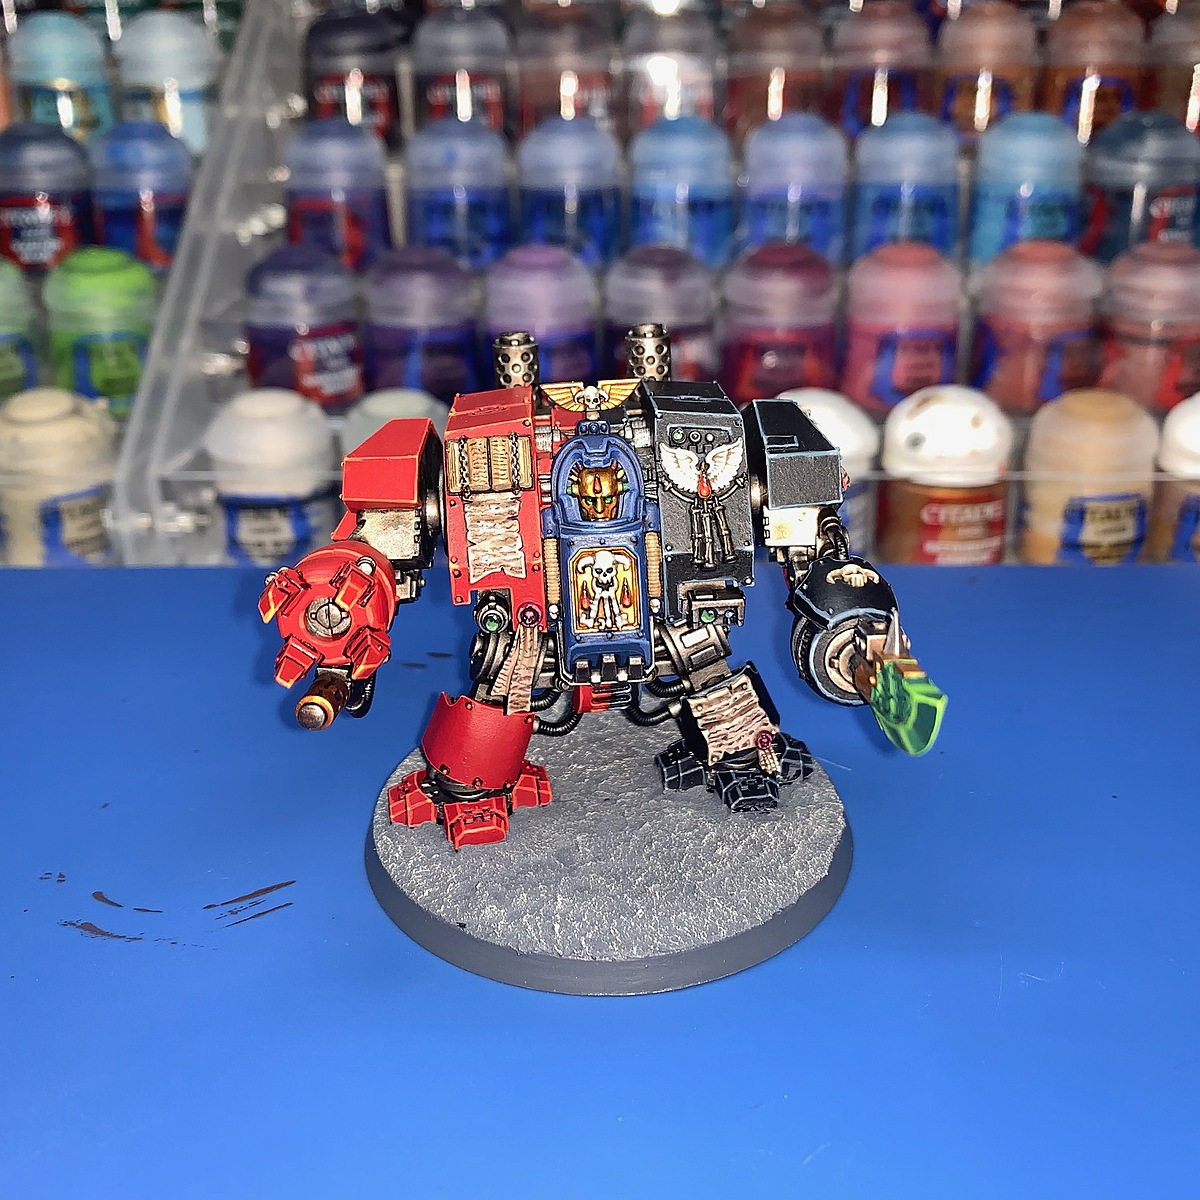
Librarian Dreadnought (Angels Sanguine Scheme)

My blood angels librarian dreadnought in my Angels Sanguine scheme.
- Undercoat the model with Chaos Black
Red Armour
- Basecoat the left side of the model (when looking at the model) with Mephiston Red
- Shade the half that is red with Cygor Brown
- Edge highlight the red armour with Evil Sunz Scarlet
- Apply a second edge highlight of Wild Rider Red
- Apply a spot highlight on the sharpest edges of the model with Fire Dragon Bright
Black Armour
- Basecoat the right side of the model (when looking at the model) with Abaddon Black
- Edge highlight the black armour with Dark Reaper
- Apply a second edge highlight of Thunderhawk Blue
- Apply a spot highlight to the sharpest edges of the model with Fenrisian Grey
Blue Armour
- Basecoat the carapace with Kantor Blue
- Shade with Nuln Oil
- Edge highlight with Altdorf Guard Blue
- Apply a spot highlight on the sharpest edges of the model with Calgar Blue
Gold Details
- Basecoat the areas of the model you wish to be gold with Retributor Armour
- Shade the areas with Reikland Fleshshade
- Layer/tidy up the gold areas with Retributor Armour
- Edge highlight the gold with Liberator Gold
- Apply a spot highlight with Stormhost Silver (Optional)
White Details
- Basecoat with Matt White
- Shade with Agrax Earthshade
- Layer with a 1:1 mix of White Scar & Matt White
- Edge highlight with White Scar
Bone Details
- Basecoat with Ushabti Bone
- Shade with Agrax Earthshade
- Layer with Ushabti Bone
- Edge highlight with Screaming Skull
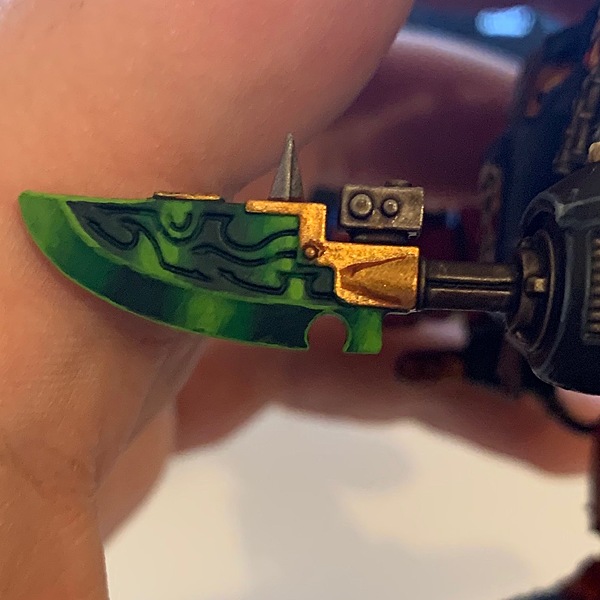 Power Blade/Sword
- Basecoat the blade with Caliban Green
- Glaze the areas of the blade with Warpstone Glow make sure to not apply the second layer until the first layer is fully dry. Continue to do this until you've got a blend from Caliban to Warpsone in opposite sides/areas.
- Glaze in the areas of Warpstone with Moot Green repeat the process until you have a blend of Caliban - Warpstone - Moot. - At this stage also edge highlight the blade with Moot Green
- Final glaze we add a small amout of Flash Gitz Yellow and Matt White to Moot Green We then apply this glaze, building up the gradient so we have Caliban - Warpstone - Moot - Moot Mixture. With this final mixture you can then look to do a final edge highlight on the blade.
Purity Seals & Parchment
- Basecoat the purity seals with Screamer Pink
- Shade the purity seals with Agrax Earthshade
- Edge highlight the purity seals with Pink Horror
- Basecoat the parchment with Rakarth Flesh
- Shade the parchment with Agrax Earthshade
- Layer the parchment with Rakarth Flesh
- Edge highlight the parchment with Flayed One Flesh
- Make a glaze consistency of Rhinox Hide then add squiggly lines to the parchment creating the appearance of text.
Basing
- Apply Astrogranite to the base
- Drybrush the base with Rakarth Flesh
- Drybrush the base with Deepkin Flesh
- Paint rim of the base with Eshin Grey
Matt Pearson
matthewpearson_paints
Citadel Painting System 34
Base 8
- Abaddon Black
- Caliban Green
- Kantor Blue
- Mephiston Red
- Rakarth Flesh
- Retributor Armour
- Rhinox Hide
- Screamer Pink
Shade 3
- Agrax Earthshade
- Nuln Oil
- Reikland Fleshshade
Layer 20
- Altdorf Guard Blue
- Calgar Blue
- Dark Reaper
- Deepkin Flesh
- Eshin Grey
- Evil Sunz Scarlet
- Fenrisian Grey
- Fire Dragon Bright
- Flash Gitz Yellow
- Flayed One Flesh
- Liberator Gold
- Moot Green
- Pink Horror
- Screaming Skull
- Stormhost Silver
- Thunderhawk Blue
- Ushabti Bone
- Warpstone Glow
- White Scar
- Wild Rider Red
Texture 1
- Astrogranite
Spray 1
- Chaos Black
Contrast 1
- Cygor Brown
The Army Painter Warpaints
Acrylic 1
- Matt White