Priming/Preparing
- Airbrush prime all parts with Vallejo Surface Primer Black Black
- Leave thrust nozzles, pipes and all grave plates on the sprues and airbrush them with Dark Steel . Cut them off when ready to assemble.
 Base Coat
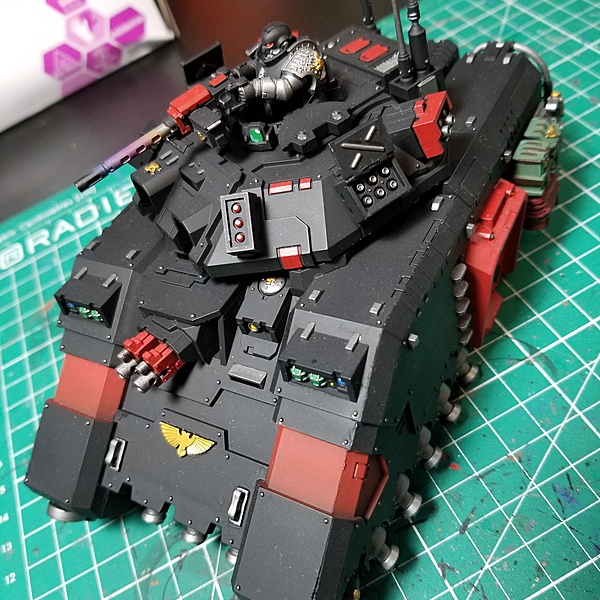
- Airbrush base black coat using a 2:1 mix of Vallejo Game Air Black Black and Vallejo Game Color Ink Black Black Ink
- Airbrush or brush base colors of red on tank body, weapons and details using Mephiston Red
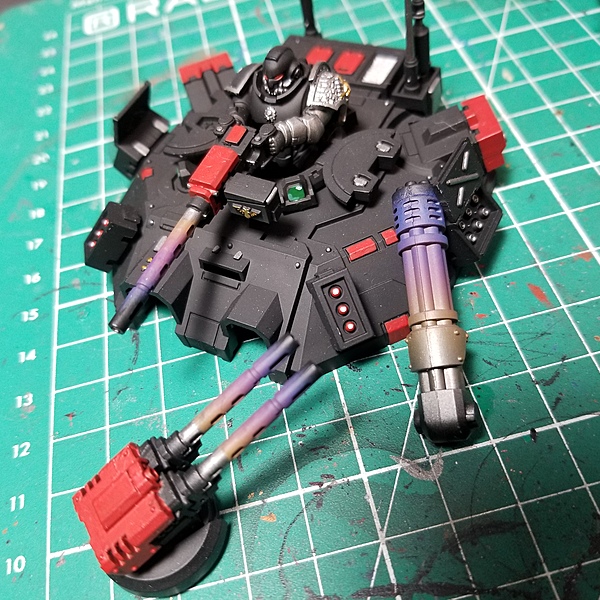 Non-Primary Weapons
- Paint barrels of non primary weapon options using Dark Steel
- Heated Barrel Effect Step 1: airbrush half of the non strombolter barrels using Vallejo Game Color Parasite Brown Parasite Brown
- Heated Barrel Effect Step 2: airbrush less of the end of the non strombolter barrels using Citadel Xereus Purple Xereus Purple
- Heated Barrel Effect Step 3: airbrush the end of the non strombolter barrels using Citadel Kantor Blue Kantor Blue
- Heated Barrel Effect Step 4: airbrush the very tips of the non strombolter barrels using Vallejo Game Air Black Black
Primary Weapons
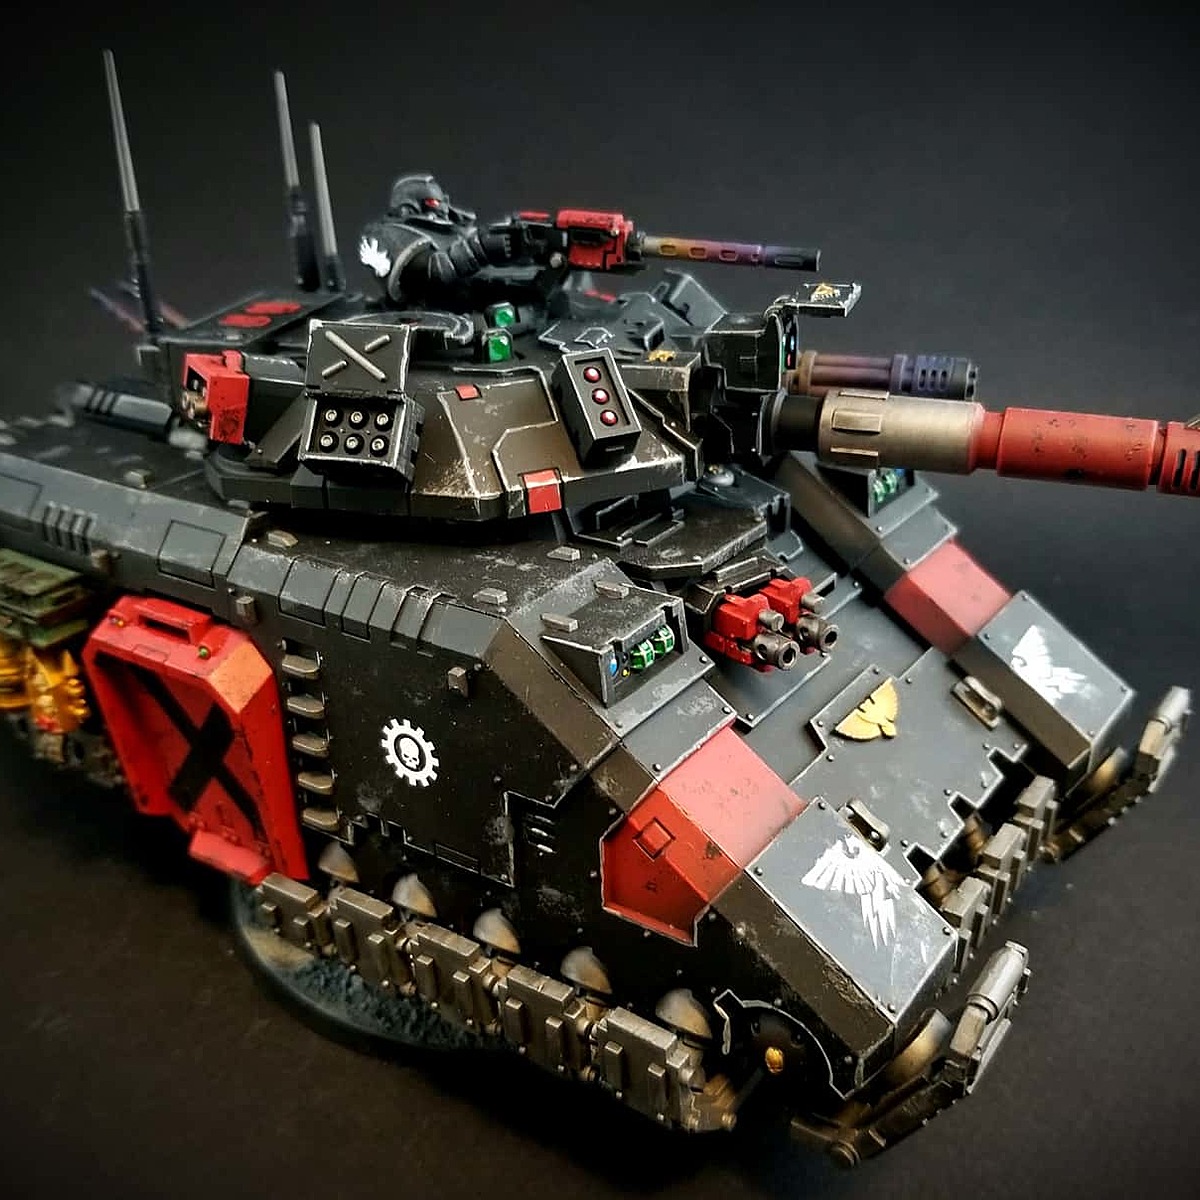
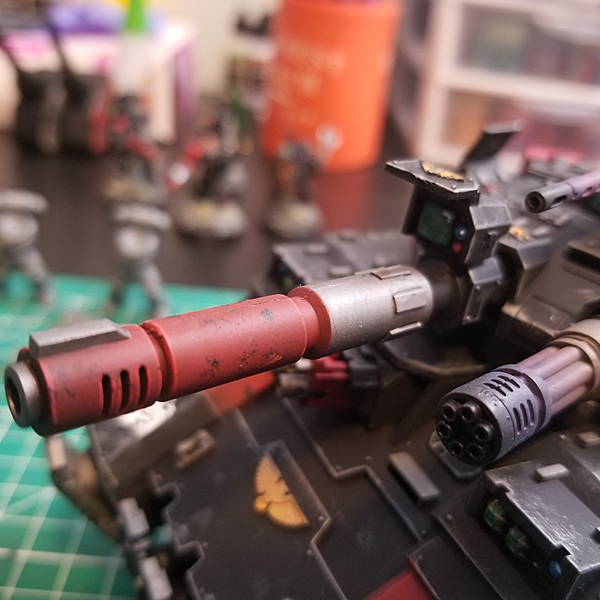 Laser Destructor is based in Mephiston Red , Black and Dark Steel . The end of the barrel is airbrushed with Black to represent a muzzle burn.
 - Plasma Exterminator is based in Mephiston Red , Black and Dark Steel . The plasma glow effect is created by base painting the coils with Kantor Blue , then airbrishing Electric Blue into the coils and the edges so that the glow is created. The final step of the glow is to airbrush the center and hottest points of the coils with Dead White
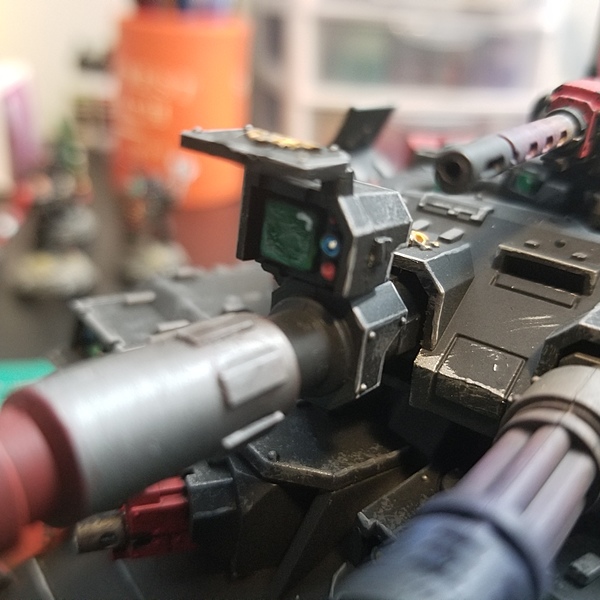 Laser Destructor/Plasma Exterminator green lenses are based in Warpstone Glow with the bottom corner touched up in Sybarite Green and the opposite top corner touched up in White Scar in order to create the effect of the lens reflection/light. The Imperial Aquila is painted with Retributor Armour
Thrust Nozzles, Exhaust and Other Pipes
- All Base coated with Dark Steel
- Thrust nozzle guards are airbrushed on inside edges with Black to create the effect of exhaust.
- Tips of Exhaust pipes are airbrushed with Black to create an exhaust effect
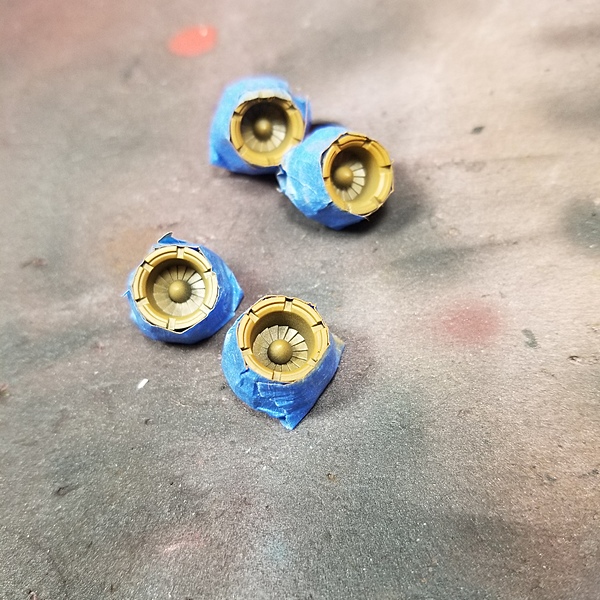 Thrust nozzles are masked on outside, inside is thinly sprayed with Parasite Brown so that the metallic effect is maintained, next a small amount of Orange Fire is airbrushed into a smaller area of the center of each nozzle. next, a small airbrushed spot of Dead White into the very center of the nozzles is done. Finally, masking is removed, and a small amount of Black is spray directly into the nozzle.
Turret Gunner
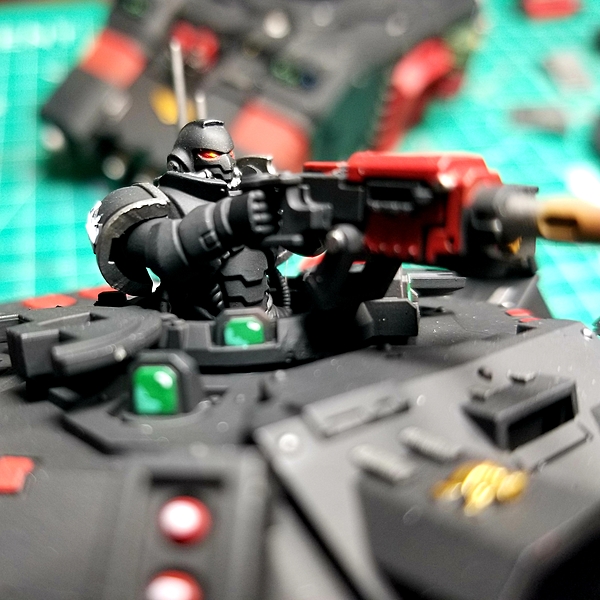 Eyes are painted with three colors decreasing in size in the following order Mephiston Red >> Evil Sunz Scarlet >> Yriel Yellow . The goal here being to create a glow effect.
 - Deathwatch pauldron is Dark Steel with the skull and cross bones painted Retributor Armour . The pauldron is also shaded with Nuln Oil
Grav Plates
- After initially basing everything in Dark Steel snip each plate from the sprue, remove mold lines and then touch up with the same silver. Then glue to the tank. If using super glue, remember to blow on or run a fan over places where you use super glue so that the fumes to not frost the paint.
Ammo Boxes and Accessories
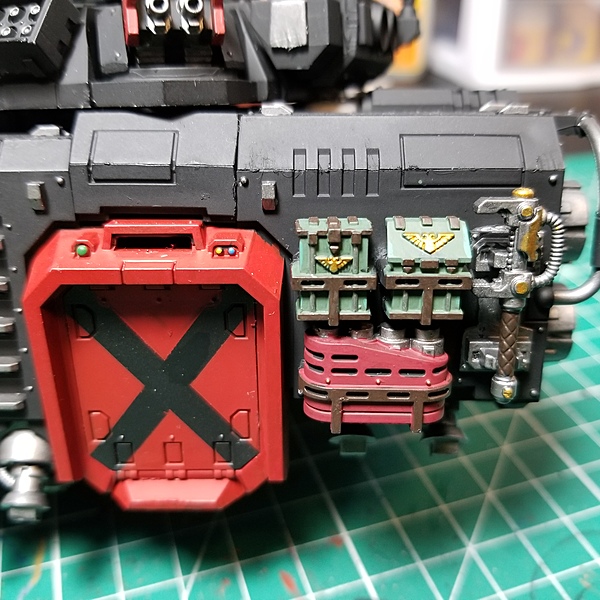 Paint boxes with a base of Gunship Green , highlighted with Sybarite Green , the straps with Rhinox Hide and the Imperium symbols painted with Retributor Armour
 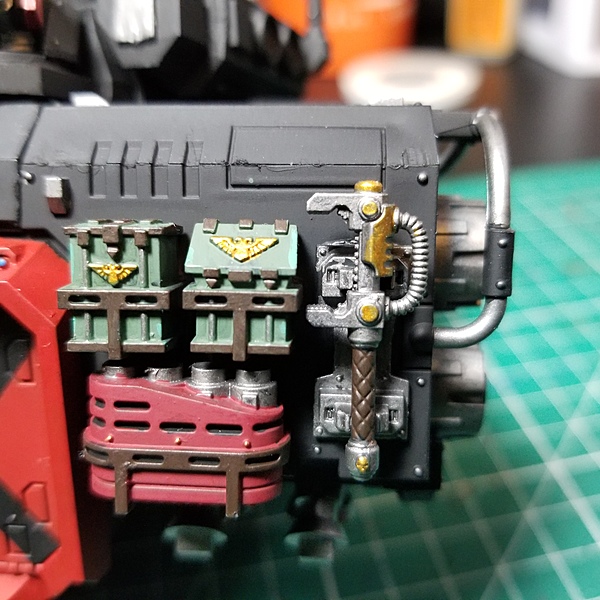 Paint the repair tool with Dark Steel , it's handle with Rhinox Hide and some accents painted with Retributor Armour
 - Paint the box with skulls with a base of Retributor Armour , the skulls with Ushabti Bone (shading the skulls with Agrax Earthshade ). Purity seals are painted with Mephiston Red where the paper is painted with Zandri Dust (both shaded with Agrax Earthshade )
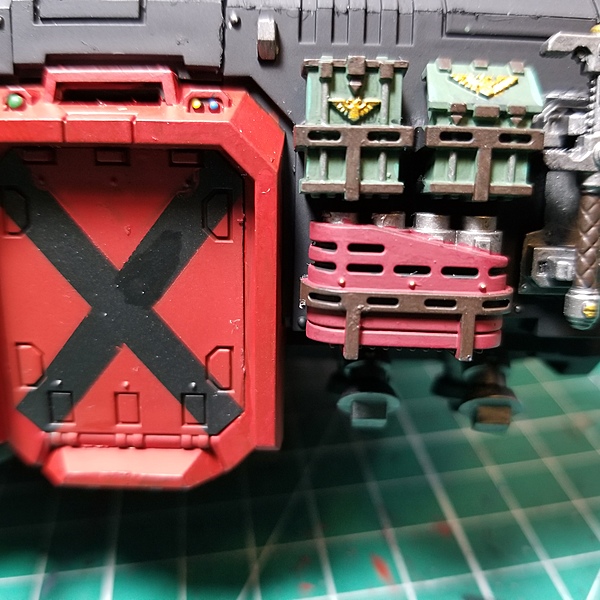 "Pipe" accessory holder is painted Khorne Red , straps are painted Rhinox Hide and the pipes themselves are painted Dark Steel
 - "Liquid" container is painted with a base of Averland Sunset , straps are painted Rhinox Hide and other items (handles, etc) are painted Dark Steel
- Wash everything here with Nuln Oil
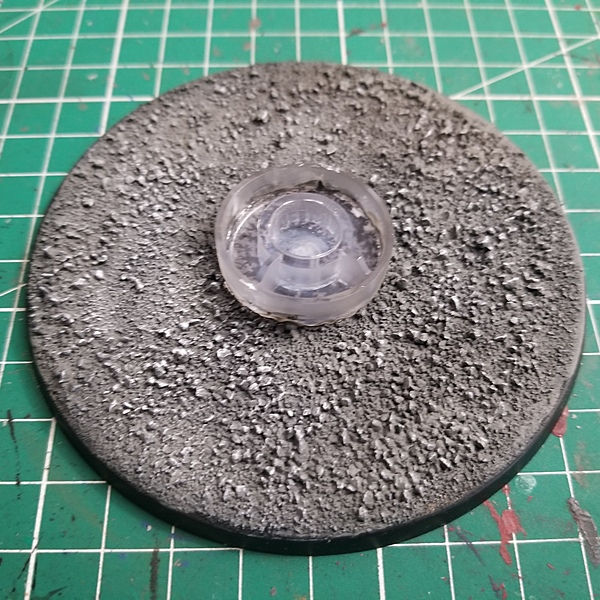 Base
Base
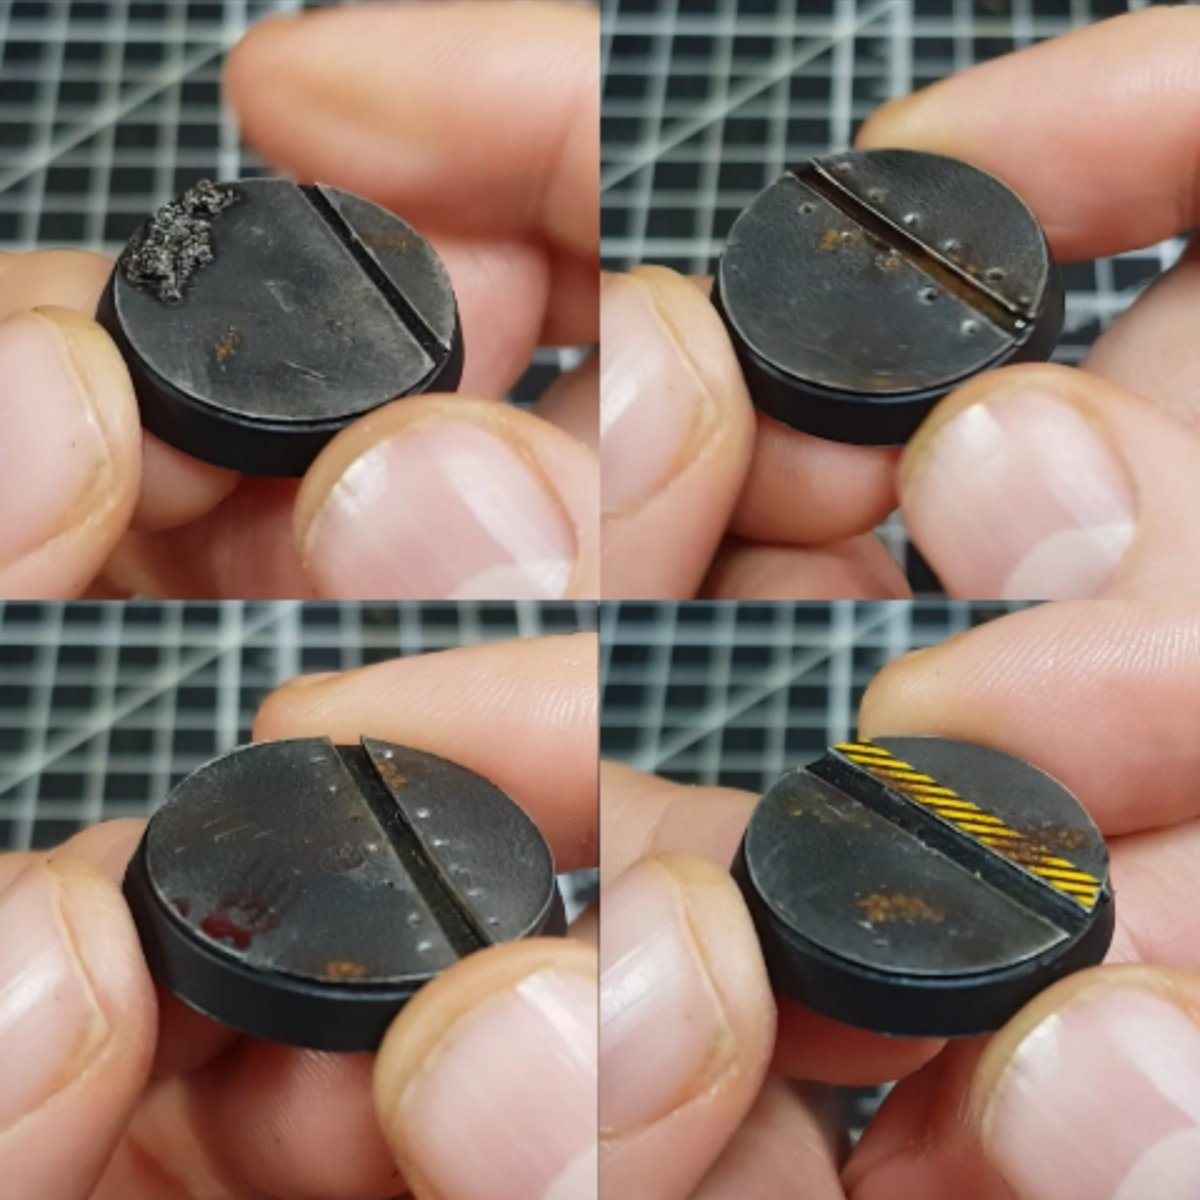
- Attach the bottom portion of the base using super glue. Mask the clear base. Apply PVA glue and then sprinkle mix of sand/rocks. Let dry.
- Airbrush prime with Vallejo Surface Primer Black Black
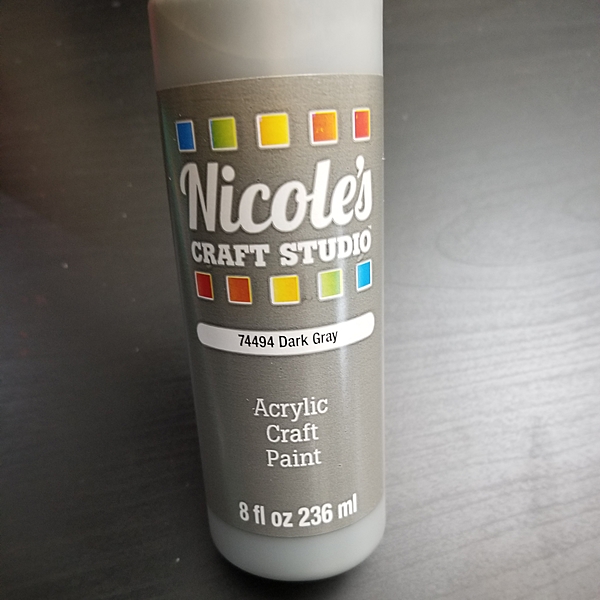 Airbrush base color of Mechanicus Standard Grey . Due to base colors often getting soaked into cork, rocks, etc. I honestly use a cheap craft paint for the base color on my model bases. Here, I actually used Nicole's Dark Gray (this is the craft paint brand at Michael's).
- Drybrush with White Scar
Battle Damage and Weathering
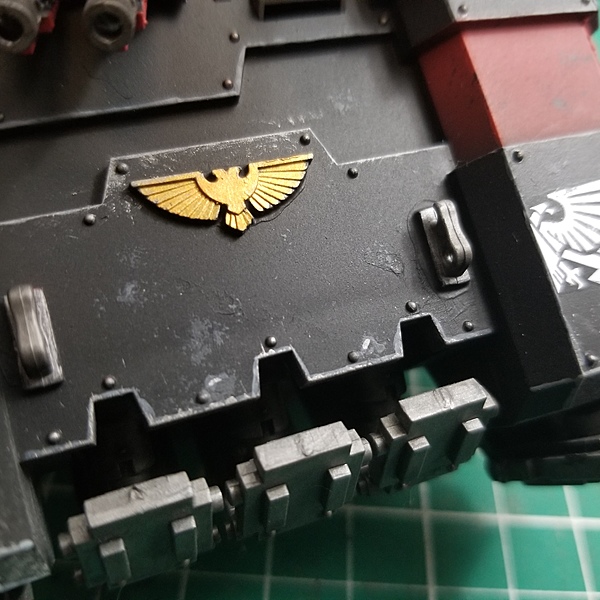 Black armor chipping is done by taking a small sponge, and lightly dabbing in Eshin Grey and spotting small areas. Then on the edges of some of the larger scratches, paint a small highlight of Administratum Grey
 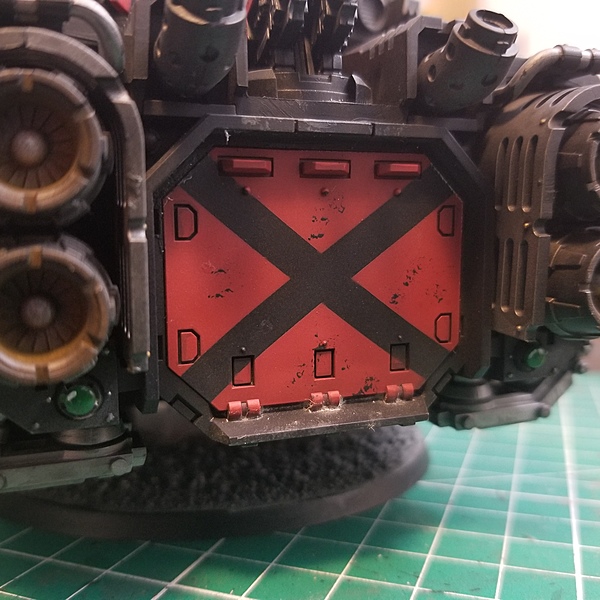 Red armor chipping is done by taking a small sponge, and lightly dabbing in Abaddon Black and spotting small areas. Then on the edges of some of the larger scratches, paint a small highlight of Administratum Grey
 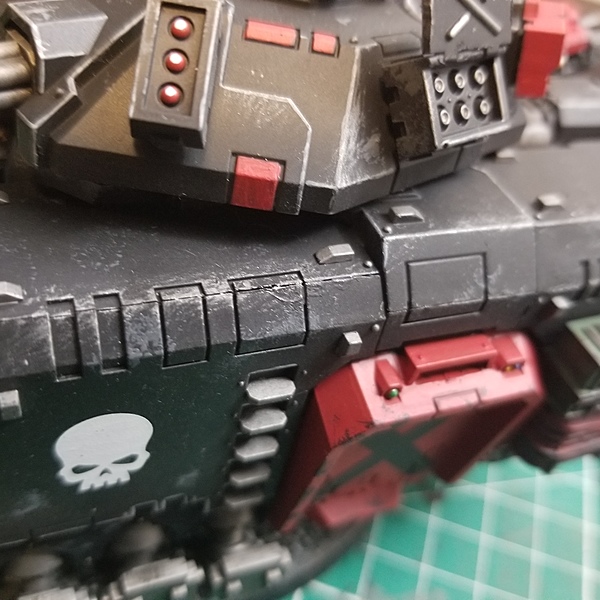 Deeper scratching to edges is then done with a dry brush on main edges of the tank (as you see fit) with Leadbelcher . You can especially see this along the top edges of the main bode of the tank.
 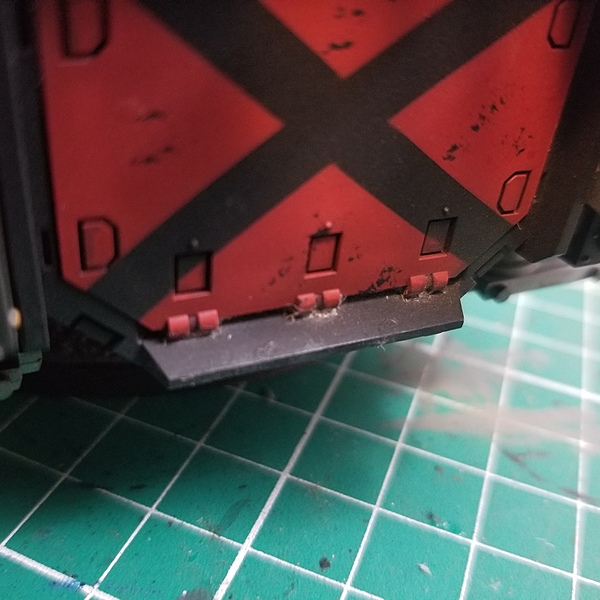 The very bottom of the tank is dusted using Vallejo Pigment Light Slate Grey (73.113)
Base
10
-
Abaddon Black
-
Averland Sunset
-
Kantor Blue
-
Khorne Red
-
Leadbelcher
-
Mechanicus Standard Grey
-
Mephiston Red
-
Retributor Armour
-
Rhinox Hide
-
Zandri Dust
Shade
2
-
Agrax Earthshade
-
Nuln Oil
Layer
9
-
Administratum Grey
-
Eshin Grey
-
Evil Sunz Scarlet
-
Sybarite Green
-
Ushabti Bone
-
Warpstone Glow
-
White Scar
-
Xereus Purple
-
Yriel Yellow
Base
3
-
72.701
Dead White
-
72.708
Orange Fire
-
72.751
Black
Base
2
-
72.023
Electric Blue
-
72.042
Parasite Brown
Base
2
-
71.014
Gunship Green
-
71.057
Black
Sign up to compare these recipe requirements to your own paint collection
 Base Coat
 Non-Primary Weapons
 Laser Destructor is based in Mephiston Red , Black and Dark Steel . The end of the barrel is airbrushed with Black to represent a muzzle burn.
  Laser Destructor/Plasma Exterminator green lenses are based in Warpstone Glow with the bottom corner touched up in Sybarite Green and the opposite top corner touched up in White Scar in order to create the effect of the lens reflection/light. The Imperial Aquila is painted with Retributor Armour
  Thrust nozzles are masked on outside, inside is thinly sprayed with Parasite Brown so that the metallic effect is maintained, next a small amount of Orange Fire is airbrushed into a smaller area of the center of each nozzle. next, a small airbrushed spot of Dead White into the very center of the nozzles is done. Finally, masking is removed, and a small amount of Black is spray directly into the nozzle.
 Eyes are painted with three colors decreasing in size in the following order Mephiston Red >> Evil Sunz Scarlet >> Yriel Yellow . The goal here being to create a glow effect.
  Paint boxes with a base of Gunship Green , highlighted with Sybarite Green , the straps with Rhinox Hide and the Imperium symbols painted with Retributor Armour
  Paint the repair tool with Dark Steel , it's handle with Rhinox Hide and some accents painted with Retributor Armour
  "Pipe" accessory holder is painted Khorne Red , straps are painted Rhinox Hide and the pipes themselves are painted Dark Steel
  Base
Base Airbrush base color of Mechanicus Standard Grey . Due to base colors often getting soaked into cork, rocks, etc. I honestly use a cheap craft paint for the base color on my model bases. Here, I actually used Nicole's Dark Gray (this is the craft paint brand at Michael's).
 Black armor chipping is done by taking a small sponge, and lightly dabbing in Eshin Grey and spotting small areas. Then on the edges of some of the larger scratches, paint a small highlight of Administratum Grey
  Red armor chipping is done by taking a small sponge, and lightly dabbing in Abaddon Black and spotting small areas. Then on the edges of some of the larger scratches, paint a small highlight of Administratum Grey
  Deeper scratching to edges is then done with a dry brush on main edges of the tank (as you see fit) with Leadbelcher . You can especially see this along the top edges of the main bode of the tank.
  The very bottom of the tank is dusted using Vallejo Pigment Light Slate Grey (73.113)