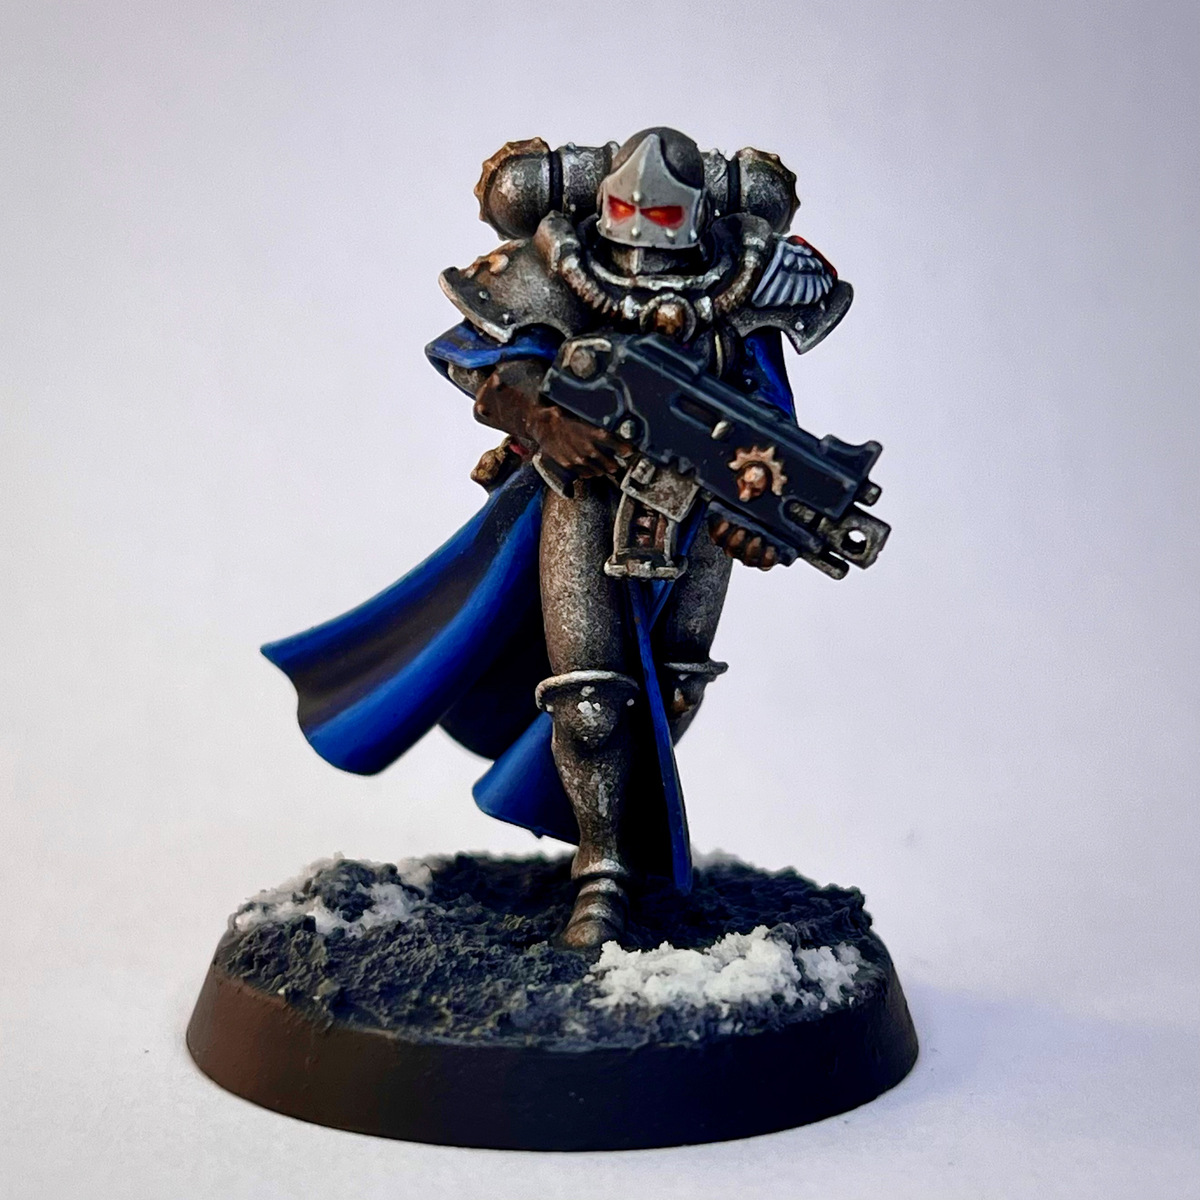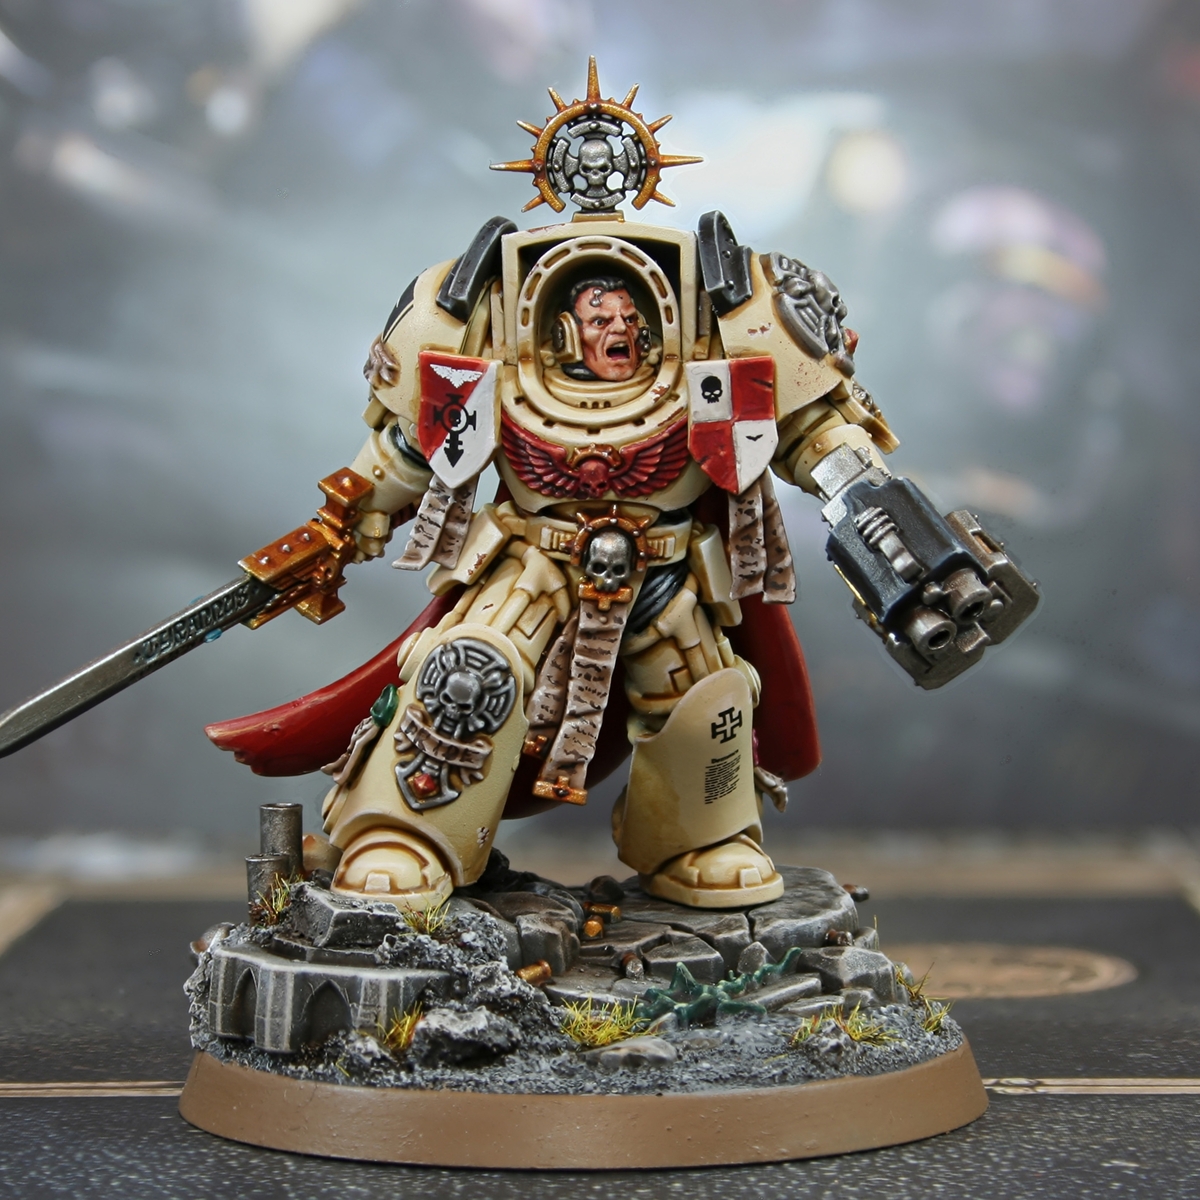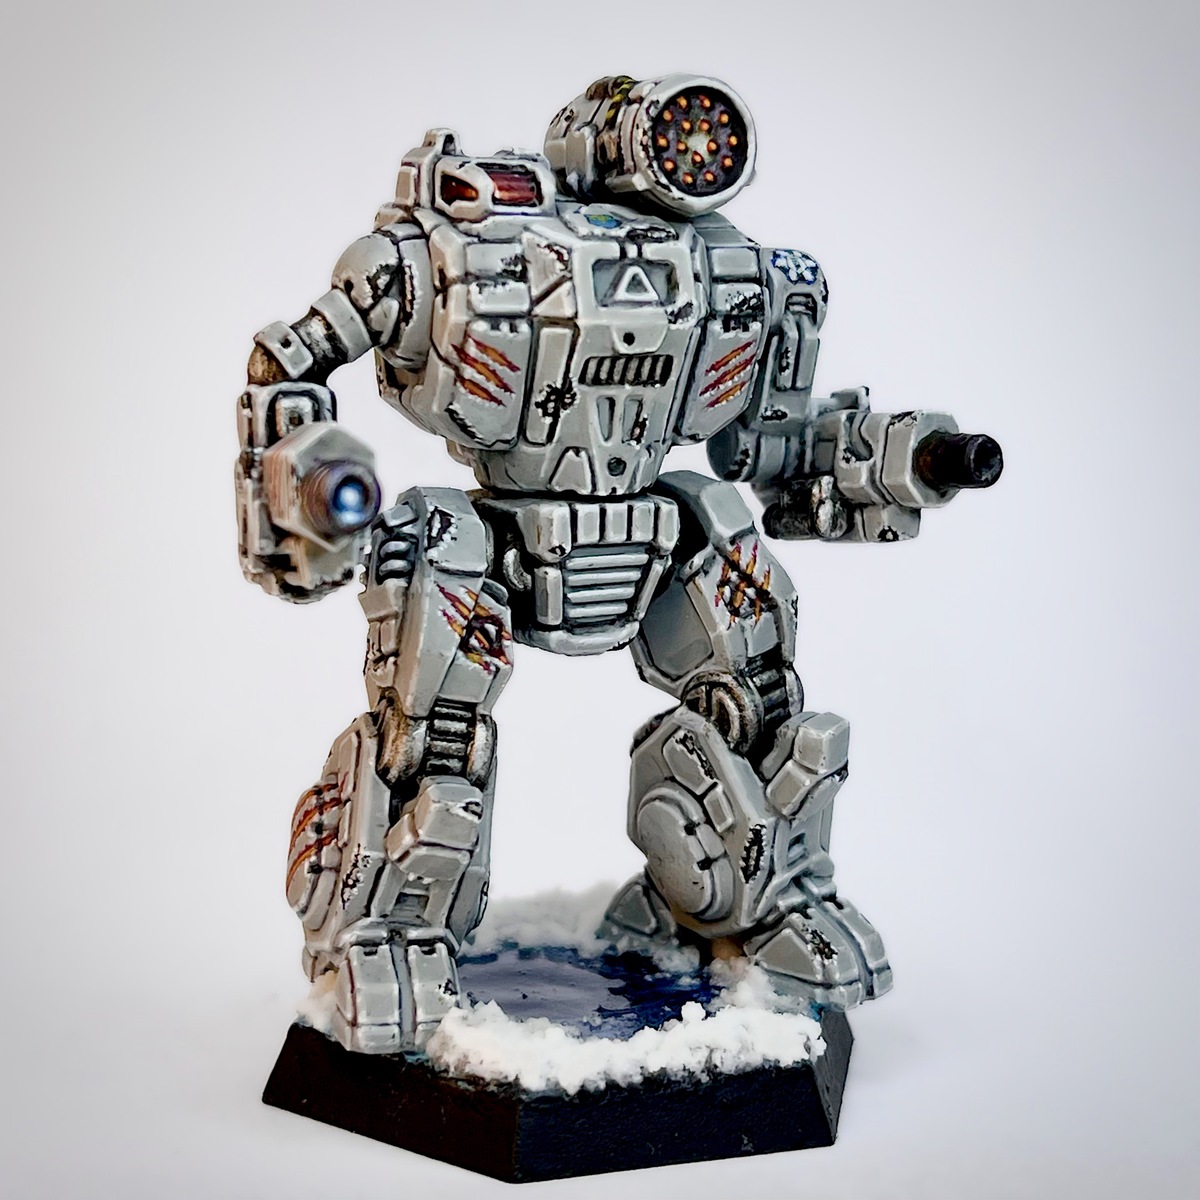

My take on saKhan Kabrinski's Silveroot Keshik of Clan Ghost Bear, Alpha Galaxy.
I really fell in love with Clan Ghost Bear after playing the Flash Storm DLC of MechWarrior 5: Clans. I immediately set out to paint a star in the Silveroot's colors.
Painting white can be a real pain. It's important to make sure your paint is well mixed and thinned down. It will likely take quite a few coats for a solid, consistent midtone.
 White Armor
- Prime using Grey Seer
- Base coat using Carcharodon Grey
- Shade recessed panels using Apothecary White
- Shade the deepest recesses using Gravelord Grey
- Edge highlight using a 1:1 mix of Carcharodon Grey and Trooper White
- Follow up with another edge highlight of pure Trooper White
- Highlight the sharpest corners using Bold Titanium White
 Metal Joints and Vents
- Base coat using Iron Warriors
- Wash the metal using Agrax Earthshade
- Shade the deepest recesses using Black Templar
- Highlight the edges and raised areas using Leadbelcher
- Apply a more selective highlight using Runefang Steel
- Finally apply a very conservative spot highlight to the most extreme corners using Aluminum
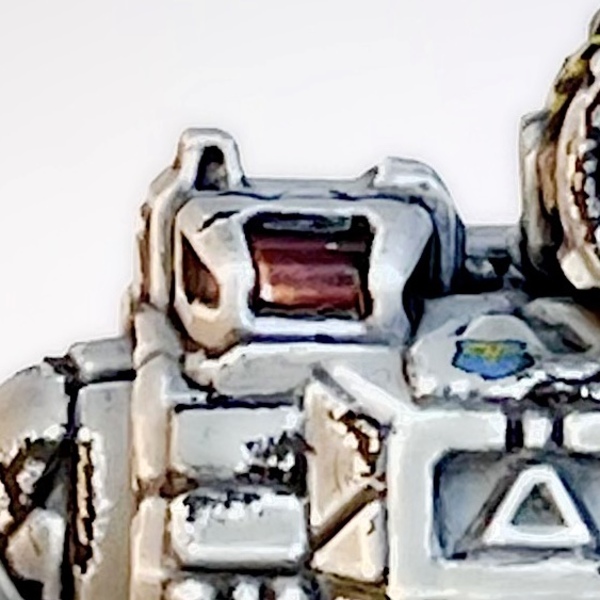 Canopy
I strongly recommend using a wet palette with this step to keep your paints wet. If you're having trouble with blending the transitions, using Lahmian Medium in place of water for thinning your paints might help them flow better and stay wet longer on the model.
- Base coat the canopy glass using a 1:1 mix of Gal Vorbak Red and Doom Death Black
- Shade the deepest recesses of the canopy using Gravelord Grey
- Starting in the lower left corner and working your way up to the upper right corner while avoiding the recesses, apply a very thin coat of Gal Vorbak Red
- Repeat the previous step, staying nearer and nearer to the lower left corner with each step using, in order: Mephiston Red , Evil Sunz Scarlet , and Fire Dragon Bright
- Using Fire Dragon Bright , paint an L shape in the lower left corner.
- Repeat the previous step, this time making a much smaller L, using Flash Gitz Yellow
- Apply a single dot of Bold Titanium White in the lower left and upper right corners.
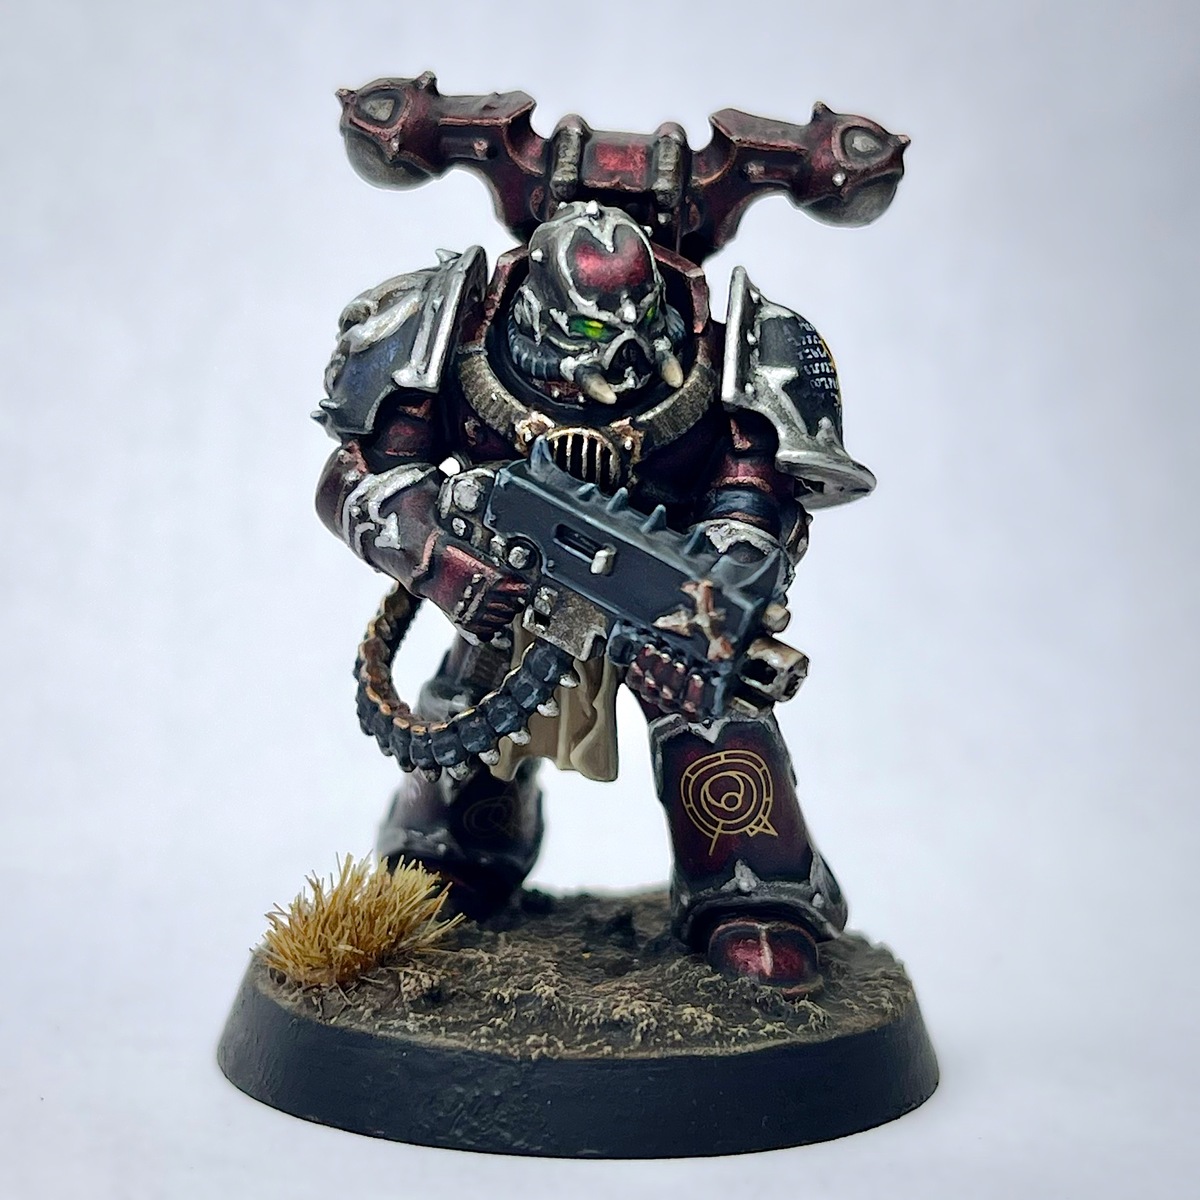
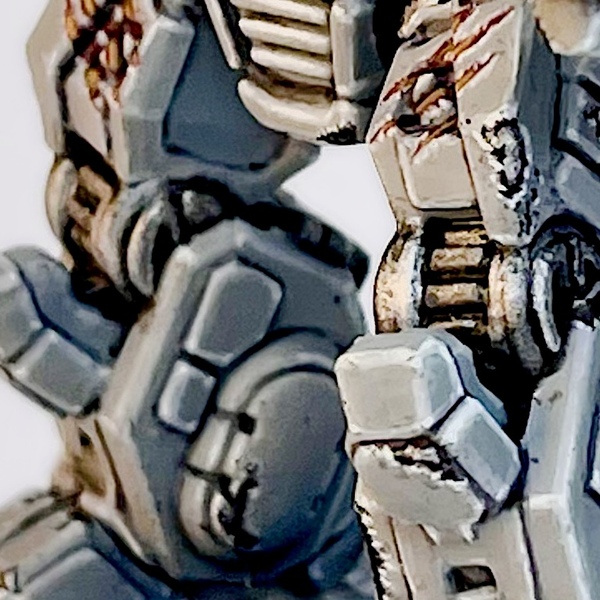
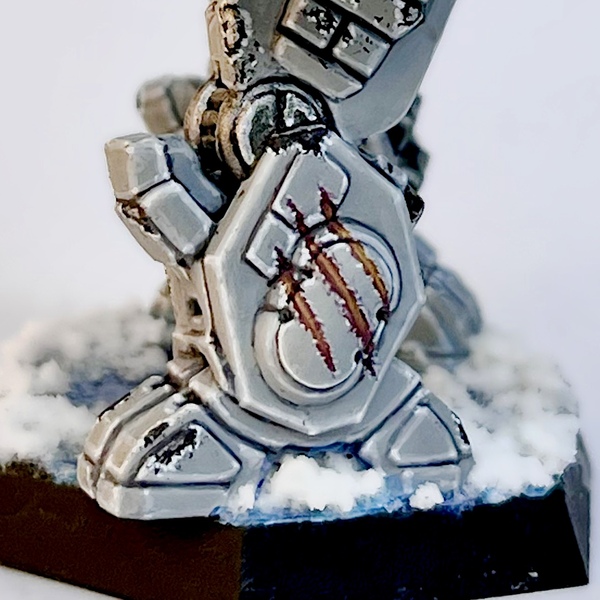 Claw Marks
- Using a 1:1 mix of Gal Vorbak Red and Doom Death Black , sketch out and fill in the shape of the claw marks.
- Being careful to avoid the recesses, apply a layer of Khorne Red to the marks.
- Repeat the previous step, getting closer and closer to the center and painting thinner and thinner lines with each color using, in order: Evil Sunz Scarlet , Wild Rider Red , Fire Dragon Bright , and Flash Gitz Yellow
- Highlight the marks by stippling on Trooper White along the edges.
- Repeat the previous step, this time being much more conservative in your application, using Bold Titanium White
 Battle Damage
For the best results, be sure to apply and clear coat any transfer decals you may want to use before adding battle damage.
- Using a sponge (I like using the green part of kitchen sponges), dab Doom Death Black in random places and patterns across the model. Sharp corners are ideal.
- Once you're happy with the sponge stippling as a rough outline, use a small brush and either Doom Death Black or Carcharodon Grey to add to or cover/clean up the marks until you're happy with their size and shape.
- Apply a layer of Rhinox Hide in the center of the damage markings, being careful to avoid the recesses and leave the black showing around the edges.
- Add a very small amount of Aluminum to the very center of the largest damage marks; particularly ones on corners.
- Highlight the marks by stippling on some Trooper White around the edges.
- Repeat the previous step, this time being much more conservative in your application, using Bold Titanium White
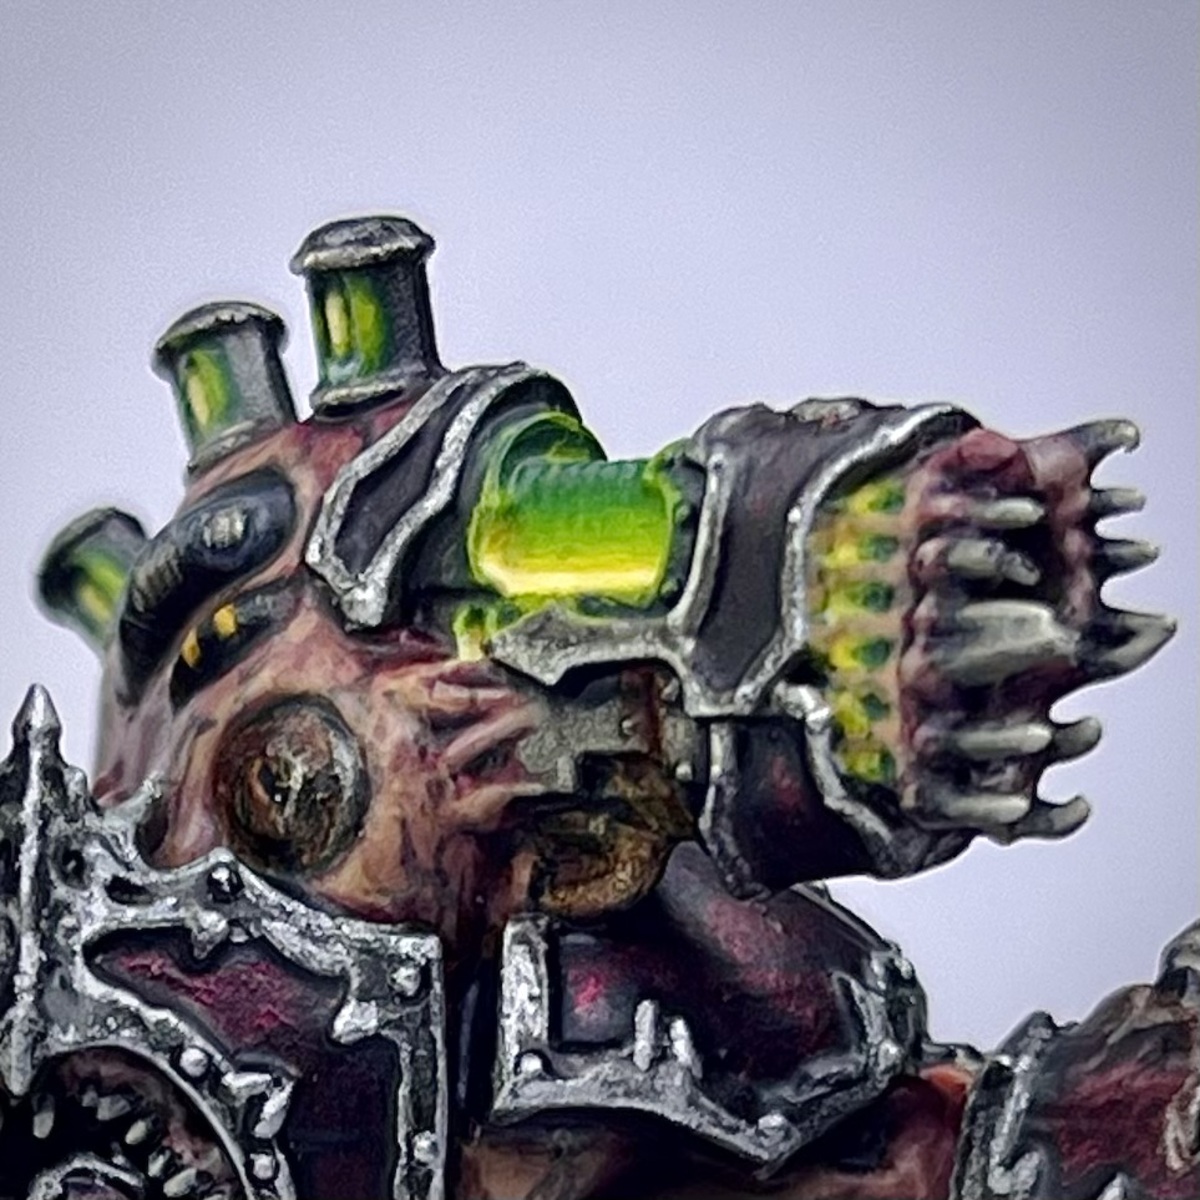
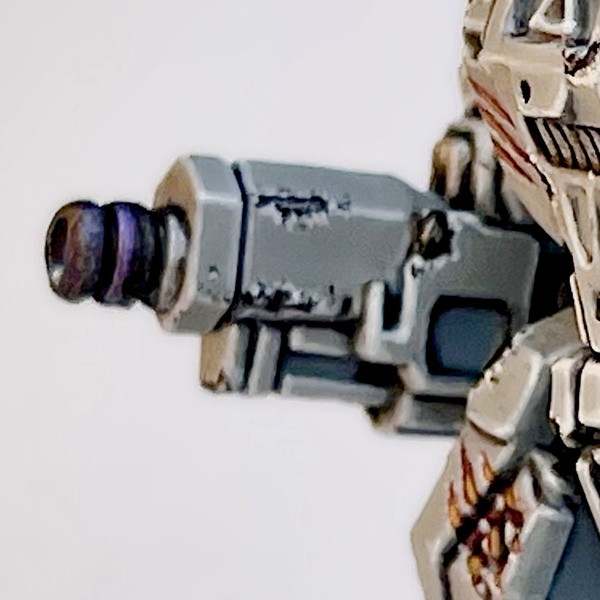
 PPC
PPC
- Start by painting the metal in the same way as in the earlier step. Then, apply Druchii Violet over roughly 2/3 of the cannon.
- Apply a coat of Drakenhof Nightshade to the front half of the cannon.
- Base coat the cannon interior using Kantor Blue and apply a small amount to the front of the muzzle, centered and on the bottom of the muzzle.
- Apply a layer of Teclis Blue to the center of the interior, being careful to avoid the recesses and do the same on the bottom of the muzzle rim.
- Repeat the previous step, focusing much closer to the center, using first Alaitoc Blue and then Baharroth Blue
- Apply a small amount of Bold Titanium White in the very center of the interior and the bottom of the muzzle rim.
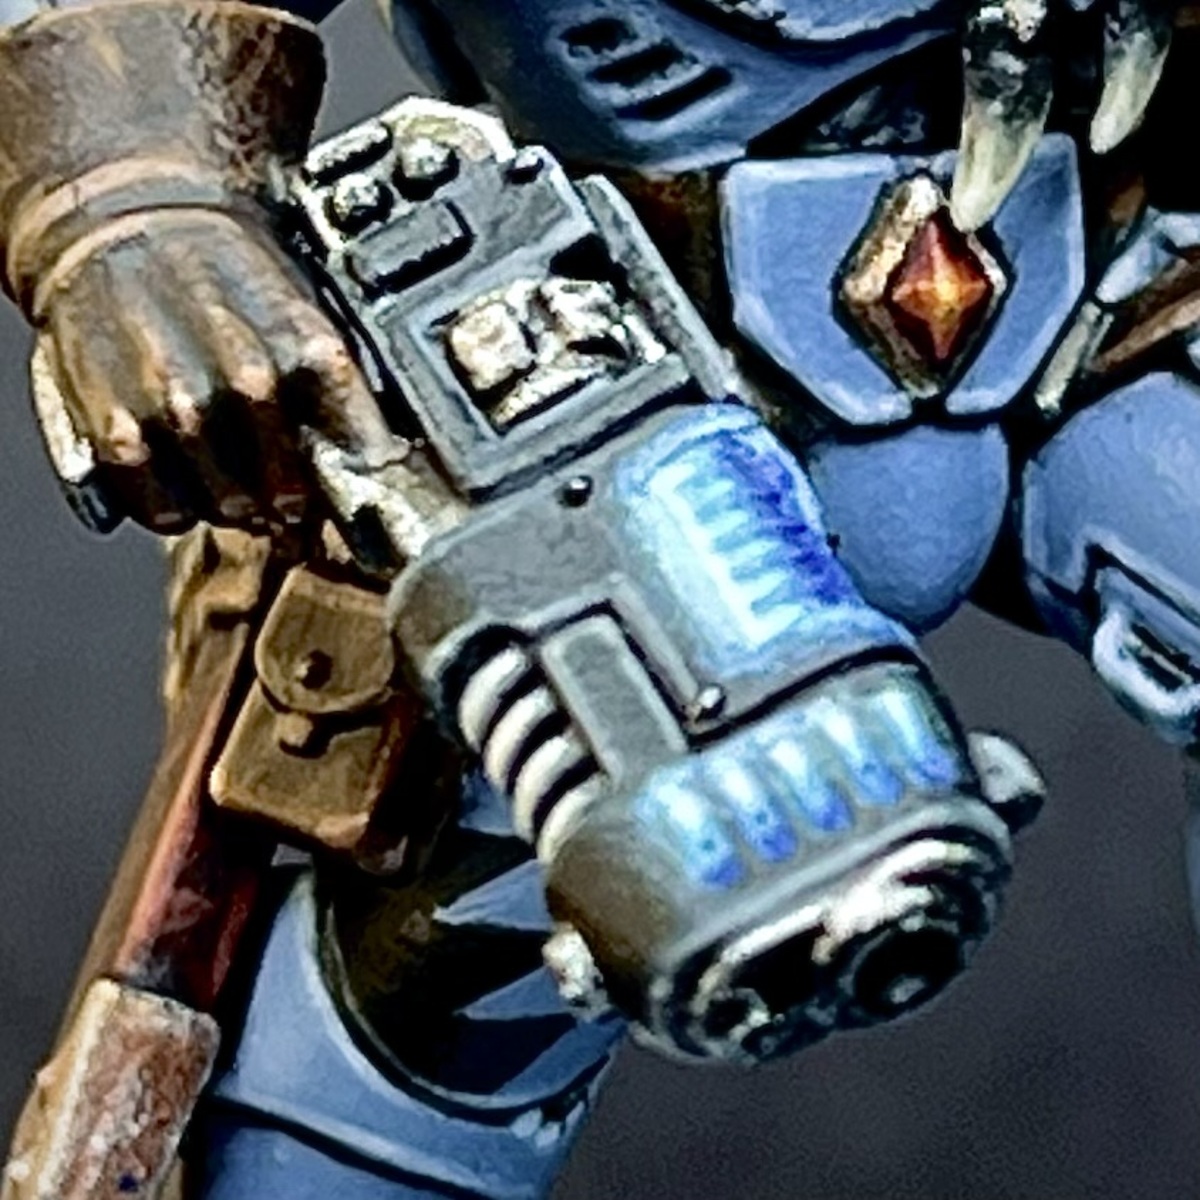
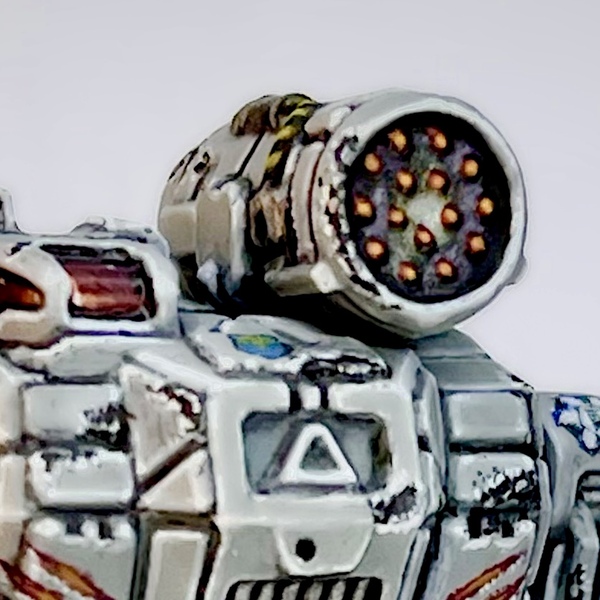
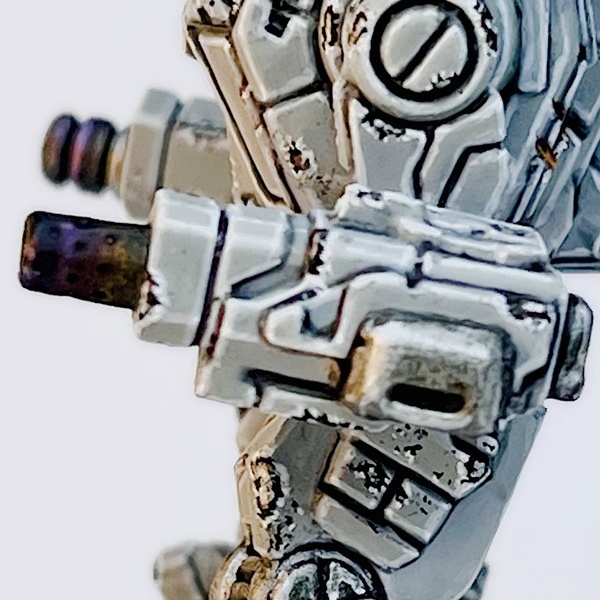 Autocannon Barrel
- Start by painting the barrel metal in the same way as we painted metal in an earlier step. Then apply a coat of Seraphim Sepia over roughly 2/3 of the barrel, starting from the front.
- Apply a coat of Druchii Violet over roughly 1/2 of the barrel, starting from the front.
- Apply a coat of Drakenhof Nightshade over roughly 1/4 of the barrel, starting from the front.
- Using Black Templar , pick out the small exhaust holes of the barrel and fill in the interior of the barrel.
- Finally, using some heavily thinned down Leadbelcher , apply a very light highlight to the muzzle rim.
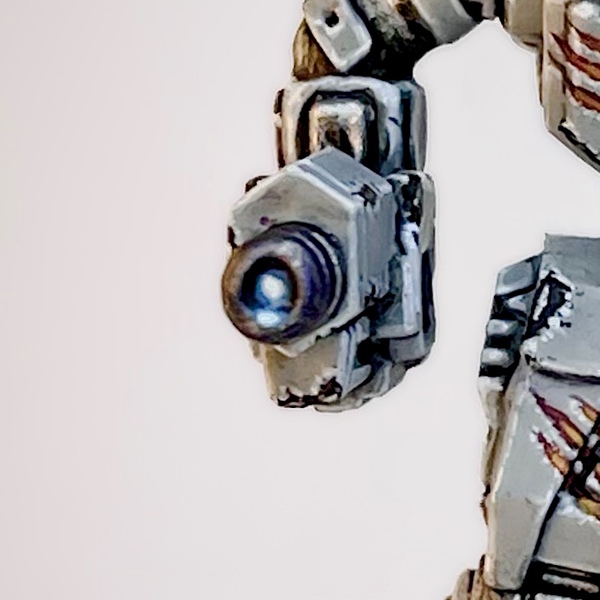
 Missile Launcher
- Base coat the interior of the launcher using Iron Warriors
- Highlight the very center using Runefang Steel
- Apply a coat of :Citadel/SeraphimSepiae to the metal, avoiding the very center.
- Apply a coat of Druchii Violet , this time even further from the center.
- Apply a coat of Drakenhof Nightshade to the very edges/outside of the circle.
- Base coat the individual missiles using Khorne Red
- Apply a layer of Mephiston Red to the missiles, bring careful to avoid the bottom of each, leaving the darker red showing.
- Highlight the top 1/4 of the missiles using Evil Sunz Scarlet followed by Fire Dragon Bright
- Finally, apply a very thin layer of Flash Gitz Yellow to the very tip of the missiles.

Sabrina Fay
FayDayParade
I paint little plastic dudes.
Citadel Painting System 23
Base 7
- Gal Vorbak Red
- Iron Warriors
- Kantor Blue
- Khorne Red
- Leadbelcher
- Mephiston Red
- Rhinox Hide
Shade 4
- Agrax Earthshade
- Drakenhof Nightshade
- Druchii Violet
- Seraphim Sepia
Layer 8
- Alaitoc Blue
- Baharroth Blue
- Evil Sunz Scarlet
- Fire Dragon Bright
- Flash Gitz Yellow
- Runefang Steel
- Teclis Blue
- Wild Rider Red
Technical 1
- Lahmian Medium
Spray 1
- Grey Seer
Contrast 2
- Apothecary White
- Black Templar
Monument Hobbies Pro Acryl
Base 1
- 001 Bold Titanium White
The Army Painter Speedpaint 2.0
Speedpaint 1
- Gravelord Grey
Vallejo Metal Color
Base 1
- 77.701 Aluminum