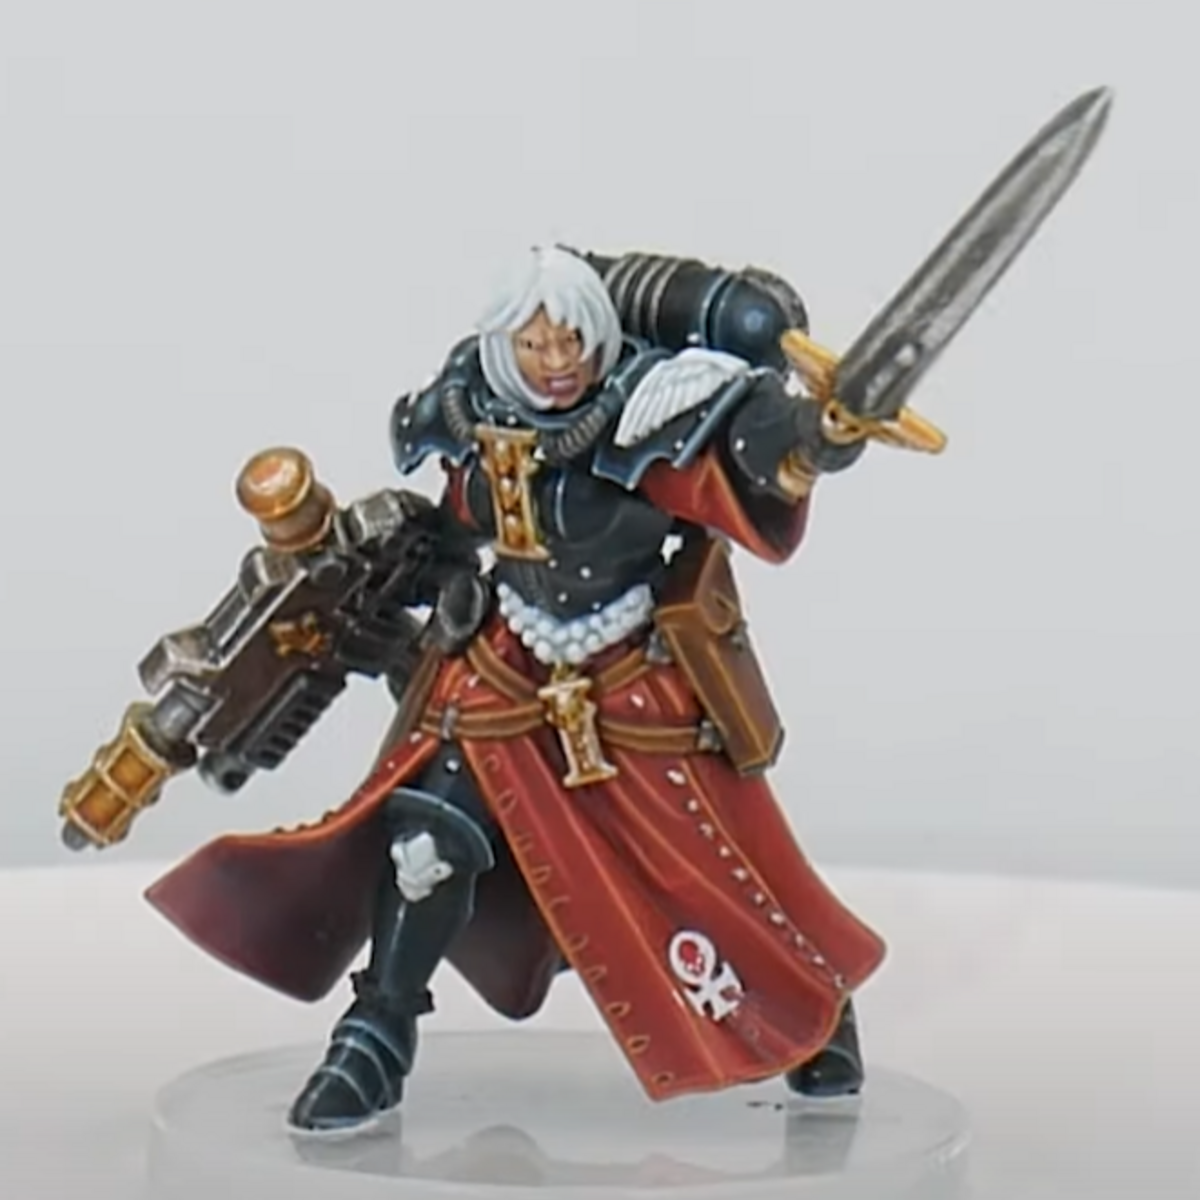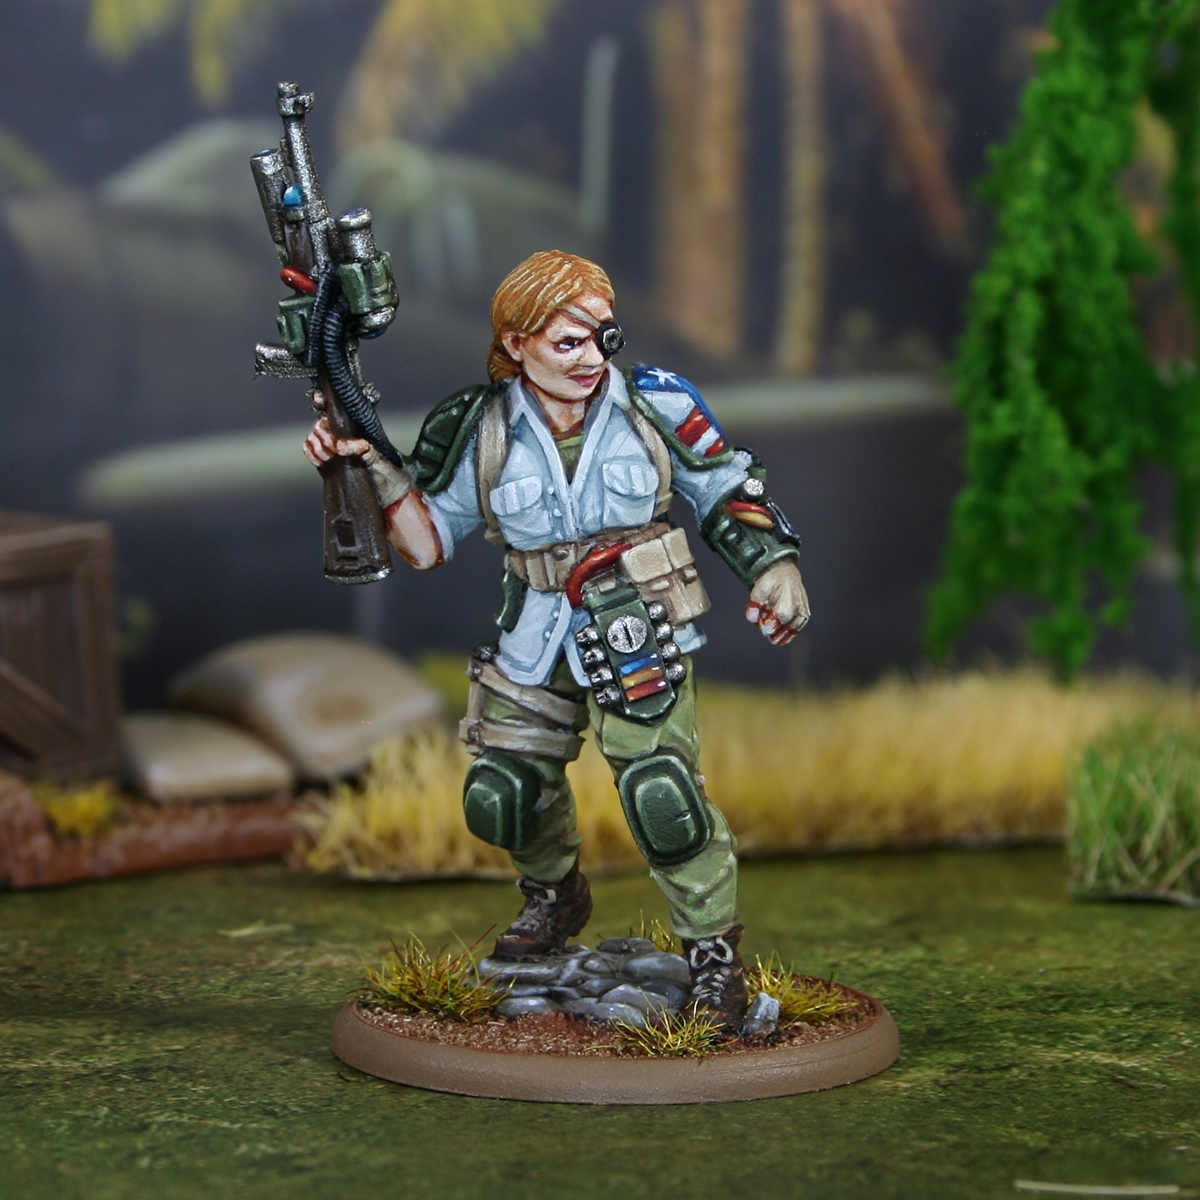

How I painted the event exclusive model from the Warlord Open Day 2025. As a named character, I aimed to keep this model as close to the studio paintjob as I could.
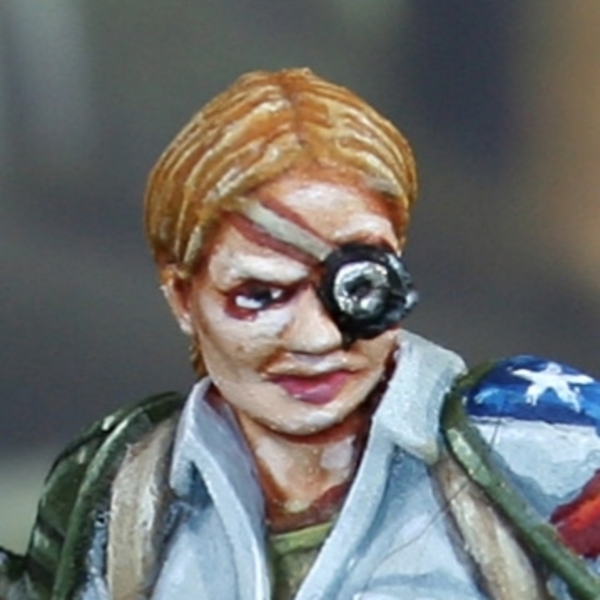 Skin
Skin
- Basecoat with an equal parts mix of Cadian Fleshtone , Kislev Flesh and White .
- Shade the skin with Reikland Fleshshade . Rather than an all-over wash, I would recommend shading and glazing carefully.
- Use thin Doombull Brown to shade deep recesses. Make sure you get some in the eye socket and under the chin.
- Add some White to the base colour, then highlight the skin.
- Increase the amount of White AGAIN, so it is now an "off-white". Finish the skin with small/specular highlights of this colour.
For the eye, I pick out the eyeball with Ulthuan Grey . Then add a dot of Black for the pupil.
 Green Cloth
- Basecoat with Death Guard Green .
- Mix the Death Guard Green 2:1 with Rhinox Hide , then shade the cloth. Keep your paint thin, to ensure the shading is very soft.
- Enhance the shading in very deep and shaded areas with some thin Rhinox Hide .
- With Ogryn Camo , edge highlight the cloth.
- Now selectively highlight with Krieg Khaki .
- Finish by adding specular highlights of Krieg Khaki , with a little White mixed in. Add these only to exposed sharp corners, bulges etc.
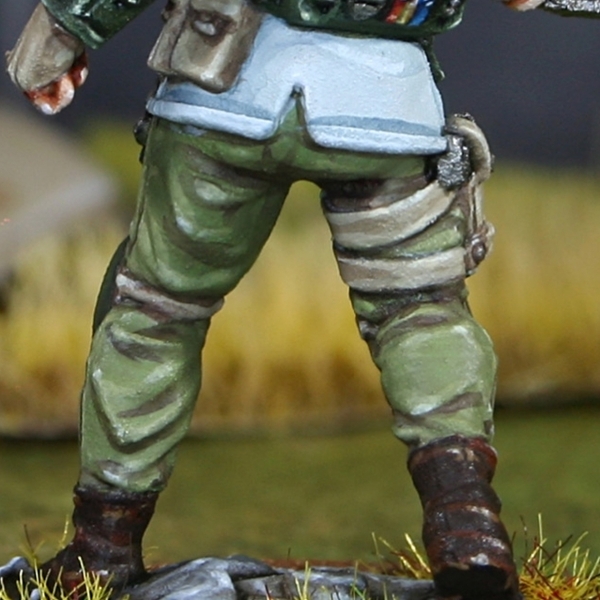
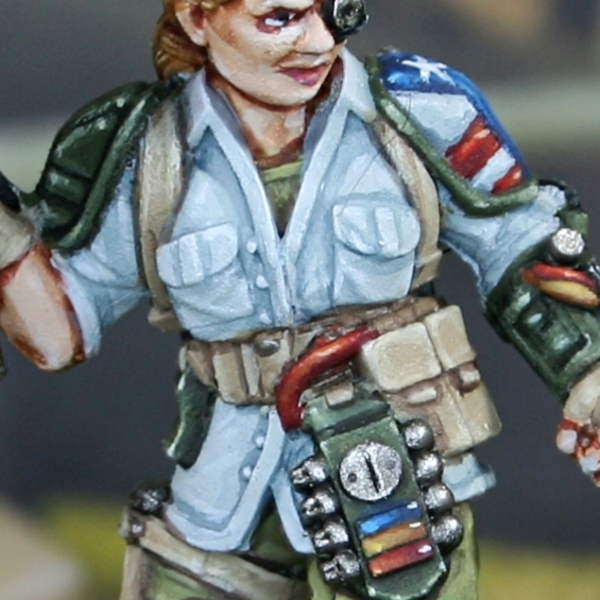 White Cloth
- Basecoat with an equal parts mix of Celestra Grey and White .
- Add a small amount of Dark Reaper to a portion of the base colour. The mix should be roughly 1:2. Use this mix to add shading to the shirt.
- Increase the amount of Dark Reaper in the above mix, so there is now more of the blue that the base colour. Using this colour, further define deep recesses.
- Mix a portion of the basecolour 1:1 with white. Use this colour both to tidy-up and add general highlights.
- Finish with selective highlights of pure White .
I used this same recipe for the white stripes on the shoulder pad.
 Red Deatils
- Basecoat with Administratum Grey .
- Highlight with Evil Sunz Scarlet .
- Selectively highlight with Troll Slayer Orange .
- Finish with very small highlights of Lugganath Orange .
 Blue Details
- Basecoat with Kantor Blue .
- Highlight with Caledor Sky .
- Selectively highlight with Teclis Blue .
- Mix a little :Citadel/AdministratumGrey into your Teclis Blue and add very small highlights.
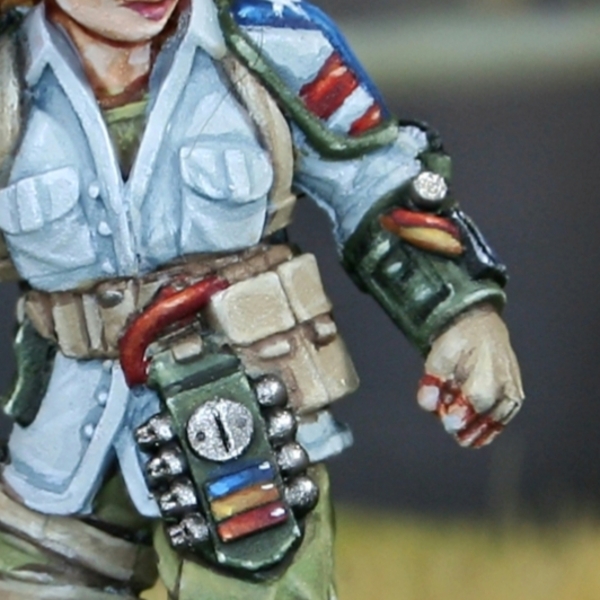 Yellow Details
- Basecoat with Skrag Brown .
- Go over everything but the deep recesses with Averland Sunset .
- Highlight with 1:1 Averland Sunset and Ice Yellow .
- Finish with smaller highlights of pure Ice Yellow .
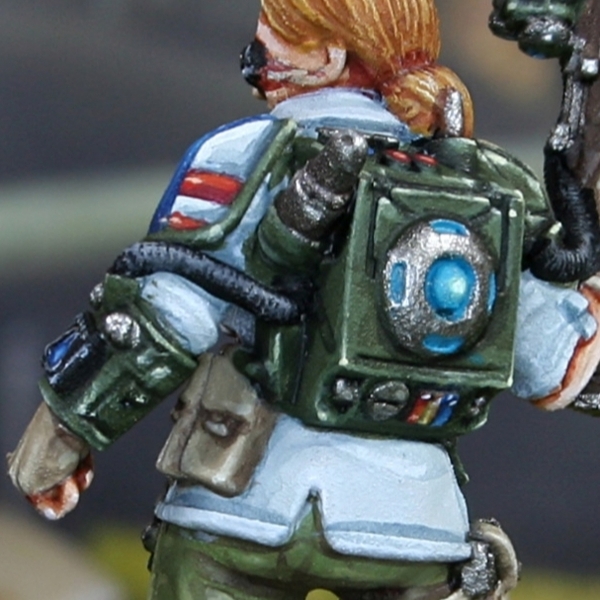 Olive Armour
- Basecoat with Castellan Green .
- Shade recesses with thinned Castellan Green and Abaddon Black .
- Add chunky highlights with 2:1 Loren Forest and Deathworld Forest .
- Now apply fine highlights with Straken Green .
- Selectively highlight corners and curves with Krieg Khaki .
- Finish with Specular highlights of Krieg Khaki mixed with a little White , where needed.
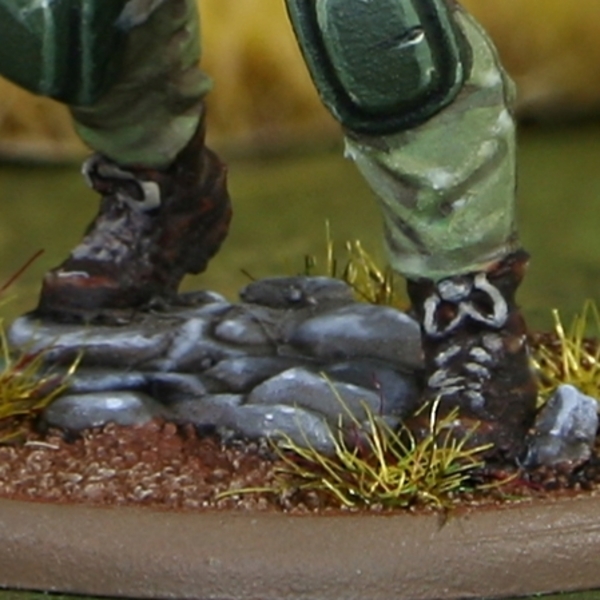 Dark Leather
- Basecoat with Rhinox Hide .
- Highlight with Doombull Brown .
- Selectively highlight with XV-88 .
- Finish with very small/specular highlights of Screaming Skull .
For the laces, I simly picked out the edges with Karak Stone . Then added small/specular highlights using Karak Stone with a little White mixed in.
 Wood
Wood
- Basecoat with Thondia Brown .
- Shade with Rhinox Hide .
- Highlight and add woodgrain with a mix of 2:1 Thondia Brown and Steel Legion Drab . use this colour to establish the woodgrain that we will highlight as we go.
- Take the above paint and mix it 1:1 with Administratum Grey . Now use this for fine highlights.
- Increase the amount of Administratum Grey again, then add selective highlights.
- Finish with a few specular highlights of pure Administratum Grey .
 Pale Leather
- Basecoat with Karak Stone .
- Shade with Baneblade Brown .
- Enhance the shading in the deepest points with thin lines of Dryad Bark .
- Apply highlights of Ushabti Bone .
- Add fine highlights of Screaming Skull .
- Finally mix a little White into your Screaming Skull , and selectively highlight.
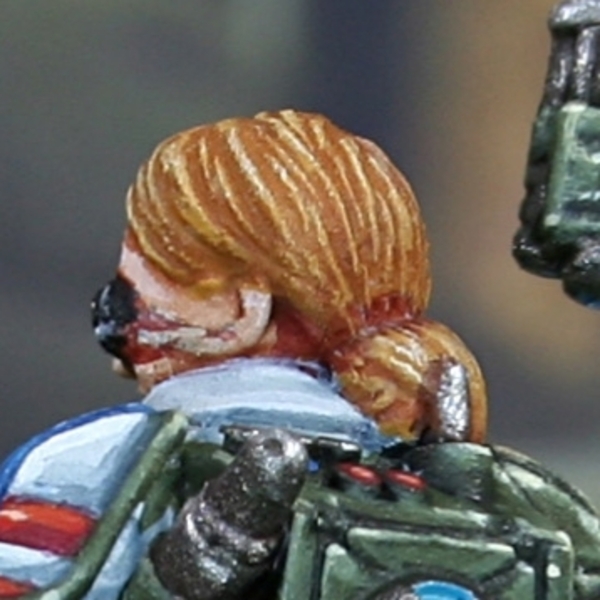 Hair
Hair
- Basecoat with Balor Brown .
- Wash with some heavily thinned 1:1 XV-88 and Doombull Brown .
- Shade around the bun with a thin line of pure Doombull Brown .
- Pick out the majority of the hair strands with an overbrush of Averland Sunset .
- Selectively highlight with 1:1 Averland Sunset and Ice Yellow .
- Apply smaller highlights of Ice Yellow .
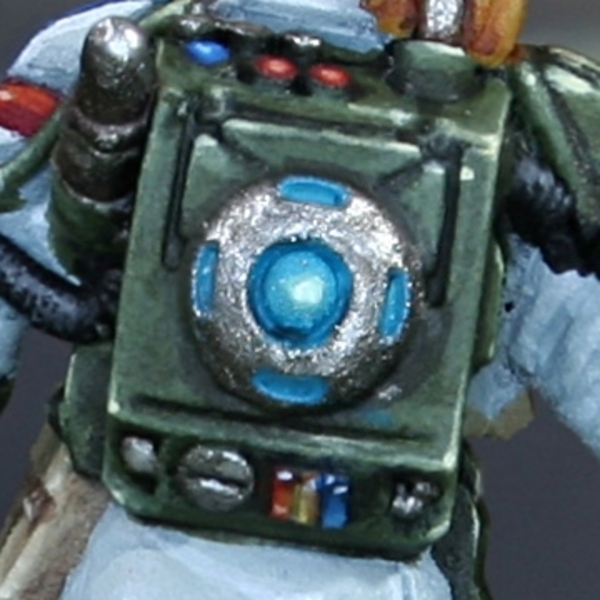 Blue Glow
- Basecoat with 1:1 Thousand Sons Blue and Gauss Blaster Green .
- Wash with Sotek Green ., avoiding the centre of the "orb" part.
- Highlight raised detials with Gauss Blaster Green .
- Finish with a highlight of pure White in the centre.
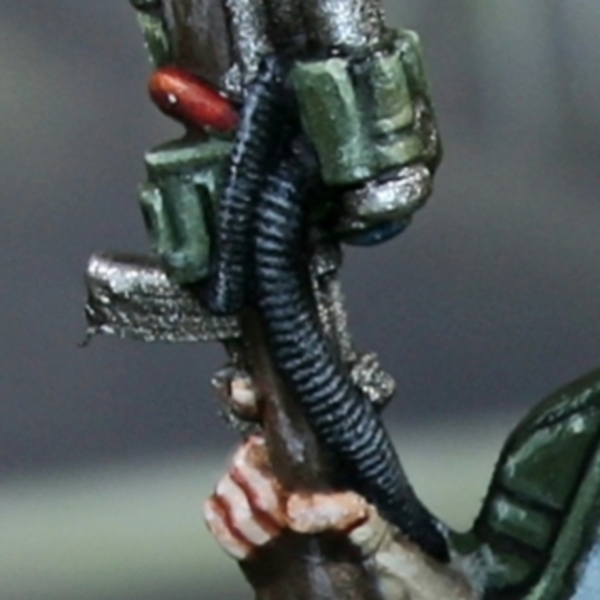 Black Details
- Basecoat with Black .
- Overbrush with Dawnstone , picking up raised details with as thin of a line as possible. Feel free to do this in a couple of light passes to build up the colour.
- Mix a little White into your Dawnstone and more selectively highlight.
- Finish with a few specular highlights of pure White .
 Steel
Steel
- Basecoat with Leadbelcher .
- Wash the larger areas with the most sculpted details, using Nuln Oil .
- Highlight with Ironbreaker .
- Finish with selective highlights of Silver RLM01 Metallic .

Rookie Brushes
RookieBrushes
Aspiring miniature painter and biscuit enthusiast. Here to share my hobby and help where I can.
Citadel Painting System 42
Base 15
- Abaddon Black
- Averland Sunset
- Caledor Sky
- Castellan Green
- Celestra Grey
- Death Guard Green
- Deathworld Forest
- Dryad Bark
- Kantor Blue
- Leadbelcher
- Rhinox Hide
- Steel Legion Drab
- Thondia Brown
- Thousand Sons Blue
- XV-88
Shade 2
- Nuln Oil
- Reikland Fleshshade
Layer 24
- Administratum Grey
- Balor Brown
- Baneblade Brown
- Cadian Fleshtone
- Dark Reaper
- Dawnstone
- Doombull Brown
- Evil Sunz Scarlet
- Gauss Blaster Green
- Ironbreaker
- Karak Stone
- Kislev Flesh
- Krieg Khaki
- Loren Forest
- Lugganath Orange
- Ogryn Camo
- Screaming Skull
- Skrag Brown
- Sotek Green
- Straken Green
- Teclis Blue
- Troll Slayer Orange
- Ulthuan Grey
- Ushabti Bone
Air 1
- Administratum Grey
Vallejo Model Air
Base 1
- 71.063 Silver RLM01 Metallic
Vallejo Model Color
Base 3
- 70.858 Ice Yellow
- 70.950 Black
- 70.951 White