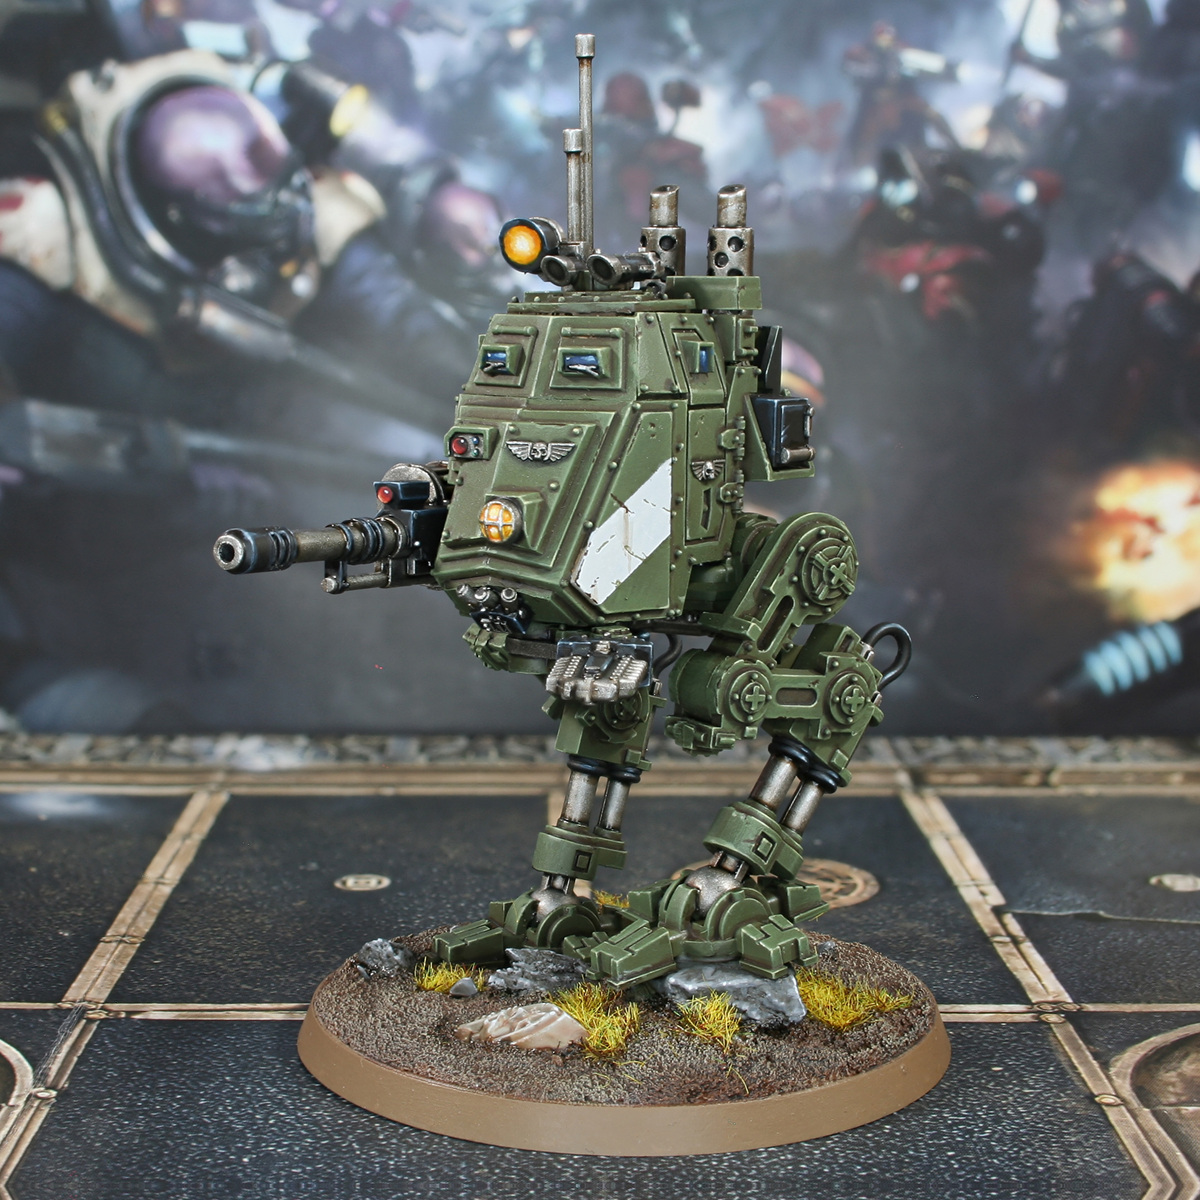

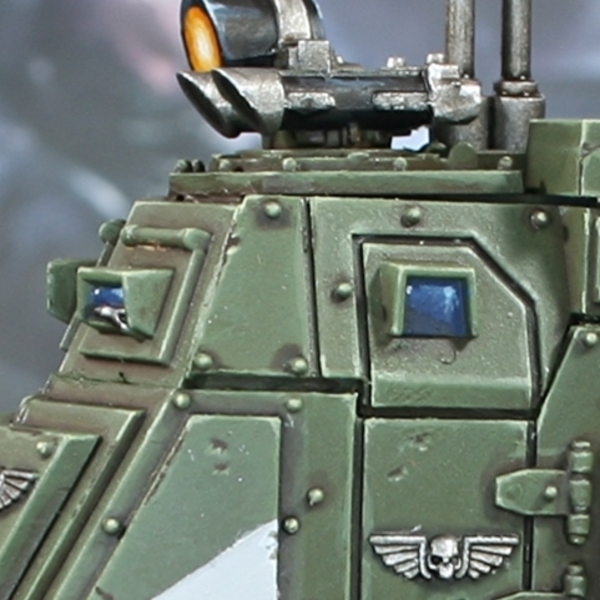
 Green Armour
I have given details on recess shading this model with Citadel paints, as this is what is what most people have already. However, I did a pinwash of Winton "Vandyke Brown" oil paint and the shading came looking very similar. This method worked out much faster and I would strongly encourage you to look into picking up the oil paints etc, if you do not have them already.
- I started by priming the whole model with Russian Green 4bo . Priming in this colour is completely optional, but it is very close to Castellan Green , which will be the dominant colour and speeds things up.
- I then established a solid basecoat of Castellan Green . This only took a single thin coat, thanks to the colour I primed in.
- Now drybrush pretty heavily, with a 2:1 mix of Loren Forest and Deathworld Forest . I used a flat brush and picked out the edges by heavy handedly hitting them. You should be aimed to get a varied result, somewhere between a chunky and a fine edge highlight, with plenty of free texture over the surface.
- With thye drybrushing done, shade recesses with a 1:1 mix of Castellan Green and Rhinox Hide . Keep the mix pretty thin and shade recesses generously.
- If any recesses look particuarly deep, add some Abaddon Black to the above mix and run it into them.
- With pure Straken Green highlight the mority of the edges. Don't drive yourself mad, but try and hit all of the exposed and visible ones with a nice thin line.
- Using Krieg Khaki , selectively highlight corners and curves. Stay well within the last stage, using these to enhance our previous work.
- If you want to really accentuate corners mix your Krieg Khaki with an equal amount of Pallid Wych Flesh and add specular highlights to corners. You could also pop some in the centre of the previous stages highlights on upward facing edges.
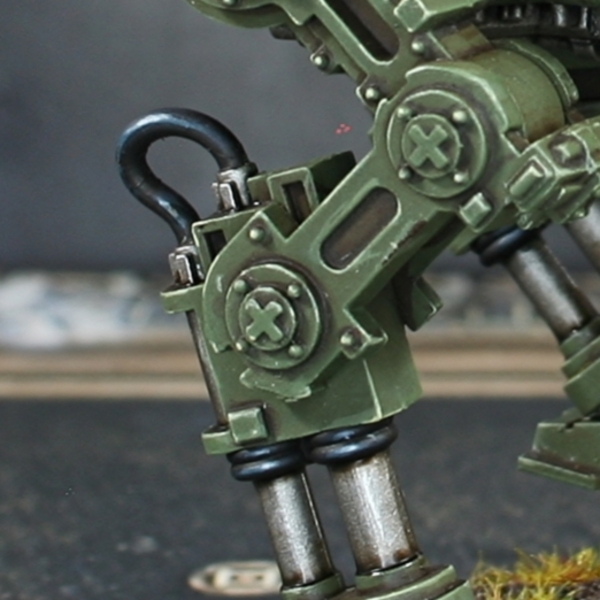
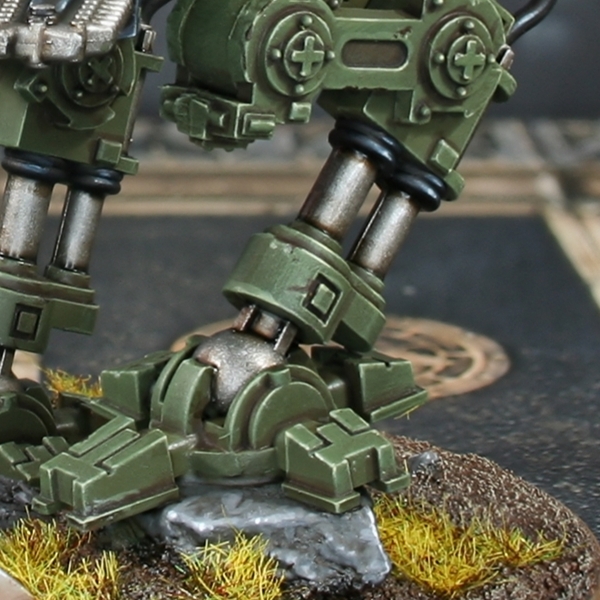 Steel
Steel
- Basecoat with Leadbelcher .
- Wash with Nuln Oil .
- Add highlights with Ironbreaker .
- Now selectively highlight with Vallejo Model Air Silver RLM01 Metallic .
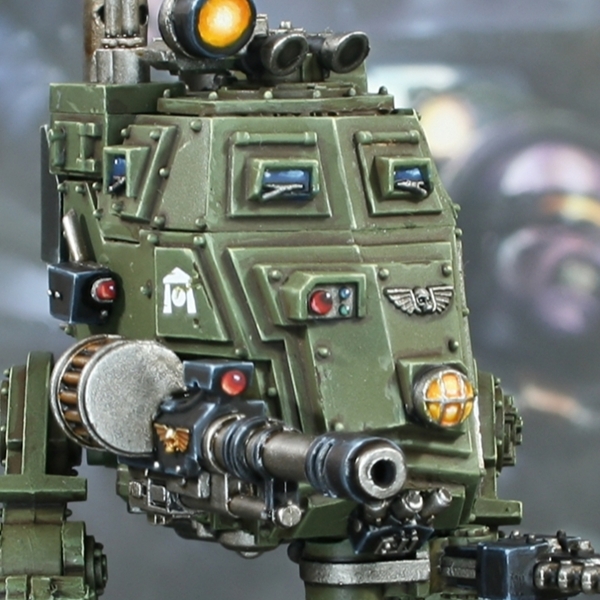
 Dark Armour Panels
- Basecoat with a mix of 2 parts Corvus Black , 1 parts Castellan Green and 1 part Abaddon Black .
- Shade recesses with some thin Abaddon Black .
- Chunky highlights of 1:1 Corvus Black and Castellan Green .
- Fine edge highlights of Castellan Green , Dark Reaper and Celestra Grey , mixed in equal amounts.
- Selective highlights of Castellan Green and Celestra Grey , mixed 1:2.
- Specular highlights of pure Celestra Grey .
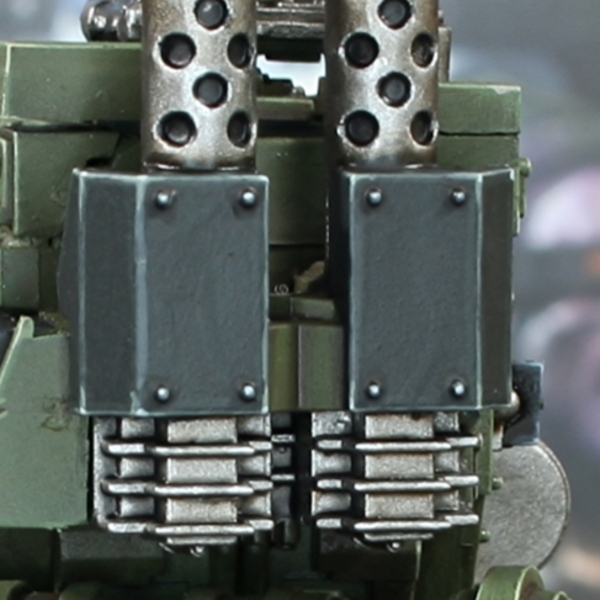
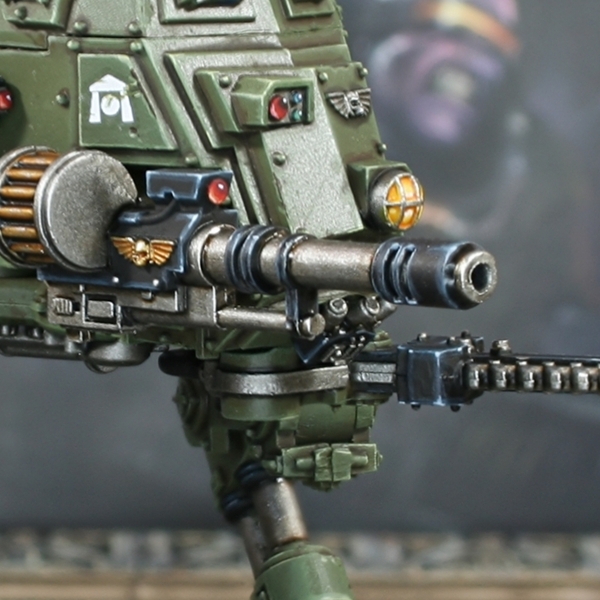 Black Weapon Casing
- Basecoat with Abaddon Black .
- Edge highlight everything with a thick line of Dark Reaper .
- Highlight everything again, this time with a thin line of Thunderhawk Blue . This colour is a good place to put in some scratches too.
- With Fenrisian Grey , selectively highlight upward facing edges, corners and prominent edges. Stick primarily to edges where the light would hit and always drag your brush towards the brightest point. If you added scratches previously, reinforce them with a smaller, thinner line underneath.
- Finally, edge add small highlights to the centre of the previous highlights and corners with Blue Horror . Try to make them very small, dots if at all possible.
 Black Rubber Tubing
- Basecoat with Abaddon Black .
- Paint chunky highlights of Incubi Darkness onto raised details.
- Mix the Incubi Darkness 1:1 with Deepkin Flesh and add fine highlights onto edges.
- Add selective hihglights of Deepkin Flesh on courners and points that would catch the light.
- Mix a little Ivory or Pallid Wych Flesh into your Deepkin Flesh and add specular highlights where needed.
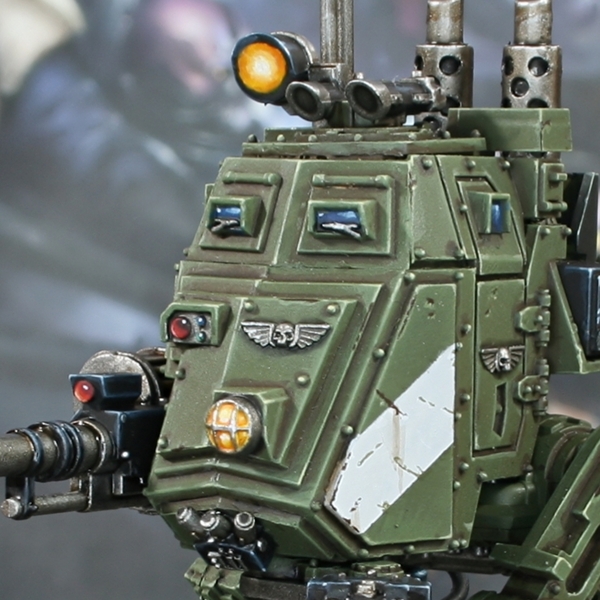 Yellow Lamps
- Basecoat with Golden Yellow (the citadel equivilent being close to Yriel Yellow ).
- Picky out the wires with Leadbelcher , Ironbreaker or a mix of the two.
- Wash the yellow area with Iyanden Yellow .
- Highlight the parts closest to the light source with Flash Gitz Yellow .
- Finish with a small highlight of White , within the last stage.
- If your contrast paint earlier has spilled onto the metallics too much, reestablish a thin highlight with Silver RLM01 Metallic or a bright silve rof your choice.
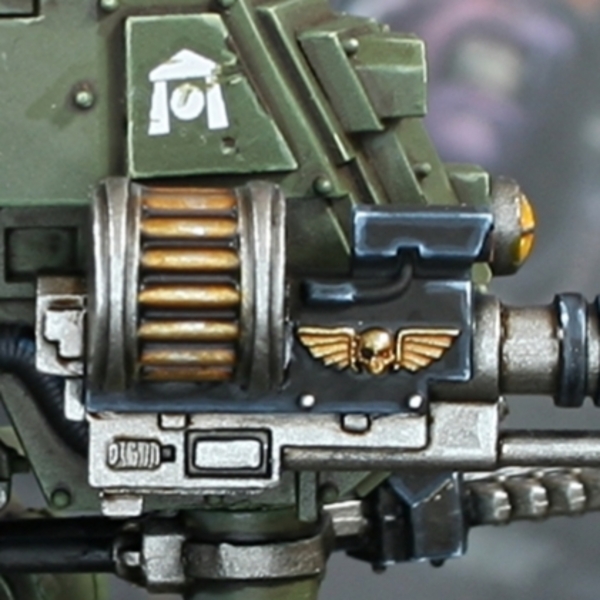 Gold Details
- Basecoat with a 1:1 mix of Retributor Armour and Liberator Gold .
- Wash with Reikland Fleshshade .
- In particularly deep points, like eye sockets on skulls, I like to add additional shading. Generally, I use a mix of Rhinox Hide and a touch of black, and water the mix down quite a lot.
- If needed, re-establish the basecoat on areas that need it. Then start adding Silver RLM01 Metallic to the base mix and add some highlights.
- Add pure Silver RLM01 Metallic in dtos to areas that would really catch the light.
 Blue Glass Window
- Basecoat with Kantor Blue .
- Mix some Russ Grey into your Kantor Blue and paint the top-right portion, leaving enough room for reducing its size 2 or 3 more times,
- Paint a smaller area with pure Russ Grey .
- Add some White to your Russ Grey in a 1:2 ratio and paint an even smaller patch, working further into the corner.
- If you have enough room, paint an even smaller patch with pure Russ Grey and White mixed 2:1.
- Finally, add a dot of white on the left corner , mirroring your brightest light blue highlight.
- If needs be, thin some of your Abaddon Black and Kantor Blue mix and carefully recess shade a thin line around the outside of the glass. This is to ensure is contrasts nicely with any surrounding metal.
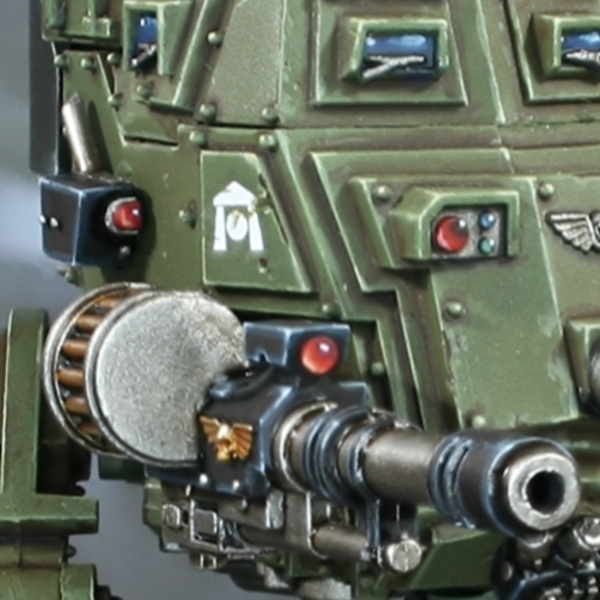 Red Lenses
- Basecoat with Khorne Red .
- Paint the lower left or right portion with a layer of Evil Sunz Scarlet , leaving enough room for reducing its size 2 or 3 more times.
- Paint a smaller area with Wild Rider Red .
- Add some Lugganath Orange to your Wild Rider Red and paint an even smaller patch, working further into your chosen side.
- If you have enough room, paint an even smaller patch with pure Lugganath Orange .
- On larger lenses, consider painting a small patch of Khorne Red and Abaddon Black mix on the exact opposite side. Make sure you leave a swathe of pure Khorne Red exposed.
- Finally, add a dot of white on the same side as the red-black, mirroring your brightest orange highlight.
Plasma Tip
- Basecoat with Runelord Brass .
- Shade with 1:1 Reikland Fleshshade and Wyldwood .
- Flood deep recesses with Wyldwood .
- Add some Stormhost Silver to the Runelord Brass and highlight.
- Finish with some small highlights of pure Stormhost Silver . I actually used Silver RLM01 Metallic , as I prefer it.
Copper Wires
- Basecoat with Hashut Copper .
- Shade with Gore-grunta Fur .
- Highlight with 1:1 Hashut Copper and Stormhost Silver .
- Finish with some small highlights of pure Stormhost Silver . I actually used Silver RLM01 Metallic , as I prefer it.

Rookie Brushes
RookieBrushes
Aspiring miniature painter and biscuit enthusiast. Here to share my hobby and help where I can.
Citadel Painting System 36
Base 12
- Abaddon Black
- Castellan Green
- Celestra Grey
- Corvus Black
- Deathworld Forest
- Incubi Darkness
- Kantor Blue
- Khorne Red
- Leadbelcher
- Retributor Armour
- Rhinox Hide
- Runelord Brass
Shade 2
- Nuln Oil
- Reikland Fleshshade
Layer 19
- Blue Horror
- Dark Reaper
- Deepkin Flesh
- Evil Sunz Scarlet
- Fenrisian Grey
- Flash Gitz Yellow
- Hashut Copper
- Ironbreaker
- Krieg Khaki
- Liberator Gold
- Loren Forest
- Lugganath Orange
- Pallid Wych Flesh
- Russ Grey
- Stormhost Silver
- Straken Green
- Thunderhawk Blue
- Wild Rider Red
- Yriel Yellow
Contrast 3
- Gore-grunta Fur
- Iyanden Yellow
- Wyldwood
Vallejo Model Air
Base 1
- 71.063 Silver RLM01 Metallic
Vallejo Model Color
Base 3
- 70.918 Ivory
- 70.948 Golden Yellow
- 70.951 White
Vallejo Surface Primer
Base 1
- 70.609 Russian Green 4bo