Dead Man's Hand: Outlaws
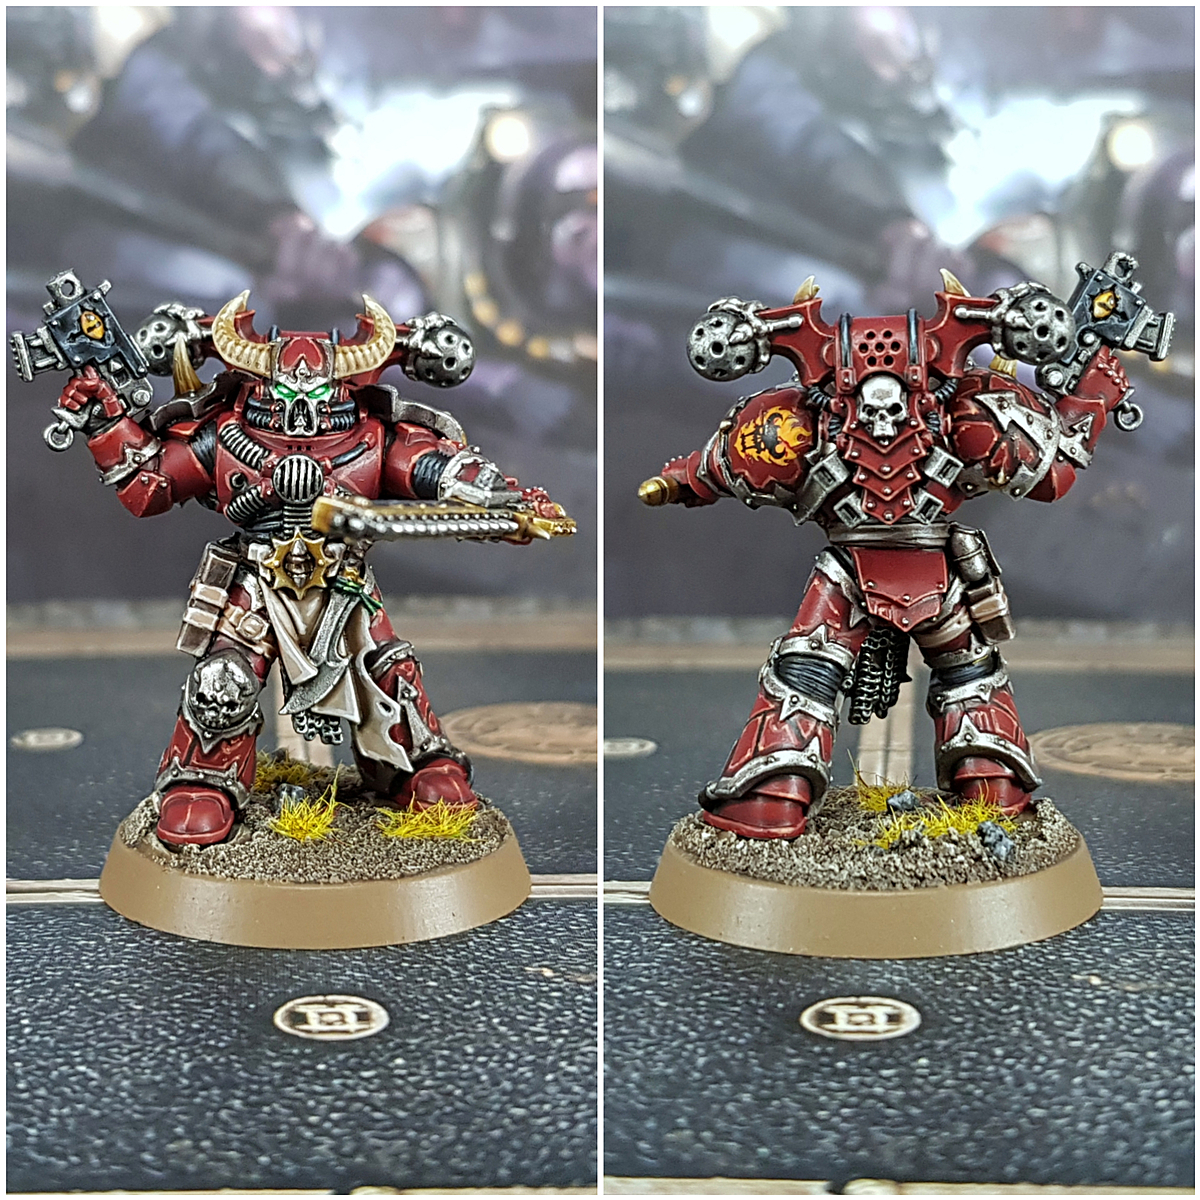
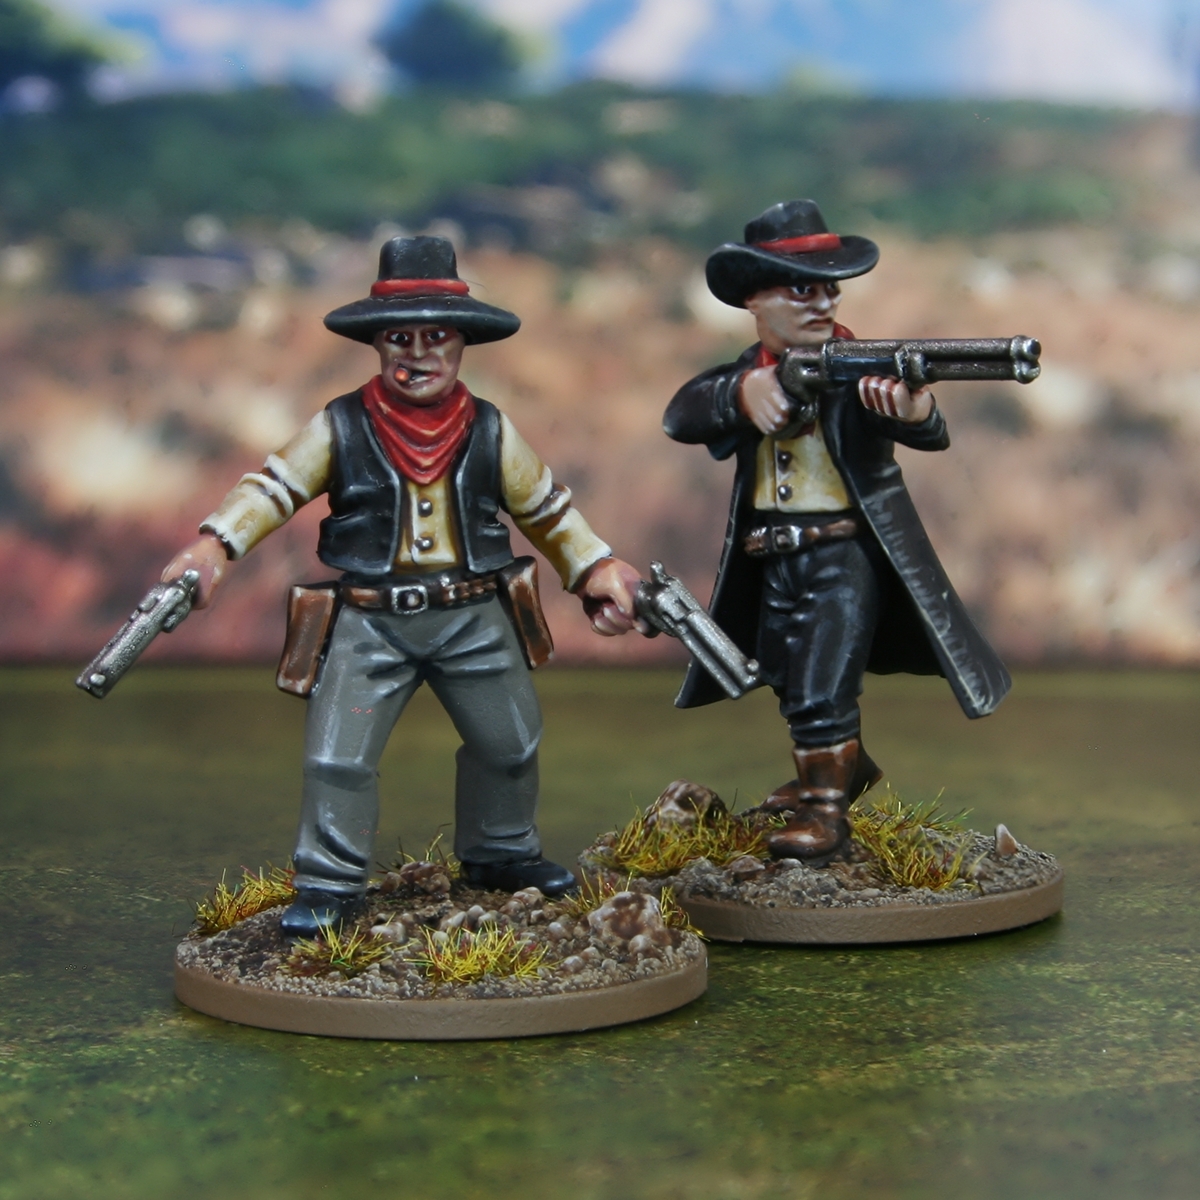
Here is how I painted the Outlaw Gang. I decided to keep them largely monochrome with a splash of read, to give them all a uniform feel and make them easily identifiable. There is some pretty blatant inspiration taken from pop culture here, rather than historical accuracy.
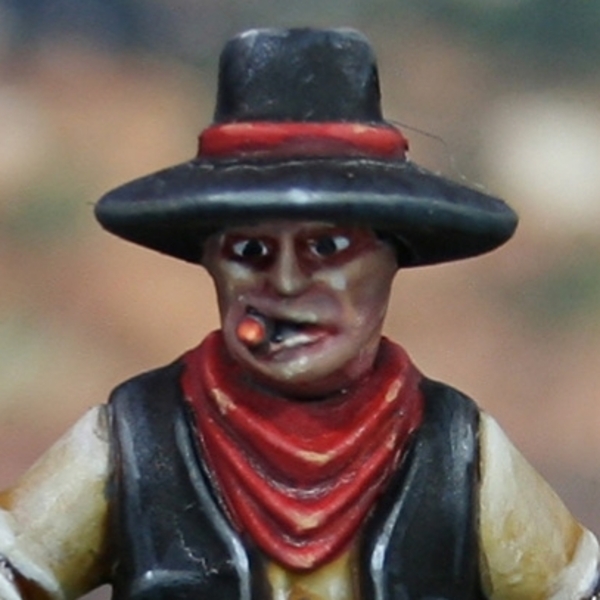 Red Bandana
- Basecoat with an equal parts mix of Khorne Red , Wazdakka Red and Evil Sunz Scarlet .
- Shade with 1:1 Khorne Red and Abaddon Black .
- Add general highlighting with Evil Sunz Scarlet .
- Apply finer highlights with 2 parts Evil Sunz Scarlet , 1 part Ungor Flesh and 1 part Ushabti Bone .
- Selectively highlight raised areas with the above mix, but containing roughly twice as much Ungor Flesh . So this would now be 2:2:1.
- Finish with small highlights of Ungor Flesh .
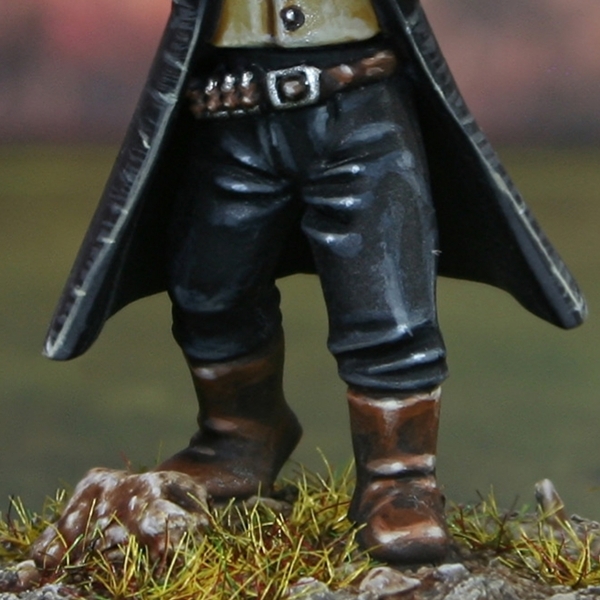 Black Cloth
- Basecoat with Black .
- Apply chunky highlights of Dark Reaper .
- Now add fine highlights of Stormvermin Fur .
- Selectively highlight with 3:1 Administratum Grey and Stormvermin Fur .
- Finish with 1:1 highlights of Administratum Grey and White .
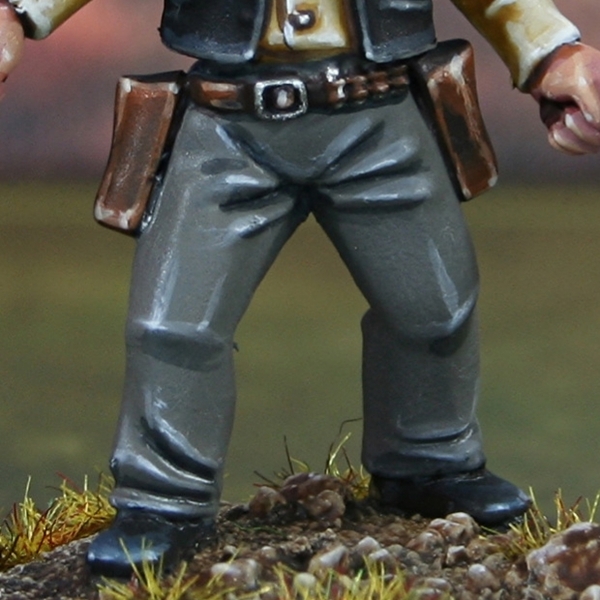 Grey Cloth
- Basecoat with Stormvermin Fur .
- Shade recesses with 2 parts Stormvermin Fur , 2 parts Abaddon Black and 1 part Incubi Darkness .
- Edge highlight with an equal parts mix of Stormvermin Fur and Administratum Grey .
- Finish with selective highlights of 1:1 Administratum Grey and White .
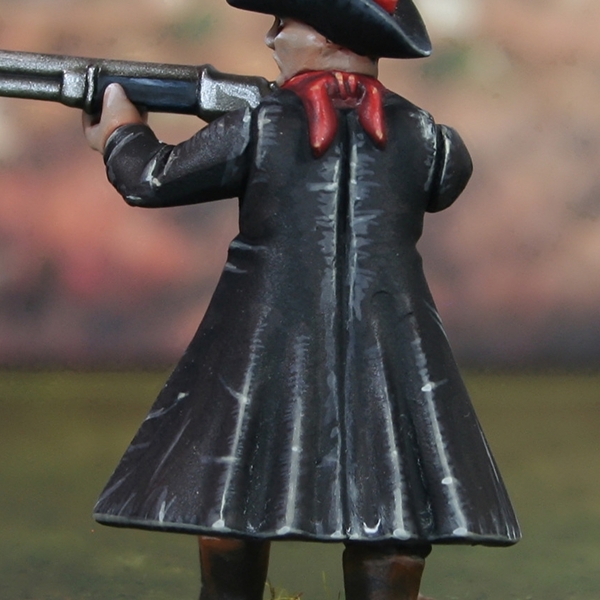 Worn Black Leather
- Basecoat with Black .
- Apply larger highlights to the majority of the material with 1:1 Rhinox Hide and Incubi Darkness . I used a fairly thin brush and ran along edges highlighting in a series of scratchy lines.
- Mix the previous colour 1:1 with Karak Stone and apply chunky highlights. Like the previous step, would recommend keeping them scratchy.
- Apply fine highlights and establish a few big scratches with Karak Stone .
- Selectively highlight and re-enforce scratches with smaller lines of Ushabti Bone .
- Finish with spot highlights of Ushabti Bone mixed with a little White on corners and points where scratches meet the edge.
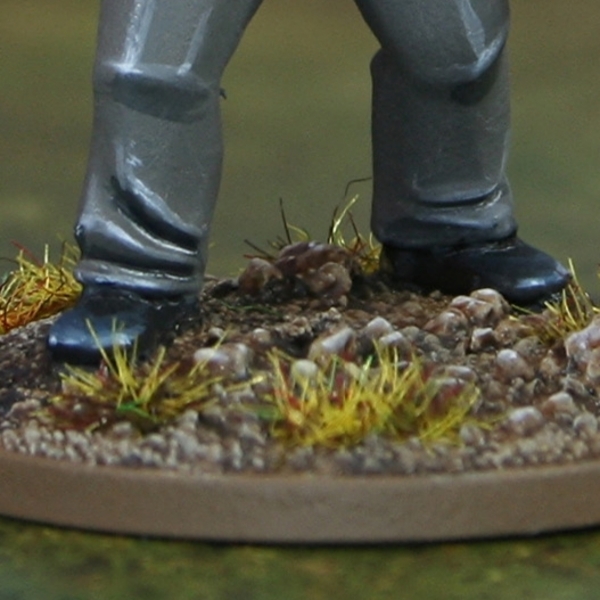 Shiny Black Leather
- Basecoat Black .
- Add chunky highlights of Stegadon Scale Green .
- Apply fine highlights of Thunderhawk Blue .
- Selectively highlight with Fenrisian Grey .
- Finish with specular highlights of Blue Horror .
 Dark Brown Leather
- Basecoat the leather area with Rhinox Hide .
- Glaze most of the leather with thinned Mournfang Brown . Use quite a small brush and drag towards edges in rough lines. This should create some extra texture.
- Add a chunky edge highlight of Skrag Brown to all edges.
- Highlight everything again, this time with a fine line of Skrag Brown and Ushabti Bone mixed 1:1. This is a good mix to throw in occasional fine lines as scratches too.
- With pure Ushabti Bone , selectively highlight corners and exposed edges of the leather. Put a dot of this colour where the additional scratched above meet edges too.
- Add a little pure white (like Dead White ) to your Ushabti Bone and add dot highlights to corners.
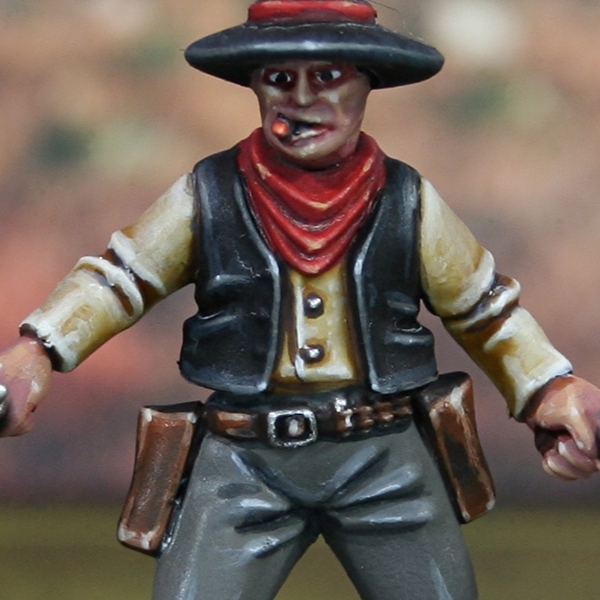 Cream Cloth
- Basecoat with Ushabti Bone .
- Wash with Seraphim Sepia .
- Shade deep recesses with thinned Dryad Bark .
- Add highlights with Screaming Skull
- Mix some White into the Screaming Skull and more selectively highlight.
- Finish with some small White highlights.
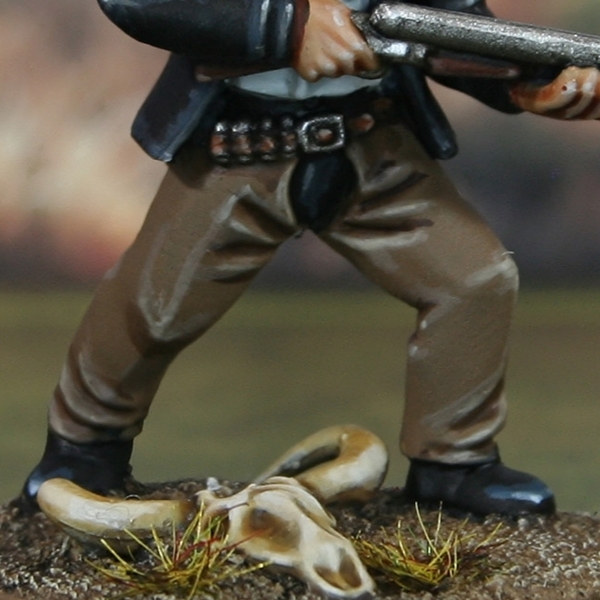 Tan Leather
- Basecoat with Steel Legion Drab .
- Shade recesses with 1:1 XV-88 and Rhinox Hide .
- Define deep recesses with fine lines of Rhinox Hide .
- Add highlights of Baneblade Brown .
- highlight again, this time with fine lines of Karak Stone .
- Mix a little off-white into your Karak Stone stone and then selectively highlight. I used Ivory but you could easily just use Wraithbone or similar
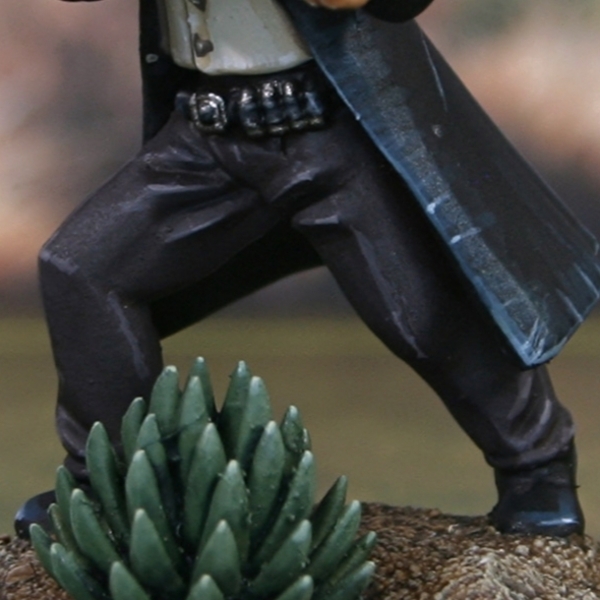 Dark Brown Cloth
- Basecoat with a mix of 3 parts Stormvermin Fur , 3 parts Rhinox Hide and 1 part Black . This should leave you with a desaturated colour similar to Rhinox Hide .
- Shade with Corvus Black .
- Mix Deepkin Flesh into your base mix, slowly. Highlight quite generally at first, then add a little more Deepkin Flesh and highlight more selectively. repeat until you are happy with the cloth.
Skin
- Basecoat with Kislev Flesh .
- Wash with Reikland Fleshshade , then re-establish with Kislev Flesh where needed.
- Mix the Kislev Flesh 1:1 with Pallid Wych Flesh and highlight selectively.
- Finish with specular highlights of Pallid Wych Flesh .
 Rugged Skin
- Basecoat the skin 4:1 with Cadian Fleshtone and Screaming Bell .
- Highlight with Cadian Fleshtone .
- Apply fine highlights of Kislev Flesh .
- Selectively with 1:1 Kislev Flesh anf Pallid Wych Flesh .
- Add specular highlights of Pallid Wych Flesh .
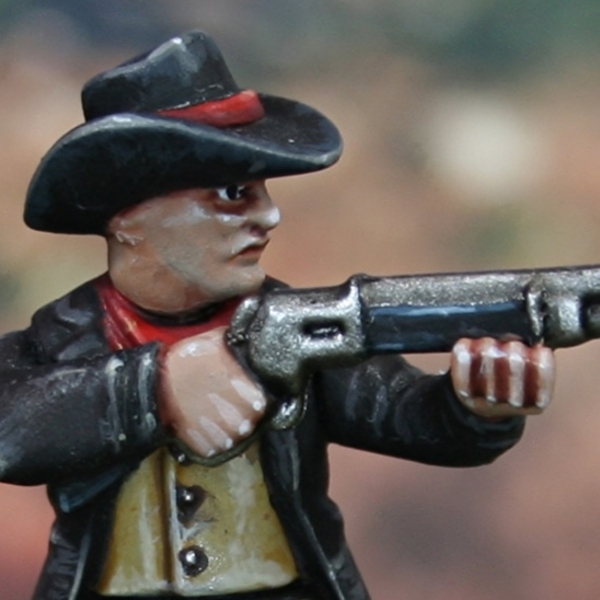 Pale Skin
- Mix 2 parts Cadian Fleshtone , 1 part Administratum Grey and 2 parts Blue Horror . Then apply a basecoat.
- Mix Reikland Fleshshade and Cadian Fleshtone 1:1, then add general shading.
- Shade more carefully with Berserker Bloodshade .
- Pick out some selective highlights with Pallid Wych Flesh .
- Finish with a few specular highlights of White .
For the eyes, I made sure the colour around the sockets was dark enough with a shade of thin Doombull Brown . Then I basecoated the eyes with Ulthuan Grey and I finished them with a Black pupil.
Where there should be stubble on these heads, I mixed Dawnstone and Kislev Flesh , then glazed it over the area.
Wooden Stock
- Basecoat with Rhinox Hide
- Glaze general highlights with Doombull Brown .
- Edge highlight with Bloodreaver Flesh .
- Selectively highlight with Gorthor Brown .
- Mix some off-white, like Wraithbone into your Gorthor Brown , then add specular highlights.
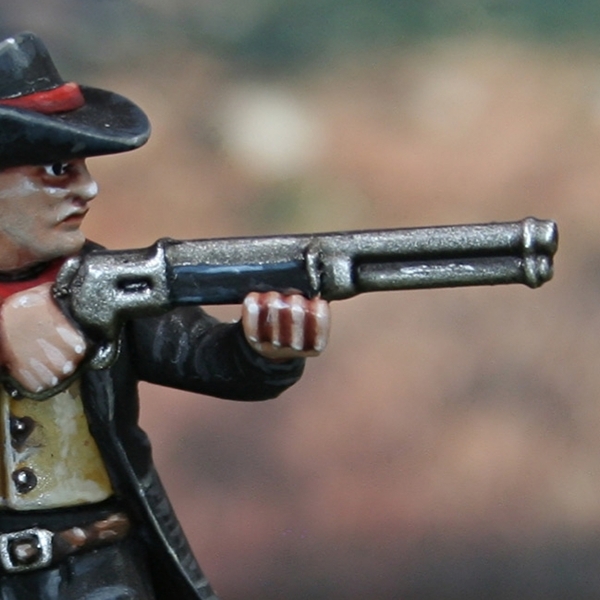 Steel
Steel
- Basecoat with Leadbelcher .
- Wash with Nuln Oil .
- Highlight with Ironbreaker .
- Add fine highlights with small amounts of Vallejo Model Air Silver RLM01 Metallic .
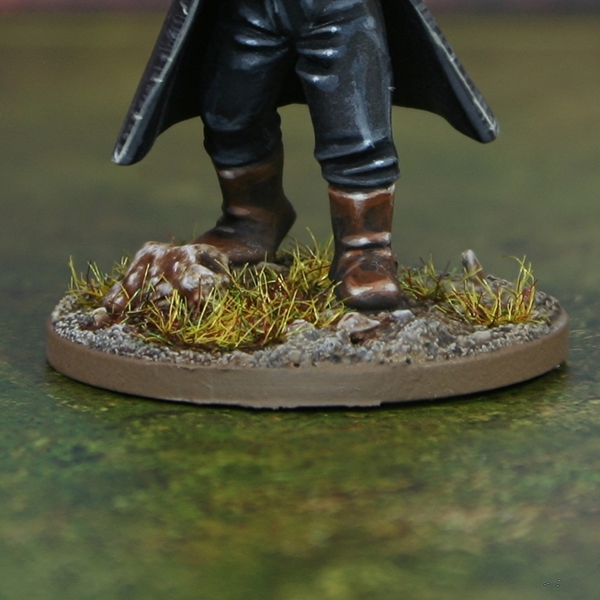 Arid Basing
- Basecoat with Zandri Dust .
- Wash with Agrax Earthshade .
- Drybrush with Zandri Dust to re-establish the base colour (if needed).
- Repeat with a lighter drybrush of Ushabti Bone .
- Drybrush very lightly, essentially dragging your drybrush over the details with a single pass of Screaming Skull .
- Wash the rocks with Reikland Fleshshade .
- Pick out prominant details and add general highlights to the rocks with Pallid Wych Flesh .
- Finish with a few small White highlights on large rocks.
- Finish with a nice Steel Legion Drab rim.

Rookie Brushes
RookieBrushes
Aspiring miniature painter and biscuit enthusiast. Here to share my hobby and help where I can.
Citadel Painting System 43
Base 14
- Abaddon Black
- Corvus Black
- Dryad Bark
- Incubi Darkness
- Khorne Red
- Leadbelcher
- Mournfang Brown
- Rhinox Hide
- Screaming Bell
- Steel Legion Drab
- Stegadon Scale Green
- Wraithbone
- XV-88
- Zandri Dust
Shade 5
- Agrax Earthshade
- Berserker Bloodshade
- Nuln Oil
- Reikland Fleshshade
- Seraphim Sepia
Layer 24
- Administratum Grey
- Baneblade Brown
- Bloodreaver Flesh
- Blue Horror
- Cadian Fleshtone
- Dark Reaper
- Dawnstone
- Deepkin Flesh
- Doombull Brown
- Evil Sunz Scarlet
- Fenrisian Grey
- Gorthor Brown
- Ironbreaker
- Karak Stone
- Kislev Flesh
- Pallid Wych Flesh
- Screaming Skull
- Skrag Brown
- Stormvermin Fur
- Thunderhawk Blue
- Ulthuan Grey
- Ungor Flesh
- Ushabti Bone
- Wazdakka Red
Vallejo Game Color
Base 1
- 72.001 Dead White
Vallejo Model Air
Base 1
- 71.063 Silver RLM01 Metallic
Vallejo Model Color
Base 3
- 70.918 Ivory
- 70.950 Black
- 70.951 White


.png)
