My method for Dark Angels Intercessors.
Undercoat
- Spray the model with Chaos Black .
Basecoat
- Paint armoured areas Caliban Green . Make sure to water down paint roughly 50/50 to ensure a smooth coat and preserve all those details! Touch up with multiple layers if necessary. This stage can be done with an airbrush if preferred.
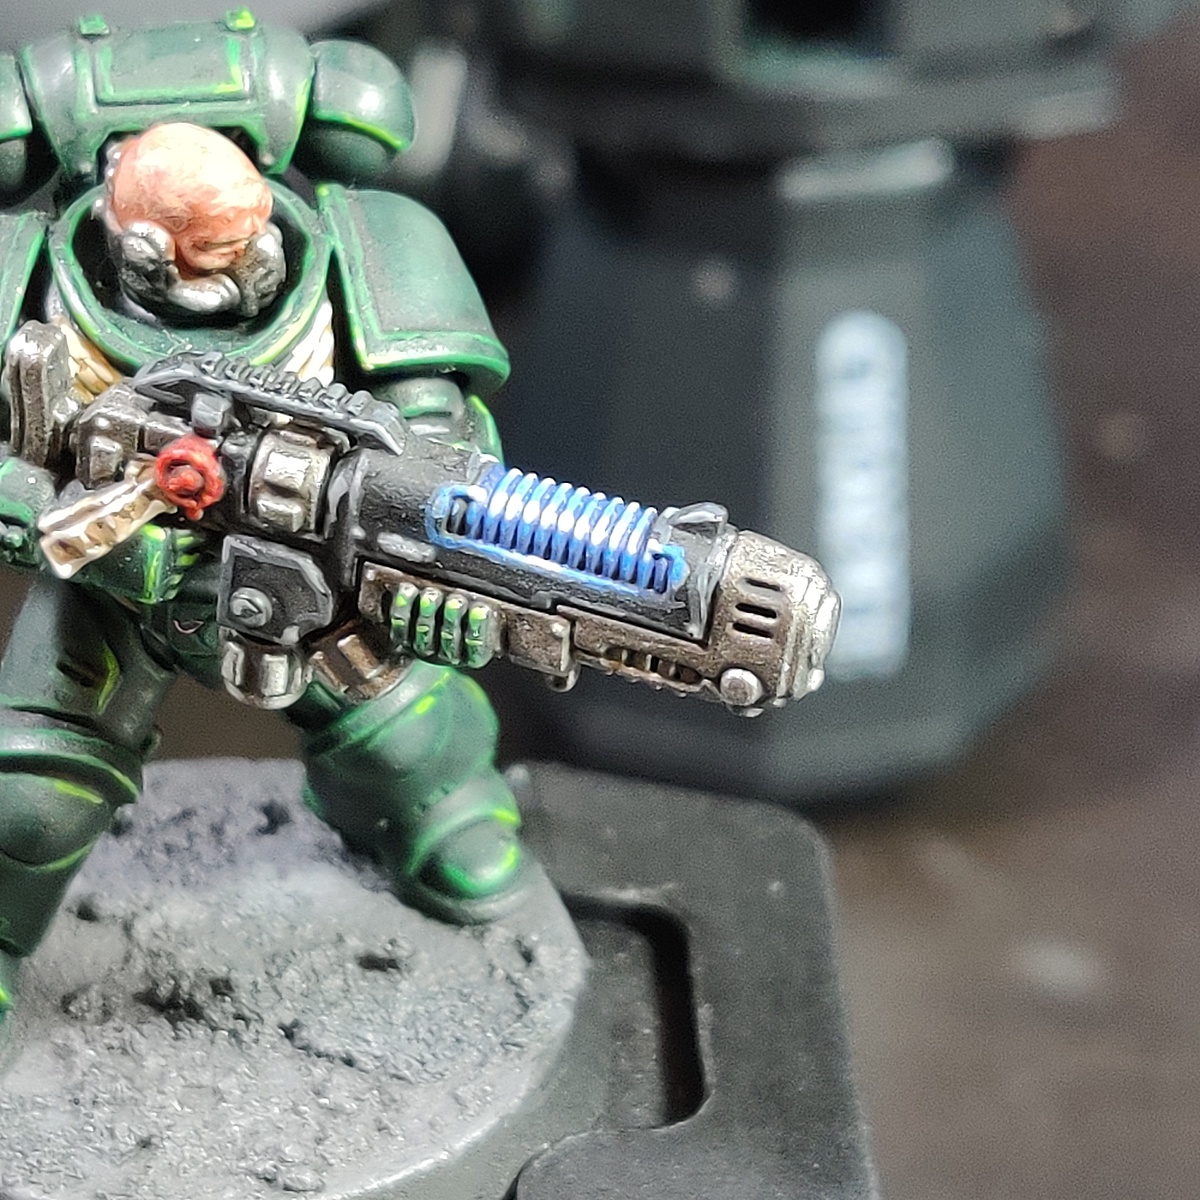
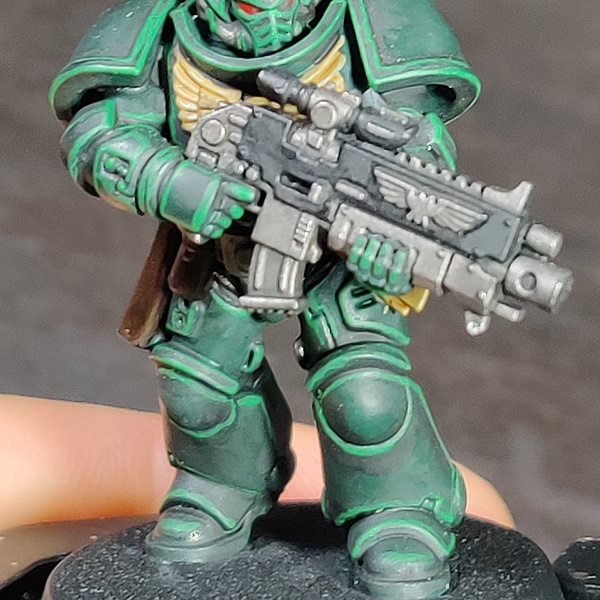
- Paint Abaddon Black to the undersuit behind the knees, groin area and elbow area. Additionally paint the casing of the gun as shown in the image.
- Paint the chest sigil Zandri Dust .
- Paint any purity seal parchments with Rakarth Flesh .
- Paint the eye lenses and purity seals with Mephiston Red .
- Paint the belt, holster and any other pouches with Rhinox Hide .
- Paint Leadbelcher to the rivets, exhausts on the backpack and remaining areas of the gun.
- Touch up any mistakes before proceeding.
Shading
- Apply Seraphim Sepia to the chest sigil.
- Apply Agrax Earthshade to the areas painted with Rhinox Hide , the eye lenses and the purity seal parchments.
- Apply Nuln Oil to the recesses in the armour, metal areas and areas painted black.
BATTLE READY
Highlight 1
- Tidy up any mistakes made while shading the model.
 Highlight around all edges of the armour with Warpstone Glow
 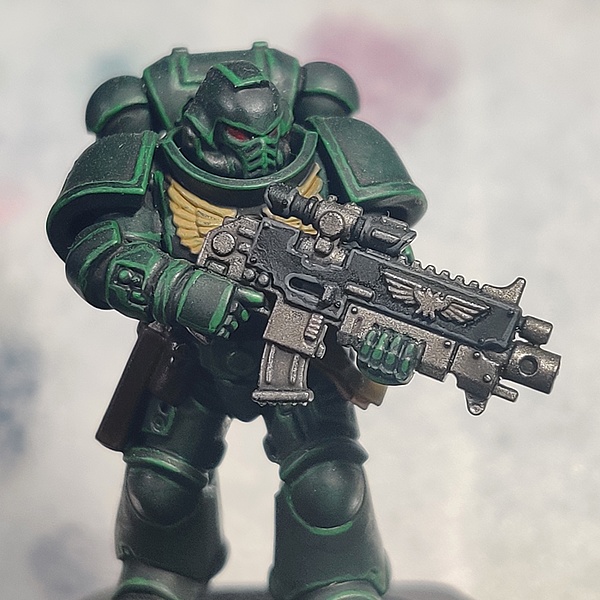 Highlight all black areas with Eshin Grey on all raised edges.
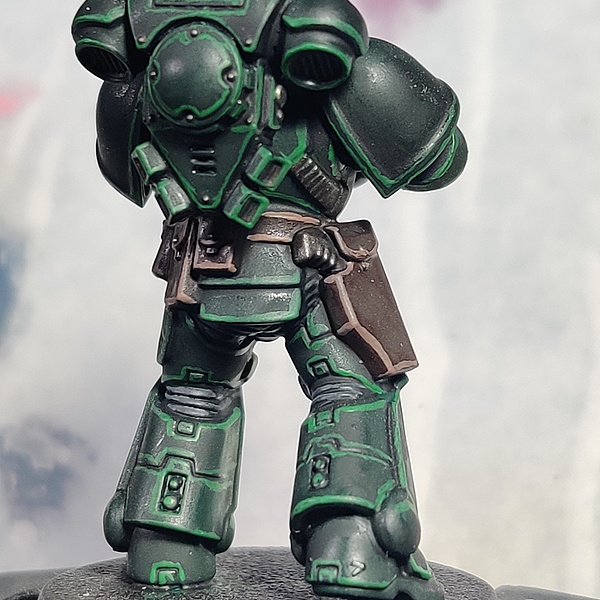 Highlight all brown areas with Gorthor Brown on all raised edges.
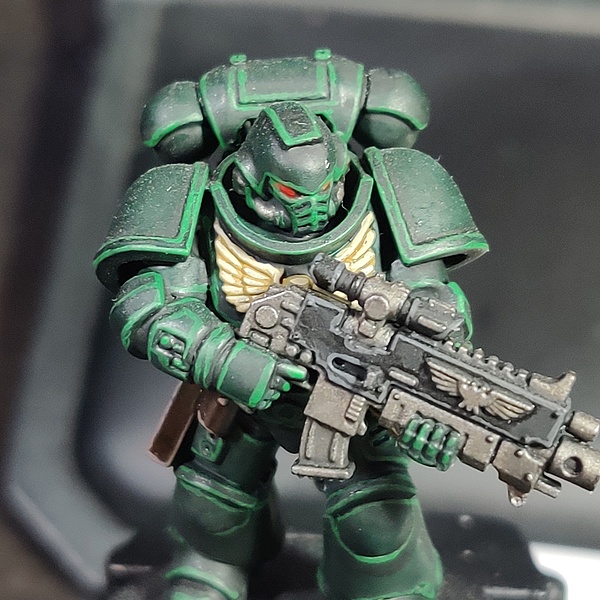 Highlight chest sigil with Ushabti Bone on all raised edges.
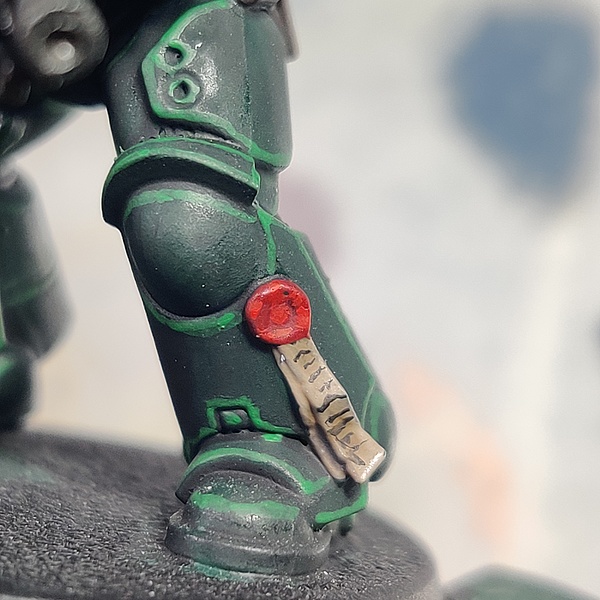 Highlight all red areas with Evil Sunz Scarlet on all raised edges.
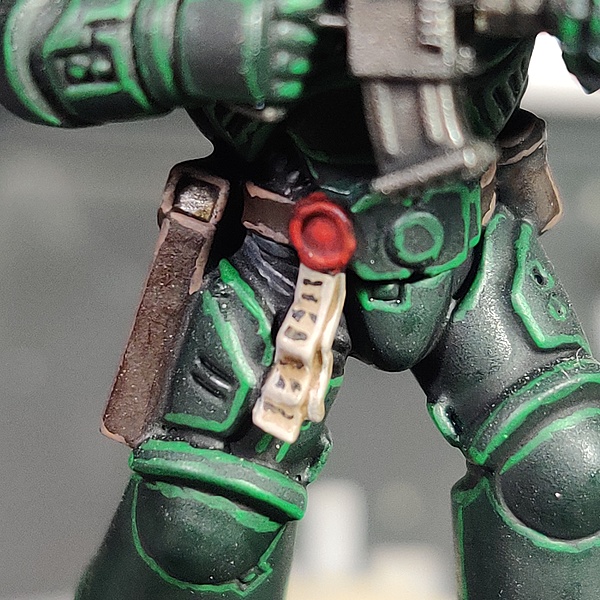 Highlight the Purity Seal parchment using Rakarth Flesh
 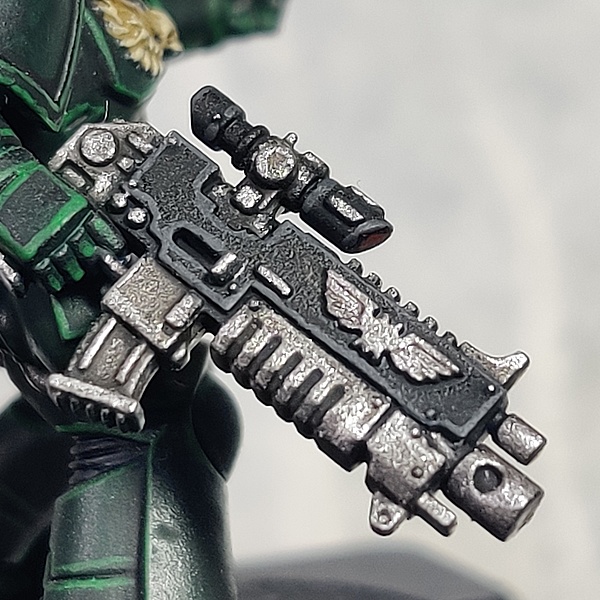 Highlight metal areas on all raised edges and areas with Stormhost Silver
Highlight 2
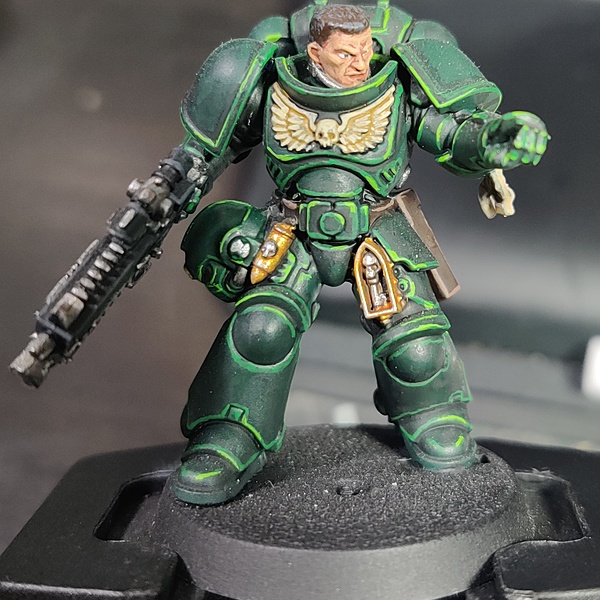
For the second stage of highlighting I like to imagine a light source and focus most of the highlights to brighten up the model this way. This helps to increase the effectiveness of the pose, in the image below the light is coming from the direction he is shooting. Use small highlights to pick out any small details too. For areas which would be shadowed I use the highlights more sparingly, although, it doesn't have to be 100% accurate to physics. If it looks good, it looks good!
 Pick out around corner areas on the armour with Moot Green .
 Highlight highest raised areas of black with Dawnstone .
 Highlight corners on brown areas with Baneblade Brown .
 Highlight highest raised areas of the purity seal and front part of eye lense with Wild Rider Red .
 Highlight towards edge of feathers, top of skull and sigil with Screaming Skull
 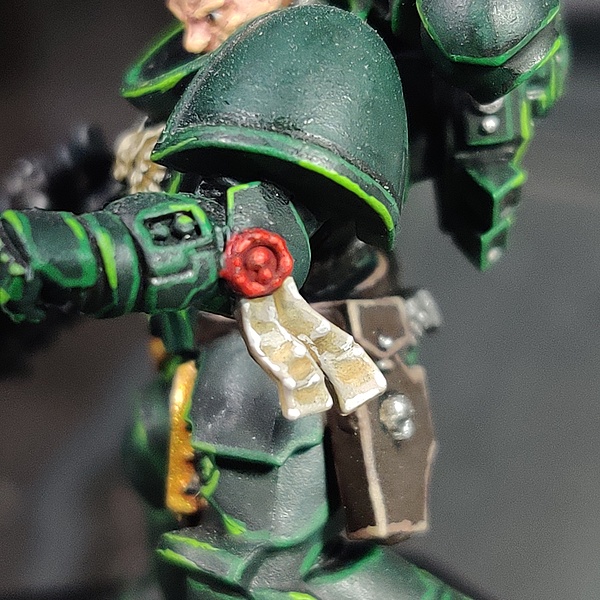 Highlight the Purity Seal parchment with Pallid Wych Flesh
Finished!
Charlie Biddle
CharlieBiddle
Citadel Painting System 23
Base 7
- Abaddon Black
- Caliban Green
- Leadbelcher
- Mephiston Red
- Rakarth Flesh
- Rhinox Hide
- Zandri Dust
Shade 3
- Agrax Earthshade
- Nuln Oil
- Seraphim Sepia
Layer 12
- Baneblade Brown
- Dawnstone
- Eshin Grey
- Evil Sunz Scarlet
- Gorthor Brown
- Moot Green
- Pallid Wych Flesh
- Screaming Skull
- Stormhost Silver
- Ushabti Bone
- Warpstone Glow
- Wild Rider Red
Spray 1
- Chaos Black