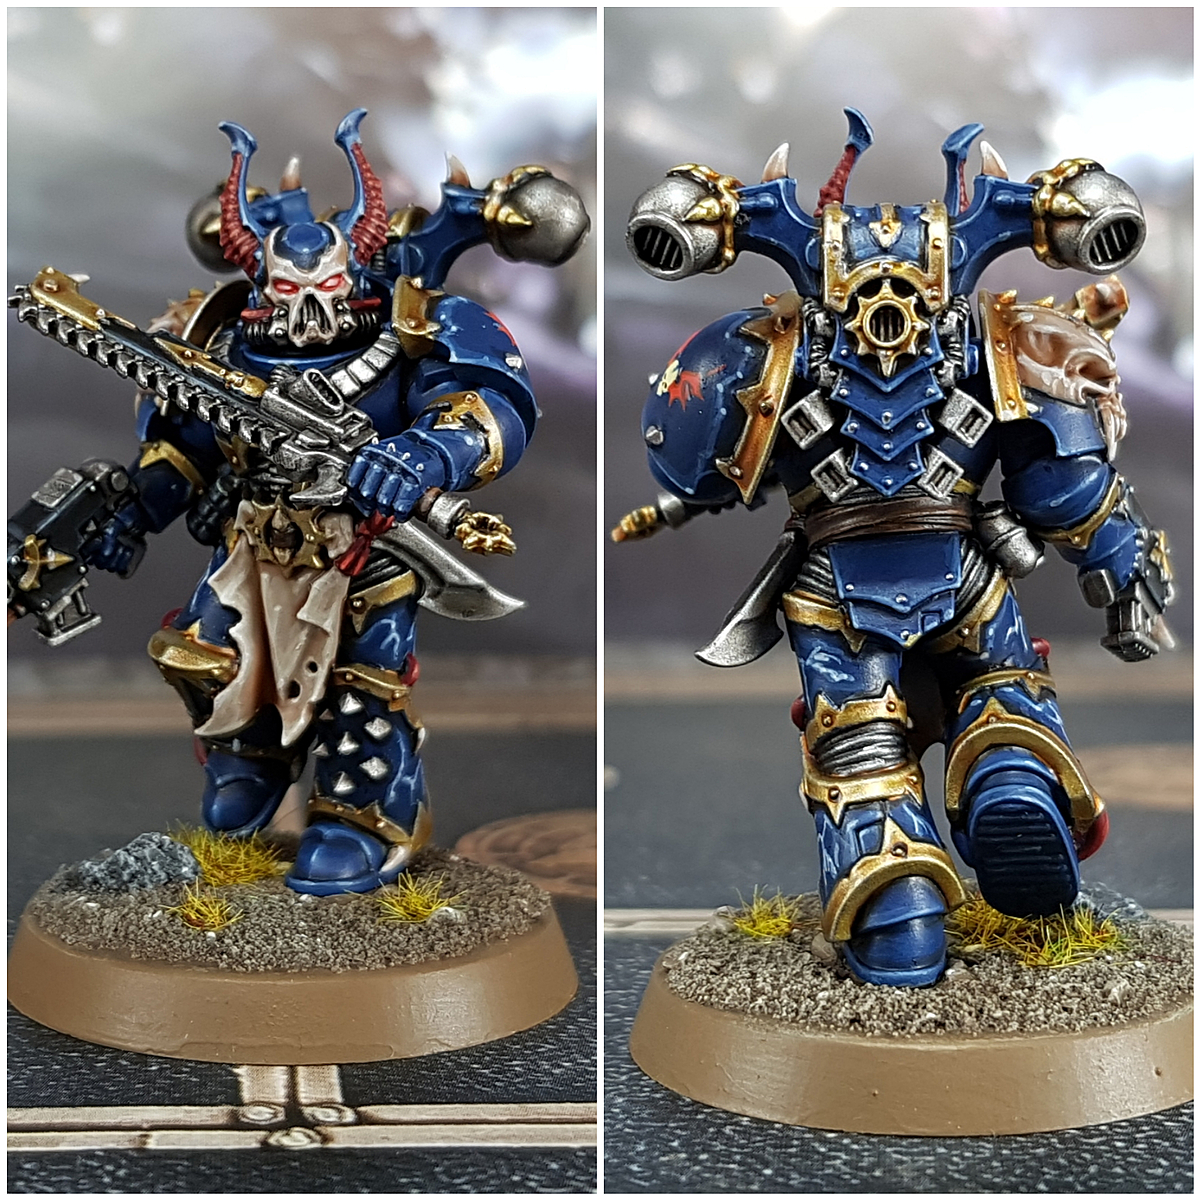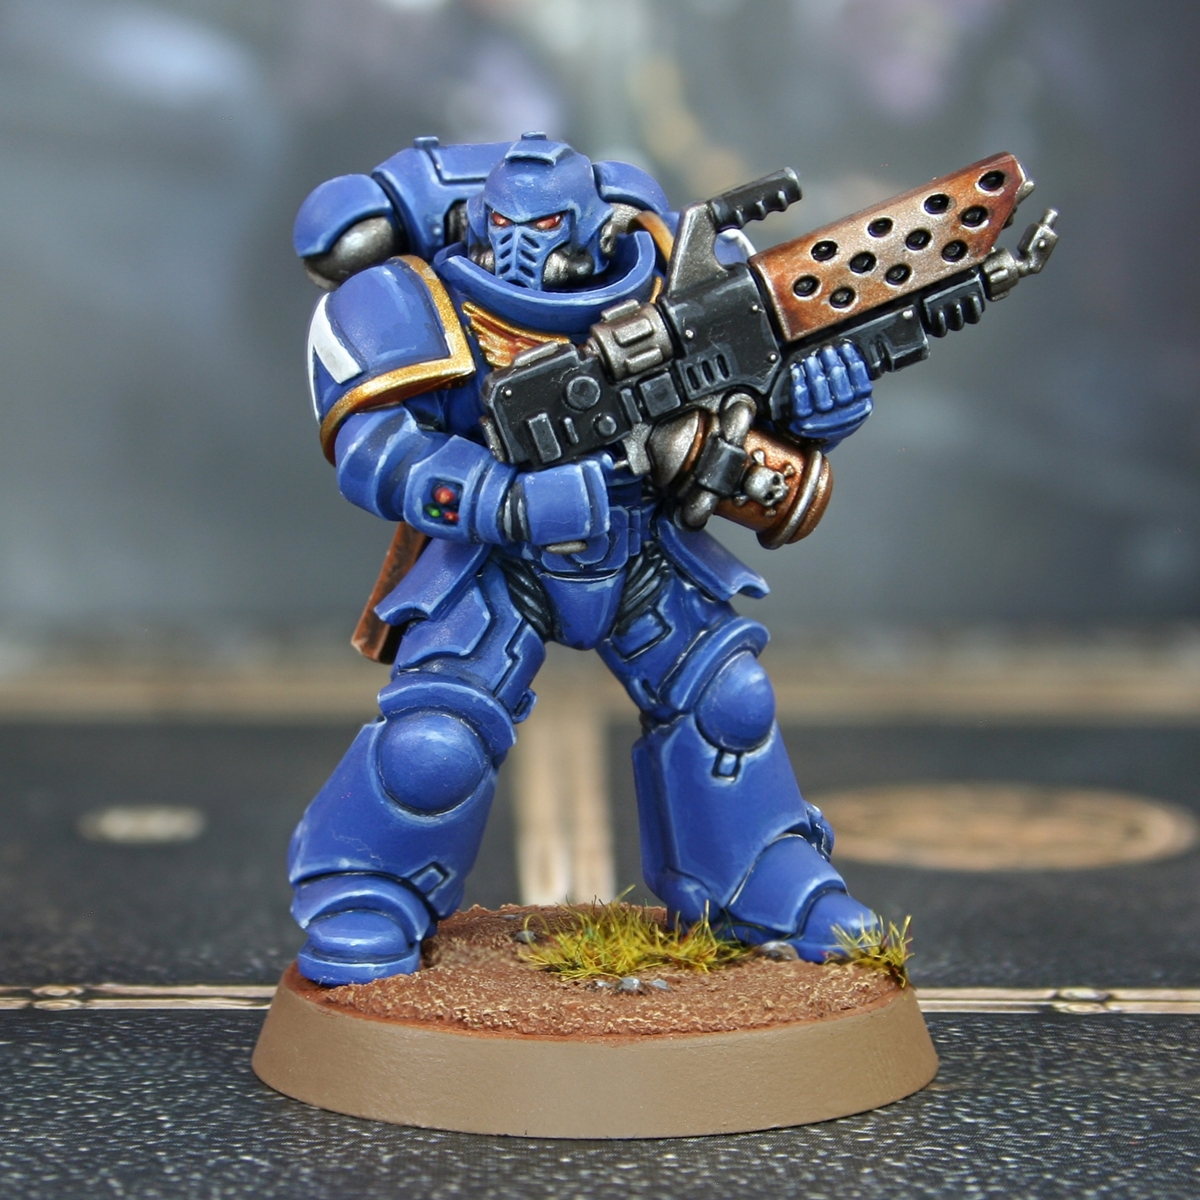

How to paint Ultramarine Space Marines like the box art style. For this guide, I pulled the majority of the information from the excellent recipes given on Eavy-Archive.com.
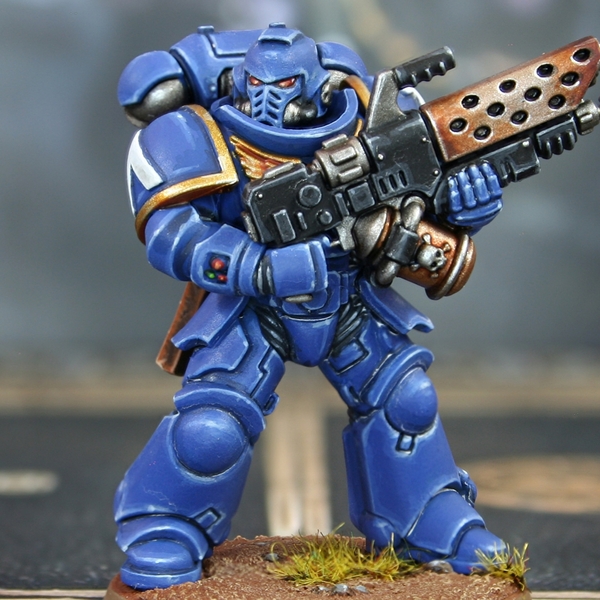 Blue Armour
- Basecoat with Macragge Blue . I primed with Republic Blue , to make establishing a solid basecoat easier.
- Soft shade with Kantor Blue .
- Add some Black to the Kantor Blue , then shade the deepest part of the recesses with a fine brush.
- Apply chunky highlights of 1:1 Macragge Blue and Calgar Blue .
- repeat, but with fine highlights of Calgar Blue , ensuring all those edges have crispy edge highlights.
- Selectively highlight with Fenrisian Grey .
- Finish with specular highlights of Blue Horror , where you want the armour to glint, focusing on upward facing curves and corners.
 Undersuit
- Basecoat with Corvus Black .
- Add fine edge highlights along all ridges with Dawnstone .
- Highlight selectively with Administratum Grey .
- Mix some White into the Administratum Grey , then add very small highlights.
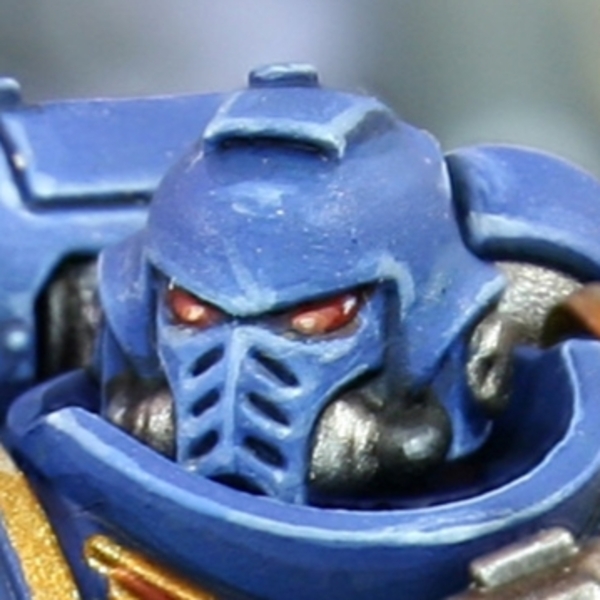 Red Lenses
- Basecoat with 1:1 Khorne Red and Abaddon Black .
- Pick out the raised portion of the lens with Mephiston Red .
- Hihlight the two thirds closest to the nose with Wild Rider Red .
- Highlight the third closest to the nose with Fire Dragon Bright .
- Mix your Fire Dragon Bright 1:1 with White and add a specular highlight next to the nose.
- Finish with a specular highlight of White on the opposite side of the lens.
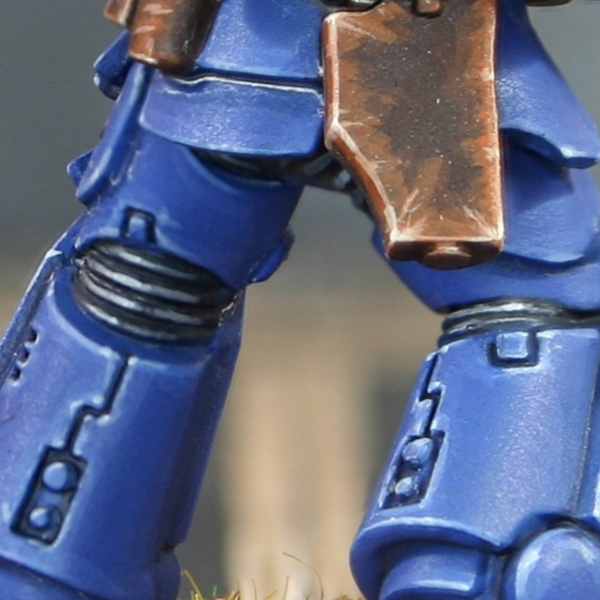
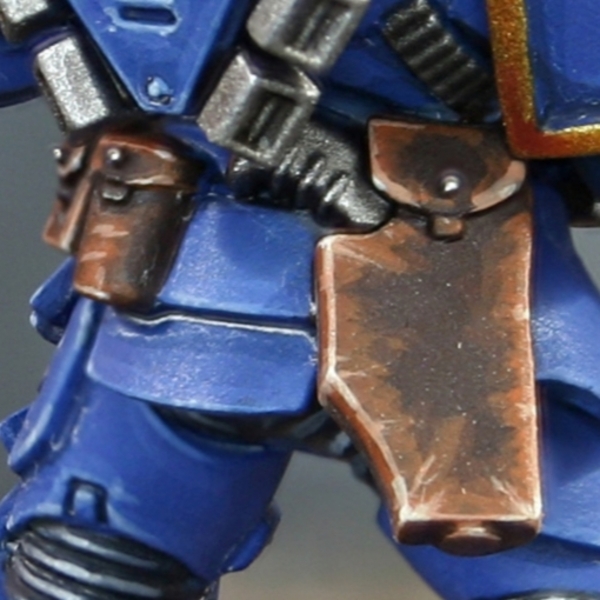 Dark Brown Leather
- Basecoat with Rhinox Hide .
- Take some thinned Mournfang Brown and apply a heavy glaze over the tube. Work in rough lines, always pulling your brush towards the apex of the tube.
- Now with Skrag Brown , apply a chunky highlight down the most exposed part of the tube, covering less area that the previous stage.
- Mix 1:1 Skrag Brown and Ushabti Bone and repeat the above, but make it a finer highlight.
- Selectively highlight with Ushabti Bone .
- Add a little White to the Ushabti Bone and add a couple of specular highlights, where needed.
 Black Weapon Casing
- Basecoat with Black .
- Add chunjy highlights of Eshin Grey .
- Now add fin highlights of Dawnstone within the last stage.
- Selectively highlight with Administratum Grey .
- Mix your Administratum Grey with some White and add specular highlights to upward facing curves and corners.
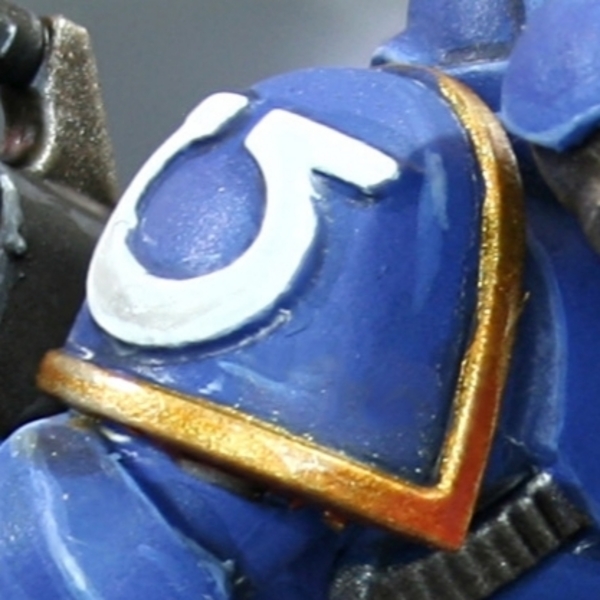 Gold
Gold
- Basecoat with Retributor Armour .
- Shade with Reikland Fleshshade , pulling your brush towards the recess.
- Shade the deepest parts with a small amount of Doombull Brown .
- Re-establish Retributor Armour where needed.
- Now mix some Silver RLM01 Metallic into your Retributor Armour and selectively highlight.
- Finish with a few specular highlight of Silver RLM01 Metallic .
 Steel
Steel
- Basecoat with Leadbelcher .
- Wash with Nuln Oil .
- With Ironbreaker , glaze highlight areas that have been dulled too much by the wash.
- With pure Silver RLM01 Metallic , edge highlight on corners and curves.
 White Armour
- Basecoat with 3:1 Celestra Grey and White .
- Shade with glazes of Administratum Grey .
- Darken in select places with glazes of Dawnstone .
- Add highlights with White
When making this guide, I was painting a model with raised markings, but these steps could easily be applied to masks on Reivers or trim on 1st company Ultramarines. Consider using Eshin Grey for additional recess shading on these details.
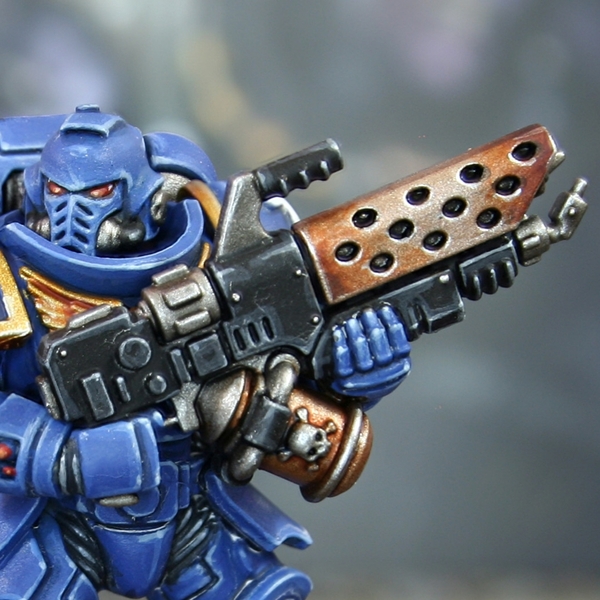 Flamer Muzzle
- Basecoat with Runelord Brass .
- Shade with Gore-grunta Fur . I would recommend popping some on your wet palette and applying selectively.
- Do the same with Wyldwood , targeting only the deepest points.
- Highlight with Runelord Brass and a little Silver RLM01 Metallic .
- Finish with selective highlights of Silver .
If you wanted to add a burn effect towards the end of the muzzle, glaze selectively with 2:1 Reikland Fleshshade and Gore-grunta Fur . Then more selectively towards the tip with a purple, like Luxion Purple .

Rookie Brushes
RookieBrushes
Aspiring miniature painter and biscuit enthusiast. Here to share my hobby and help where I can.
Citadel Painting System 29
Base 12
- Abaddon Black
- Celestra Grey
- Corvus Black
- Kantor Blue
- Khorne Red
- Leadbelcher
- Macragge Blue
- Mephiston Red
- Mournfang Brown
- Retributor Armour
- Rhinox Hide
- Runelord Brass
Shade 2
- Nuln Oil
- Reikland Fleshshade
Layer 12
- Administratum Grey
- Blue Horror
- Calgar Blue
- Dawnstone
- Doombull Brown
- Eshin Grey
- Fenrisian Grey
- Fire Dragon Bright
- Ironbreaker
- Skrag Brown
- Ushabti Bone
- Wild Rider Red
Contrast 3
- Gore-grunta Fur
- Luxion Purple
- Wyldwood
Colour Forge
Base 1
- Republic Blue
Vallejo Model Air
Base 1
- 71.063 Silver RLM01 Metallic