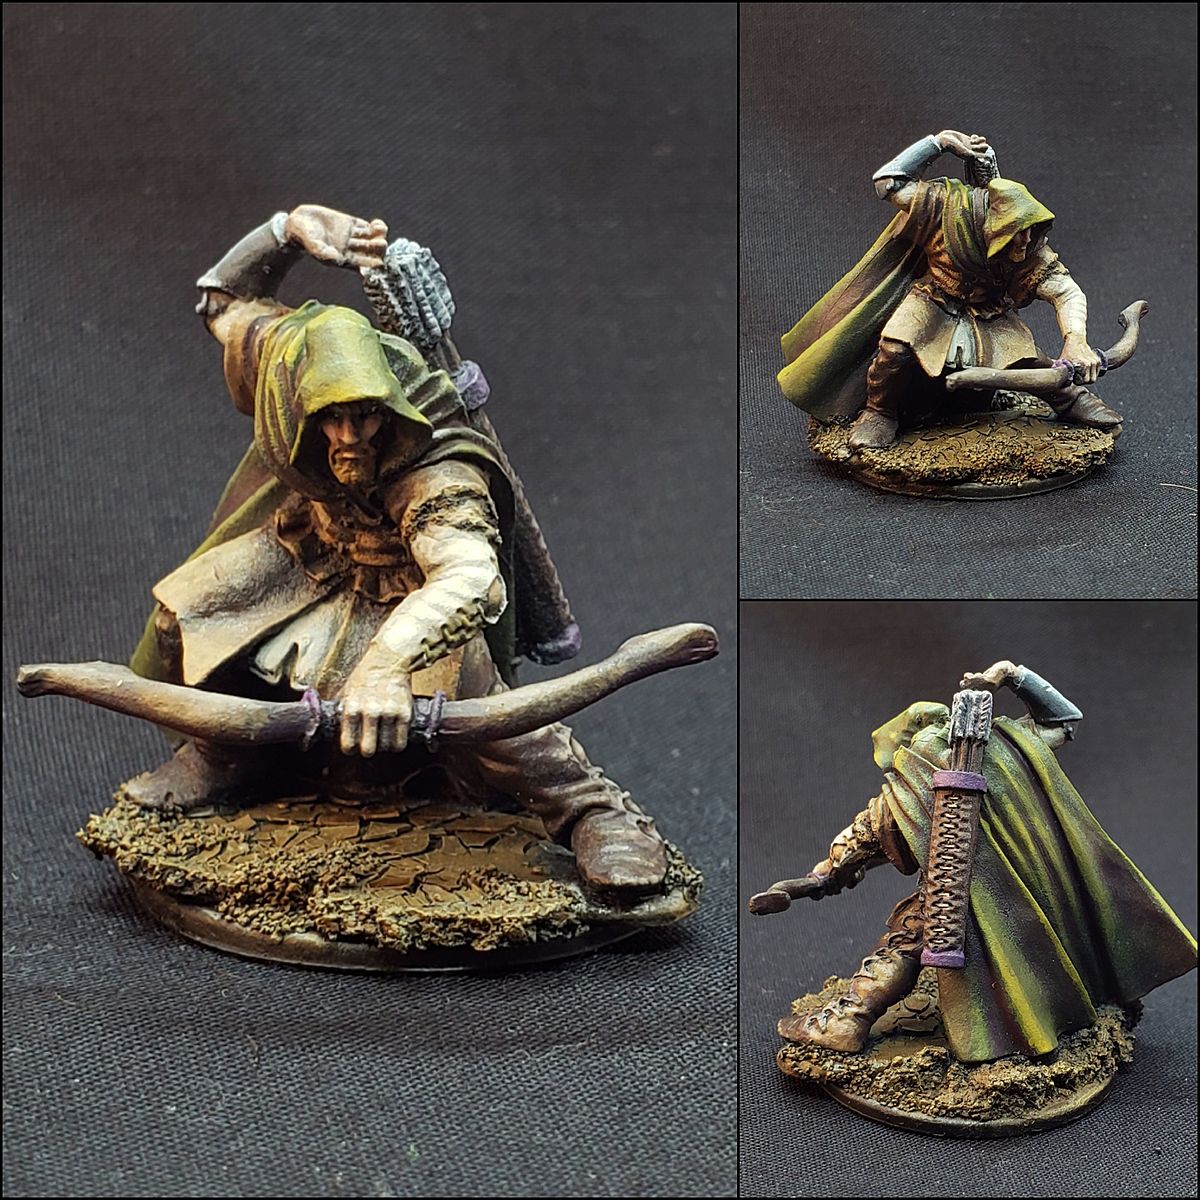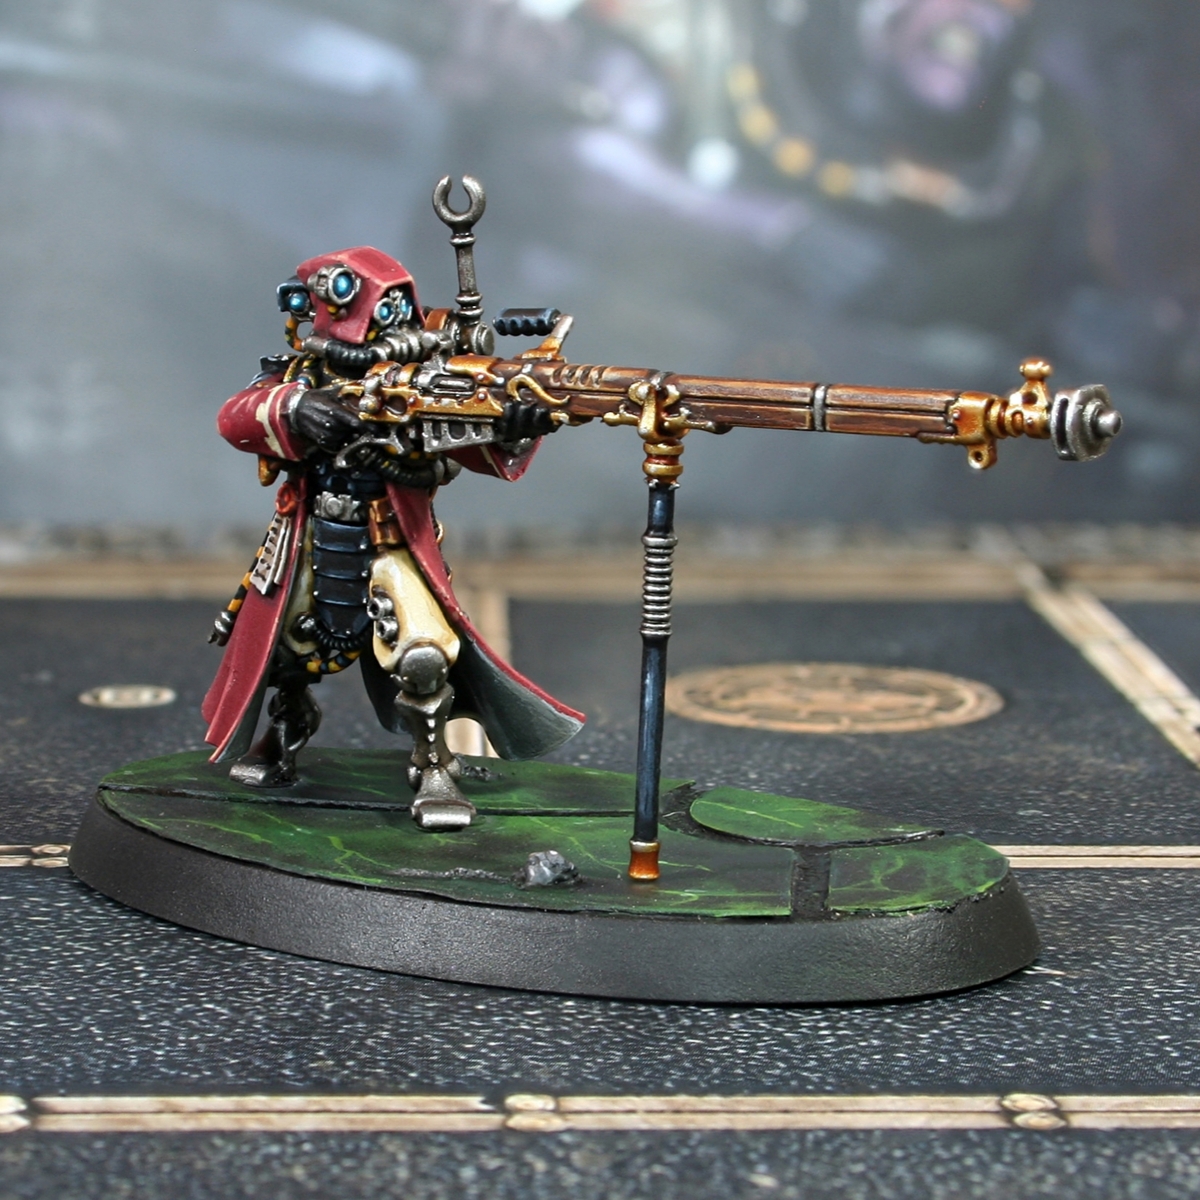
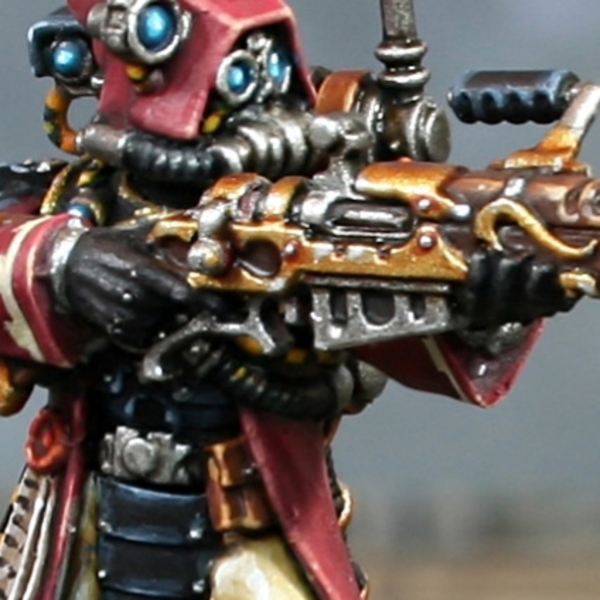
Forge World Lucius Skitarii Rangers

To get started, I primed with Colour Forge Sanguine Red . This will help speed up painting the main colour.
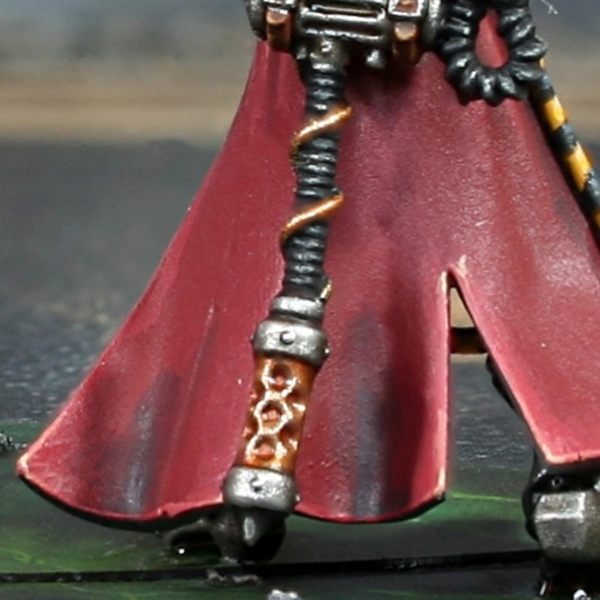
 Dark Red Robe
- Basecoat with Khorne Red .
- Drydrush with 1:1 Khorne Red and Wazdakka Red .
- Take a small amount of Incubi Darkness and add it to your Khorne Red . Use this mix and add soft shading to any recesses or relevant parts of the cloth.
- Now with a 1:1 mix of Khorne Red and Incubi Darkness , add fine lines of shading to the deepest parts of the recesses.
- Apply chunky Highlights of Wazdakka Red .
- Mix your Wazdakka Red 1:1 with Ungor Flesh and apply fine highlights.
- Take whatever remains of the above mix and mix it 1:1 with Ungor Flesh . Use this brighter mix to selectively highlight.
- Finish with very small/specular highlights of Kislev Flesh .
For the line pattern, I used Ushabti Bone and highlighted it with Screaming Skull .
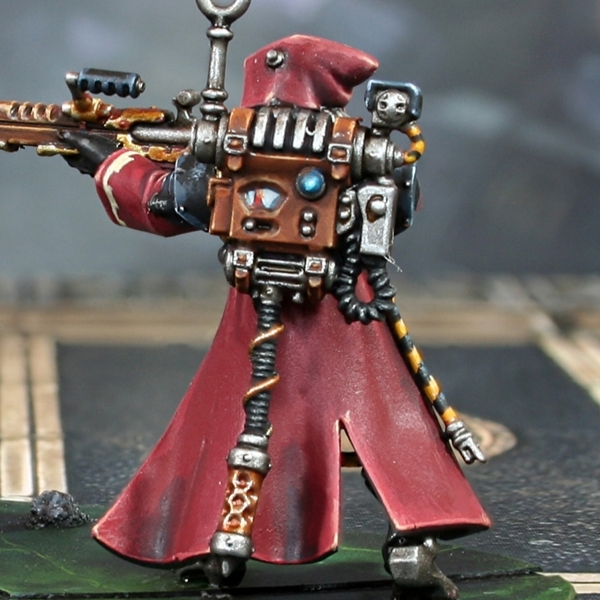
 Robe Lining
- Basecoat with Skavenblight Dinge .
- Shace recesses with a few quick heavy glazes of 1:1 Skavenblight Dinge and Abaddon Black .
- Apply chunky highlights with Stormvermin Fur .
- Now do finer highlights with 1:1 Stormvermin Fur and Administratum Grey .
- Selectively highlight with Administratum Grey .
- Finish with a few very small/specular highlights of Administratum Grey with a little White mixed in.
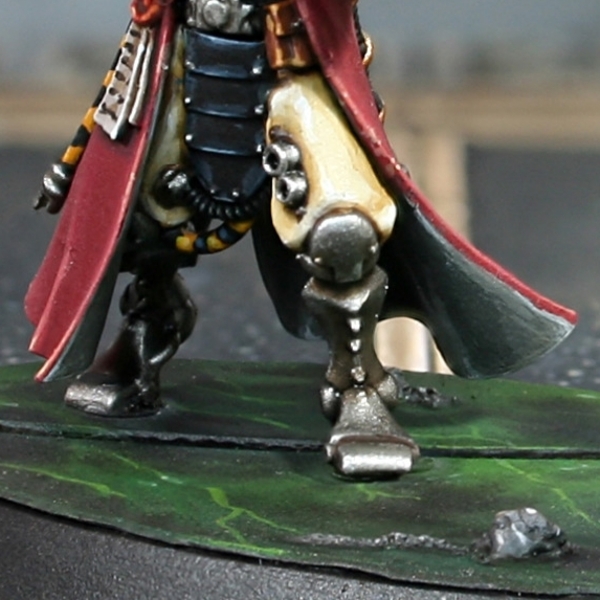
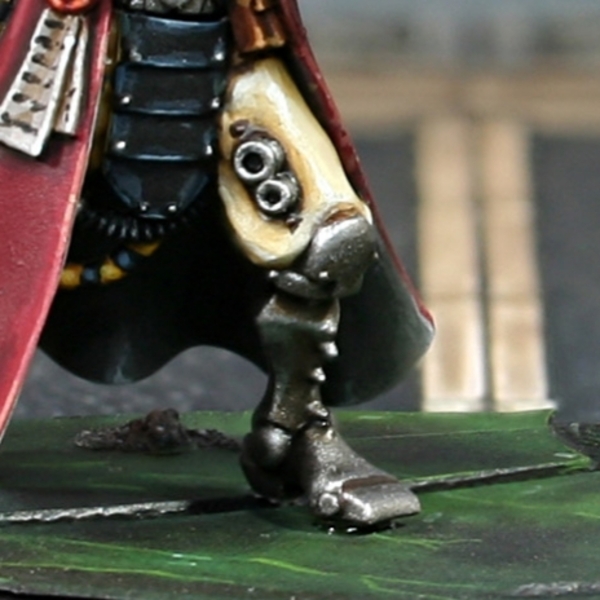 Cream Trousers
- Basecoat with Ushabti Bone .
- Thin down some Tallarn Sand to a wash consistency and generously shade the recesses.
- Now shade more selectively with Steel Legion Drab .
- Add extra definition in the deepest recesses with 1:1 Rhinox Hide and Abaddon Black .
- Add highlights with Screaming Skull .
- Highlight more selectively with 1:1 Screaming Skull and White .
- Finish with a few very small White highlights.
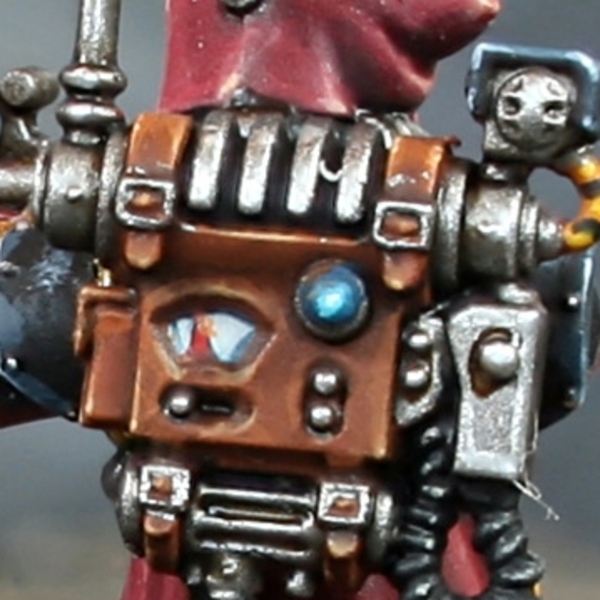
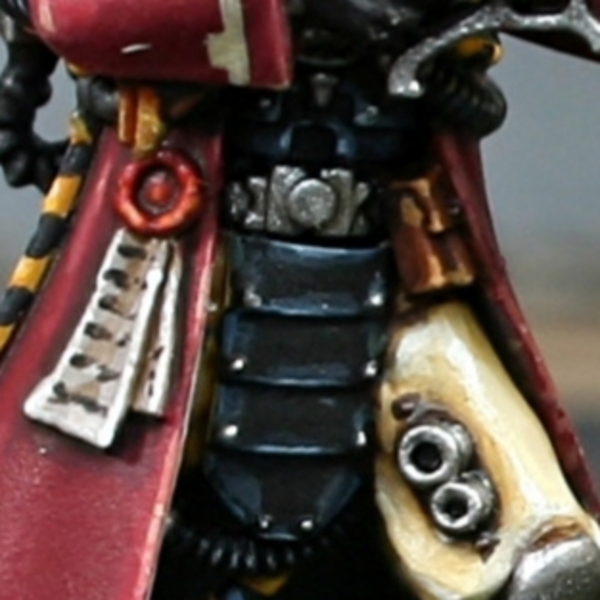 Black Armour
- Basecoat with Black .
- Apply chunky highlights of Dark Reaper .
- Fine edge highlight with Thunderhawk Blue .
- Selectively highlight with Fenrisian Grey .
- Finish with a few specular highlights of Blue Horror .
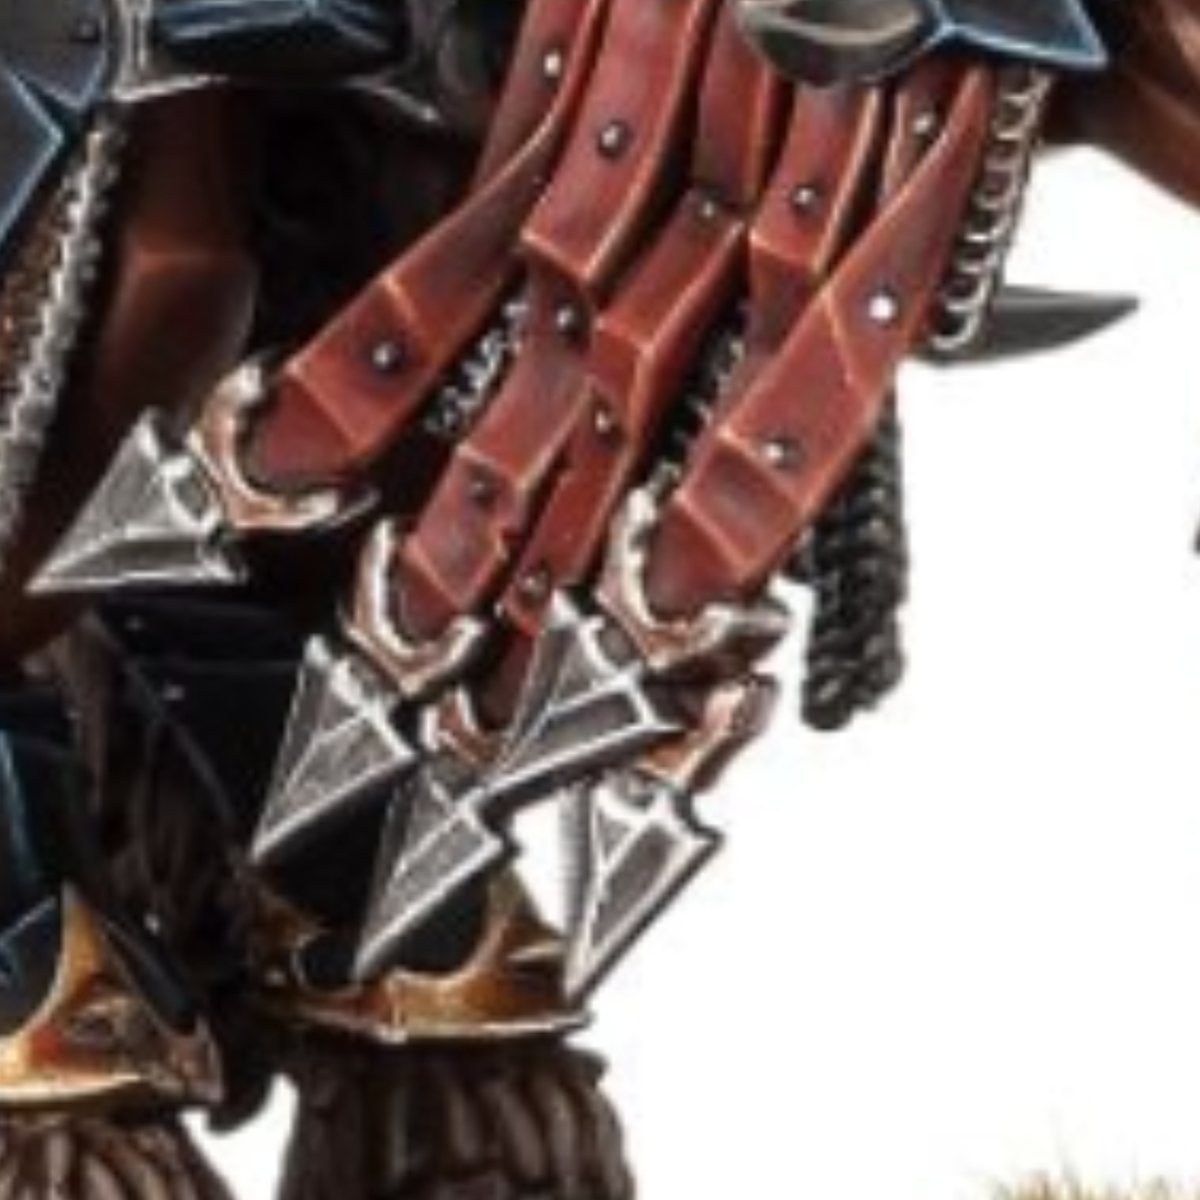
 Black Leather
- Basecoat with Black .
- With a 1:1 mix of Abaddon Black and Dryad Bark , pick out highlights along raised details.
- Mix the leftover paint 1:1 Stormvermin Fur and selectively highlight curves and knuckles.
- Take the previous mix and add in the same amount of Rakarth Flesh . Now use this to add specular highlights to knuckles and areas that would catch light.
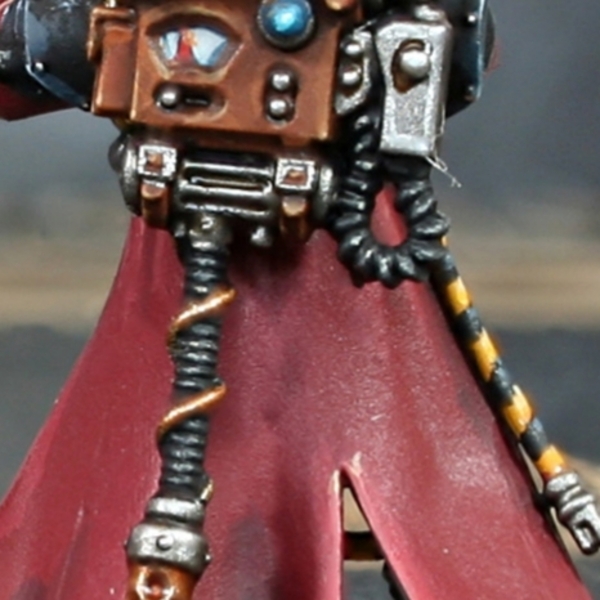 Ribbed Tubing
- Basecoat with Black .
- Pick out the ridges with a 1:1 mix of Abaddon Black and Stormvermin Fur .
- Selectively highlight with Stormvermin Fur .
- Finish with specular highlights of Ushabti Bone across the ridges where the tubing would catch light.
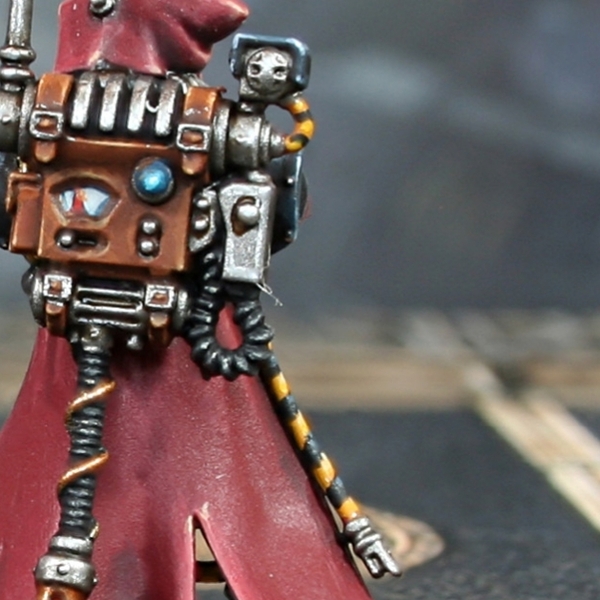 Hazard Striped Tubing
- Basecoat with Averland Sunset .
- Wash with Iyanden Yellow pulling your brush away from the centre.
- Pick out the stripes with Black .
- Now finish the tubing with some highlights. I recommend a vibrant colour like Yriel Yellow for the yellow and blue-ish greys like Thunderhawk Blue for the black stripes.
 Brown Leather
- Basecoat with Mournfang Brown .
- Shade recesses with a thin mix of 1:1 Abaddon Black and Doombull Brown .
- Pick out edges with Skrag Brown .
- Selectively highlight corners and curves with Tau Light Ochre .
- Mix an off white, like Ivory with your Tau Light Ochre and add specular highlight to corners.
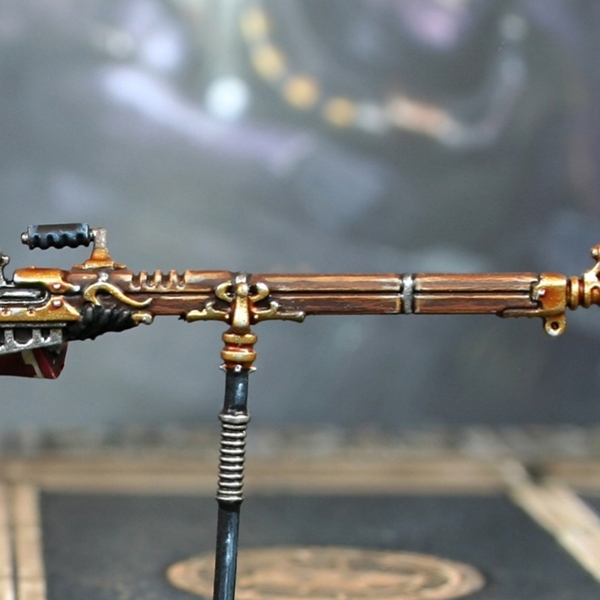 Wood
Wood
- Basecoat with 1:1 Rhinox Hide and Mournfang Brown .
- Shade recesses with Agrax Earthshade and a fine brush.
- Add chunky highlights with Mournfang Brown .
- Now fine highlights of Tau Light Ochre .
- Finish with a few selective highlights of Ushabti Bone .
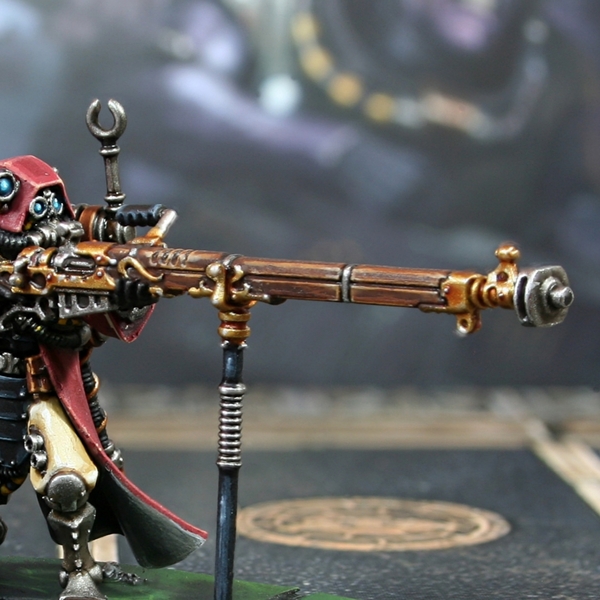 Gold
Gold
- Basecoat with 3:1 Retributor Armour and Silver RLM01 Metallic .
- Wash with Reikland Fleshshade . Once this is dry, you can accentuate the shading around rivets with Doombull Brown , if needed.
- Add a touch more Silver RLM01 Metallic to your Retributor Armour and apply some highlights.
- Finish with a few selective Silver RLM01 Metallic highlights.
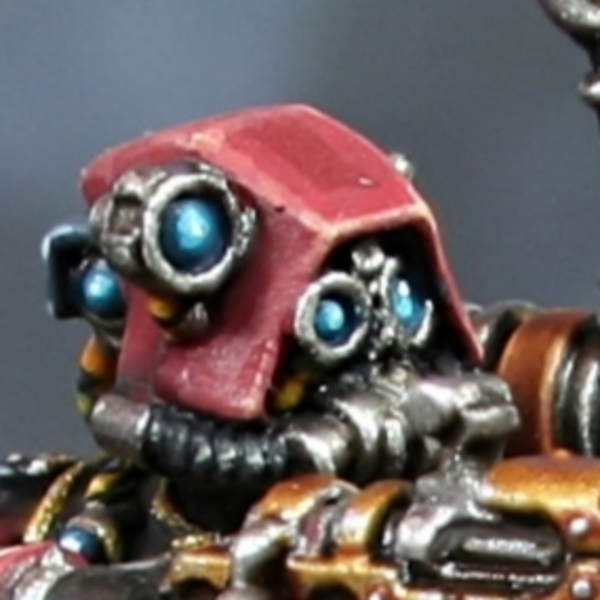 Blue Lenses
- Basecoat with Stegadon Scale Green . In a lot of cases, you can overspill around lenses here, giving the impression of a slight glow/adda bit of colour into surrounding recesses.
- Pick out everything but the recesses with Sotek Green .
- Add highlights with Temple Guard Blue .
- Selectively highlight with Baharroth Blue .
- Finish with specular White highlights.
The details you will probably want to use this recipe for are quite varied, and there will not always be space to use all of these paints. feel free to make bigger jumps in colour when necessary.
 Steel
Steel
- Basecoat with Leadbelcher .
- Wash with Nuln Oil .
- Glaze some Agrax Earthshade where you want metal to look dirtier.
- Mix some Silver RLM01 Metallic into your Leadbelcher , then highlight close to the tip (on the flat sides) and edge highlight the rest.
- With pure Silver RLM01 Metallic , edge highlight the tip and place a few specular highlights on corners.
 Copper
- Basecoat with Brass Scorpion .
- Wash with Reikland Fleshshade .
- Highlight with Hashut Copper .
- Mix your Hashut Copper 1:1 with Silver RLM01 Metallic and apply selective highlights.
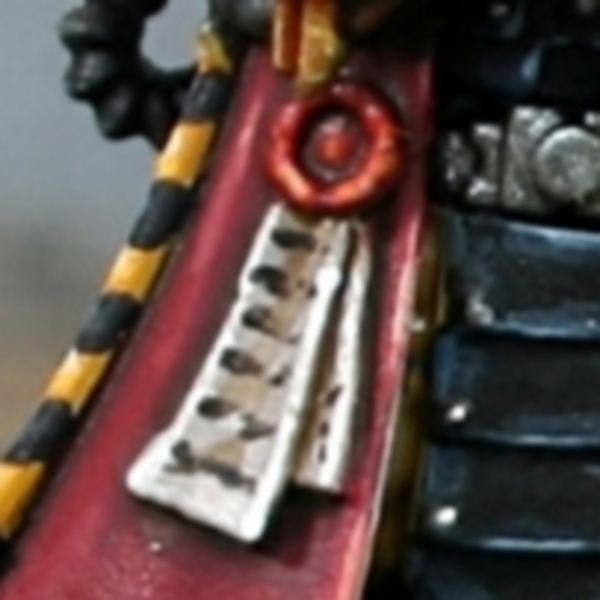 Purity Seal
- Basecoat the parchment with Rakarth Flesh .
- basecoat the wax with Mephiston Red .
- Wash/glaze everything with Agrax Earthshade . Don't go too heavy on it though.
- Pick out everything but the recesses of the partment with scratchy lines of 1:1 Rakarth Flesh and Pallid Wych Flesh .
- Edge highlight with Pallid Wych Flesh .
- Mix some White into your Pallid Wych Flesh and pick out corners.
- On the wax, pick out all raised details with Evil Sunz Scarlet .
- Now highlight more selectively with Troll Slayer Orange .
- Mix some Screaming Skull into your Troll Slayer Orange , then do a few specular highlights.
For the text, mix Abaddon Black and Rhinox Hide 1:1 then paint in the text with a very fine brush. I find the best way is to randomly paint in dots and dashes in lines, moving my hand along slowly. Do a secondary pass refining for the best results.

Rookie Brushes
RookieBrushes
Aspiring miniature painter and biscuit enthusiast. Here to share my hobby and help where I can.
Citadel Painting System 42
Base 13
- Abaddon Black
- Averland Sunset
- Dryad Bark
- Incubi Darkness
- Khorne Red
- Leadbelcher
- Mephiston Red
- Mournfang Brown
- Rakarth Flesh
- Retributor Armour
- Rhinox Hide
- Steel Legion Drab
- Stegadon Scale Green
Shade 3
- Agrax Earthshade
- Nuln Oil
- Reikland Fleshshade
Layer 25
- Administratum Grey
- Baharroth Blue
- Blue Horror
- Brass Scorpion
- Dark Reaper
- Doombull Brown
- Evil Sunz Scarlet
- Fenrisian Grey
- Hashut Copper
- Kislev Flesh
- Pallid Wych Flesh
- Screaming Skull
- Skavenblight Dinge
- Skrag Brown
- Sotek Green
- Stormvermin Fur
- Tallarn Sand
- Tau Light Ochre
- Temple Guard Blue
- Thunderhawk Blue
- Troll Slayer Orange
- Ungor Flesh
- Ushabti Bone
- Wazdakka Red
- Yriel Yellow
Contrast 1
- Iyanden Yellow
Colour Forge
Base 1
- Sanguine Red
Vallejo Model Air
Base 1
- 71.063 Silver RLM01 Metallic
Vallejo Model Color
Base 3
- 70.918 Ivory
- 70.950 Black
- 70.951 White