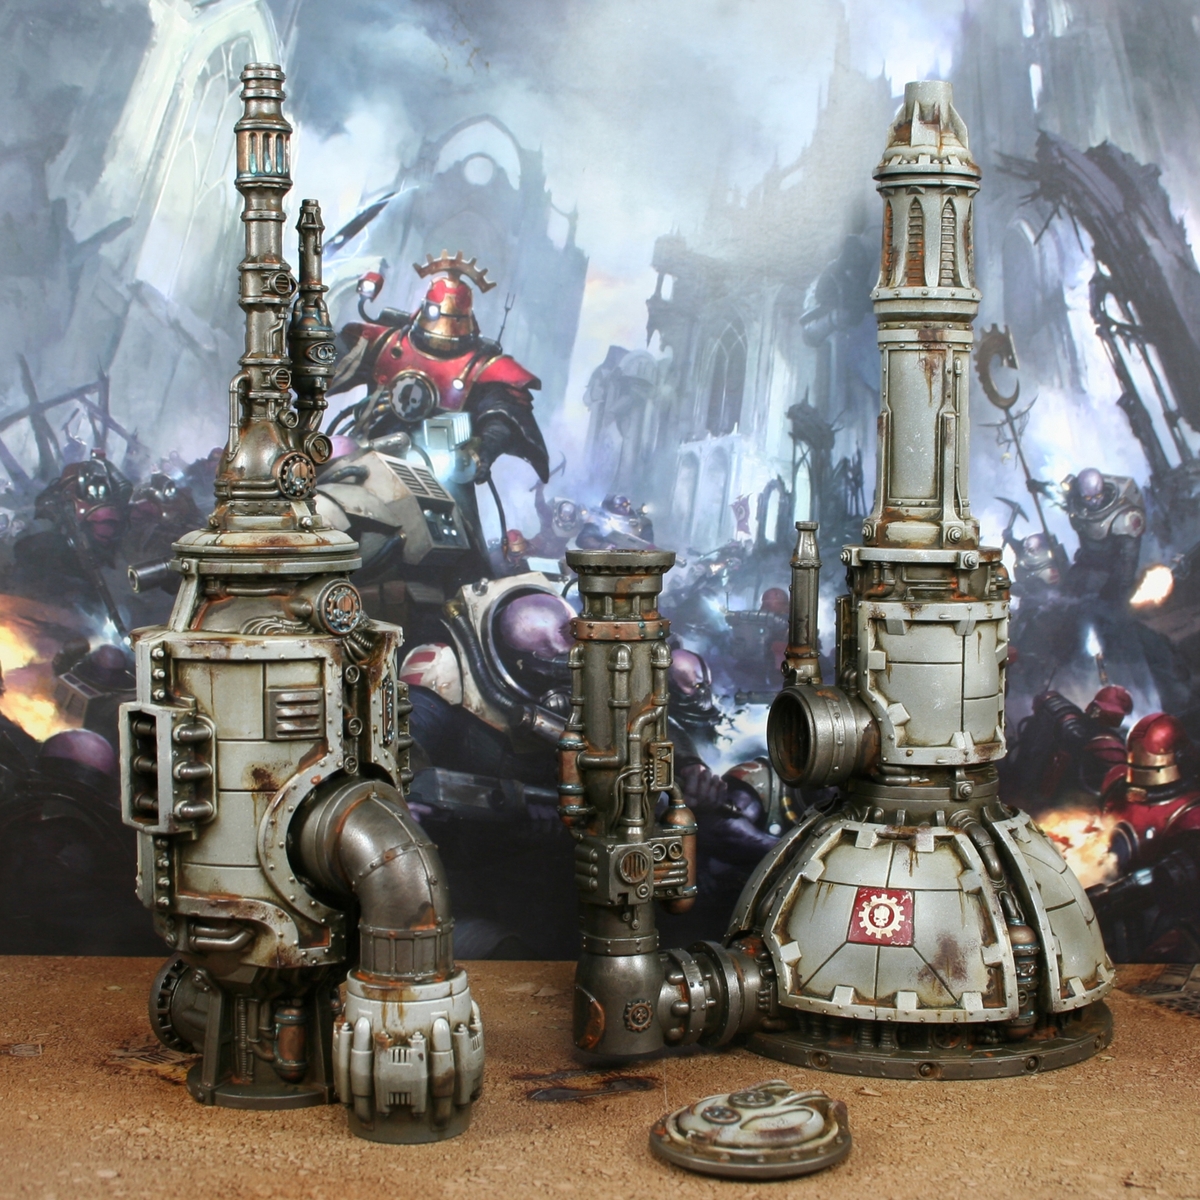

I wanted a quick way of getting the Nachmund scenery done and Vince Venturella came through right on time. I pretty much followed his "9 Tips for Popping Grimdark Terrain - HC 339" YouTube video for this, but have recorded my steps so I can follow again when I get to the box.
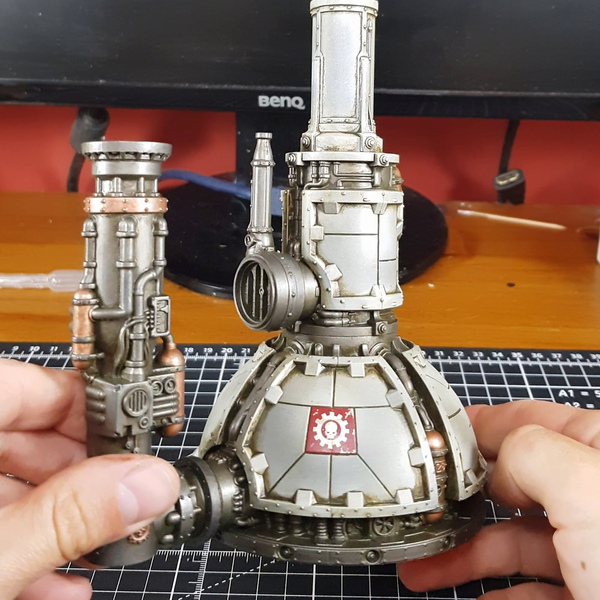 Main Colours and Grime
- Prime with Chaos Black .
- Spray thinned Cold Grey from a downward angle, coverring all of the panels you wish to paint white.
- Add large highlights by airbrushing a pure white (like Dead White ) over exposed areas. I used Liquitex Titanium White, if you were interested.
- Pick out pipes and exposed machinery with Steel .
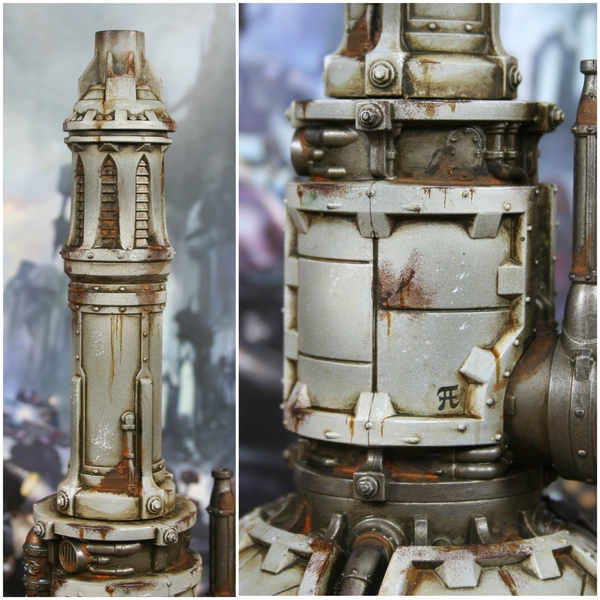
- Basecoat tanks, badges and relevant details with Copper . I like to add some brown ink to make it a richer colour. I popped a drop of Liquitex Burnt Umber in for every two drops of. Copper
- I have picked out details to paint with Mephiston Red on each piece too, just for a colour pop. I added a small bit of chipping with Dead White again too. I had some AdMech decals to hand and popped a few of these on there too.
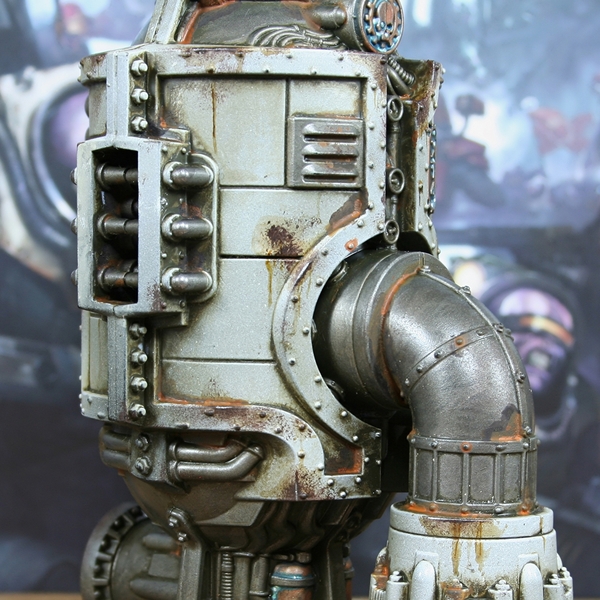
- With everything basecoated, I covered all of the terrain with AK Interactive Streaking Grime and left it to dry overnight.
- I then removed the grime from prominent areas. I started of by giving the scenery an all over wipe with kitchen tissue. Then, with some odorless Artists' White Spirit on a cloth, I cleaned up raised/exposed areas more.
 Chipping
- Dip a small bit of sponge in Rhinox Hide , wipe of most of the excess and then dab what remains in patches on the miniature. Try to be random and let patches build up. Try to focus on corners and more exposed areas that would chip naturally, but a little on flatter plates is fine too.
- On these pieces of terrain, I found it hard to get concentrated patches where I wanted them. So I went in with Rhinox Hide on a brush and dabbed it along edges to make sure I had a concentrated areas of brown where the majority of the damage would have happened. I was dabbing to make the pattern irregular.
- To make an occasional edge pop, I did patch edge highlights of Vallejo Metal Color Silver within the dark brown.
 Streaking and Water Stains
- I used Skeleton Horde to create streaks down from areas where water would run/collect. In addition to the streaks I also used the same paint to give the illusion of staining for puddles and where water would collect around rivets. I consciously looked for ones that has had a lot of the streaking grime wiped off to add more visual interest.
- With a finer brush I added thin streaks of Snakebite Leather both within the previous streak and to make new ones. The idea being to make it look like many layers of streaking have been left over time.
 Rusting
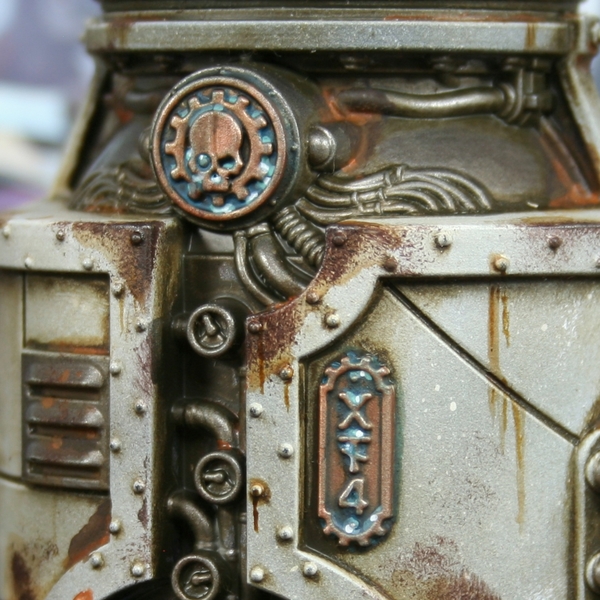
- The metal is now looking a little boring in comparison, so I pop some Typhus Corrosion in recesses and areas where water could collect on it. Just grab an old brush and mash it on in there, wiping excess off with your finger. I used this to cover up little unsightly patched of Streaking Grime too.
- Once dried, I go over most of the above areas again, placing a mix of 4:1 Agrax Earthshade and Vallejo Rust and use it to accentuate these rusty areas.
- To add more general rust to other areas of the metal, I water down Skrag Brown and brush it into deep recesses and around occasional rivets. Try to stick to areas that look bland and don't be too uniform. Most of the water will just evaporate and the paint will dry much darker than when it is wet, so feel free to go pretty heavy.
- In areas that have collected a large amount of pigment in the above steps, I place very small amount of Rust , to give a little colour pop. If you don't have this paint, I would recommend Ryza Rust mixed with a fair amount of water or even just a heavily thinned bright orange.
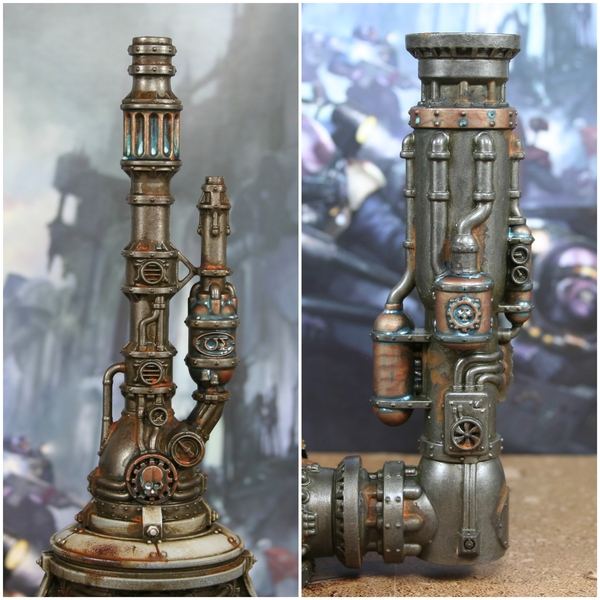
 Oxidised Copper
- Wash the metal with equal parts Agrax Earthshade and Aethermatic Blue .
- In areas where the previous wash has dried and collected, pop some thinned Sotek Green .
- Put very small amounts of Nihilakh Oxide within the previous colour. This represents the most oxidized parts.
- If you wanted to add a little additional "pop", consider adding dots of pure white in areas where oxidisation would have REALLY built up.
Sponge Highlighting?
- I took my favourite pure white (Vallejo Dead White ) and dabbed it all over areas that were pretty much free from other weathering. This is to make the areas that have been weathered look even dirtier.
- Like the initial sponge chipping, I wasn't super happy with the look of this sponging. To make it look more natural I put in small highlights with my Dead White on upwards facing edges where the sponging had landed.
 Final Steps
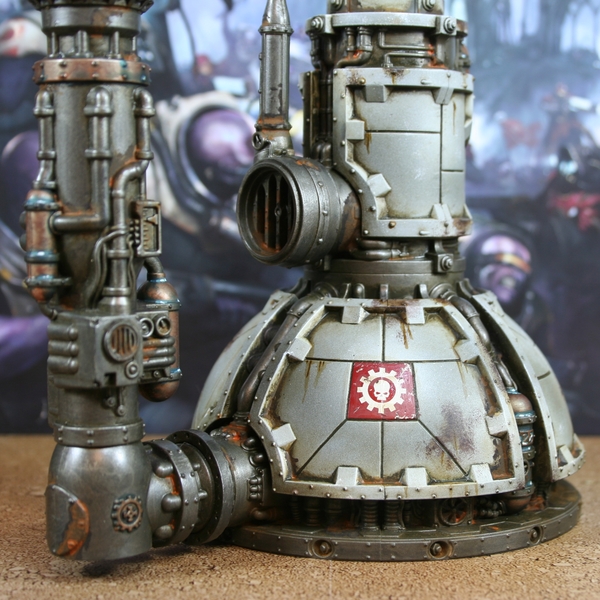
In Vince's video, he used a variety of pigments to add more visual interest and confusion, but I felt these pieces were busy enough. So I just jabbed a little Vallejo Pigments "Siena Natural" onto the lower parts to make them look dusty. On future pieces I will probably go a little easier on the amount of weathering I do, to leave space for a variety of pigments in this step.
Finally, I sprayed some Seraphim Sepia over the lower areas. This is to better tie them to the environment and also worked to seal the pigment and make it look muddier.

Rookie Brushes
RookieBrushes
Aspiring miniature painter and biscuit enthusiast. Here to share my hobby and help where I can.
AK Interactive
Weathering effect 1
- AK012 Streaking Grime
Citadel Painting System 13
Base 2
- Mephiston Red
- Rhinox Hide
Shade 2
- Agrax Earthshade
- Seraphim Sepia
Layer 2
- Skrag Brown
- Sotek Green
Dry 1
- Ryza Rust
Technical 2
- Nihilakh Oxide
- Typhus Corrosion
Spray 1
- Chaos Black
Contrast 3
- Aethermatic Blue
- Skeleton Horde
- Snakebite Leather
Vallejo Metal Color
Base 3
- 77.710 Copper
- 77.712 Steel
- 77.724 Silver