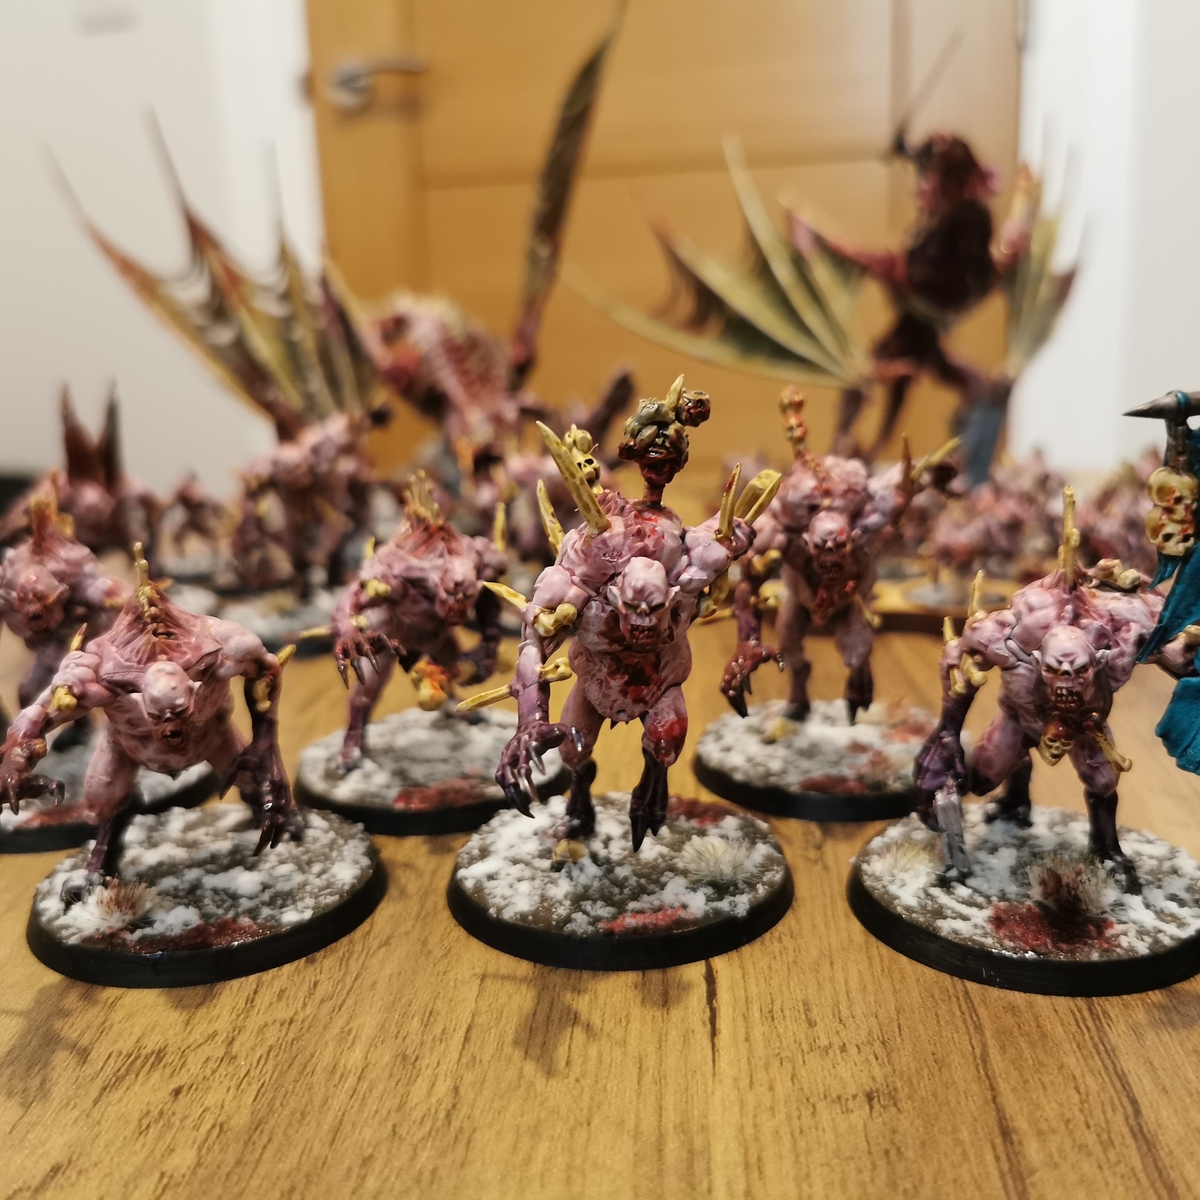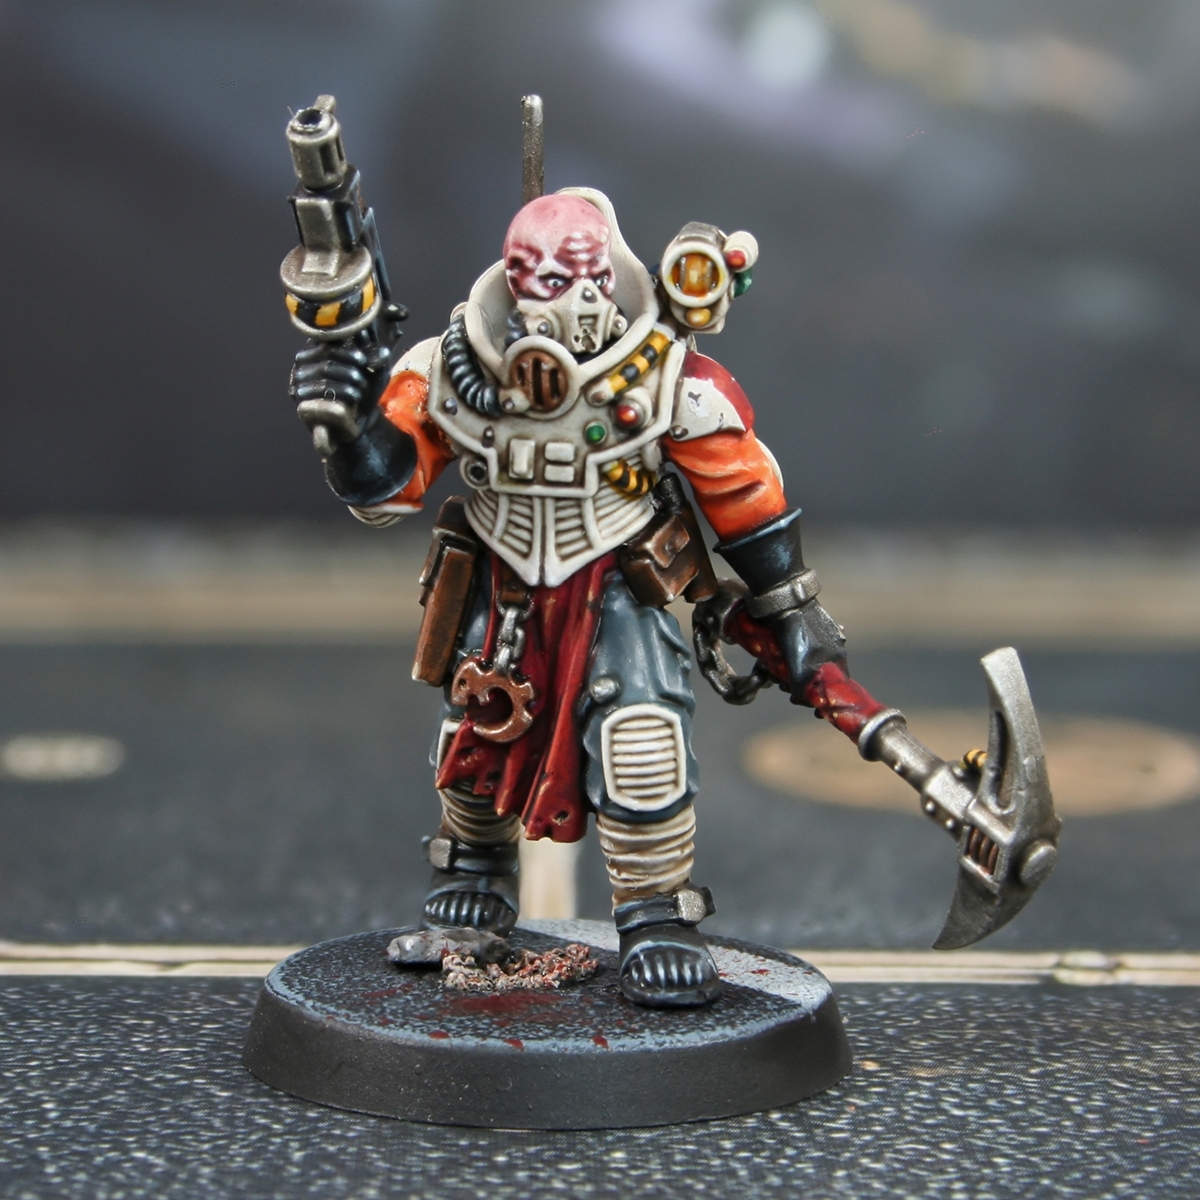
Cult of the Rusted Claw - Neophyte Hybrids

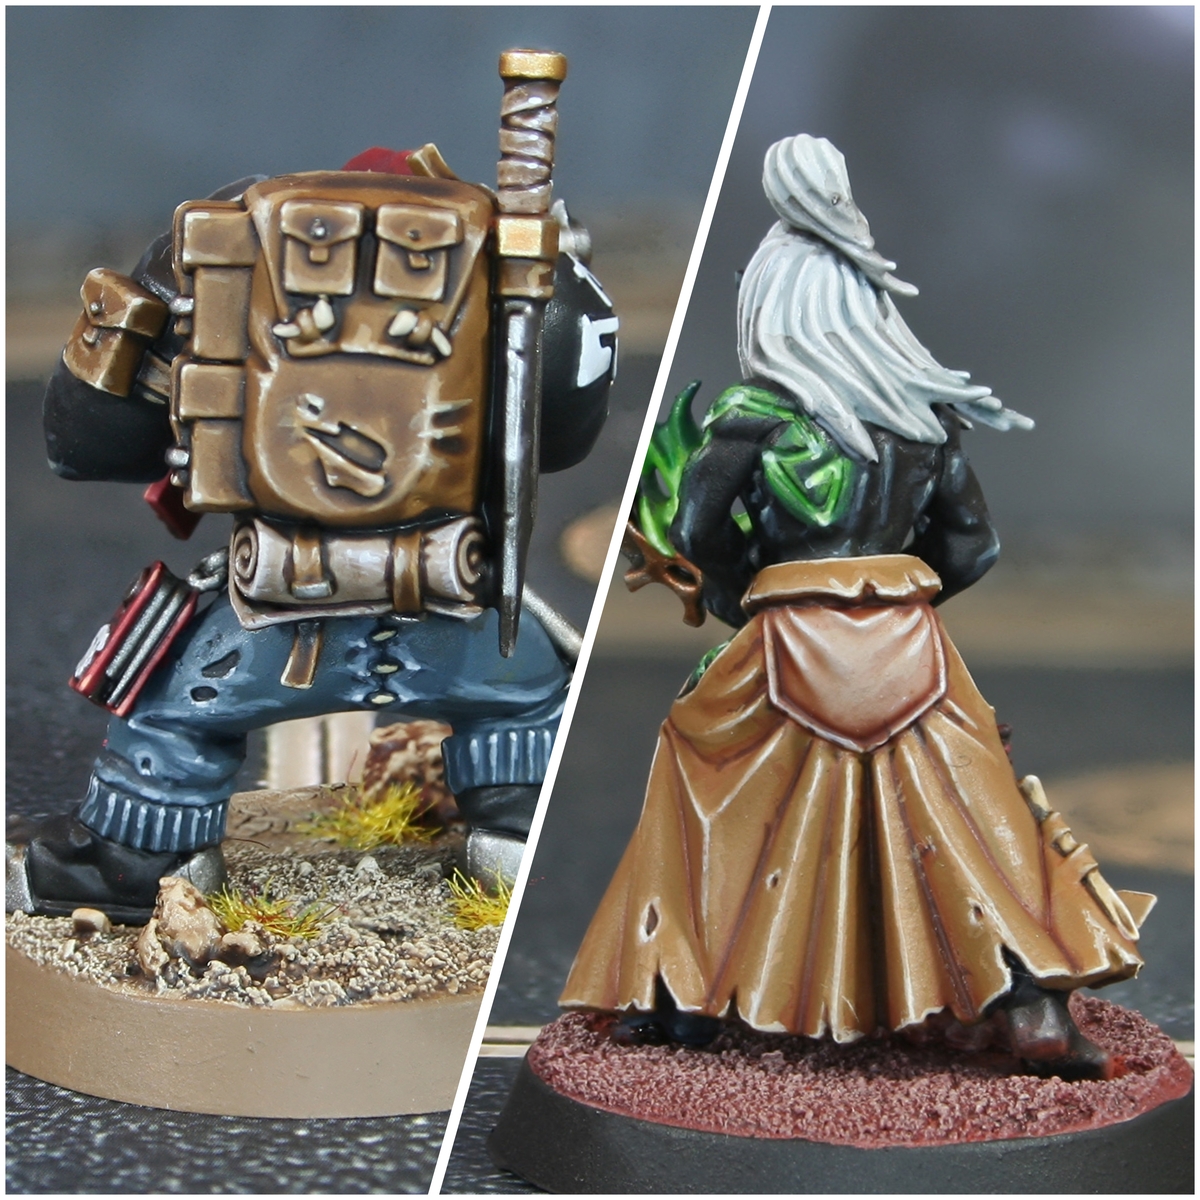
White Armour
- Basecoat with Pallid Wych Flesh .
- Wash with "Marine Juice" this is a mix of 3 parts, Reikland Fleshshade , 3 parts Army Painter Dark Tone and 4 parts Lahmian Medium . I basecoated the armour, orange cloth and grey trousers by this point and washed all of them at once, just to save time.
- Re-highlight with Pallid Wych Flesh where needed. The wash can take a lot of the white out of the armour, so I think this stage is worth the time investment.
- Selectively highlight the edges with White . Try to stick to curved edges and corners, where the light would be hitting. Make these highlights a little wider in areas that you want to add additional chipping to, I recommend sticking to corners and curved edges.
- Add thin edge highlights of Dryad Bark within the previously selected chipping areas. On open panels, leave small patches with dots of Dryad Bark and then underline then with dots of White .
Orange Cloth
- Basecoat with Deep Orange .
- Wash with "Marine Juice" this is a mix of 3 parts, Reikland Fleshshade , 3 parts Army Painter Dark Tone and 4 parts Lahmian Medium .
- Add highlights with Fire Dragon Bright on folds.
- Mix some Ice Yellow into the Fire Dragon Bright and add selective highlights to prominant edges and corners.
- Finish with a few select dots of pure Ice Yellow on points where light would catch.
Grey Cloth
- Basecoat with :Citadel/MechanicusStandardGrey & Stegadon Scale Green , mixed 3:1.
- Wash with "Marine Juice" this is a mix of 3 parts, Reikland Fleshshade , 3 parts Army Painter Dark Tone and 4 parts Lahmian Medium .
- Chunky highlights of Mechanicus Standard Grey .
- Fine highlights of Dawnstone .
- Selective highlights of Administratum Grey .
- Finish with a few specular highlights of Grey Seer .
Bandages
- Basecoat with 2:1 Wraithbone and Rakarth Flesh .
- Wash with "Marine Juice" this is a mix of 3 parts, Reikland Fleshshade , 3 parts Army Painter Dark Tone and 4 parts Lahmian Medium .
- Edge highlight with Wraithbone .
- Add dots of White randomly along accessible edges, to add texture.
Red Robes
- Basecoat with Khorne Red .
- Soft shade with 1:1 Khorne Red and Abaddon Black .
- Glaze/chunky highlight with Evil Sunz Scarlet .
- Edge highlight everything with Wild Rider Red .
- Selectively highlight corners and areas where light would hit, using a 1:1 mix of Squig Orange and Tau Light Ochre .
- Finish with spot highlgihts of Ungor Flesh .
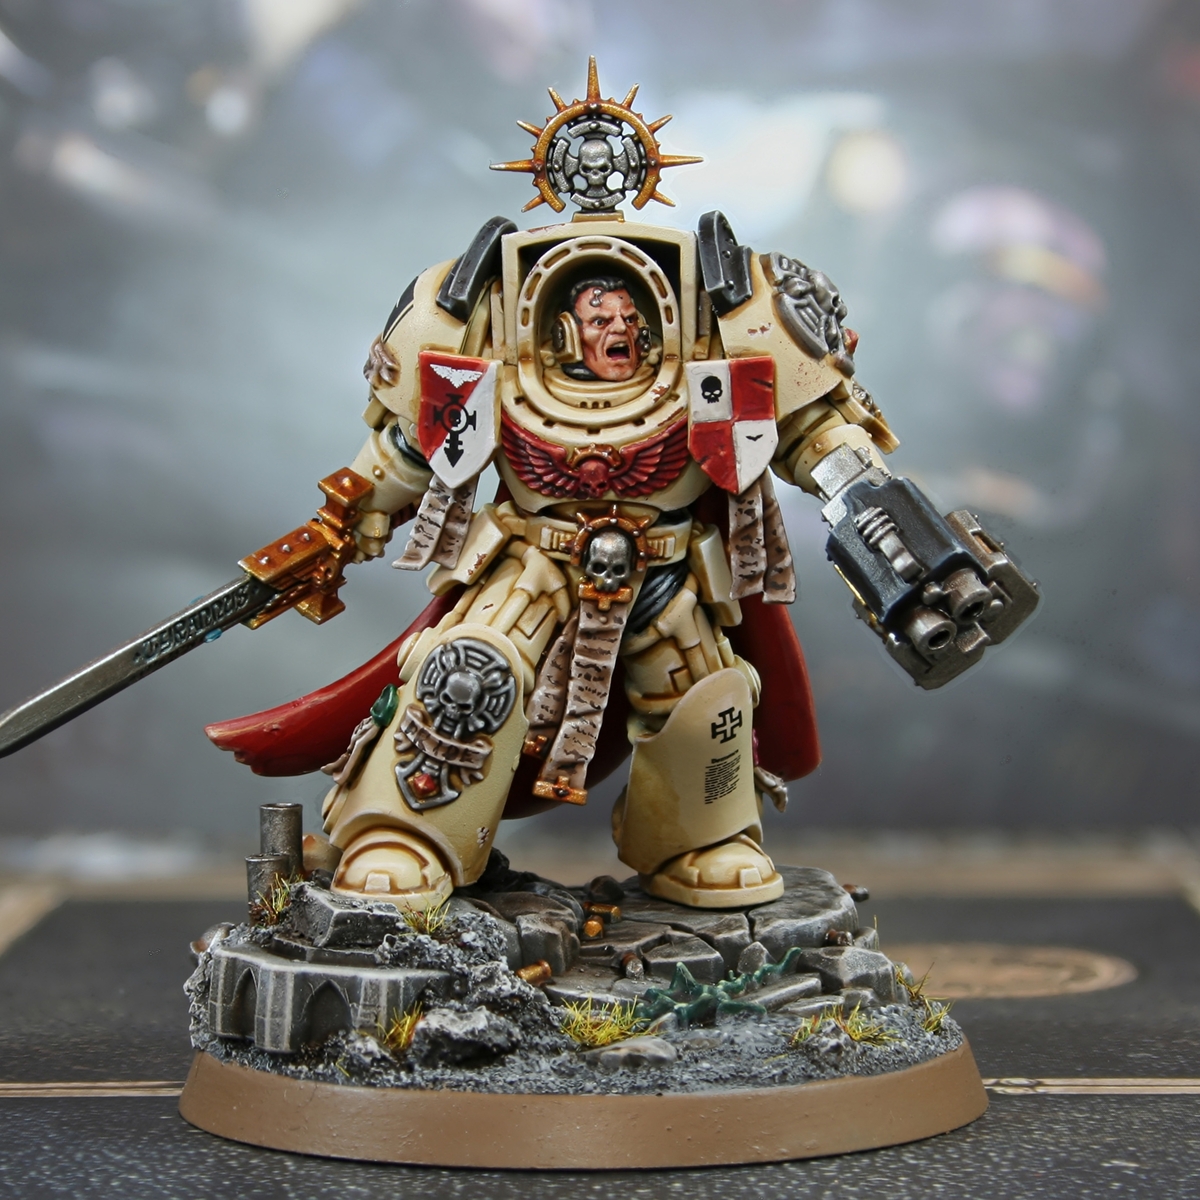
Tainted Skin
- Basecoat with Wraithbone .
- Wash with 1:1 Guilliman Flesh and Magos Purple .
- Enhance richness in recesses with 1:1 mix of Fyreslayer Flesh and Magos Purple , apply with a fine brush.
- Glaze Magos Purple in a few thin layers on the back part of the head.
- Paint in some veins with Naggaroth Night .
- Highlight details on the face with Pallid Wych Flesh .
- Finish with select highlights of White .
Ribbed Tubing
- Basecoat with Grey Seer .
- Wash with Black Templar .
- Selectively edge highlight with Ulthuan Grey .
- Add a few dots of White where light would hit.
Black Leather
- Basecoat with Abaddon Black .
- Add a chunky highlight to edges with 1:1 Abaddon Black and Baharroth Blue .
- With pure Baharroth Blue add smaller, finer highlights.
- Selectively highlight with very small highlights of Blue Horror .
- Finally mix the Blue Horror 1:1 with White Scar and add specular highlights to select areas.
Steel
- Basecoat with Leadbelcher .
- Wash with Nuln Oil .
- Add highlights with Ironbreaker .
- Now selectively highlight with Vallejo Model Air Silver RLM01 Metallic .
If you wanted to add some dirt in recesses, try glazing with thin Agrax Earthshade or some of your leftover "Marine Juice".
Copper Details
- Basecoat: with Hashut Copper and a touch of Rhinox Hide , to to help get full coverage.
- Wash the metal with Agrax Earthshade or some of your leftover "Marine Juice".
- Re-establish pure Hashut Copper on raised areas.
- Pick out edges with Hashut Copper , mixed with some Silver RLM01 Metallic .
- Finish with dots of Silver RLM01 Metallic on points and corners where light would hit.
Dark Brown Leather
- Basecoat the leather area with Rhinox Hide .
- Glaze most of the leather with thinned Mournfang Brown . Use quite a small brush and drag towards edges in rough lines. This should create some extra texture.
- Add a chunky edge highlight of Skrag Brown to all edges.
- Highlight everything again, this time with a fine line of Skrag Brown and Ushabti Bone mixed 1:1. This is a good mix to throw in occasional fine lines and scratches.
- With pure Ushabti Bone , selectively highlight corners and exposed edges of the leather. Put a dot of this colour where the additional scratched above meet edges too.
- Add a little pure white (like White ) to your Ushabti Bone and add dot highlights to corners.
Black Weapon Casing
- Basecoat with Abaddon Black .
- Edge highlight everything with a thick line of Dark Reaper .
- Highlight everything again, this time with a thin line of Thunderhawk Blue . This colour is a good place to put in some scratches too.
- With Fenrisian Grey , selectively highlight upward facing edges, corners and prominent edges. Stick primarily to edges where the light would hit and always drag your brush towards the brightest point. If you added scratches previously, reinforce them with a smaller, thinner line underneath.
- Finally, edge add small highlights to the centre of the previous highlights and corners with Blue Horror . Try to make them very small, dots if at all possible.
Hazard Stripes
- Basecoat with Averland Sunset .
- Carefully paint in the black stripes with Abaddon Black .
- Wash the lower parts of the yellow stripes and the recesses with Iyanden Yellow . Pull the brush toward the recesses to try and create a gradient.
- Highlight the top edges of the stripe with a line of Averland Sunset , again.
- Where the previous highlight isn't noticeable, go over the area with a fine line of Averland Sunset and Screaming Skull mixed 1:1.
- Finally add a small highlight of Screaming Skull within the last stage.
- Highlight the black stripes in the same way. I used Eshin Grey , Dawnstone and Administratum Grey for this.

Rookie Brushes
RookieBrushes
Aspiring miniature painter and biscuit enthusiast. Here to share my hobby and help where I can.
AK Interactive 3rd Generation Acrylics
Intense 1
- AK11080 Deep Orange
Citadel Painting System 45
Base 13
- Abaddon Black
- Averland Sunset
- Dryad Bark
- Grey Seer
- Khorne Red
- Leadbelcher
- Mechanicus Standard Grey
- Mournfang Brown
- Naggaroth Night
- Rakarth Flesh
- Rhinox Hide
- Stegadon Scale Green
- Wraithbone
Shade 3
- Agrax Earthshade
- Nuln Oil
- Reikland Fleshshade
Layer 22
- Administratum Grey
- Baharroth Blue
- Blue Horror
- Dark Reaper
- Dawnstone
- Eshin Grey
- Evil Sunz Scarlet
- Fenrisian Grey
- Fire Dragon Bright
- Hashut Copper
- Ironbreaker
- Pallid Wych Flesh
- Screaming Skull
- Skrag Brown
- Squig Orange
- Tau Light Ochre
- Thunderhawk Blue
- Ulthuan Grey
- Ungor Flesh
- Ushabti Bone
- White Scar
- Wild Rider Red
Technical 1
- Lahmian Medium
Air 1
- Dryad Bark
Contrast 5
- Black Templar
- Fyreslayer Flesh
- Guilliman Flesh
- Iyanden Yellow
- Magos Purple
The Army Painter Warpaints
Quickshade 1
- Dark Tone
Vallejo Model Air
Base 1
- 71.063 Silver RLM01 Metallic
Vallejo Model Color
Base 2
- 70.858 Ice Yellow
- 70.951 White