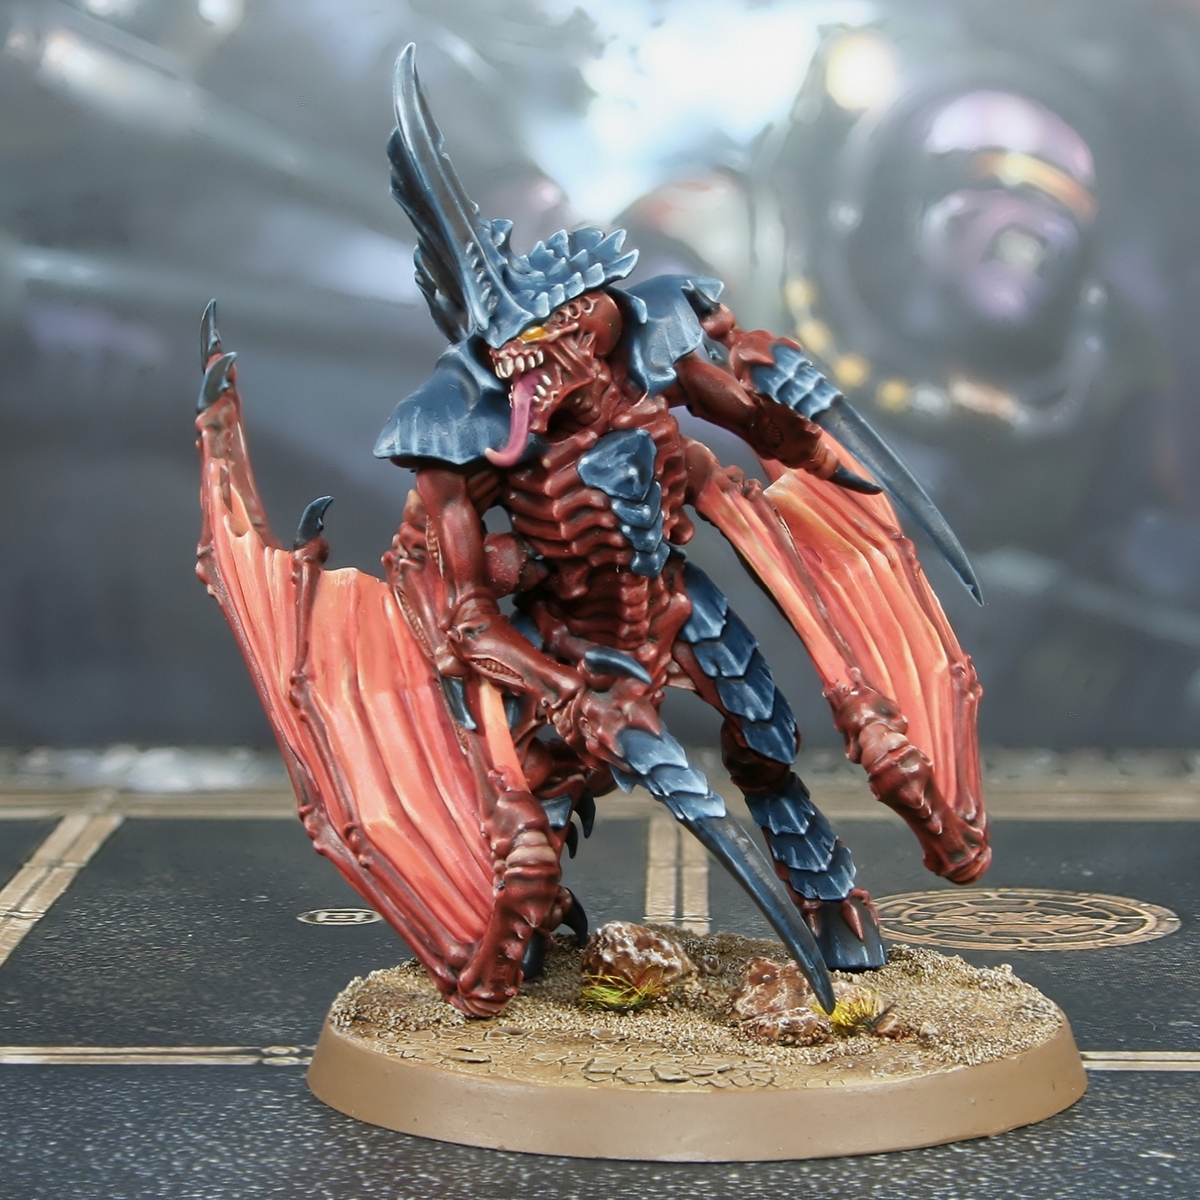
Gobsprakk, The Mouth of Mork
Recipies for the Ork, the Gobbo, and the Vulcha
Gobsprakk
This is a rather complex model to paint on the vulcha, so I found it best to do him as a sub-assembly. Fully assemble Gobsprak with all his bits then glue him to a bit of sprue for painting. He attached to the vulcha at the saddle and ankles so its few glue points.
Gobsprakk is best done in three layers due to the multiple hidden areas on the model. First, do all the basecoats, then the shades/layers, and then the highlights. This should have you working on fewer and fewer areas each time.
Basecoats
- Prime the whole model in Grey Seer
- Basecoat all the skin in Mantis Warriors Green This should only need one layer for later touchup
- Basecoat the lower robe in Black Legion
- Basecoat the upper robe in Flesh Tearers Red
- Basecoat the skull on his back with Aggaros Dunes
- Basecoat the staff with Wyldwood
- Basecoat any metal bits (on the staff, bracelets, dodads etc.) in Iron Warriors
- Basecoat the rope bundles in Black Legion
- Basecoat the bottle in Terradon Turquoise and the robes in Baneblade Brown
Shades/Layers
This step brings the basecoats up to their proper colors either through shades or layers
- Layer the lower robe with Thondia Brown leaving Black Legion showing in the deepest recesses
- Shade the upper robe with Carroburg Crimson . Use an even layer and avoid pooling
- Shade the hand ontop the staff with two layers of Athonian Camoshade
- Shade the metal details with Agrax Earthshade
- Layer various metal details with Liberator Gold particularly some of his charms and the finger armor on the staff hand
- Layer Orruk Flesh over any of the skin areas that got hit by other colors. It should blend nicely but relayer mantis warriors as necessary
- Layer the teeth of the skull with Screaming Skull avoiding the deepest recesses
- Layer the eyes with Evil Sunz Scarlet
- Layer the teeth with Ushabti Bone
- Layer the nails with Corvus Black
Highlights
- Highlight the wood of the staff with Gorthor Brown
- Highlight the lower robe along the edges with Gorthor Brown then Baneblade Brown
- Highlight the upper robe along the edges with Evil Sunz Scarlet then Wild Rider Red
- Highlight the skull with Ushabti Bone then Screaming Skull
- Area highlight the teeth on the skull with Corax White
- Highlight the metal and gold with Stormhost Silver
- Highlight the stitches on the robes with Ushabti Bone
- Highlight the ropes with Mechanicus Standard Grey and then Stormvermin Fur
Gobbo Helper
Another part best built as a sub-assembly is the gobo helper. Attach him to his rack of goodies and paint him separately. Like Gobsprakk he is also best done in layers as theres a lot of little bits and bobs. Do all the bases, then the layers/shades, then highlights.
Basecoats
- Basecoat the skin in Mantis Warriors Green
- Basecoat the loincloth and boots in a 70/30 mix of Gore-grunta Fur and Contrast Medium
- Basecoat the foot wraps in Aggaros Dunes
- Basecoat the belt rope with Black Legion
- Basecoat the wood of the rack in Wyldwood
- Basecoat the doodads on the rack in appropriate colors. I used Volupus Pink on the radishes/eyes, Terradon Turquoise on the bottle, Aggaros Dunes on the bags, rat, and skulls (one bag with Gore-grunta Fur ), Iron Warriors on the knife and other metal bits. Athonian Camoshade on the mandrake root and Ork Flesh on its leaves, Gryph-charger Grey on the feather, Athonian Camoshade on the hands, Th Flesh Tearers Red on the mushroom caps, and Averland Sunset on the goops
Shades
- Shade the metal areas and various recesses with Agrax Earthshade
- Shade the rat with Ratling Grime
- Layer the skulls with Ushabti Bone
- Layer the cords on the skulls with Corvus Black
Highlights
- Highlight the l loincloth with Tau Light Ochre
- Highlight the skulls with Screaming Skull
- Highlight the ropes on the bottle with Baneblade Brown
- Hightlight the wood rack with Gorthor Brown
- Highlight the belt rope with Mechanicus Standard Grey and then Stormvermin Fur
- Highlight the stalks on the radishes/eyes with Ogryn Camo
Corpse-rippa Vulcha / Killabeak
I left the head separate on this model to make it easier to hold. In hindsight I should have left the back banners/big seat, separate as well. I also assembled this model with the horned/armored head of the killaboss because it looked more impressive.
Like previous steps this one is going to be basecoats, shades/layers, and highlights. I prefer this when working with models that have lots of little sections so that a missed brush stroke doesnt ruin fully layered work.
Basecoats
- Basecoat the top of the wings with The Fang on the top half (small feathers) Thunderhawk Blue on the bottom feathers and Corvus Black on the primary flight feathers (5)
- Basecoat the underside of the wings with The Fang on the top edge Thunderhawk Blue on the top third (small feathers no shafts), Russ Grey on the mid third of feathers (small feathers with shafts), and the bottom feathers and primary flight feathers (5) with Corvus Black
- Basecoatthe tail feathers (top and bottom) with Thunderhawk Blue on the large feathers and The Fang on the small ones.
- Basecoat the bare skin areas with Space Wolves Grey
- Basecoat the neck feathers with The Fang
- Basecoat the armor plates with Leadbelcher
- Basecoat the rope bundles with Black Legion thin with a bit of water for flow
- Basecoat the wood of the chair frame with Wyldwood
- Basecoat all the small metal bits with Leadbelcher
- Basecoat the leather body cover with Gore-grunta Fur
- Basecoat the leather sitting bag with Snakebite Leather
- Basecoat the hanging bits with Skeleton Horde
- Basecoat the wood holding the banners with Aggaros Dunes and the metal parts with Leadbelcher
- Basecoat the log with Aggaros Dunes on the recessed wood and Wyldwood on the bark
- Basecoat the hanging moss with Castellan Green
- Basecoat the feet with Grey Seer then Mantis Warriors Green
- Basecoat banners in one each of Volupus Pink / Flesh Tearers Red / Blood Angels Red / and 2:1 mix of Gryph-hound Orange and Magmadroth Flame
- Basecoat the beak in Corvus Black
- Basecoat the skin above the eyes and the lower legs in Averland Sunset
- Basecoat the claws in Black Legion
- Basecoat the body in Space Wolves Grey then in 1:1 Space Wolves Grey and Contrast Medium
- Basecoat the head horns in Aggaros Dunes
- Basecoat the leather straps on the banner and horns in Black Legion
Shade
- Shade wings with Drakenhof Nightshade (all over)
- Shade recesses on banners with Drakenhof Nightshade
- Shade metal bits and armor with Agrax Earthshade
- Shade some spike bits on helmet and back banner with Aggaros Dunes
- Shade hanging fleshy parts with Plaguebearer Flesh
- Shade lower legs in Targor Rageshade and a layer of Drakenhof Nightshade at the interface
- Shade the bones in Seraphim Sepia
Layering
- Layer middle feathers on underside of wing with Fenrisian Grey
- Layer tips of primary feathers on front and back with a striping of Thunderhawk Blue and then Russ Grey
- Layer the eyes with Evil Sunz Scarlet
- Layer the to the midpoint of the horns with a second coat of Aggaros Dunes . While still wet layer the outer 3rd with Wyldwood and use a wet brush to blend. When dry relayer the very tips with Wyldwood
Drybrushing
- Drybrush body in Russ Grey lightly
- Drybrush wings and tail feathers in Russ Grey lightly and gradually
- Drybrush the lower legs in 1:1 Averland Sunset and Ushabti Bone
Highlights
- Highlight the beak in Skavenblight Dinge and then Stormvermin Fur
- Highlight the armor and metal bits in Stormhost Silver
- Highlight the claws in Corvus Black
- Highlight the wood frame in Gorthor Brown
- Highlight the tree trunk in Gorthor Brown on the dark bits and Ushabti Bone on the light bits
- Highlight the moss in Deathworld Forest
- Highlight the ropes in Mechanicus Standard Grey and then Stormvermin Fur
- Highlight the leather back cover in Skrag Brown and then Tau Light Ochre (along the sharp edges)
- Highlight the bones with Screaming Skull
- Highlight the banners with Pink Horror / Evil Sunz Scarlet / Wild Rider Red then Troll Slayer Orange / Fire Dragon Bright respectively based on color
- Highlight the wood of the banner pole with Ushabti Bone
- Highlight the stitches on banner and back leather with Ushabti Bone
- Highlight the leather straps on the horns and back banner in Dark Reaper
Sub-assembly
- Use super glue to glue on the gobbo helper, Gobsprakk, and Vulcha head, in that order
Citadel Painting System 59
Base 12
- Averland Sunset
- Castellan Green
- Corax White
- Corvus Black
- Deathworld Forest
- Grey Seer
- Iron Warriors
- Leadbelcher
- Mechanicus Standard Grey
- Orruk Flesh
- The Fang
- Thondia Brown
Shade 6
- Agrax Earthshade
- Athonian Camoshade
- Carroburg Crimson
- Drakenhof Nightshade
- Seraphim Sepia
- Targor Rageshade
Layer 20
- Baneblade Brown
- Dark Reaper
- Evil Sunz Scarlet
- Fenrisian Grey
- Fire Dragon Bright
- Gorthor Brown
- Liberator Gold
- Ogryn Camo
- Pink Horror
- Russ Grey
- Screaming Skull
- Skavenblight Dinge
- Skrag Brown
- Stormhost Silver
- Stormvermin Fur
- Tau Light Ochre
- Thunderhawk Blue
- Troll Slayer Orange
- Ushabti Bone
- Wild Rider Red
Technical 1
- Contrast Medium
Air 1
- Baneblade Brown
Spray 1
- Grey Seer
Contrast 18
- Aggaros Dunes
- Black Legion
- Blood Angels Red
- Flesh Tearers Red
- Gore-grunta Fur
- Gryph-charger Grey
- Gryph-hound Orange
- Magmadroth Flame
- Mantis Warriors Green
- Ork Flesh
- Plaguebearer Flesh
- Ratling Grime
- Skeleton Horde
- Snakebite Leather
- Space Wolves Grey
- Terradon Turquoise
- Volupus Pink
- Wyldwood