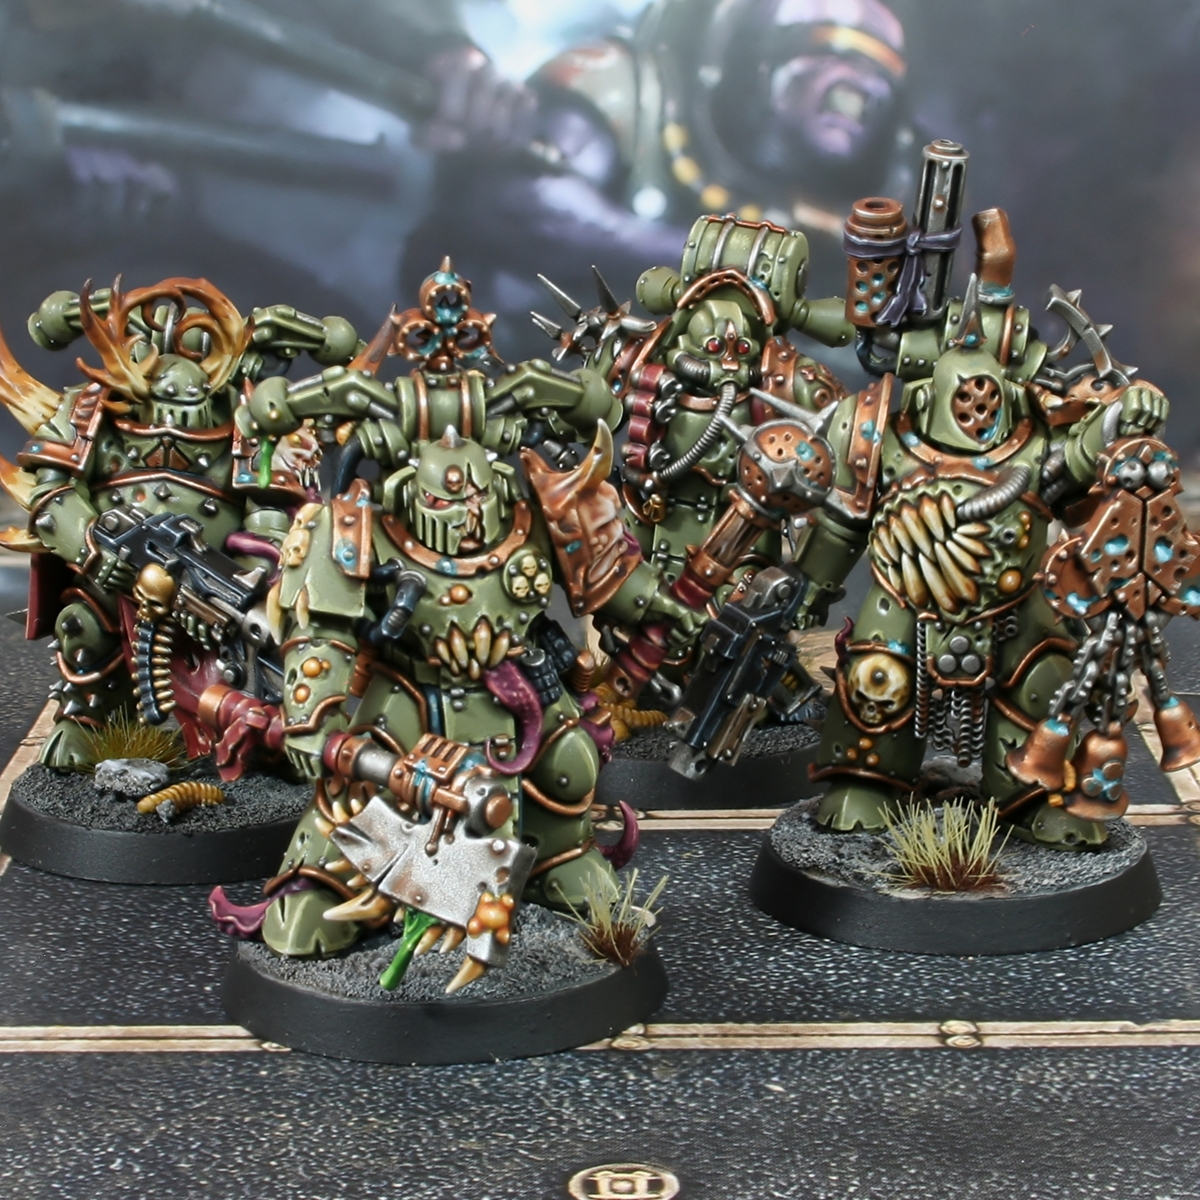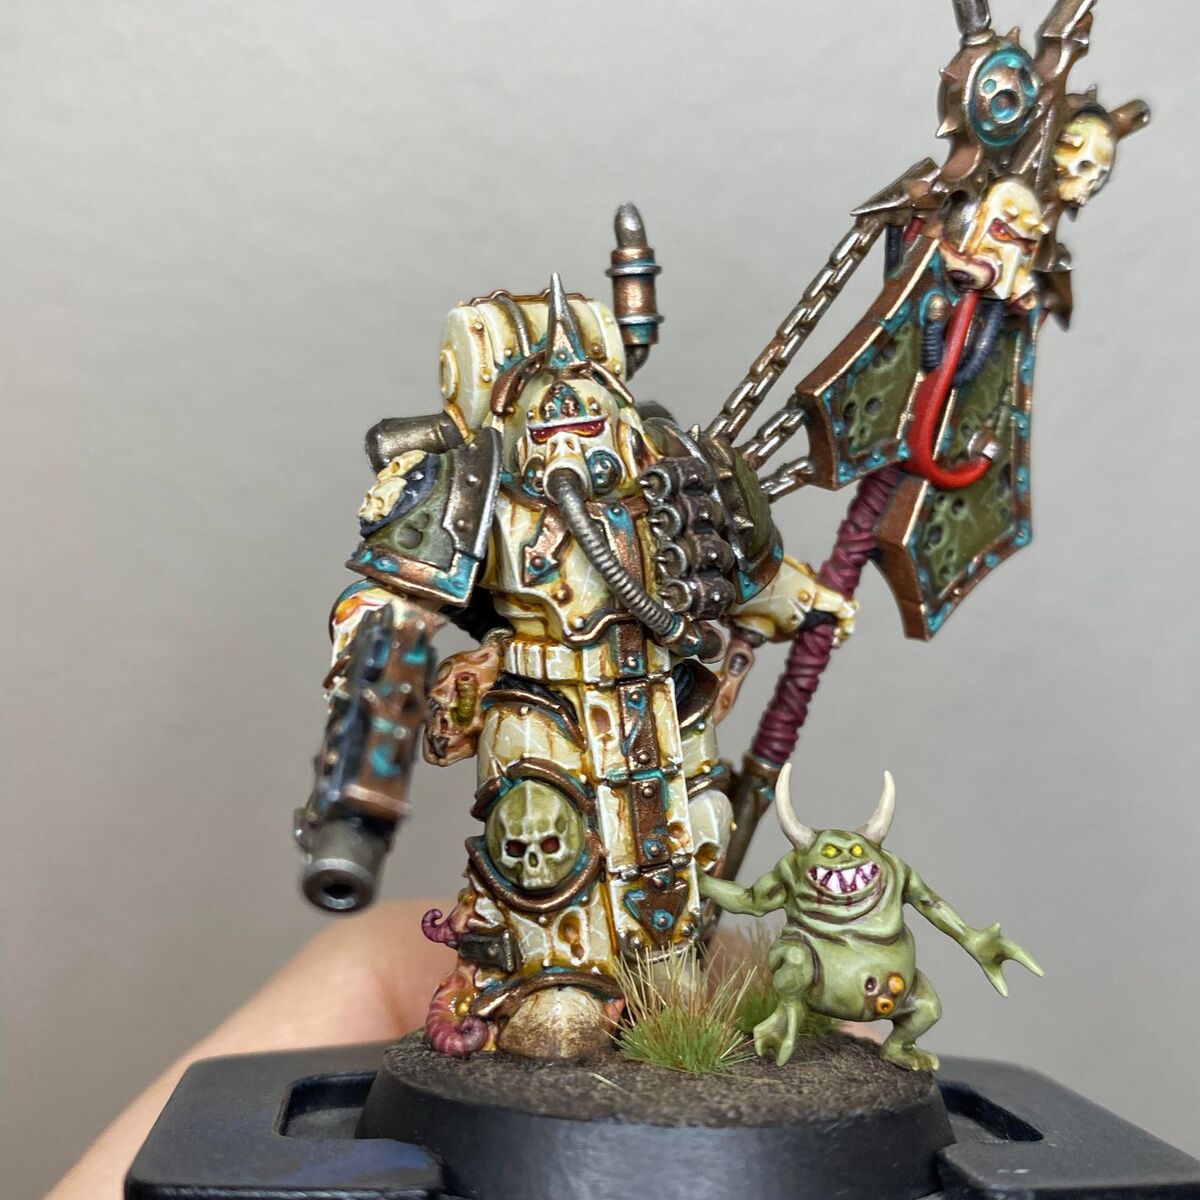
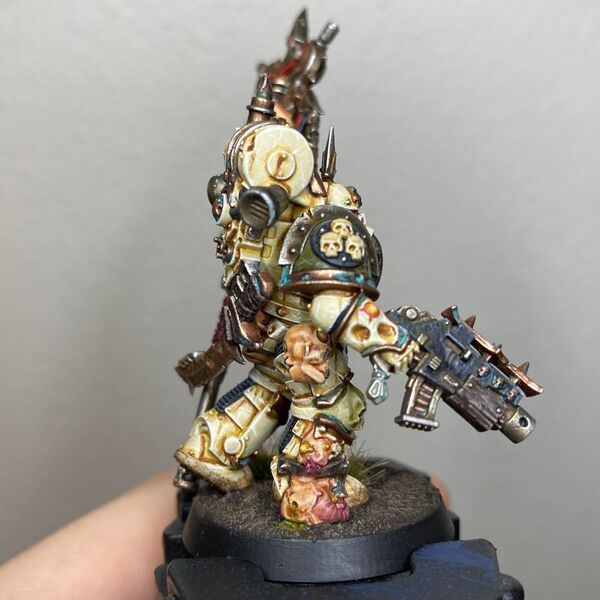
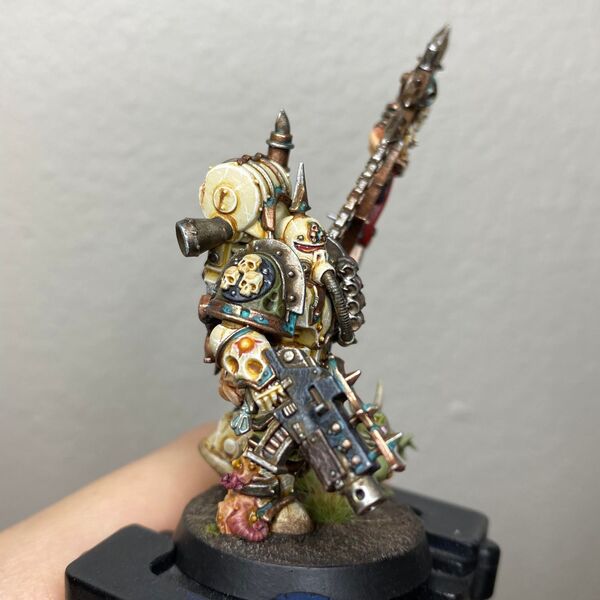
My Pallid Hand scheme mostly based on Duncan Rhodes' YT video with my own twist on the nurgly bits, cloth and horns! I figured it'd be good to write it down in case I forgot and I had a lot of people on Reddit ask how it's done so figured this might make things easier :D
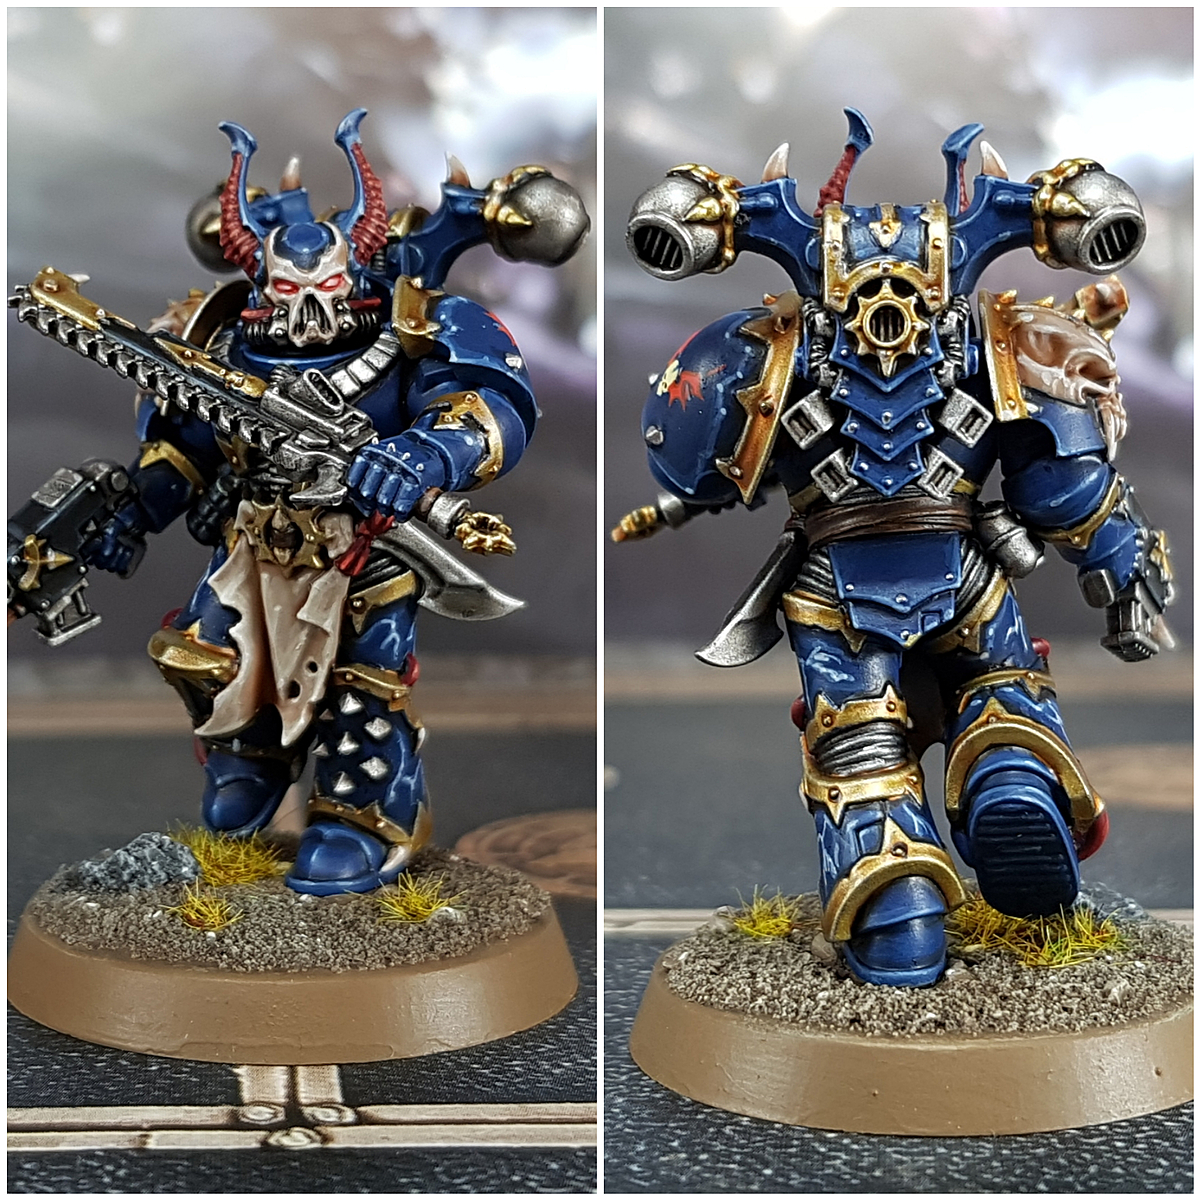
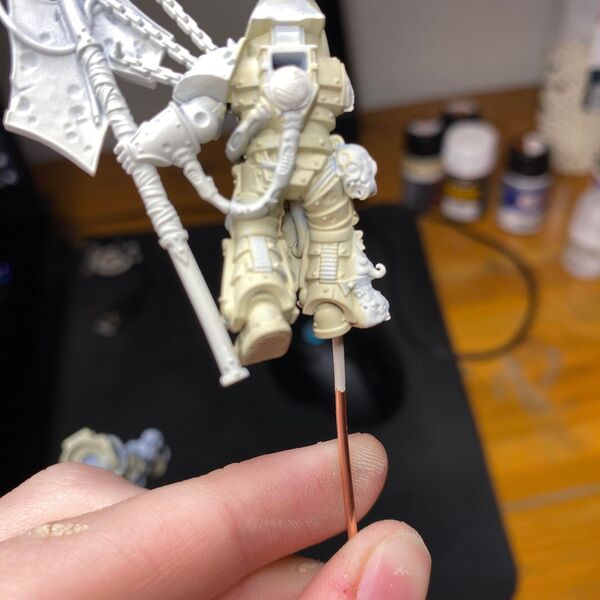 Basecoat the model's armour with Screaming Skull It might take 2-3 thin layers as the paint can be a little clumpy/chalky and needs to be thinned well.
- Basecoat any skulls and bones with Wraithbone
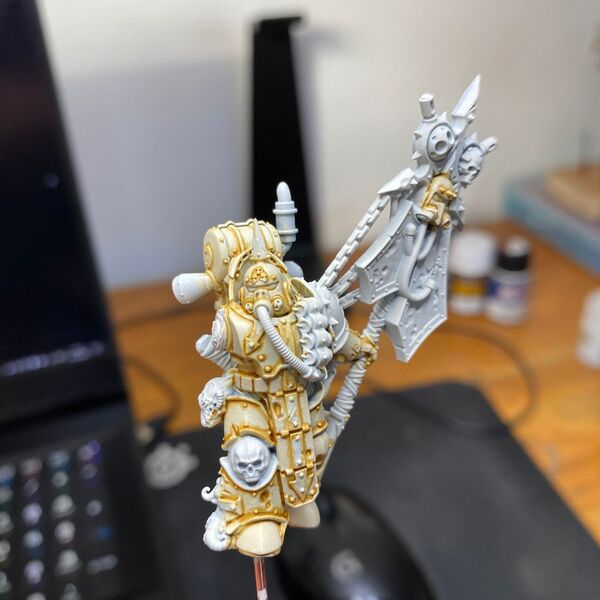 Recess shade the armour liberally with Seraphim Sepia This will help add the rusty and ageworn look to the armour. In my experience a little too much is better than too little but as always it's easier to add than remove. In this step you can also shade any skulls with Seraphim Sepia , or if you want a more rotting look/the skull is growing out of the armour use Athonian Camoshade . Make sure to thin the Athonian Camoshade well, as it can be very strong over the Wraithbone
 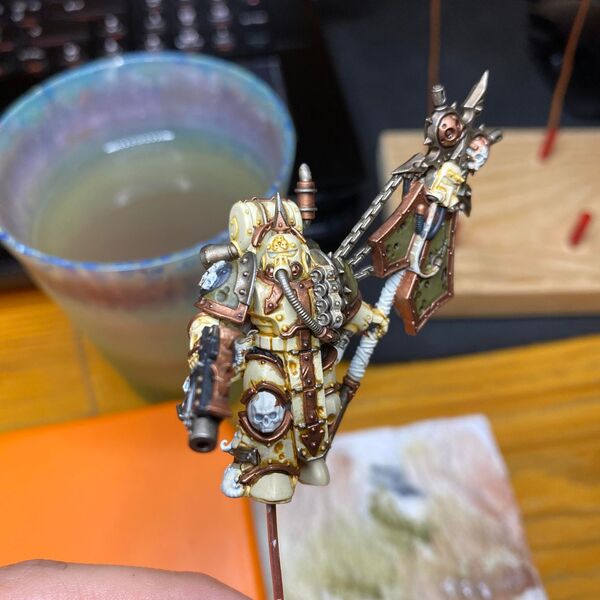 Start basecoating all the areas that will be shaded with Agrax Earthshade .
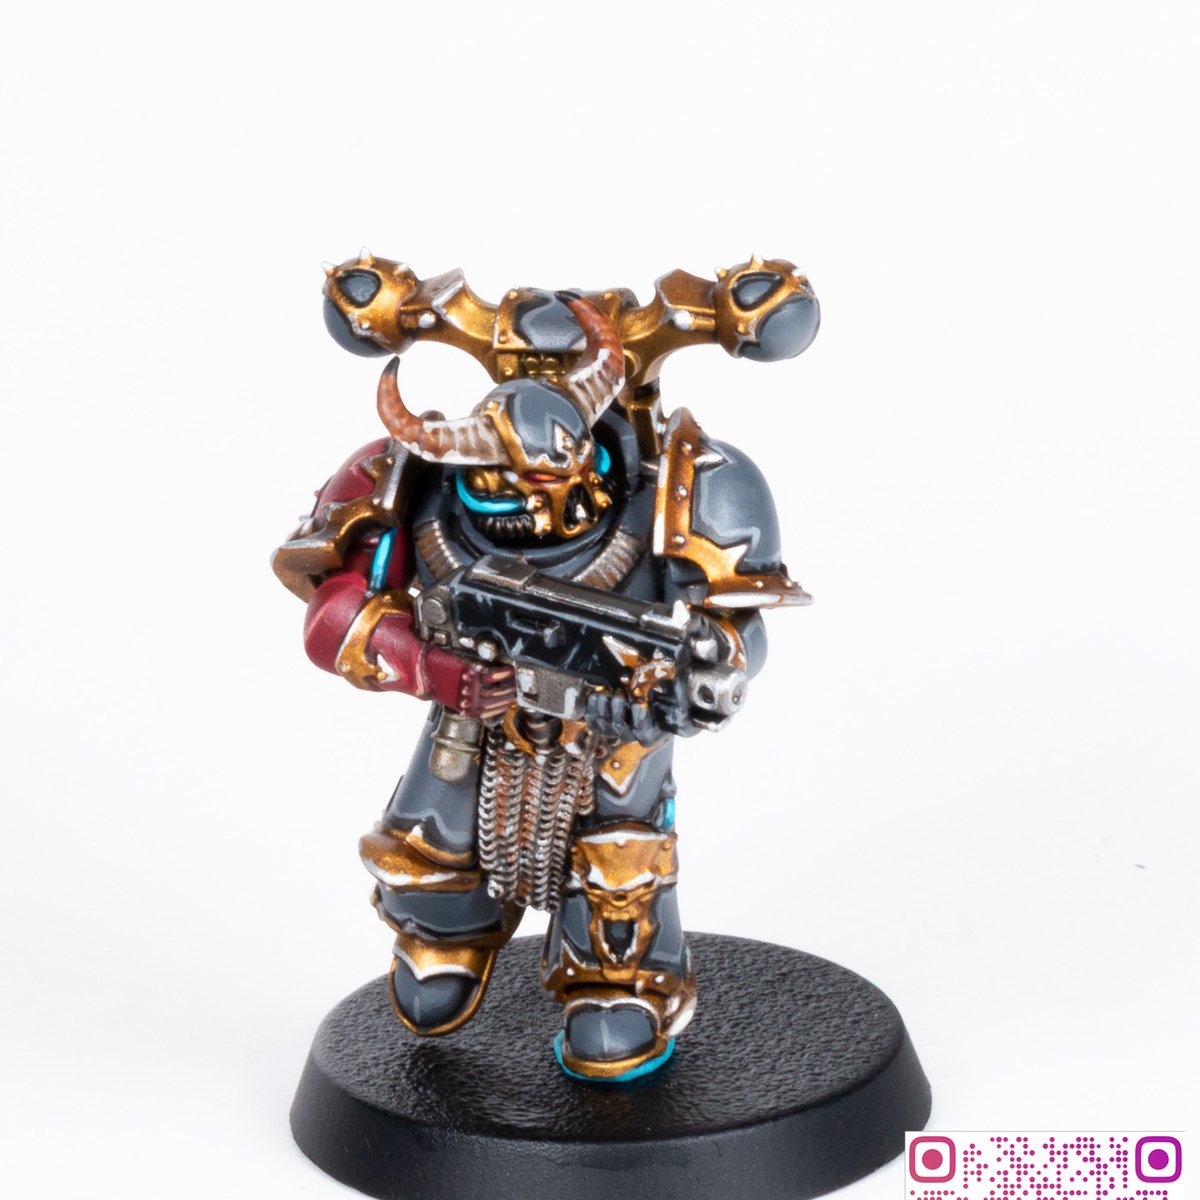
I use Deathworld Forest for the pauldrons,
Leadbelcher for any metal parts,
Balthasar Gold for the trim and occasional adornment/pipe etc.
Mephiston Red for smaller wires,
Khorne Red for cloth, Dryad Bark for any wood or leather,
and finally Corvus Black for any black areas like guncasings, ribbed pipes, the 'under suit', grenade handles and so on.
Finally do a liberal all-over shade of Agrax Earthshade on the aforementioned areas. Some areas might benefit from a second all-over coat or a more targeted second coat on places like rivets, pits, deep recesses and the like.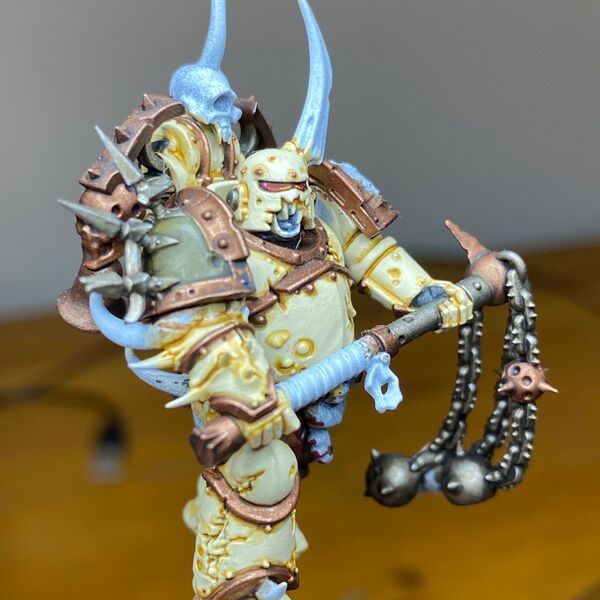 Lenses! I usually do lenses before I start highlighting the armour around it as it makes for far easier cleanup when I inevitably spill some Khorne Red onto the helmet.
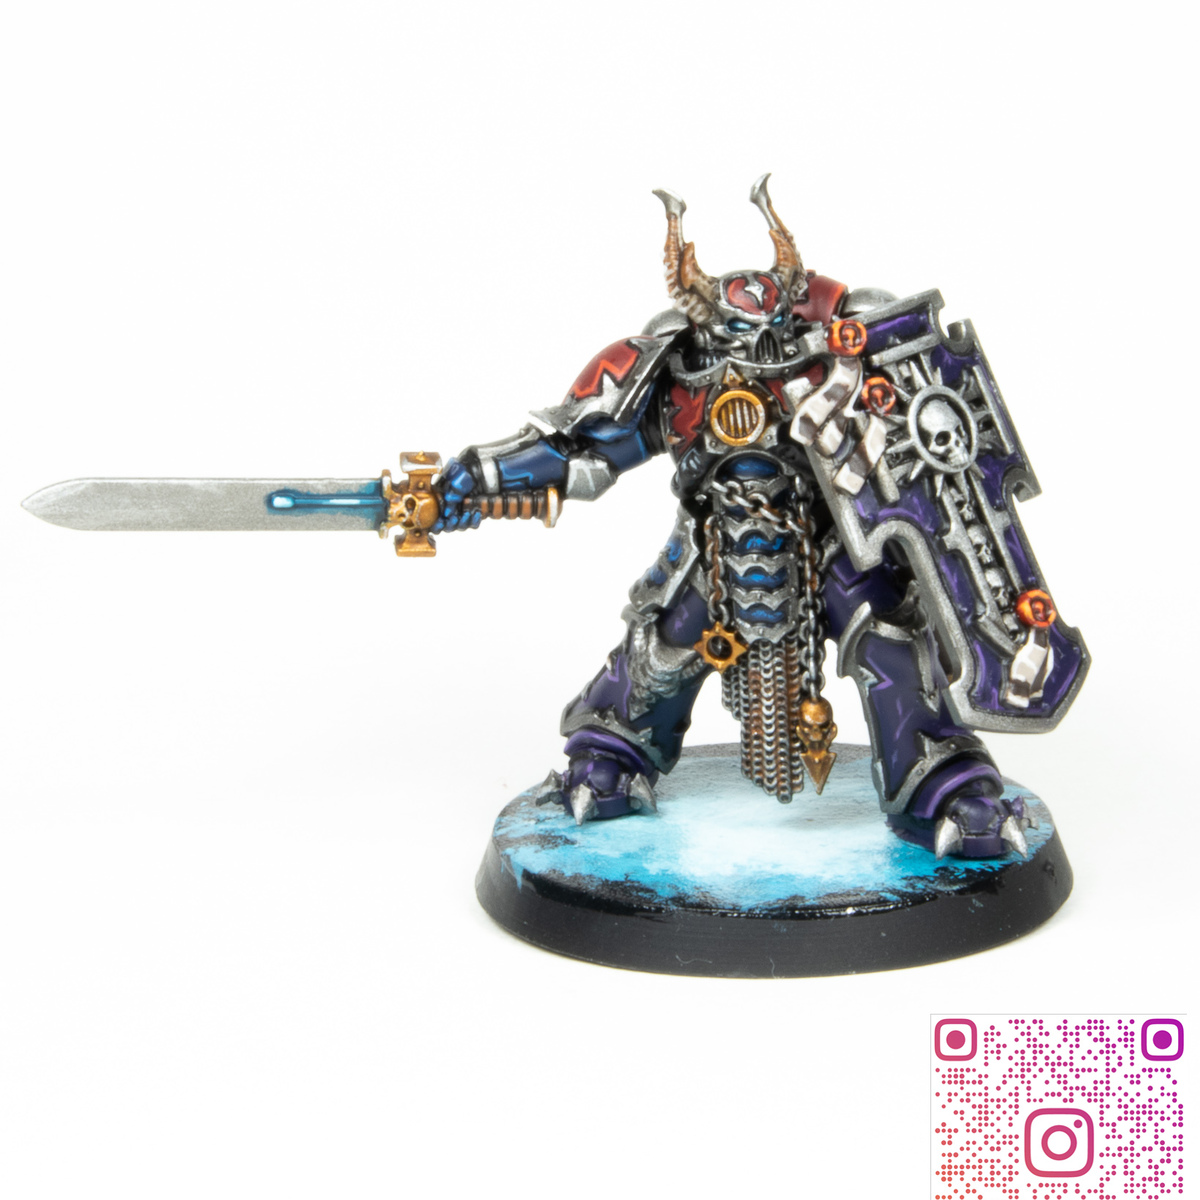
Start by basecoating with Khorne Red and doing a light bit of shading with Agrax Earthshade , focusing on the lower part of the lense.
Then move on to Evil Sunz Scarlet . Using Evil Sunz Scarlet draw a thin line going from the bottom 'front' of the lense to about the middle.
Then use Yriel Yellow to draw anothe thin line, over the top of the Evil Sunz Scarlet but only going about half, or a third of the way of the Evil Sunz Scarlet line.
Finally use Cold White , or any other pure white, to place a small dot of white in the opposite corner of the lense (from the lines). This should then give you a lense/gemstone effect. It can be a little tricky and might take a few models to get right.
It can be a little hard to visualize how to paint the lenses so if you're struggling check out Duncan Rhodes' old video on lenses here: https://www.youtube.com/watch?v=FZYObTNdhkA&pp=ygUYd2FyaGFtbWVyIDQwayByZWQgbGVuc2Vz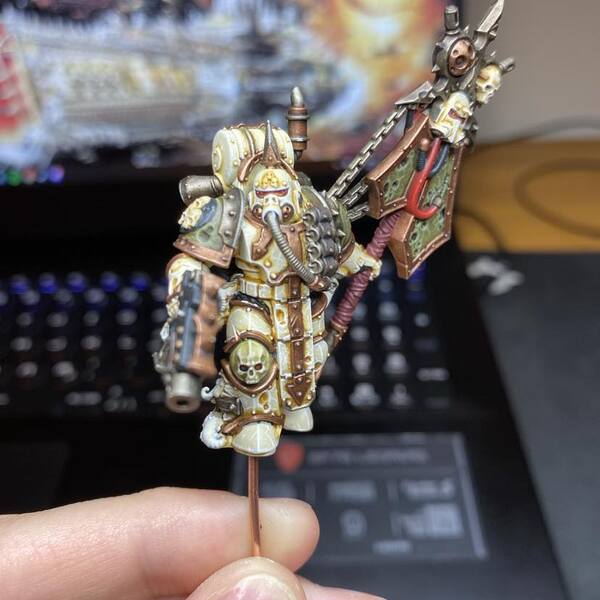 Now for highlighting the armour and adding a bit of battle damage! I use Off White for both highlighting and a few scratches here and there. The paint is a little clumpy and chalky (as most light and especially white paints are) so ensure that it's thinned and mixed well! I'd recommend dropping a ball bearing or two in the bottle to ensure it's shaken, not stirred.
Highlighting the armour can be tricky in areas where it's hard to reach so doing sub assemblies or simply leaving deeper areas un highlighted might be good especially if you're just starting out with highlighting. Alternatively if you're struggling; waiting with shading areas of the model with Agrax Earthshade until after you've highlighted will make later cleanup a little easier!
When it comes to the battle damage less is almost always more! Start out small and go from there. I often do a round of scratches and nicks and nacks and then go back to add/remove where needed using Screaming Skull . Scratches should be focused around areas like the edges of armour as well as places that would get dinged more often like knees and in general areas that have been highlighted. A scratch or two is a great way of breaking up big armour panels like thighs or torso. Painting on small dots of Off White near scratches as well as having scratches be broken into two or three parts can be a great way to add variety and keep the damage looking realistic and random!
Just always remember less is more and going back to add more scratches is easier than painting over them.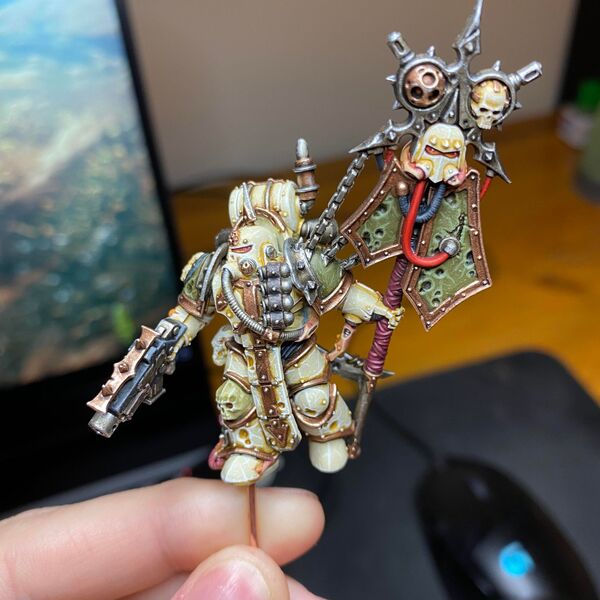 The next step is highlighting all the areas shaded with Agrax Earthshade as well as the skulls painted with Wraithbone !
- I use Deathworld Forest for the pauldrons as well as Elysian Green for the finest points, though this probably isn't needed on non-characters.
- For the Leadbelcher I use Stormhost Silver though any other decently brigt silver paint should do. Having a high contrast between the well-shaded Leadbelcher and the highlight will help give a more worn appearence as the recesses are dark and dirty while the edges have been worn at, polishing the metal to a shine.
- The Balthasar Gold gets a highlight of Sycorax Bronze and then, if you can be bothered, a very fine highlight of Stormhost Silver , which once again helps with the contrast giving that nice, worn look!
- Wires and other little nick-nacks painted with Mephiston Red are highlighted with either Evil Sunz Scarlet or Wazdakka Red depending on if you need a more sharp or soft tone, respectively.
- The cloth painted with Khorne Red is highlighted first with Khorne Red , then Wazdakka Red , then Squig Orange . All of these highlights should be done in a stippling motion, so that instead of a continuous line the highlights are broken up lines that that across the edge instead of along it. This creates a sense of texture that helps make the cloth look more like, well, cloth. It's easier to do on stuff like loincloths and capes but can be a achieved on wraps of clothes on e.g. knifes and staves and the like.
(Note that the cloth around the handle of the icon is painted with a more purple colour than Khorne Red as I was experimenting with different recipes. If you prefer this over the red cloth, using Screamer Pink as a basecoat, Agrax Earthshade for shading and a mix of Pink Horror and a bit of Screamer Pink in combination with the stippling technique, should give you the result in the picture.) - The Dryad Bark is highligted first with Gorthor Brown , then Baneblade Brown . For the leather use the same stippling manner as the cloth to create texture and if there is space for it, or if you have a steady hand, paint small scratches to simulate cracks in the leather. If you're painting wood making small skips in your highlights and painting thin slightly squigly lines along the grain of the wood will help making it look more realistic!
- For the Corvus Black areas I use Eshin Grey . Highlighting the pipes, handles, and 'under suit' is pretty straightforward, however the guncasings can really benefit from some added battledamage giving them a worn look especially for those of them that have sculpted damage to highlight around!
- For the skulls I highlight with Wraithbone and occasionally a very fine highlight of Off White , especially on the teeth.
 Next up is painting all the Nurgly bits! I use either Kislev Flesh or Pallid Wych Flesh as a basecoat for the Nurgly bits depending on if I want a more bruised/skin like look or a more necrotic feel to it.
- After the basecoats are done I use some slightly thinned Guilliman Flesh contrast paint over the entire area but focusing on the point where the tentacles/mass of flesh/Nurgly thing attaches to the model.
- Next up is Magos Purple and a bit of Volupus Pink . You'll want to paint the bottom third of any tentacles or sore areas with Magos Purple and then use Volupus Pink for the extremities and extra sore areas. If you're fast enough you can paint on the Magos Purple and Volupus Pink while the Guilliman Flesh is still wet, allowing you to easier blend the colours together.
- Next up is highlighting with the same paint as you based the areas with. You'll want to be a little careful and sparing as to not make the highlights too harsh and inorganic. If you've got tentacles or the like making very light thin highlights across the tentacles to suggest at 'bending lines' will help make it look more nasty and natural
 Next up is some nasty pustules! I basecoat all the pustules across the model with Averland Sunset
 - Then I shade the pustules with either Reikland Fleshshade or Guilliman Flesh depending on what I have at hand and how sore I want the pustules to look. If the pustules are part of the Nurgly bits lightly painting some thinned down Carroburg Crimson around them can really help to make them look sore and nasty!
- For the highlighting I use Averland Sunset again and then a mixture of Averland Sunset and increasing amounts of Flayed One Flesh until the pustule looks suitably nasty and ready to burst! Varying how much Flayed One Flesh you use in the mix can really help to give the pustules some variety in their 'ripeness'.
- Lastly I use some thinned down Nurgles Rot on some of the bigger pustules or clumps of pustules! It gives a real nasty look but make sure you use a brush that can take a bit of a beating as Nurgles Rot can be a little hard on brushes.
Citadel Painting System 34
Base 10
- Averland Sunset
- Balthasar Gold
- Corvus Black
- Deathworld Forest
- Dryad Bark
- Khorne Red
- Leadbelcher
- Mephiston Red
- Screamer Pink
- Wraithbone
Shade 5
- Agrax Earthshade
- Athonian Camoshade
- Carroburg Crimson
- Reikland Fleshshade
- Seraphim Sepia
Layer 15
- Baneblade Brown
- Elysian Green
- Eshin Grey
- Evil Sunz Scarlet
- Flayed One Flesh
- Gorthor Brown
- Kislev Flesh
- Pallid Wych Flesh
- Pink Horror
- Screaming Skull
- Squig Orange
- Stormhost Silver
- Sycorax Bronze
- Wazdakka Red
- Yriel Yellow
Technical 1
- Nurgles Rot
Contrast 3
- Guilliman Flesh
- Magos Purple
- Volupus Pink
Vallejo Game Color
Base 1
- 72.101 Off White
Vallejo Model Color
Base 1
- 70.919 Cold White