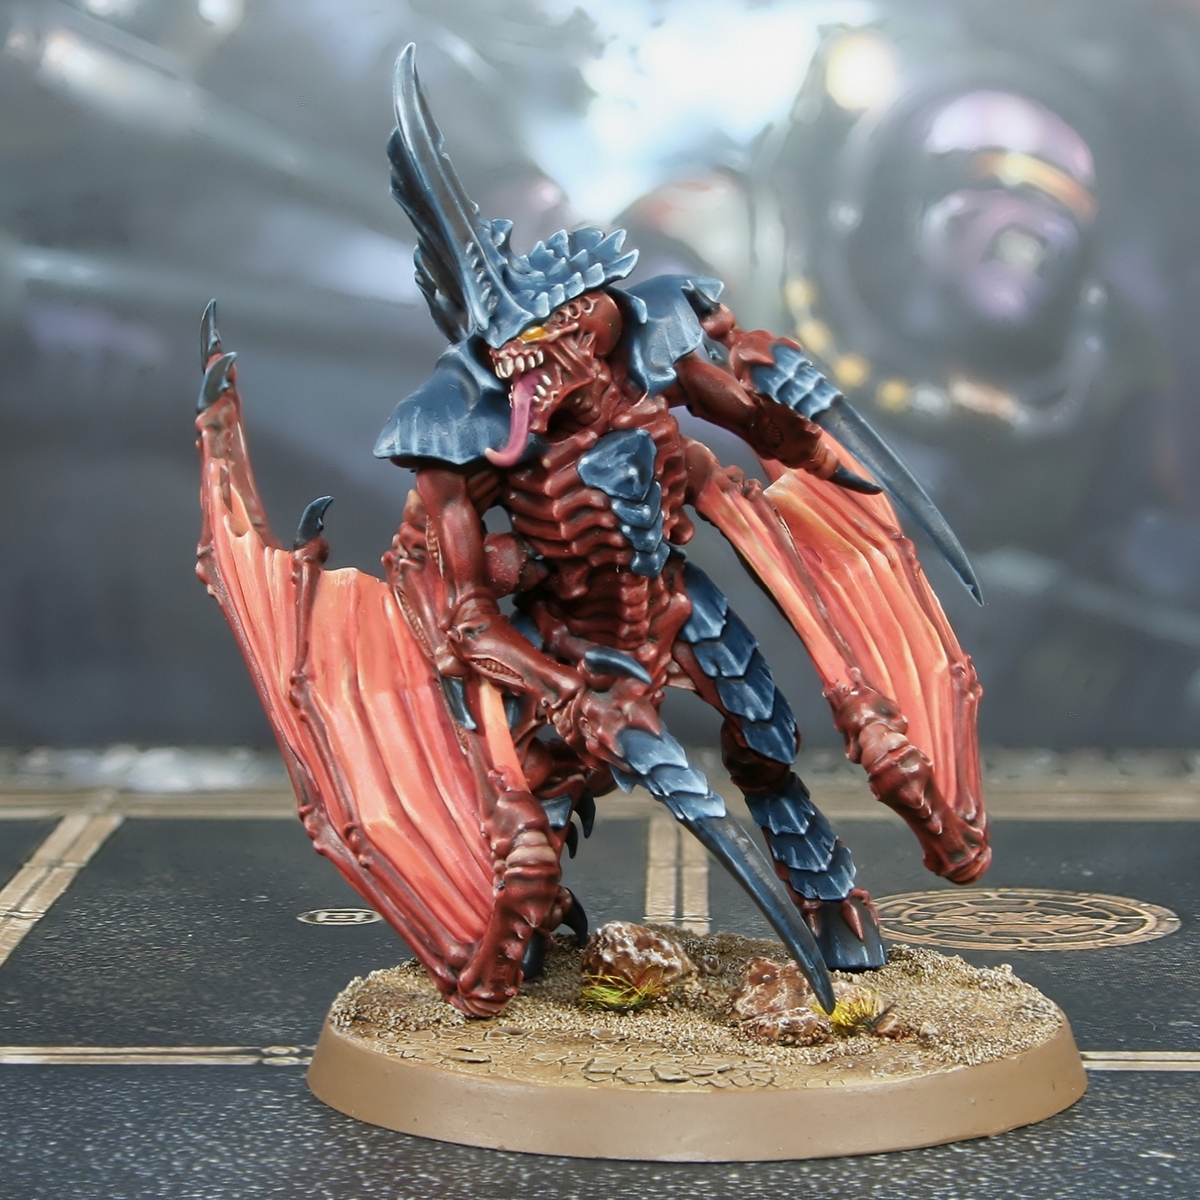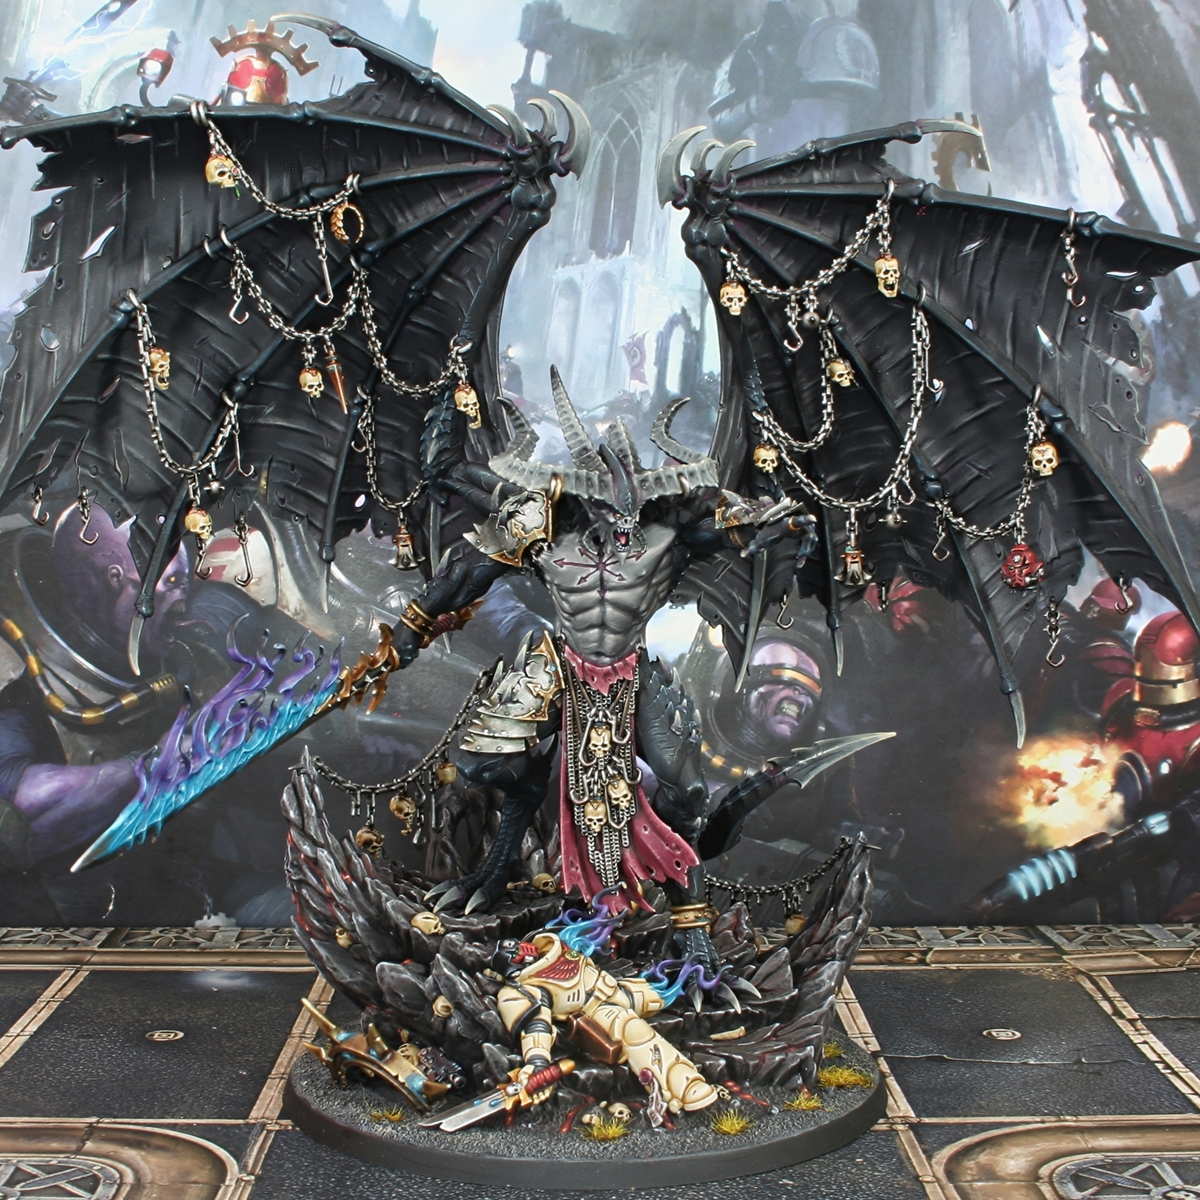

A step by step guide, showing how to paint Be'lakor. You could definitely use this on other Daemons too, if you wanted. My ain here was to get a look close to the box art, I'm happy with how he turned out.
The first thing I did was prime the whole model in Matt Black, I used one from Colour Forge. There is no reason why you couldn't use Chaos Black though.
 Black Skin & Scales
- Basecoat with Abaddon Black .
- Drybrush with Stegadon Scale Green . I used a soft makeup brush and tried to just build up volumes at the this stage.
- More lightly drybrush with 1:1 Stegadon Scale Green and Sons of Horus Green .
- Selectively highlight the skin with 1:1 Sons of Horus Green and Karak Stone .
- Add a little White to your Sons of Horus Green and Karak Stone mix, then pick out a very very small/specular highlights in certain places.
On areas where there are scales, I drybrush and highlight slightly heavier. Because the scaled areas are so dense, and textured, it should read as a much lighter colour and a different material.
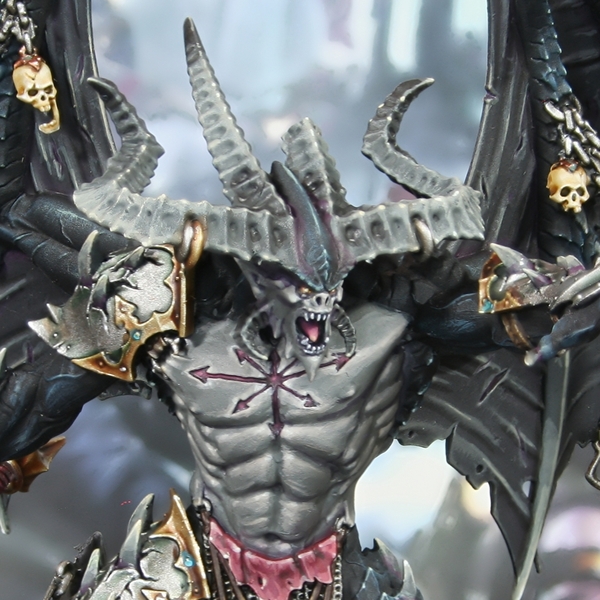 Grey Skin
- Basecoat with 2:1 Skavenblight Dinge and Rakarth Flesh .
- Flood the chaos symbol on his chest with a mix of Screamer Pink , Khorne Red and Abaddon Black . The paint I used was in roughly equal parts, we want the colour to be rich, but dark enough to contrast the highlighted flesh.
- If you are feeling adventurous, feel free to highlight the more open parts of the symbol with Screamer Pink and Pink Horror .
- Add general shading with Skavenblight Dinge
- Deep shade with small amounts with an equal parts mix of Skavenblight Dinge , Naggaroth Night and Abaddon Black .
- Highlight with Basecoat with 2:1 Skavenblight Dinge and Rakarth Flesh ..
- Apply finer highlights of Rakarth Flesh .
- With a 1:1 mix of Rakarth Flesh and Deepkin Flesh .
- Apply very small/specular highlights of Deepkin Flesh in select places.
It is quite easy to go overboard with this skin and go too bright, especially on the chest. If you find yourself in this position, consider glazing towards recesses with the 2:1 Skavenblight Dinge and Rakarth Flesh basecoat colour.
 Eyes
Eyes
- Basecoat the whole eyeball with Averland Sunset .
- More selectively highlight with Yriel Yellow .
- Add a specular highlight of Ice Yellow (or Dorn Yellow ) in the centre of the eye.
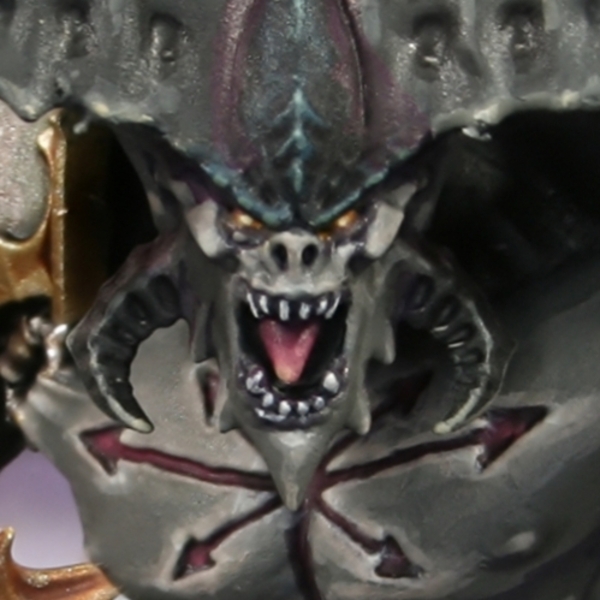 Teeth
Teeth
- First of all define the recesses around the teeth by washing with the deepshade mix of Skavenblight Dinge , Naggaroth Night and Abaddon Black . I would advise thinning it to a wash consistency, to make sure it runs in.
- Pick out the teet carefully with Pallid Wych Flesh .
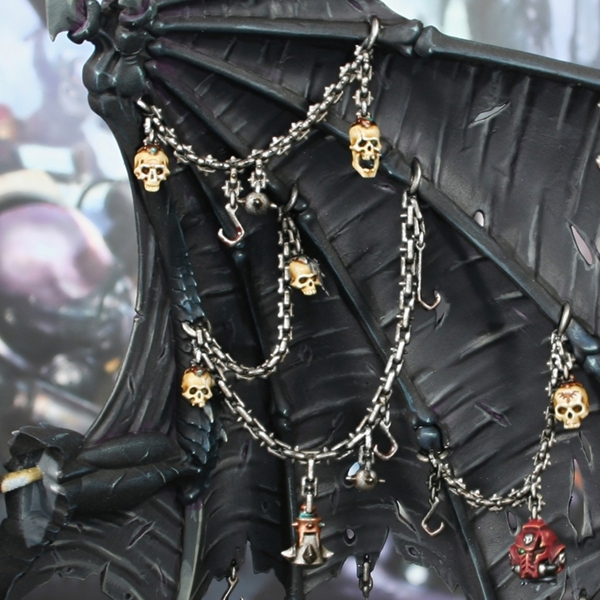
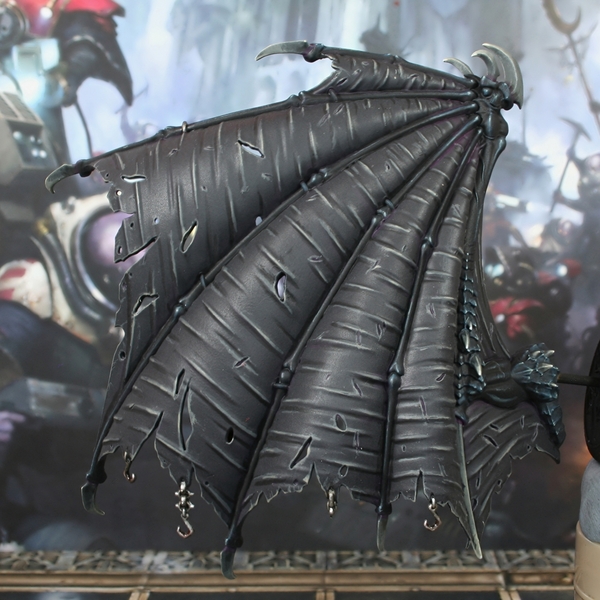 Grey Wing Membranes
- Basecoat with 2:1 Corvus Black and Dryad Bark .
- Shade recesses with thin Abaddon Black .
- Mix Naggaroth Night and Screamer Pink 1:1 and thin it to a glaze consistency. Now run this mix into tears and glaze over patches where the bloodflow would be greater. I would recommend sticking to the underside of fleshy looking ripples where the membrane meets the "arm".
- Take what remains of your Corvus Black and Dryad Bark base coat and mix it 2:1 with Karak Stone . With this mix add some general highlights.
- I wasn't super happy with how dark the membranes were at this point. To lighten them, I dry brushed the central parts with the above mix, moving my brush in a downward motion only. I then added a touch more Karak Stone and was more selective.
- Finally, I finished off with more selective edge highlights of Karak Stone .
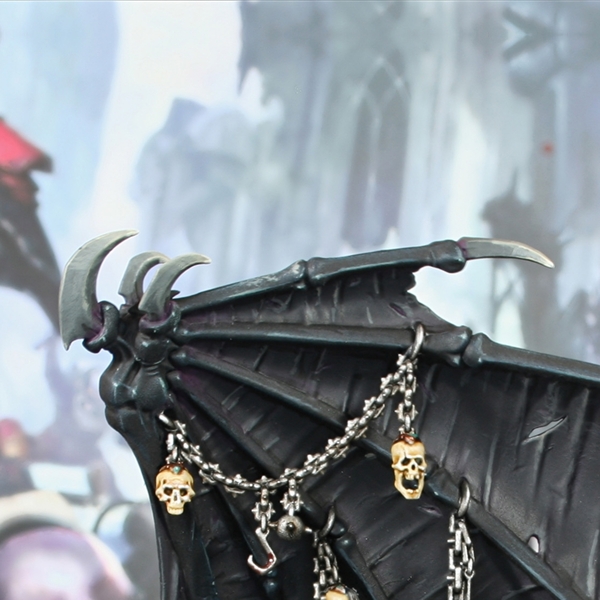 Wing Claws
- Basecoat with Skavenblight Dinge .
- Drybrush the two thirds closest to the tip with 2:1 Skavenblight Dinge and Ushabti Bone . Also edge highlight with this mix.
- Mix more Ushabti Bone in, so the mix is now 1:2 Skavenblight Dinge and Ushabti Bone . Now drybrush the third closest to the tip and edge highlight tow thirds of the claw.
- If you want to shade any bits of the claws or shade around the "elbow spike", I would recommend using a 1:1 mix of Nuln Oil and Abaddon Black .
- With pure Ushabti Bone edge highlight the top third and add a little to the tip for good measure.
- Selectively highlight at the brightest point with a mix of Ushabti Bone and White .
- Finish with specular highlights of White .
- Around the base of the claws, where they meet flesh, I like to run in a little colour. For this I use a 1:1 mix of Naggaroth Night and Screamer Pink . This is thinned heavily with water and a little flow improver.
 Leather Straps
- Basecoat with Rhinox Hide .
- Highlight with 1:1 Rhinox Hide and XV-88 .
- Apply fine highlights of XV-88 .
- Mix some Ushabti Bone into your XV-88 and selectively highlight.
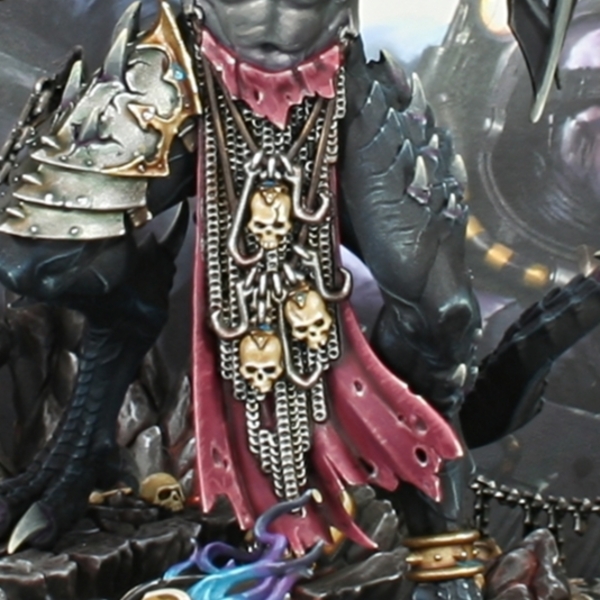 Red Loincloth
- Basecoat with a 1:2 mix of Wazdakka Red & Screamer Pink
- Add shading to recesses with a mix of Khorne Red & Barak-Nar Burgundy .
- Add some Abaddon Black to your Khorne Red & Barak-Nar Burgundy mix, then shade more selectively.
- Make scratchy highlights around the edge of the cloth with 1:1 Wazdakka Red & Morghast Bone .
- Now highlight again, this time with thinner highlights. I used the previous Citadel/WazdakkaRed: & Morghast Bone mix, with an equal amount of Ushabti Bone added to it.
- Selectively highlight with pure Ushabti Bone .
- Finially, mix some White into your Ushabti Bone (roughly 1:1, and add very small/specular highlights.
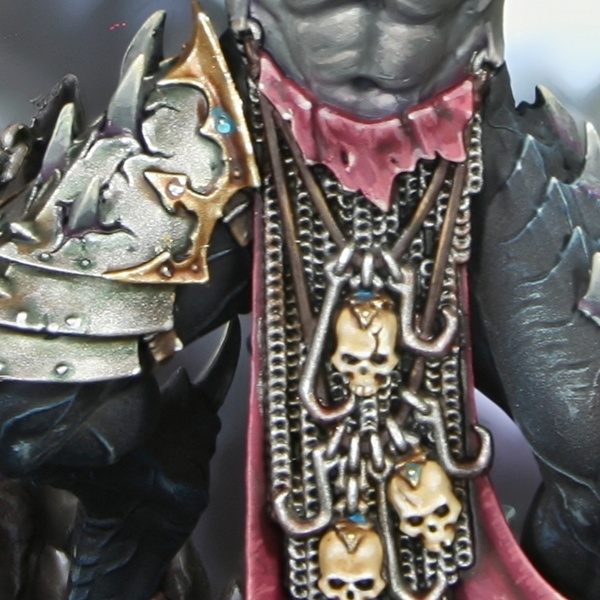
 Steel
Steel
- Basecoat with Leadbelcher .
- Wash with Nuln Oil .
- Overbrush with Ironbreaker .
- Pick out selective highlights with Silver RLM01 Metallic or your preferred light silver.
If you want to add further variety to the steel, I would recommend glazing some browns into areas where dust would collect (ideally after the Nuln Oil wash). I did this around pronounced spikes and in parts of the chainmail with Agrax Earthshade .
Similarly, I noticed that the official artwork has a lot of greens on his armour. I attempted to emulate this with an equal parts mix of Nuln Oil , Coelia Greenshade and Biel-Tan Green . I glazed this to enhance shading, after the Nuln Oil stage.
 Chaos Gold
- Basecoat with an equal parts mix of Retributor Armour , Silver RLM01 Metallic and Dryad Bark .
- Wash with 1:1 Reikland Fleshshade and Agrax Earthshade .
- Shade the deepest recesses with 1:1 Rhinox Hide and Black . If you are feeling lazy, just use some Agrax Earthshade .
- Increase the amount of Silver RLM01 Metallic in the base mix and edge highlight.
- FInish with selective highlights of Silver RLM01 Metallic
- In areas where you want to build us some oxidisation, glaze in some Sotek Green .
- You can enchance the above step my mixing increasing amounts of White into your Sotek Green and applying smaller patches.
- For very oxidised areas, pop in a tiny amount of pure White .
I wanted the hilt of the sword to look like a richer gold than the armour trim. To achieve this, I added a drop of Gore-grunta Fur and 2 of Contrast Medium to the mix at the wash stage, then proceeded with the highlights as normal. I think this sets the two masses of gold apart.
 Gold
Gold
- Basecoat with 2:1 Retributor Armour and Silver RLM01 Metallic .
- Wash with Guilliman Flesh .
- Add increasing amounts of Silver RLM01 Metallic to your Retributor Armour and apply highlights.
- Add specular highlights with Silver RLM01 Metallic .
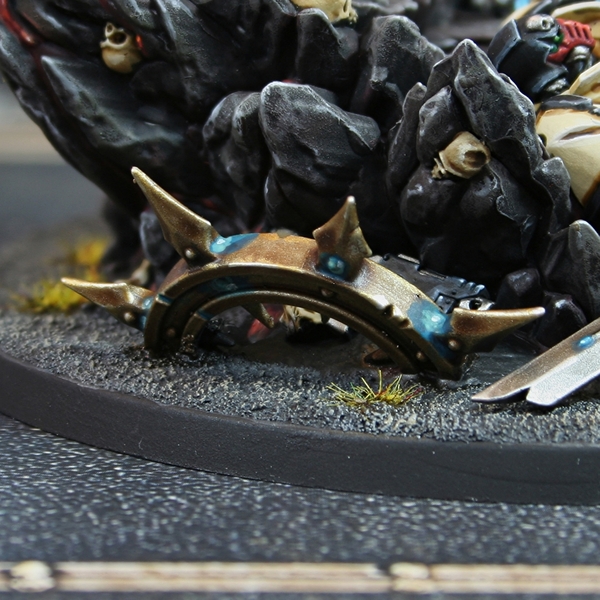
 Bronze Armour Trim
- Basecoat with Hashut Copper mixed with just a touch of Doombull Brown , about 9:1 if you wanted a ratio.
- Shade recesses and around recesses with Agrax Earthshade .
- In the very deepest parts, add line shading with a thin 1:1 mix of Khorne Red and Abaddon Black .
- Mix some light gold and silver into the base mix, so the paints are roughly in equal parts. If you wanted to use Citadel paints, I would recommend Liberator Gold and Stormhost Silver . Use this mix to add highlights to edges.
- Increase the amount of Stormhost Silver and add fine highlights.
- With pure Stormhost Silver add selective specular highlights. I prefer Vallejo Model Air Silver RLM01 Metallic .
- To add verdigris to the bronze, mix Sotek Green and Kabalite Green 1:1 and run it into recesses. To enhance the effect, mix in increasing amounts of White Scar and cover a small area.
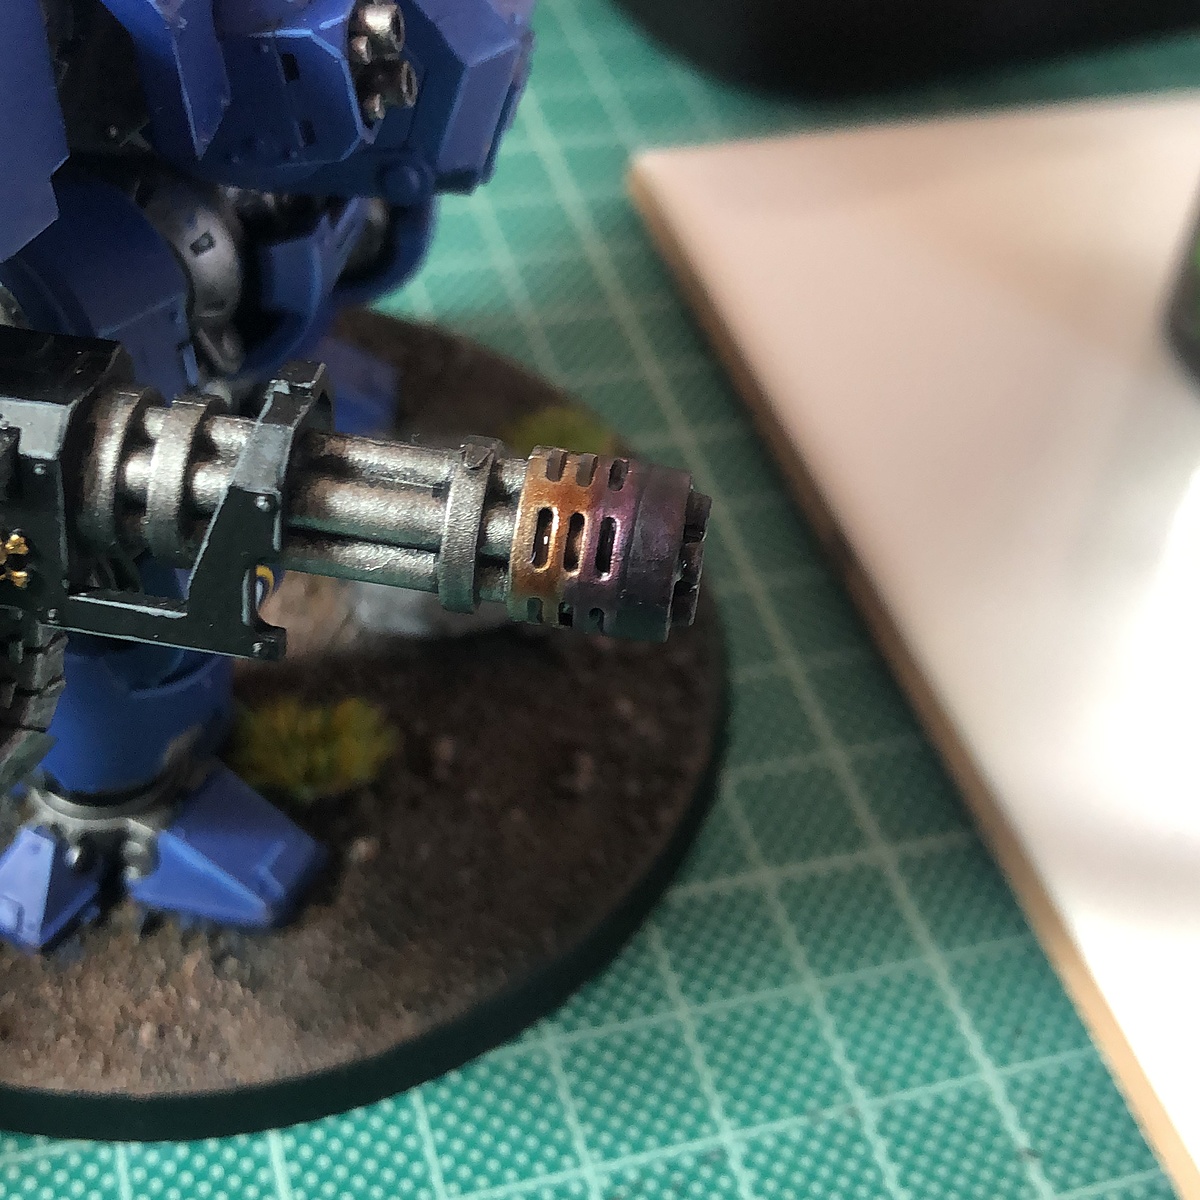
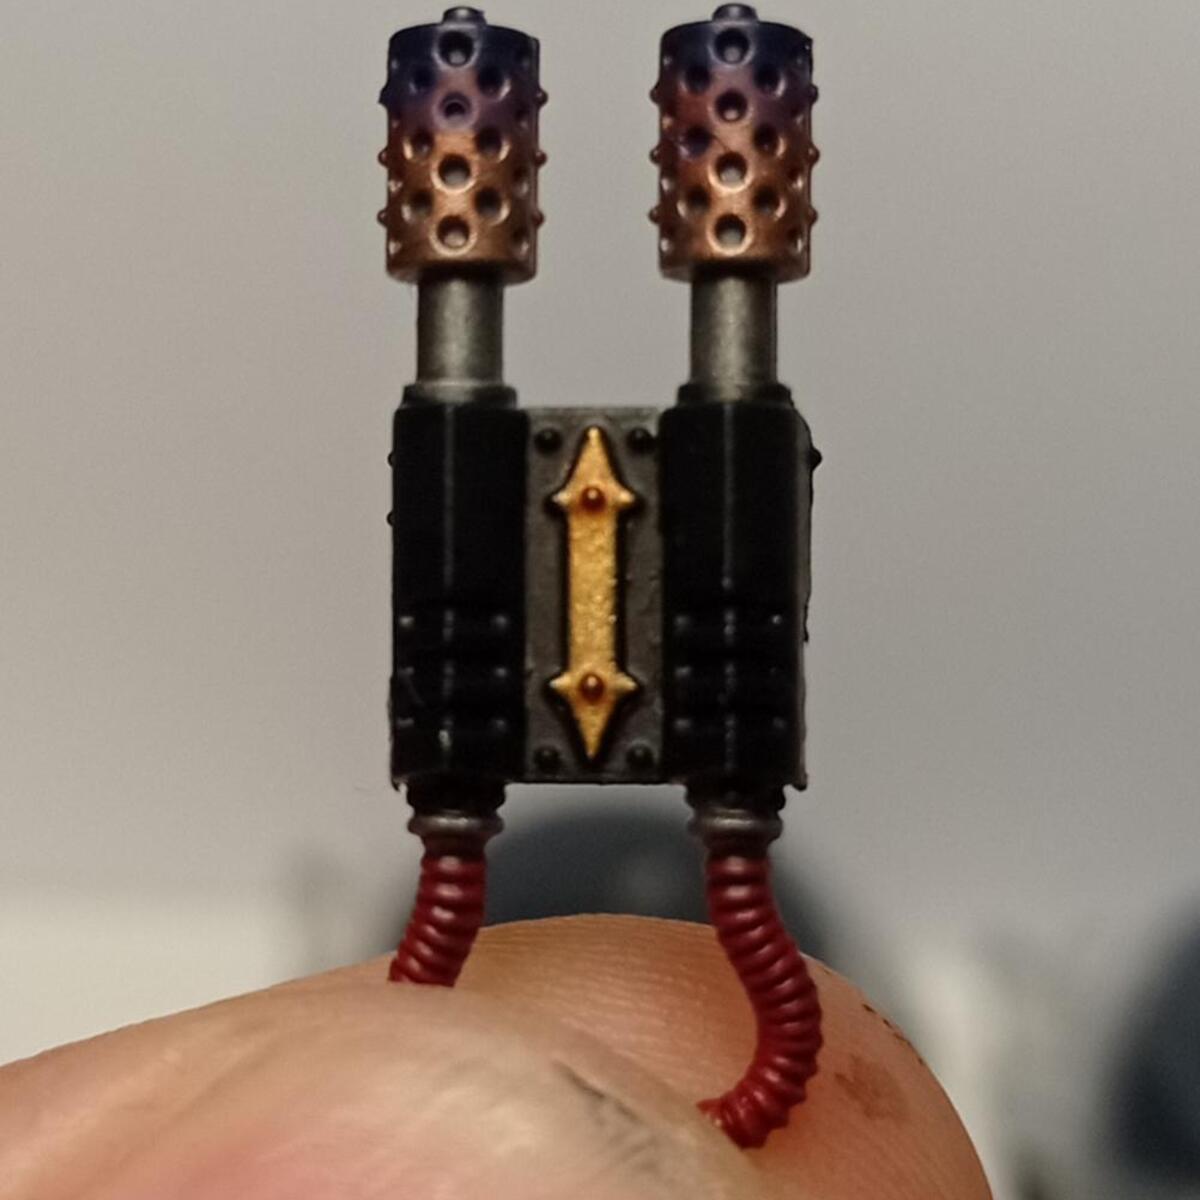
 Blue Flames/Smoke
- Basecoat the with Sotek Green .
- Glaze all of the flames that come away from the mass of flames with Xereus Purple .
- Glaze the tips with Corvus Black .
- Highlight up the blue portion, making the highlights smaller and smaller. For this I used Temple Guard Blue , Baharroth Blue and White , in that order.
- Highlight up the purple portion, making the highlights smaller and smaller. For this I used a Xereus Purple / Baharroth Blue mix, then mixed in a little White for the final highlight.
- I highlighted the tip in a similar way, to finish the flames. For this I just mixed increasing amounts of White into my Corvus Black .
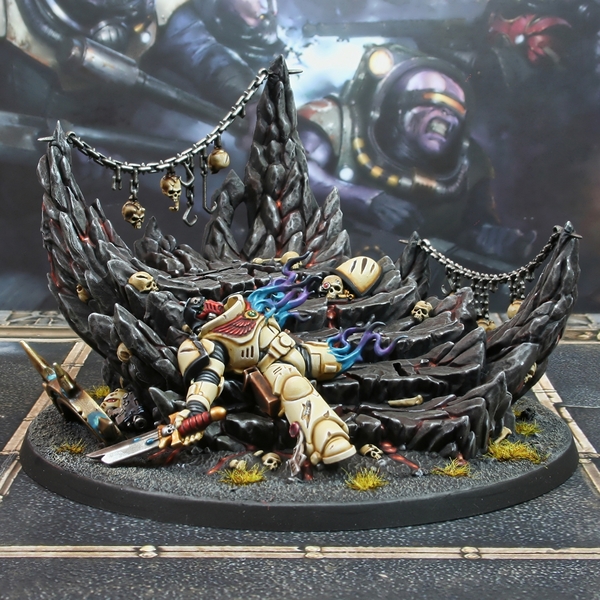 Base Rocks
- Ensure a solid basecoat of :black or Abaddon Black before painting, if the primer hasn't done a good enough job already.
- Give all of the stone a heavy drybrush of Rhinox Hide , coverring most of the surface. Really get into it with circular motions, getting pigment on eveything but the deepest recesses.
- Overbrush all of the rocks with Stormvermin Fur , picking out raised details.
- More selectively drybrush with 1:1 Stormvermin Fur and Administratum Grey . Ypou should be aiting to just catch harsh edges with this pass.
- The rock was looking a little boring at this point, so I glazed some of the rock with Death Korps Drab . This is to suggest moss or other subtle growth.
- Pop some Administratum Grey on a brush and selectively highlight curved ages and corners that you want to stand out.
- Mix Administratum Grey and White , just adding specular highlights to points and the sharpest of corners that would catch light.
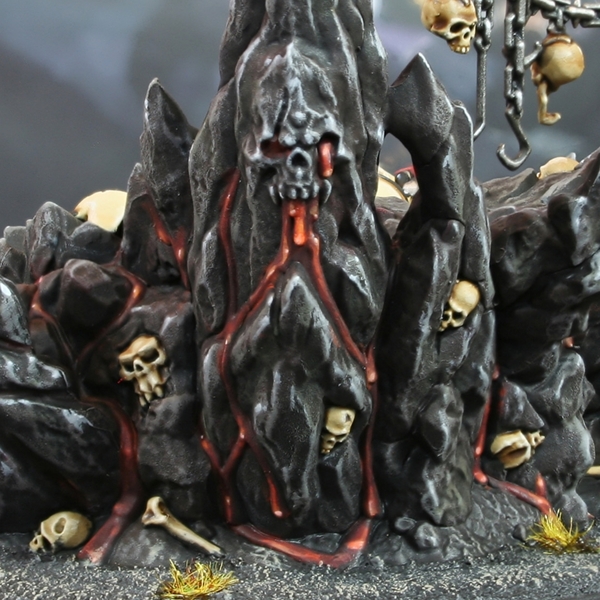 Lava
Lava
- Basecoat with 1:1 Abaddon Black and Khorne Red . For the deep recesses I thinned my paint with water and a little flow improver, using a long thin brush.
- Now pick out the exposed bits with Khorne Red .
- Now apply finer highlights with Wild Rider Red .
- Selectively highlight with Fire Dragon Bright .
- Apply small/specular highlights of White .
- We now pump the vibrancy by glazing all of the highlighted areas with Orange Fluorescent .
- In very select places, re-highlight with dots of White where relevant.
 Skulls
- Basecoat with Ushabti Bone .
- Wash with Agrax Earthshade , Seraphim Sepia or a mix of the two. I misex it up to add a little variety to the shading.
- Pick out highlights with 1:1 Screaming Skull and Ushabti Bone .
- Mix White into the Screaming Skull and Ushabti Bone mix, then highlight more selectively.
- Finish off with dots of White in points and corners.
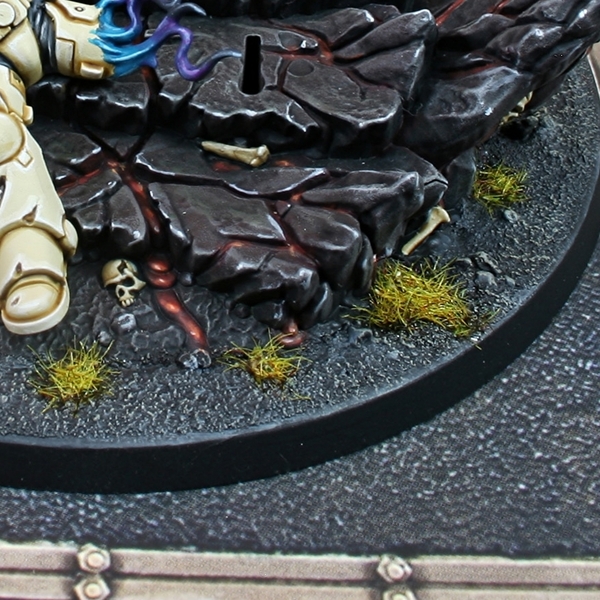 Grey Ground
- Basecoat with Mechanicus Standard Grey .
- Wash with Nuln Oil .
- Drybrush with Karak Stone .
- Lightly drybrush with Screaming Skull .
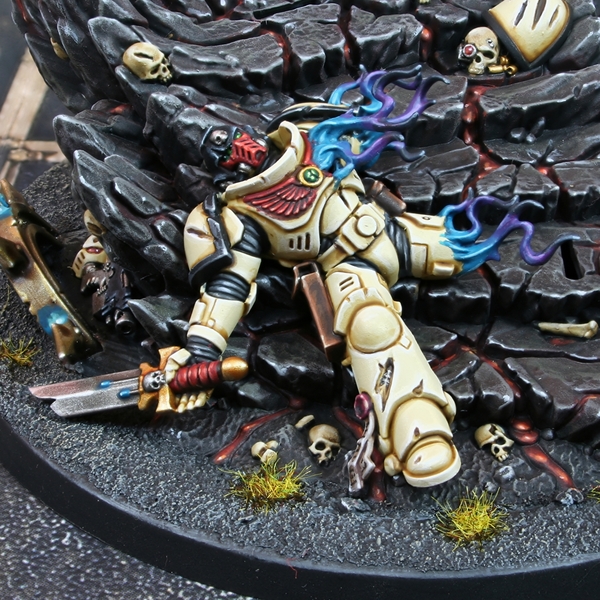 For the Space Marine on the base, I used my pretty standard Tome Keepers reciepe. You can find some pretty detailed guides as to how I paint them on my profile. I painted a Tome Keepers Space Marine as they are my chapter of choice, but there are probably more sensible colour choices that could be made for this element.

Rookie Brushes
RookieBrushes
Aspiring miniature painter and biscuit enthusiast. Here to share my hobby and help where I can.
Citadel Painting System 53
Base 17
- Abaddon Black
- Averland Sunset
- Barak-Nar Burgundy
- Corvus Black
- Death Korps Drab
- Dryad Bark
- Khorne Red
- Leadbelcher
- Mechanicus Standard Grey
- Morghast Bone
- Naggaroth Night
- Rakarth Flesh
- Retributor Armour
- Rhinox Hide
- Screamer Pink
- Stegadon Scale Green
- XV-88
Shade 6
- Agrax Earthshade
- Biel-Tan Green
- Coelia Greenshade
- Nuln Oil
- Reikland Fleshshade
- Seraphim Sepia
Layer 26
- Administratum Grey
- Baharroth Blue
- Deepkin Flesh
- Doombull Brown
- Dorn Yellow
- Fire Dragon Bright
- Hashut Copper
- Ironbreaker
- Kabalite Green
- Karak Stone
- Liberator Gold
- Pallid Wych Flesh
- Pink Horror
- Screaming Skull
- Skavenblight Dinge
- Sons of Horus Green
- Sotek Green
- Stormhost Silver
- Stormvermin Fur
- Temple Guard Blue
- Ushabti Bone
- Wazdakka Red
- White Scar
- Wild Rider Red
- Xereus Purple
- Yriel Yellow
Technical 1
- Contrast Medium
Spray 1
- Chaos Black
Contrast 2
- Gore-grunta Fur
- Guilliman Flesh
Vallejo Model Air
Base 1
- 71.063 Silver RLM01 Metallic
Vallejo Model Color 4
Base 3
- 70.858 Ice Yellow
- 70.950 Black
- 70.951 White
Fluorescent 1
- 70.733 Orange Fluorescent