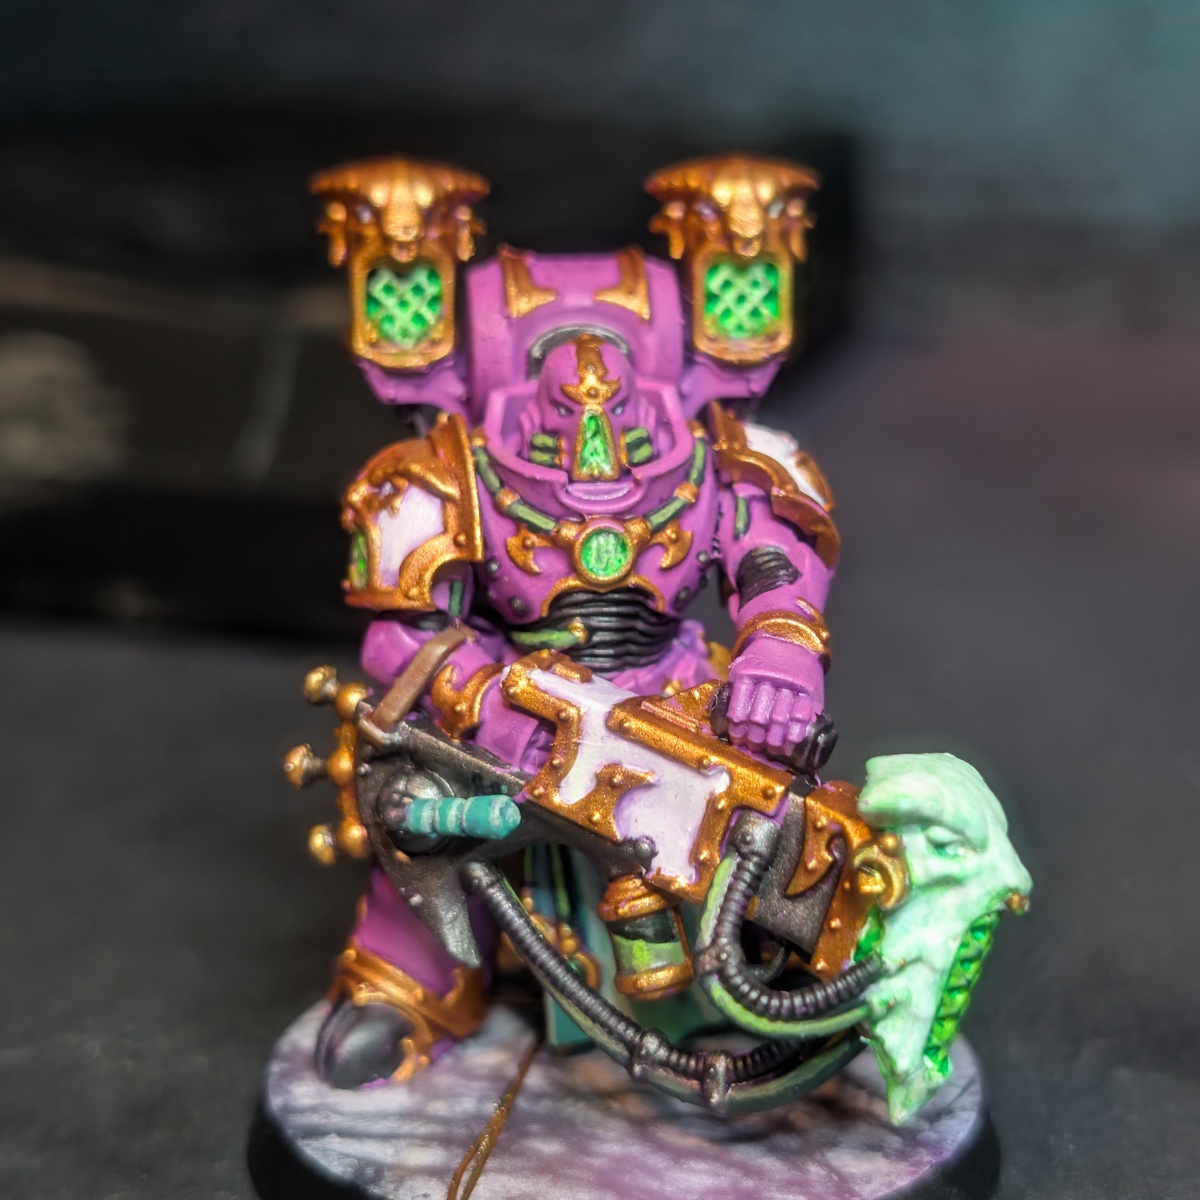
Regal Emperor's Children
Heresy era inspired EC
Airbrush Base Coat
 V1:
* Full coat of Warlock Magenta over black primer
* 45° highlight coat of Spellbound Fuchia
* 90° zenithal of Enchanted Pink
V2 (Improved contrast):
* Full coat of Warlock Magenta over black primer
* 30° from vertical midtone of Impish Rouge
* 90° zenithal of Fulgrim Pink , including highlights on areas like legs and arms.
Detail Base Coat
 Black Templar on under suit regions, hooves, foot bottoms, gun handles and magazines, and ribbed tubes
 Trooper White for shoulder pads, noise marine weapon heads and bodies, decorative panels on guns
 Ghoul Green for tassles, loin cloths, eye lenses, whammy bar handle
 Wyvern Green smooth tubing, belt hanging cords
 Mournfang Brown leather straps, holsters, pouches, and obsessionist whips
 Skeleton Legion for any corks on bottles
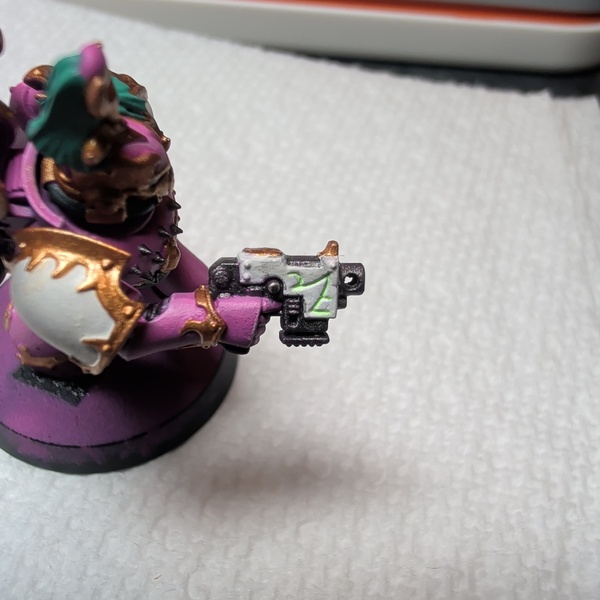 Data System Glow in weapon engravings
Vials of Drugs
 Wyvern Green for base coat on vials
 Orc Hide for vial liquid
 Leafy Green for highlight and bubbles in vial liquid, with central dots of Orc Hide in the bubbles
 Matt Black above liquid line but not covering whole vial
 Mecha Gloss Varnish on vials to add shine
Flayed Flesh
 Flayed One Flesh base coat
 Sharp highlights with Pale Sand
 2:1 mix of Reikland Fleshshade and Doomfire Magenta wash
 Iron Warriors on studs
Metallics Base Coat
 Iron Warriors for non gold metals like some body elements of noise marine weapons, ports on armor, studs, blades
 Retributor Armour chaos trim be like (include guards and ornamentation on blades)
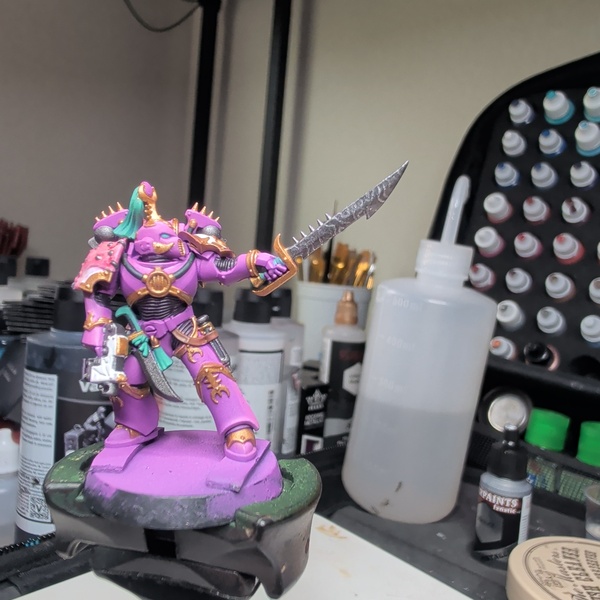 Paint squiggles on blade with Mithril to mimic pattern of Damascus Steel
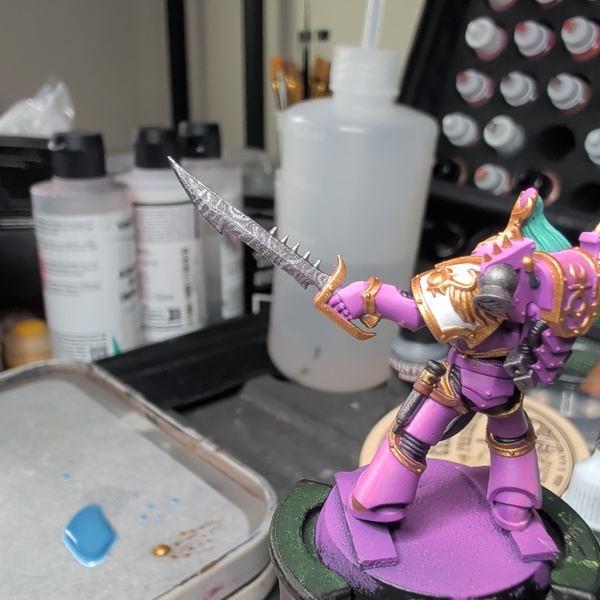 Highlight sharp edges of blade with Mithril
Noise Marine Glow
 Paint grilles with Retributor Armour
 Base Coat intended glowing areas with the inks by AK immaculate white
 Do several 2-3 thin coats of Data System Glow over the ink
Plasma Glow
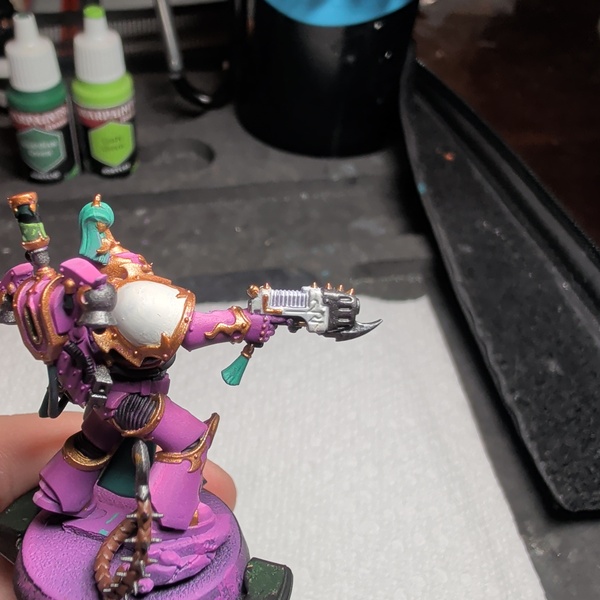 Base coat coils with Bold Titanium White
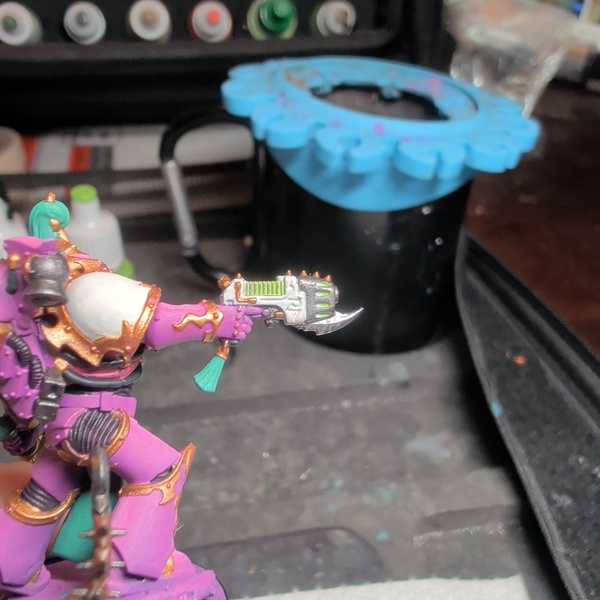 Coat all but the deepest parts with Leafy Green
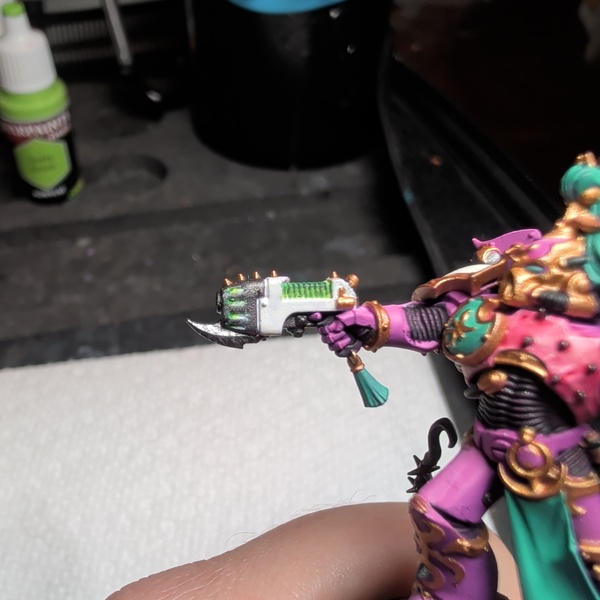 Coat highest parts with Guardian Green
Highlights
 Highlight sharp armor edges with Fulgrim Pink
 Highlight smooth tubing with Orc Hide
 Bright highlight on tubing with Leafy Green
 Highlight cloth, tassles, and eye lenses with Forest Faun
 Sharp eye lens highlights with Bold Titanium White
 Bold Titanium White highlights on weapond, shoulder pads
 Dust Bowl highlights on leather
- Gloss Varnish on syringes and other fluid containers that haven't already been treated like the vials
Shading
 1:5 Warp Lightning to Warpaints Stabilizer for recess shading on head of sonic blaster
 1:1 Druchii Violet to Warpaints Stabilizer shade across all of the model other than sonic blaster head and vials
Gemstones
 Death Reaper base coat
 Wyvern Green blob in lower 1/3-1/2 of stone
 Jade Green smaller blob within Wyvern Green area
 Bold Titanium White point highlights in top of gem and lower colored area
 Warp Lightning shade over the gemstone
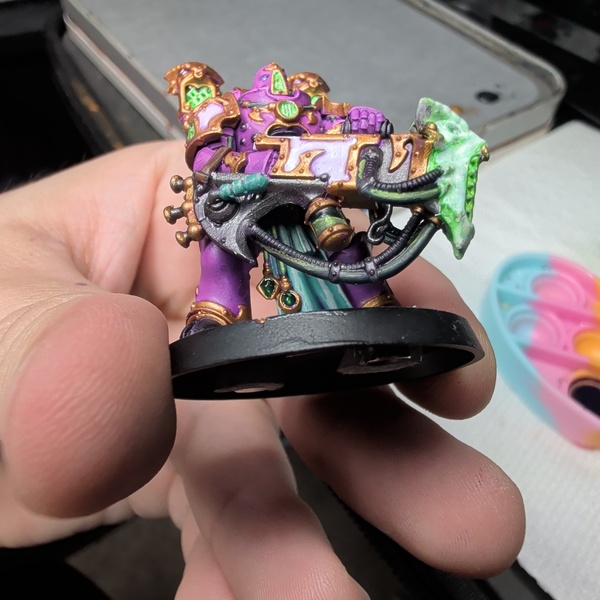 Gloss Varnish over the gems to add extra shine
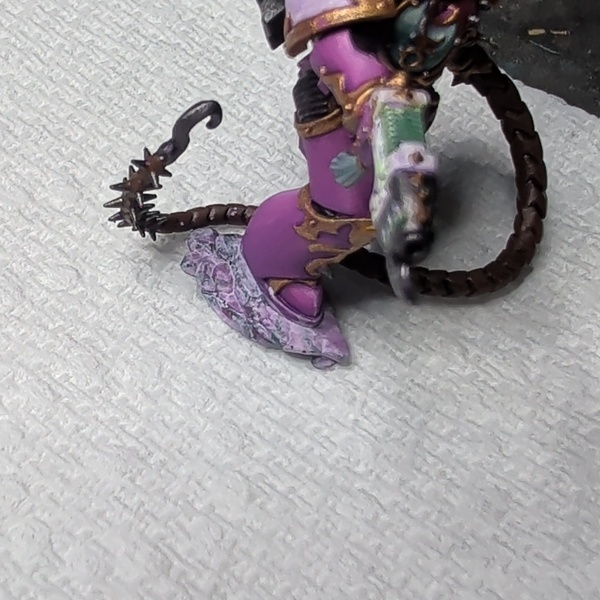 Tactical Rocks
 Paint veins of Death Reaper , Gal Vorbak Red , Warlock Magenta , and Fulgrim Pink . These veins should be close to/touching each other
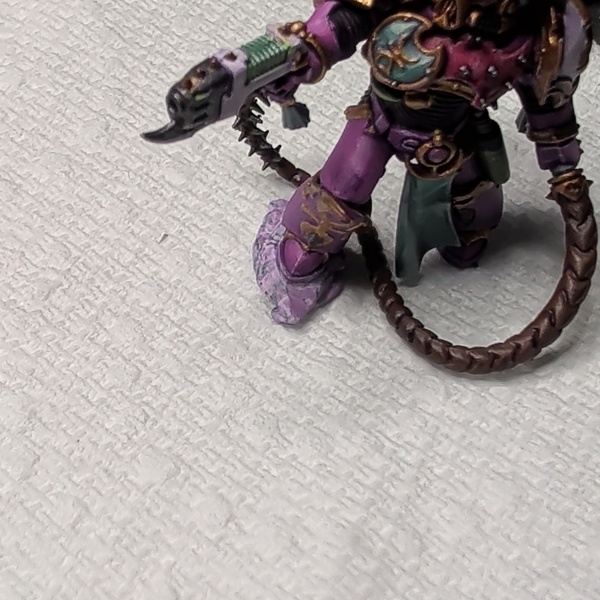 Glaze with 1:1 mix of Fulgrim Pink and Bold Titanium White to allow veins to show through while matching marble color from bases.
 Marble Bases
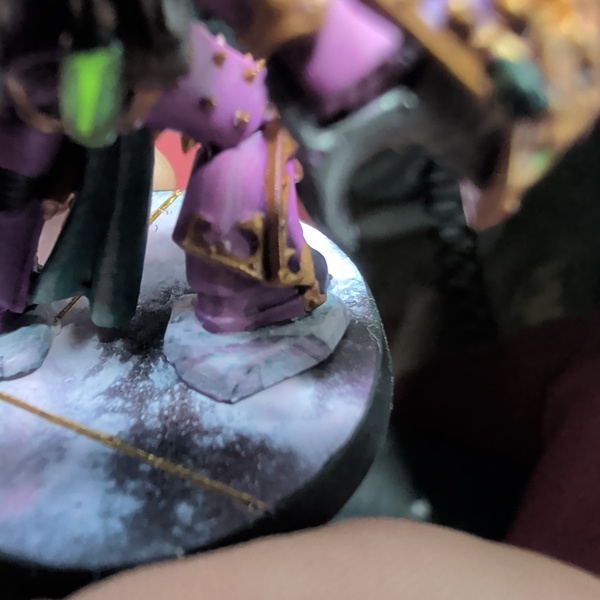
 Wet sand base top smooth (240, 320, 400, 800 grit in that order)
 Black prime
 Death Reaper splotches
 Smaller Gal Vorbak Red splotches within Death Reaper areas
 Even smaller Warlock Magenta splotches in previous areas, Fulgrim Pink for brightest areas
 Stretch out a wet wipe until it looks like picture. These can be fragile so take it slow until it has this webbing look
 1:1 mixture of Fulgrim Pink and Bold Titanium White for top coat, through wet wipe webbing. Paint the base rim Matt Black
 Etch lines into marble for tile gaps. Can use a straight edge and a hobby knife, but I've had good success with a Tamiya plastic scriber
 Gloss Varnish over the base to make it look smooth and reflective
 Retributor Armour in the tile lines
Citadel Painting System 11
Base 4
- Gal Vorbak Red
- Iron Warriors
- Mournfang Brown
- Retributor Armour
Shade 2
- Druchii Violet
- Reikland Fleshshade
Layer 2
- Flayed One Flesh
- Fulgrim Pink
Contrast 3
- Black Templar
- Doomfire Magenta
- Warp Lightning
Monument Hobbies Pro Acryl
Base 1
- 001 Bold Titanium White
The Army Painter Warpaints Fanatic 13
Acrylic 9
- Enchanted Pink
- Forest Faun
- Guardian Green
- Impish Rouge
- Leafy Green
- Matt Black
- Pale Sand
- Spellbound Fuchia
- Warlock Magenta
Effect 3
- Data System Glow
- Gloss Varnish
- Warpaints Stabilizer
Metallic 1
- Mithril
Two Thin Coats 8
Shade 3
- Dust Bowl
- Orc Hide
- Wyvern Green
Midtone 3
- Death Reaper
- Jade Green
- Skeleton Legion
Highlight 2
- Ghoul Green
- Trooper White
Vallejo Mecha Color
Base 1
- 69.701 Mecha Gloss Varnish
Vallejo Surface Primer
Base 1
- 70.602 Black