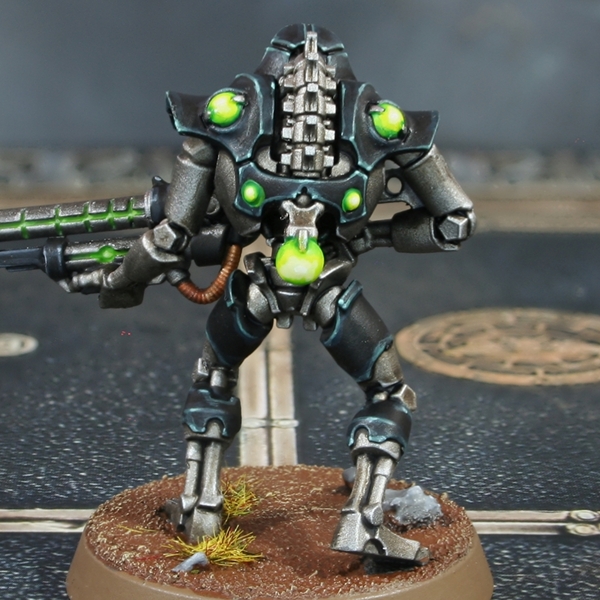
Necron Deathmarks (Sautekh Dynasty)
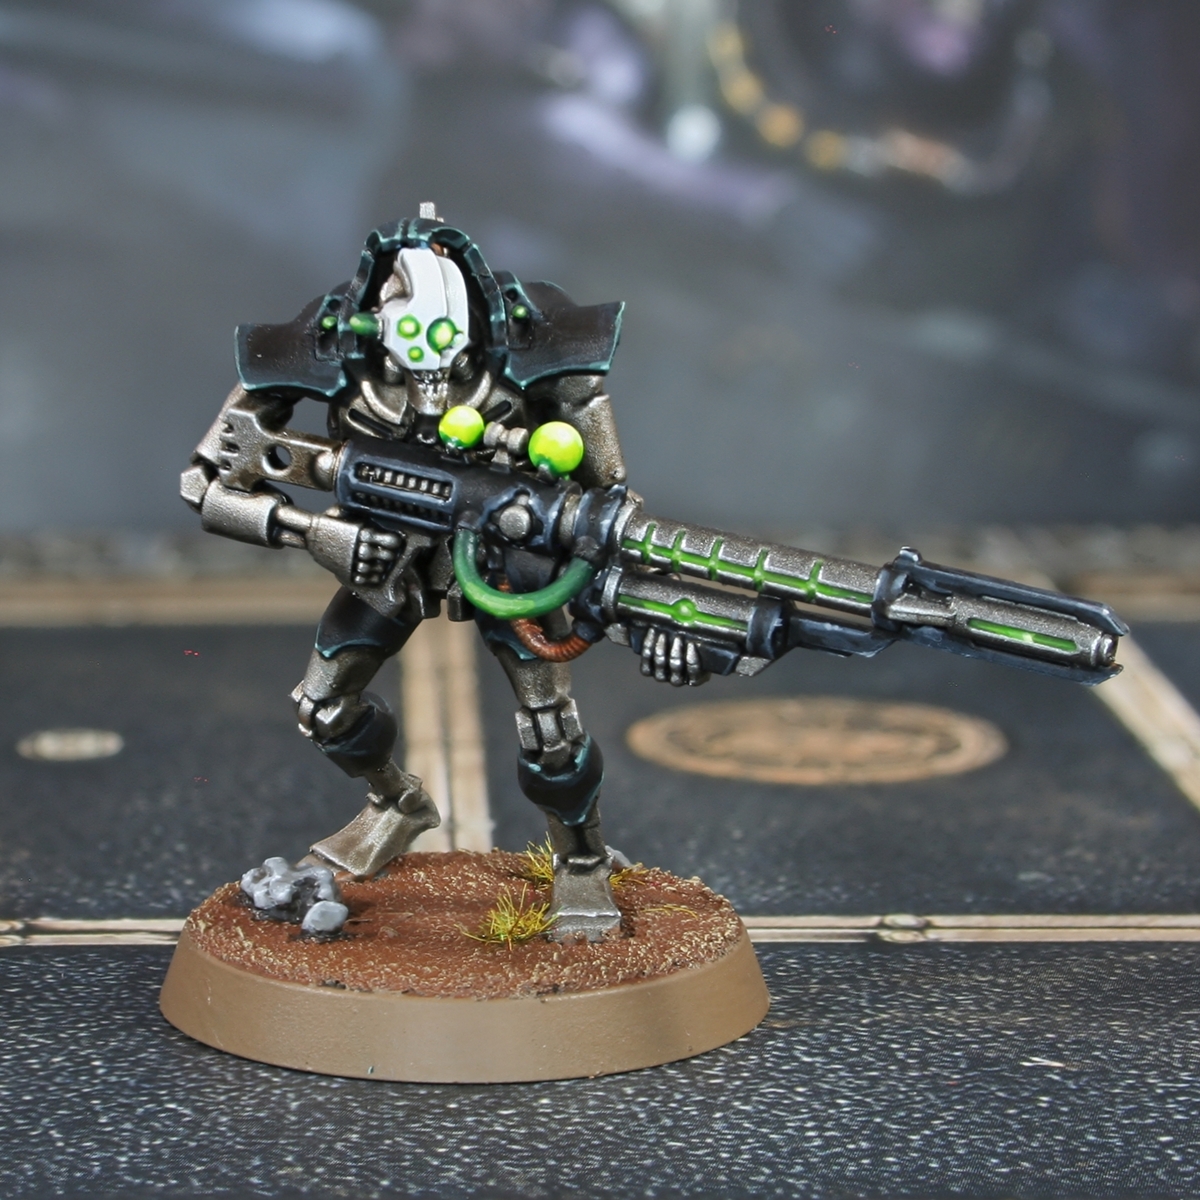
I painted these Deathmark miniatures for my Hierotek Circle Kill team, but this exact set of recipes can be used for painting the full Warhammer 40,000 unit. I hope you will find it useful.
 Living Metal
- Basecoat the model with Gunmetal Grey .
- With an airbrush, spray an all over zenethal highlight of Duraluminum downwards at a 45 degree angle.
- Spray White Aluminum almost straight downward, from the top of the model. Be selective only catching the very top, face and shoulders.
- Now we do an oil wash on all of the Necron and the weapon coil. I poured out the amount odourless Artists' White Spirits I felt I needed for the wash and added paint to it, until I was happy with the consistency. I used 3 parts Ivory Black, with 1.5 parts Burnt Sienna and 1 part Cobalt Violet Hue, all from the Winton range of oil paints.
- After giving the oil paint at least an hour to dry, wipe paint from the exposed areas and avoid recesses. I like to use makeup sponges or those little sponges on stick for applying makeup. If you want to remove the paint extra thoroughly in an area, add a very small amount of white odourless Artists' White Spirits to the sponge.
- Selectively highlight exposed edges and places where the light would hit with Silver RLM01 Metallic .
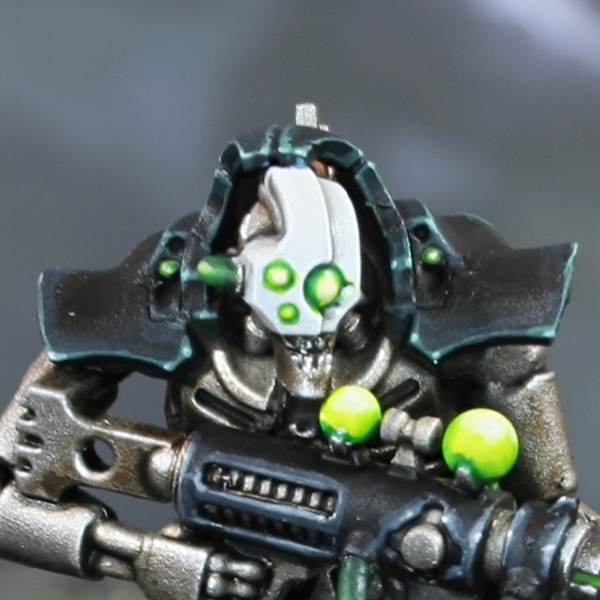 Black Armour
- Basecoat with Black .
- Chunky highlights of Incubi Darkness .
- Fine edge highlights of Sons of Horus Green .
- Selective highlights of 1:1 Sons of Horus Green and Sybarite Green .
- Add some White to the previous mix, and add specular highlights.
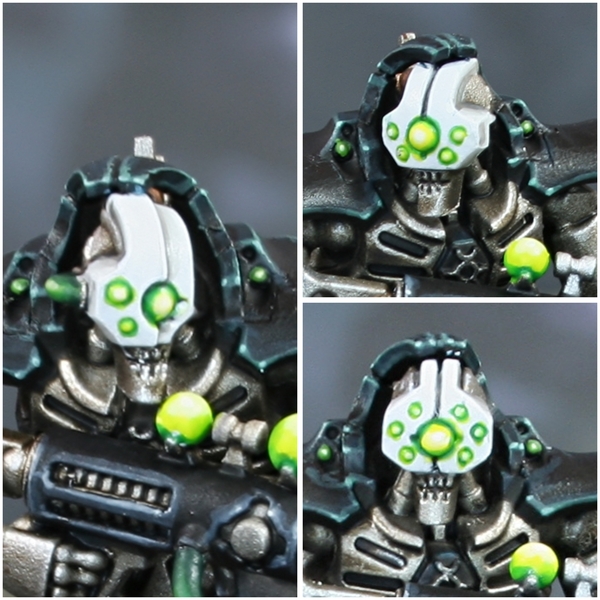 White Armour
- Basecoat with a 1:1 mix of Grey Seer and White .
- Glaze/shade with Grey Seer . Be quite generous with the area you shade.
- Add additional shading with Dawnstone . Make this stage more selective.
- In areas where you want a clear division, shade with very thin lines of Skavenblight Dinge .
- Add edge highlights with White .
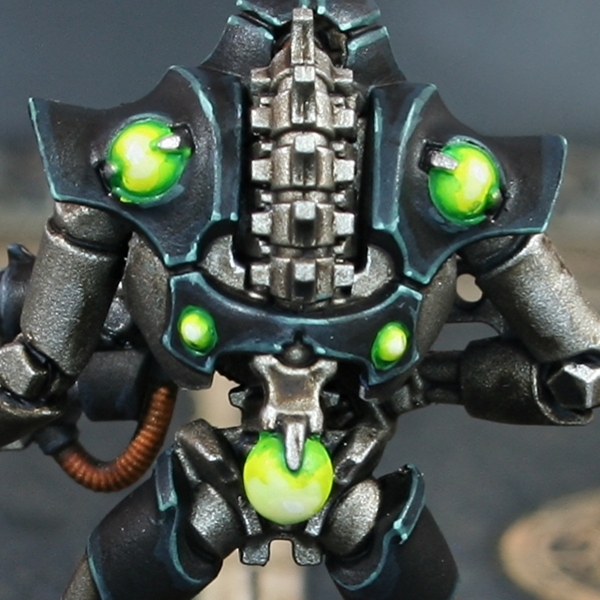 Light Green Energy
- Basecoat with White .
- Wash with Tesseract Glow .
- Shade with thin Warpstone Glow .
- Shade the deepest areas with Caliban Green .
- Towards the centre, mix your Tesseract Glow with some White and lighten a small area, leaving space to get brighter.
- Finish with a small amount of White in the very centre.
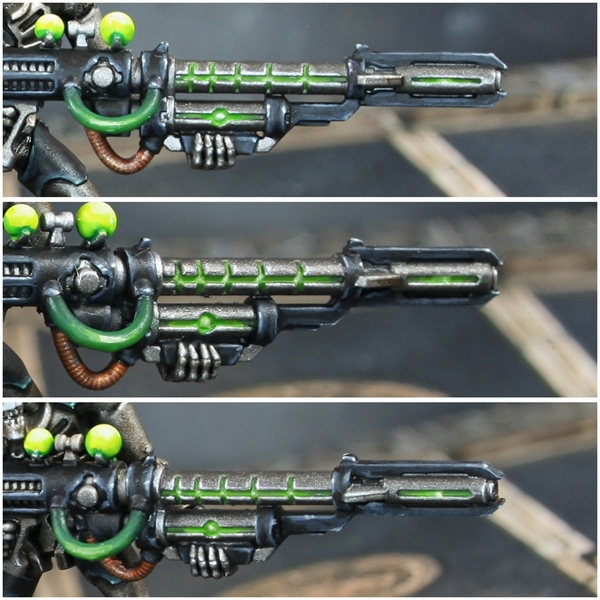 Dark Metal Barrel
- Basecoat with a 1:1 mix of Leadbelcher and Abaddon Black .
- Flood the recesses with a 1:1 mix of Waaagh! Flesh and Moot Green .
- More precisely run some Moot Green into recesses.
- Mix your Moot Green with Ice Yellow and run it into a small area, where the light would be coming from.
- Repeat AGAIN, but even smaller and using Ice Yellow .
- If you have a lot of area to play with, you might want to add a specular highlight of White .
- Finish this detail by edge highlighting the metallic area with Silver RLM01 Metallic
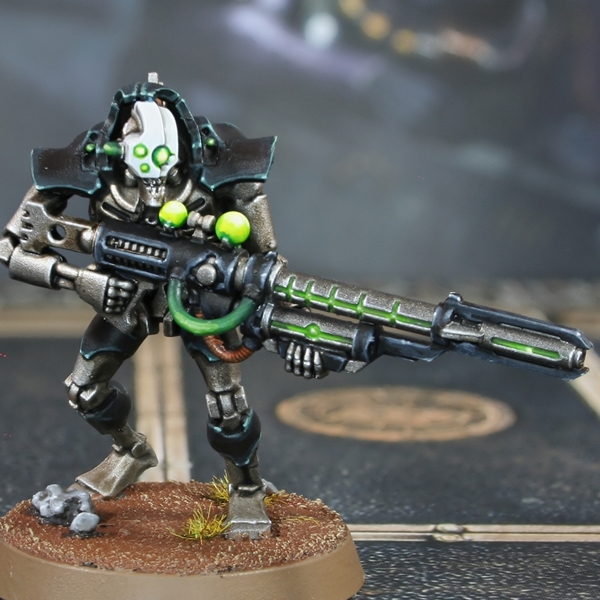 Black Weapon Casing
- Basecoat with Black .
- Add chunky highlights of Dark Reaper .
- Fine highlights withal mix of Dark Reaper and Administratum Grey .
- Selectively highlight with Administratum Grey .
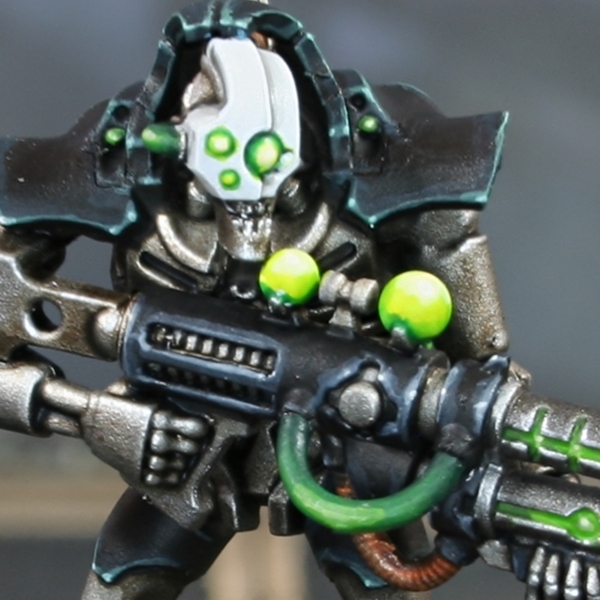 Green tubing
- Basecoat with Caliban Green .
- Glaze everything but the recessed parts with Warpstone Glow , pulling your brush towards where you are planning to build your highlights.
- Apply highlights with 1:1 Warpstone Glow and Moot Green .
- Selectively highlight with Moot Green .
- Mix some Ice Yellow into your Moot Green and add very small highlights where needed.
These tubes draw quite a lot of attention, so don't be afraid to spend a little extra time on them. If at any point you are unhappy with the smoothness of a transition, just glaze it with the colour again or knock it back with a glaze of the previous colour. Many of the paint used here offer quite a lot of translucency, making them great for this.

Rookie Brushes
RookieBrushes
Aspiring miniature painter and biscuit enthusiast. Here to share my hobby and help where I can.
Citadel Painting System 15
Base 6
- Abaddon Black
- Caliban Green
- Grey Seer
- Incubi Darkness
- Leadbelcher
- Waaagh! Flesh
Layer 8
- Administratum Grey
- Dark Reaper
- Dawnstone
- Moot Green
- Skavenblight Dinge
- Sons of Horus Green
- Sybarite Green
- Warpstone Glow
Technical 1
- Tesseract Glow
Vallejo Metal Color
Base 3
- 77.702 Duraluminum
- 77.706 White Aluminum
- 77.720 Gunmetal Grey
Vallejo Model Air
Base 1
- 71.063 Silver RLM01 Metallic
Vallejo Model Color
Base 3
- 70.858 Ice Yellow
- 70.950 Black
- 70.951 White


![[Piel] - Piel Nazarova / Skin Nazarova](https://assets.paintpad.app/rails/active_storage/representations/proxy/eyJfcmFpbHMiOnsiZGF0YSI6MjAxMzMsInB1ciI6ImJsb2JfaWQifX0=--32b943a890dd6eca82cf2d8513d45c7f777ba04f/eyJfcmFpbHMiOnsiZGF0YSI6eyJmb3JtYXQiOiJqcGciLCJyZXNpemVfdG9fZmlsbCI6WzEyMDAsMTIwMF0sImF1dG9fb3JpZW50Ijp0cnVlfSwicHVyIjoidmFyaWF0aW9uIn19--e0f14d5d109f64b9466c1bf520a2b11f6a7dc47c/photo_2023-10-14_11-42-52.jpg)

