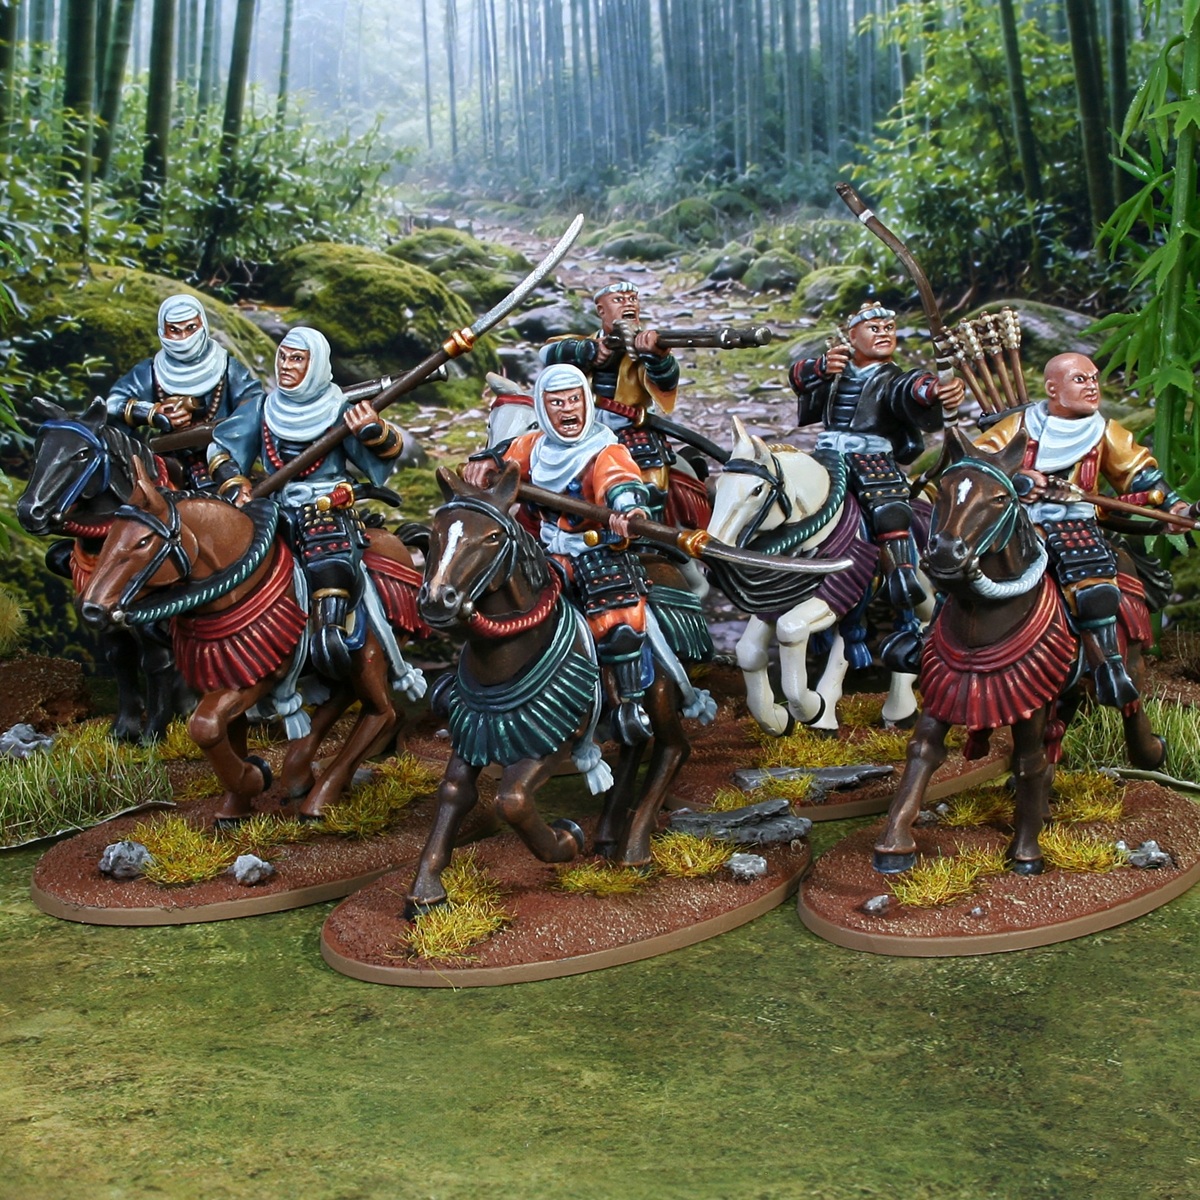

Kindly sent to me by Fireforge games, these models are a mash-up of their Mounter Samurai and Sohei Warrior Monks kits, to see what what possible. He is how I went about painting my test models.
Skin
- Basecoat with 2:1 Cadian Fleshtone and Mournfang Brown .
- Increase the amount of Mournfang Brown in the above mix and shade the skin.
- Mix the base colour 2:1 with Ushabti Bone and add chunky highlights.
- Increase the amount of Ushabti Bone in the above mix, so it is about 1:2 now. use this for finer highlights.
- Mix in a little White and selectively highlight.
- Increase the amount of White in the mix, until it is a subtle off-white. Now pick out a few specular highlights.
- When it came to the shaved portion in the centre of his head, I highlighted as normal, then mixed a little Dawnstone into the initial highlight colour. With this mix, glaze the section then highlight if needed. This should add a subtle grey.
Yellow Cloth
- Basecoat with Balor Brown .
- Mix Balor Brown 1:1 with Mournfang Brown and use this to shade folds.
- With pure Mournfang Brown , further define highlights. Try to stick to fine lines and use this to separate sleeves from the body, plus where the cloth meets other materials.
- Add chunky highlights of Averland Sunset .
- Apply fine highlights using a 1:1 mix of Averland Sunset and Ice Yellow .
- Selectively highlight with pue Ice Yellow .
- Finish with specular White highlights.
Orange Cloth
- Basecoat with 2:1 Jokaero Orange and Deep Orange (or Troll Slayer Orange ).
- Mix the base colour 1:1 with Khorne Red and add shading to folds.
- Now, mix the above colour 1:1 with Black and further shade the recesses. At this point, I find it best to stick to the very deep folds and where the cloth meets other materials.
- Apply chunky highlights of Fire Dragon Bright to the cloth. With the crispness of the details on this sculpt, I first applied a standard edge highlight, before thickening the highlights with a series of downward facing lines.
- Using a 1:1 mix of Fire Dragon Bright and Ice Yellow , as fine edge highlights to the cloth.
- Mix a little White into the above colour and more selectively highlight edges, focussing on upward facing curves.
- Add even more White to the above paint, until it is an off-white colour. Now enhance your highlighting with a few very small/specular highlights.
- If your cloth looks too drab for your tastes, consider a glaze of Orange Fluorescent , to bring back some vibrancy.
Blue Cloth
- Basecoat with Thunderhawk Blue .
- Shade with a thin mix of 1:1 Dark Reaper and Black .
- Add edge highlights with a 2:1 mix of Thunderhawk Blue and Ushabti Bone . Keep to an all over edge highlight, but make them a little thicker on corners and curves.
- Selectively edhe highlight with 1:2 Thunderhawk Blue and Ushabti Bone . Aim for the areas with the heavier highlights from the previous stage.
- Add some White to the above paint, then finish with very small/specular highlights.
Black Cloth
- Basecoat with 4:1 Black and Kantor Blue .
- Add edge highlights with a 1:3 mix of the base colour and Administratum Grey . Keep to an all over edge highlight, but make them a little thicker on corners and curves.
- Selectively edge highlight with pure Administratum Grey . Aim for the areas with the heavier highlights from the previous stage.
- Finish with very small/specular highlights of Grey Seer .
Dark Blue Cloth
- Basecoat with Stegadon Scale Green .
- Shade with thin 1:1 Stegadon Scale Green and Black .
- Glaze and edge highlight with Thunderhawk Blue , to accentuate hard edges and folds.
- Selectively edge highlight with 1:1 Thunderhawk Blue and Fenrisian Grey .
- Finish with small highlights of Fenrisian Grey within the previous stages highlights.
White Cloth
- Basecoat with 1:1 Celestra Grey and White .
- Glaze some shading in with Fenrisian Grey be quite generous here, the result will be quite subtle, so use it to bring out texture.
- With a 1:1 mix of Fenrisian Grey and Dark Reaper , shade the cloth more selectively.
- Carefully shade the very deepest recesses (and where the cloth meets other material ) with pure Dark Reaper . Be very selective here and keep your lines thin.
- Mix the basecoat 1:1 with White and pick out edges.
- Selectively highlight with pure White .
Black Armour
- Basecoat with Black .
- Apply chunky highlights of Dark Reaper .
- Add fine edge highlights of Thunderhawk Blue .
- Selectively highlight with Fenrisian Grey .
- Carefully apply very small highlights of Blue Horror .
- On points and upward facing edges that you want to "glint", finish with specular White highlights.
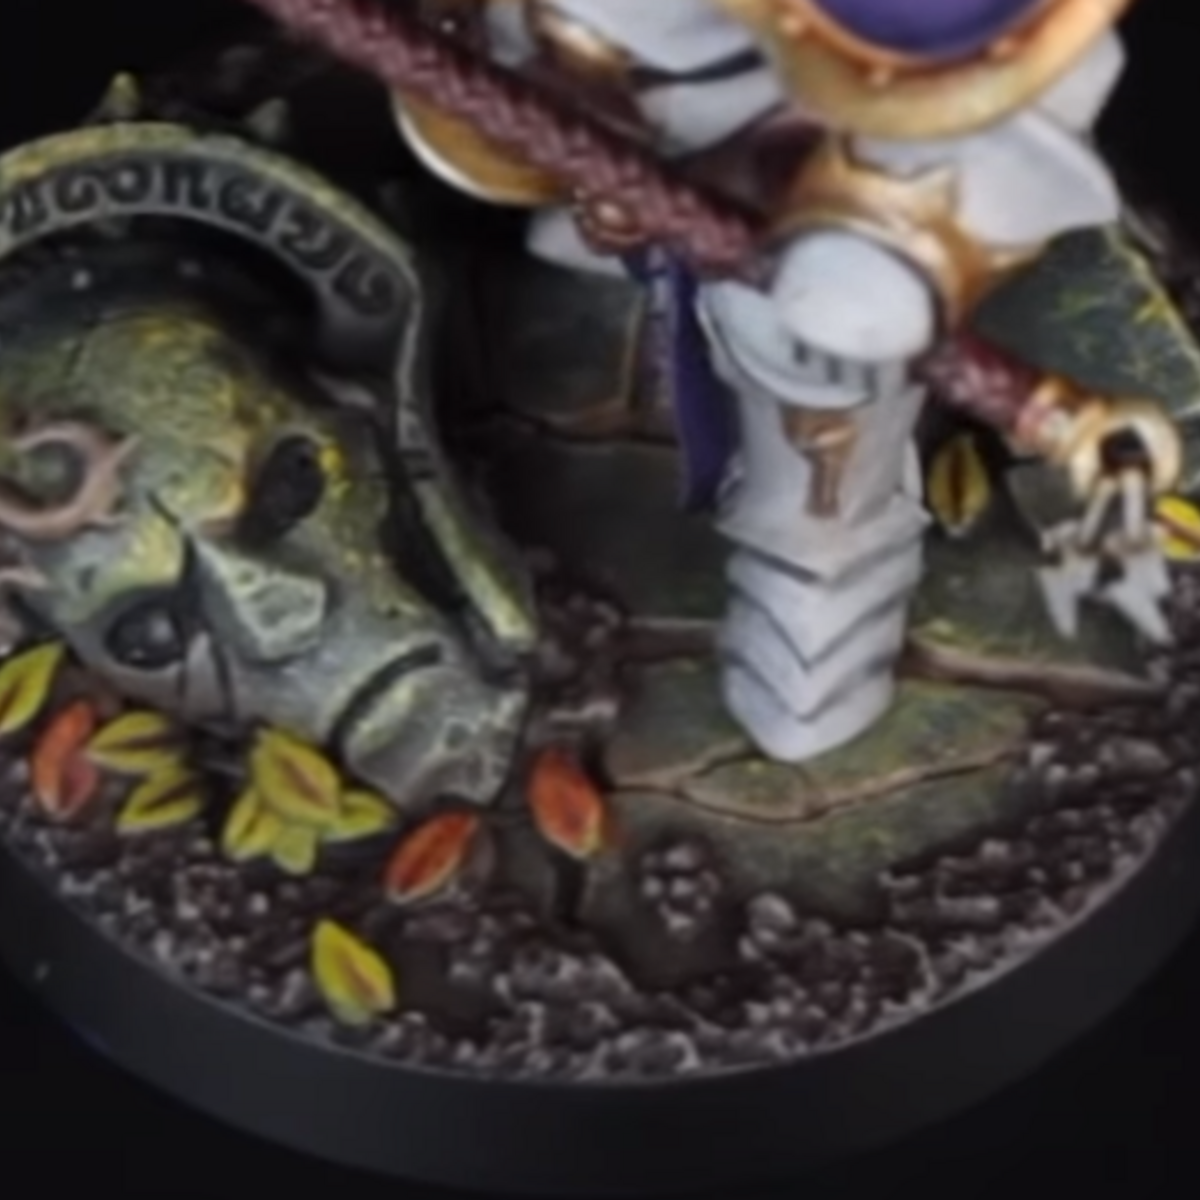
Dark Wood
- Basecoat with Thondia Brown .
- Shade with some thinned Rhinox Hide .
- Mix the Thondia Brown 1:1 with Steel Legion Drab , then highlight.
- Now mix the above colour with an equal amount of Administratum Grey and selectively highlight.
- Finish with very small/specular highlights of Administratum Grey .
- It is very easy to over-highlight this wood, and have the grey desaturate it too much. If this happens to you, consider a glaze of Reikland Fleshshade to bring back warmth.
Rope & Bindings
- Basecoat with Rakarth Flesh .
- Shade with Agrax Earthshade .
- Selectively highlight the light parts of the feathers with 1:1 Rakarth Flesh and White /.
- Finish with specular White highlights.
Arrows
- Basecoat the shafts with Mournfang Brown .
- Basecoat the feathers with Ushabti Bone .
- Add any additional variety to the arrows with Rhinox Hide .
- Wash everything with Agrax Earthshade .
- Highlight the shafts with XV-88 .
- More selectively highlight with Balor Brown .
- Finish the shafts with specular Screaming Skull highlights.
- Selectively highlight the light parts of the feathers with Screaming Skull .
- Finish with specular Wraithbone highlights.
- Selectively highlight the dark parts of the feathers with Gorthor Brown .
- Finish with specular Karak Stone highlights.
Dark Brown Leather
- Basecoat with Rhinox Hide .
- Highlight with Doombull Brown .
- Selectively highlight with XV-88 .
- Finish with very small/specular highlights of Ushabti Bone .
Red Details
- Basecoat with Khorne Red .
- Highlight with Evil Sunz Scarlet .
- Selectively highlight with 1:1 Evil Sunz Scarlet and Ungor Flesh .
- Finish with a few specular highlights of Ungor Flesh .
Blue Details
- Basecoat with Kantor Blue .
- Highlight with Teclis Blue .
- Selectively highlight with 1:1 Teclis Blue and Celestra Grey .
- Finish with a few specular highlights of Celestra Grey .
Jade Details
- Basecoat with Incubi Darkness .
- Highlight with with Kabalite Green ..
- Selectively highlight with Sybarite Green .
- Finish with a few specular highlights of Gauss Blaster Green .
Purple Details
- Basecoat with 1:1 Naggaroth Night and Screamer Pink .
- Mix some Black into the base colour and add shading.
- Edge highlight with Screamer Pink .
- Mix some Ushabti Bone into the Screamer Pink and build up highlights. Feel free to a increase the amount of Ushabti Bone and highlight smaller and smaller.
- Finish with pure Ushabti Bone specular highlights in a few places.
Wooden Beads
- Basecoat with 1:1 Dryad Bark and Mournfang Brown .
- Highlight individual beads, using a 1:1 mix of the base colour and Karak Stone .
- Finish with specular highlights of pure Karak Stone .
Blades
- Basecoat with Leadbelcher .
- Glaze Gryph-charger Grey towards the guard, styarting from just below the half way point on the blade.
- Add a little Black to your Gryph-charger Grey , then glaze a smaller area. This should create a nice dark transition to the gold.
- Edgde highlight everything and glaze half closest to the tip with Ironbreaker .
- Finish with selective highlights of Silver RLM01 Metallic .
Teppo Steel
- Basecoat with Leadbelcher .
- Wash with Nuln Oil .
- Highlight with Ironbreaker .
- Selectively highlight with Silver RLM01 Metallic .
Gold
- Basecoat with Retributor Armour .
- Wash with Reikland Fleshshade .
- Mix a little Silver RLM01 Metallic into your Retributor Armour , then add general highlights and highlights to all hard edges.
- Increase the amount of Silver RLM01 Metallic in the mix, so it is a very pale gold. Now selectively highlight.
- Finish with specular highlights of Silver RLM01 Metallic .
Dark Brown Horse
- Basecoat with Rhinox Hide .
- Drybrush exposed areas with Mournfang Brown . I would recommend using a small brush and take the direction of the light into consideration. This stage is to act as a main highlight and add a little texture. Feel free to use a brush to pick out highlights on hard to reach parts.
- Apply fine highlight to edges and curves using Skrag Brown .
- Mix your Skrag Brown 1:1 with Ushabti Bone and highlight more selectively.
- Finally, mix some Ivory into the paint above and add a few specular/very small highlights.
Brown Horse
- Basecoat with Mournfang Brown .
- Drybrush with 1:1 Mournfang Brown and Cadian Fleshtone .
- Shade with thin Rhinox Hide .
- Make an equal parts mix of Mournfang Brown , Cadian Fleshtone and Ushabti Bone . Use this colour to add highlights.
- Increase the amount of Ushabti Bone in the mix, then more selectively highlight.
- Finish with a highlight of pure Ushabti Bone .
Black Horse
- Basecoat with Black .
- Drybrush exposed areas with Skavenblight Dinge . I would recommend using a small brush and take the direction of the light into consideration. This stage is to act as a main highlight and add a little texture. Feel free to use a brush to pick out highlights on hard to reach parts.
- Selectively highlight edges and curved portions where the light mould hit using Stormvermin Fur .
- Mix a little Ivory (or another warm off-white) into your Stormvermin Fur and highlight more selectively.
Grey Horse
- Basecoat with Administratum Grey .
- Drybrush highlights with a 1:1 Administratum Grey and :white. I would recommend using a small brush and take the direction of the light into consideration. This stage is to act as a main highlight and add a little texture. Feel free to use a brush to pick out highlights on hard to reach parts.
- Shade with Dawnstone .
- Add more selective shading with some thinned Eshin Grey .
- Selectively highlight edges and curved portions where the light mould hit using pure White .
Black Tail
- Basecoat with Black .
- Drybrush with Skavenblight Dinge .
- Selectively pick out upward facing curves with Stormvermin Fur .
- Mix a little Ivory into your Stormvermin Fur and add a few smaller highlights to accentuate the previous steps.
White Horse
- Basecoat with a mix of 3 parts Corax White , 1 part Ionrach Skin and 1 part Cadian Fleshtone .
- Mix some :white into the above and either drybrush or manually apply highlights.
- Shade with some thinned Ushabti Bone .
- Mix some Dryad Bark into your Ushabti Bone and add further shading as needed.
- Add some final shading with Dryad Bark in select places
- Finish with selective White highlights.
Cream Tail
- Basecoat with Tallarn Sand .
- Wash with a 1:1 mix of Seraphim Sepia and Reikland Fleshshade .
- Highlight with 1:1 Tallarn Sand and Ushabti Bone .
- Selectively highlight with Ushabti Bone .
- Mix a little White into the Ushabti Bone and add some final specular highlights.

Rookie Brushes
RookieBrushes
Aspiring miniature painter and biscuit enthusiast. Here to share my hobby and help where I can.
AK Interactive 3rd Generation Acrylics
Intense 1
- AK11080 Deep Orange
Citadel Painting System 54
Base 22
- Averland Sunset
- Celestra Grey
- Corax White
- Dryad Bark
- Grey Seer
- Incubi Darkness
- Ionrach Skin
- Jokaero Orange
- Kantor Blue
- Khorne Red
- Leadbelcher
- Mournfang Brown
- Naggaroth Night
- Rakarth Flesh
- Retributor Armour
- Rhinox Hide
- Screamer Pink
- Steel Legion Drab
- Stegadon Scale Green
- Thondia Brown
- Wraithbone
- XV-88
Shade 4
- Agrax Earthshade
- Nuln Oil
- Reikland Fleshshade
- Seraphim Sepia
Layer 27
- Administratum Grey
- Balor Brown
- Blue Horror
- Cadian Fleshtone
- Dark Reaper
- Dawnstone
- Doombull Brown
- Eshin Grey
- Evil Sunz Scarlet
- Fenrisian Grey
- Fire Dragon Bright
- Gauss Blaster Green
- Gorthor Brown
- Ironbreaker
- Kabalite Green
- Karak Stone
- Screaming Skull
- Skavenblight Dinge
- Skrag Brown
- Stormvermin Fur
- Sybarite Green
- Tallarn Sand
- Teclis Blue
- Thunderhawk Blue
- Troll Slayer Orange
- Ungor Flesh
- Ushabti Bone
Contrast 1
- Gryph-charger Grey
Vallejo Model Air
Base 1
- 71.063 Silver RLM01 Metallic
Vallejo Model Color 5
Base 4
- 70.858 Ice Yellow
- 70.918 Ivory
- 70.950 Black
- 70.951 White
Fluorescent 1
- 70.733 Orange Fluorescent