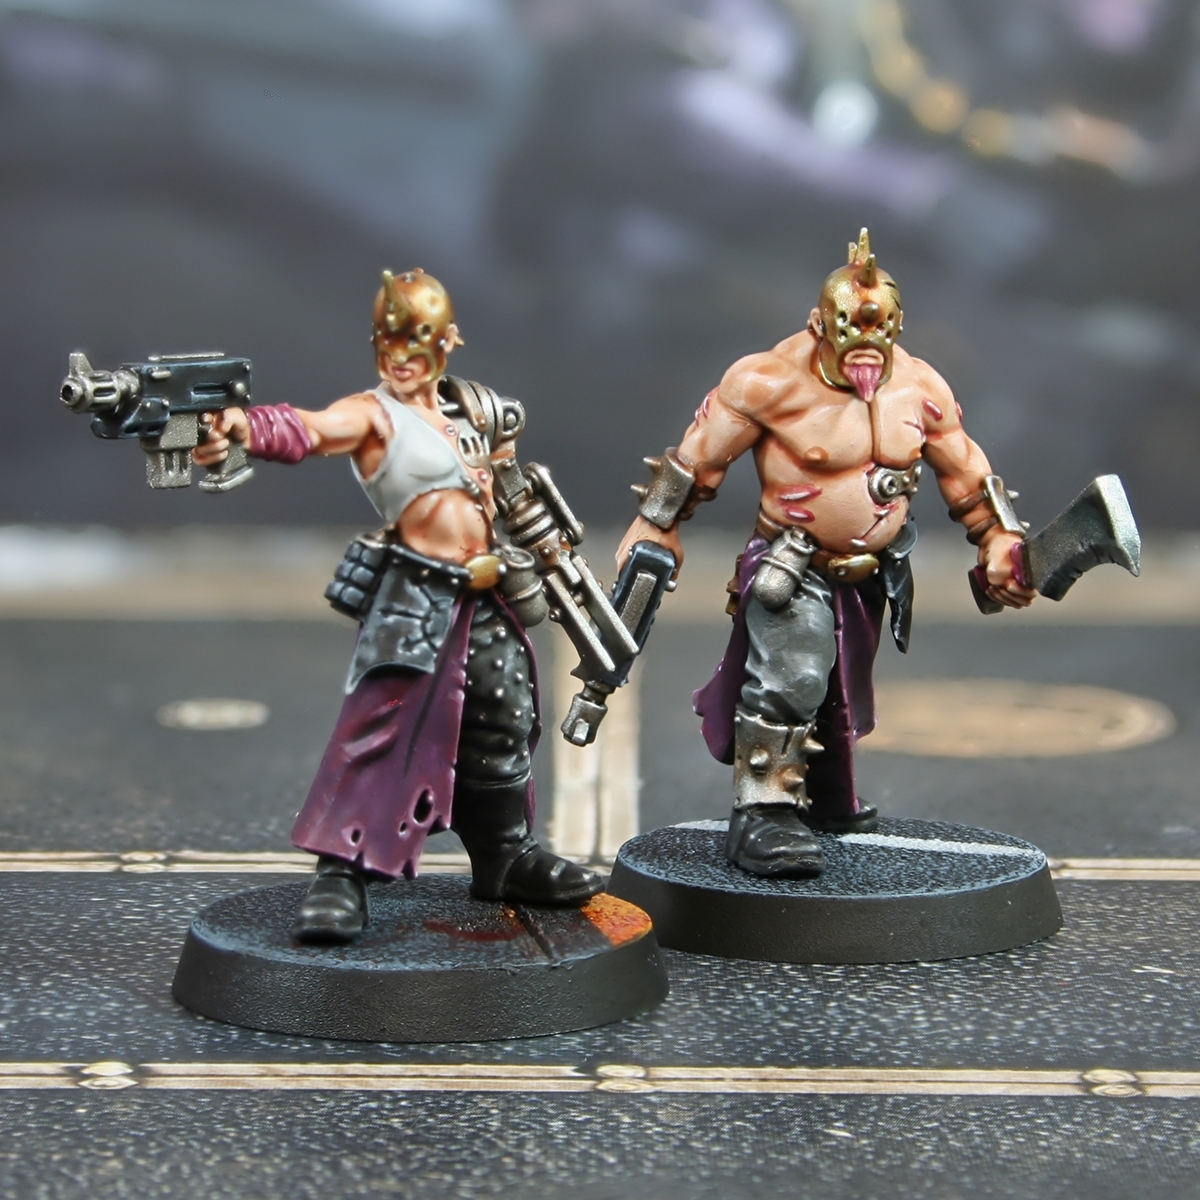

 Black Skin
- Basecoat Abaddon Black .
- Glaze highlights or just drybrushthem in, selectively, with Dark Reaper .
- Highlight with 1:2 Sons of Horus Green & Dawnstone .
- Add Ushabti Bone into the previous mix, then add finer highlights.
- Finish with specular highlights of Deepkin Flesh .
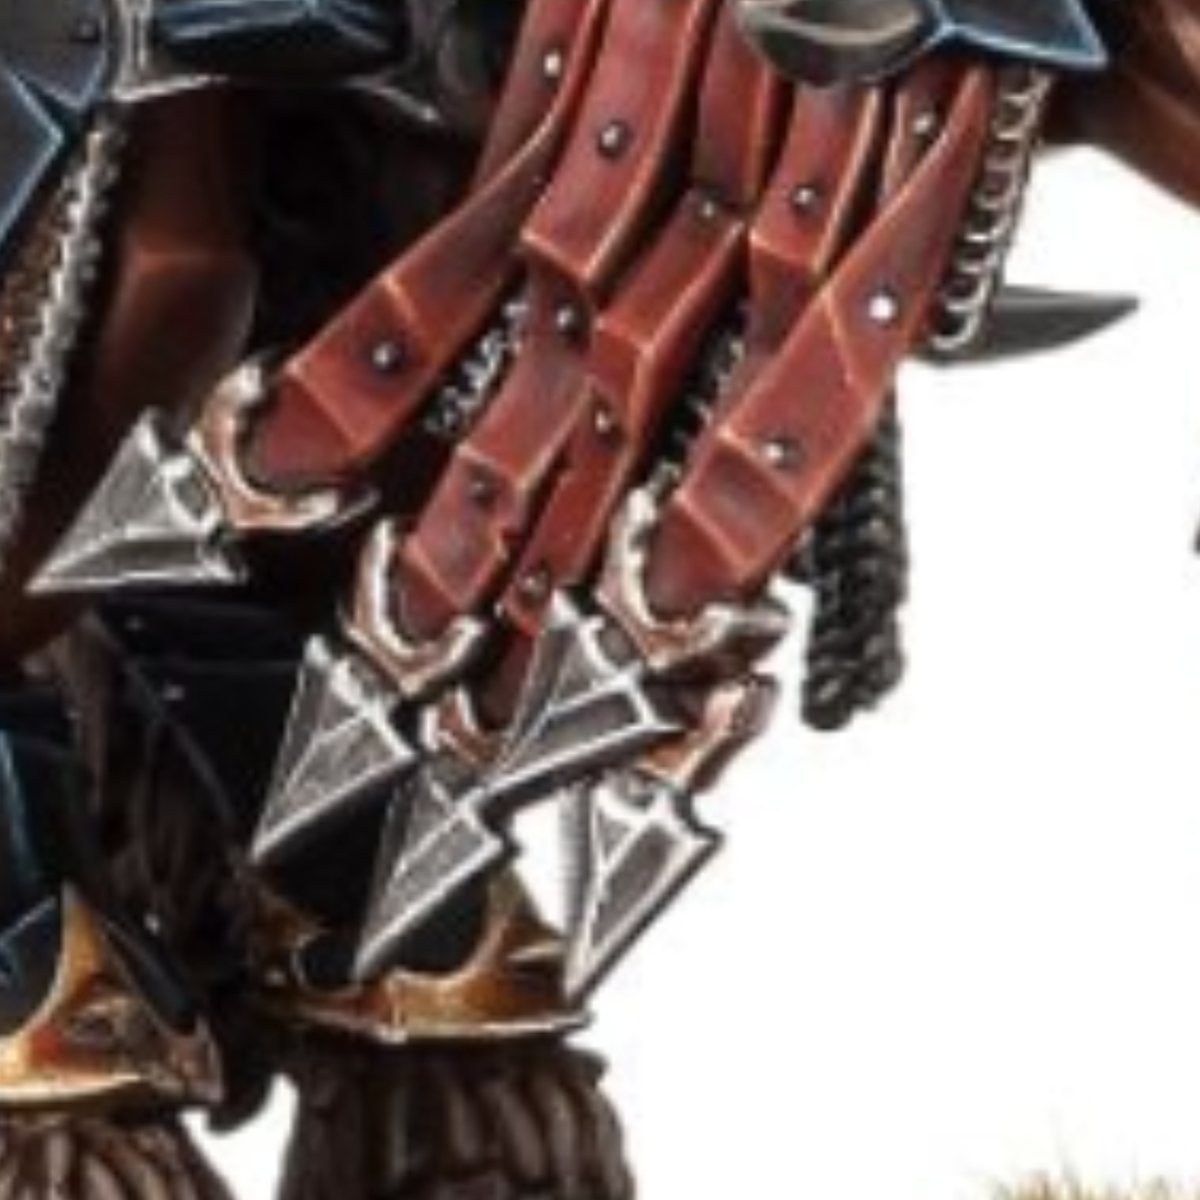
Whilst you are in the area, pick out the claws with an edge highlight of Stormvermin Fur . Then mix in a little Wraithbone and add specular highlights.
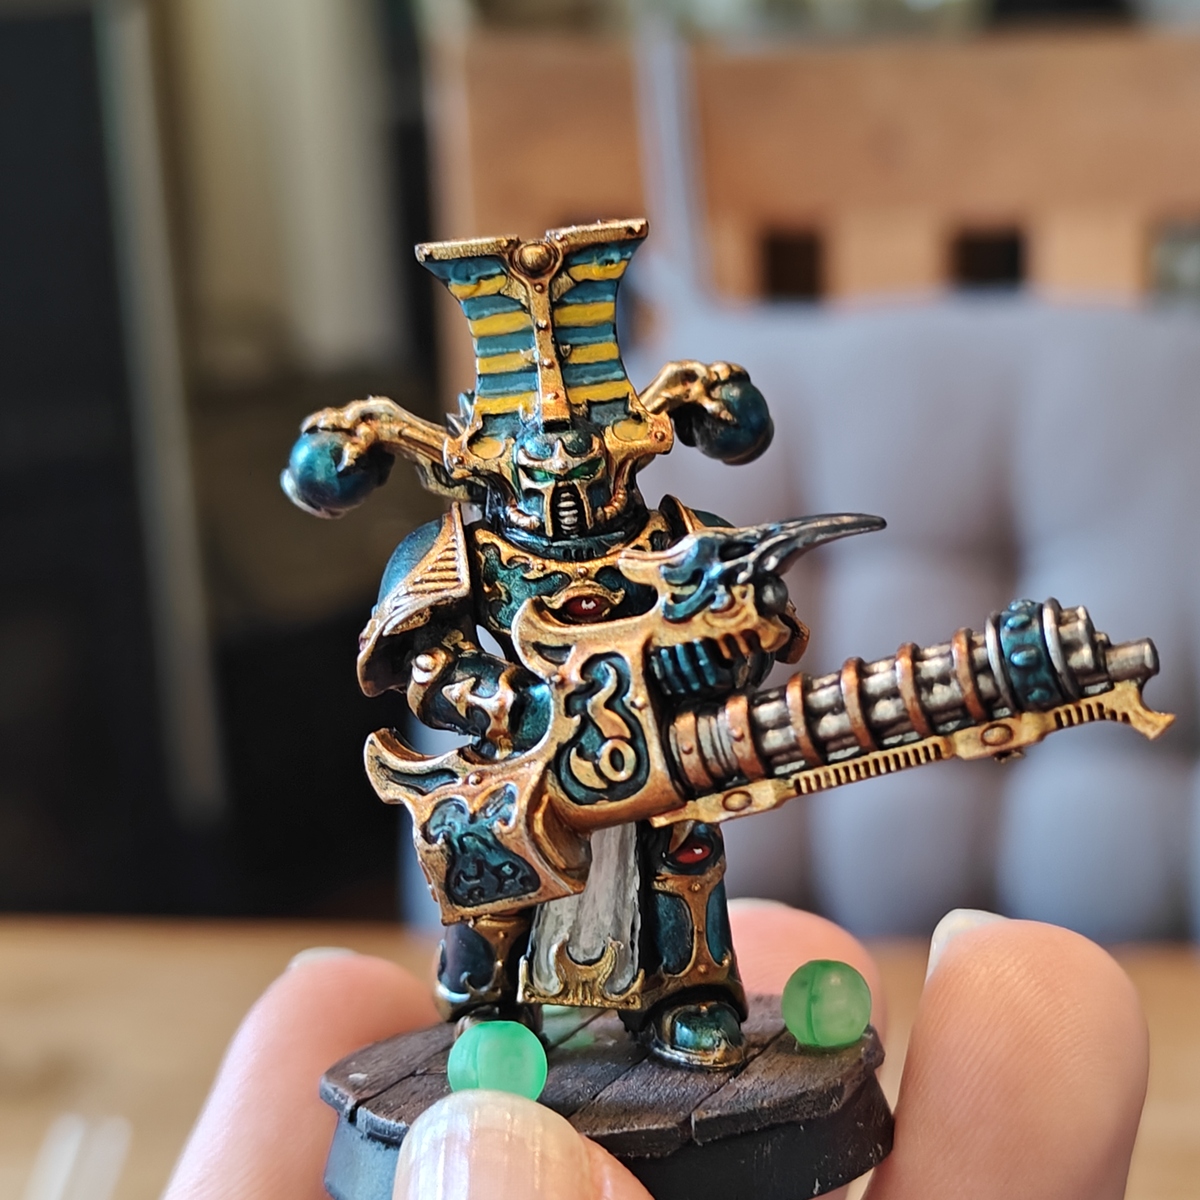
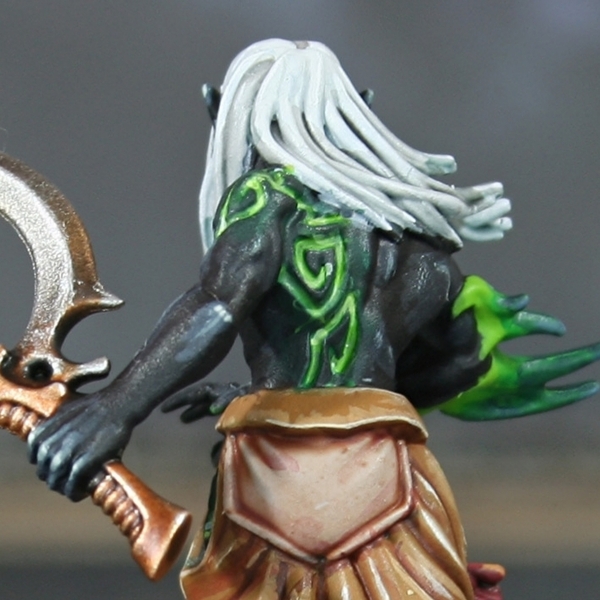
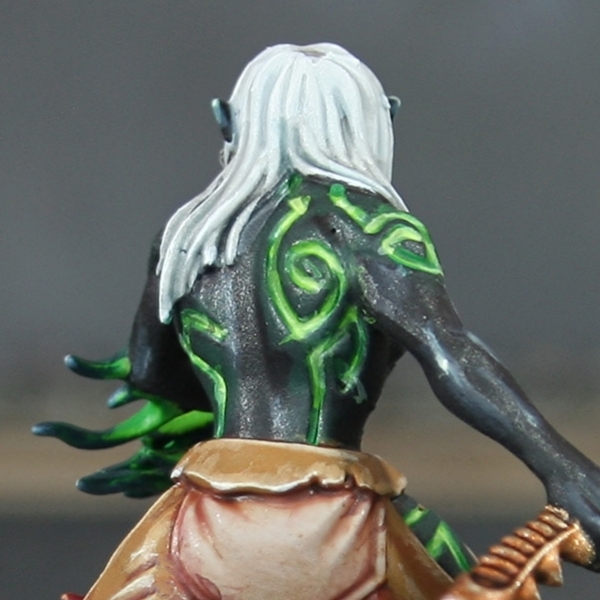 Glowing Tattoos
- Glaze the whole tatto and the surrounding area with Caliban Green . You should have the paint watery enough, that the recessed tattoo is flooded with paint.
- When dry, go over just the recessed parts with Warpstone Glow .
- Now take a thin brush and try to just paint the deepest part of the recess with Moot Green .
- To add a little extra punch, I like to mix my Moot Green 1:1 with Ice Yellow and paint the corners or areas you want a little extra glow in.
Whilst these are the basic steps, you can go back and forth with these colours, smoothing transitions. When done, I aslo took the time to glaze more Caliban Green around the reccess again, tidying up where I had got the other paints accidentaly.
 Flayed Skin
- Basecoat with Rakarth Flesh .
- Wash with Reikland Fleshshade .
- Add a tiny bit of Khorne Red to some Reikland Fleshshade and glaze shade in recesses where needed. You can tell when you have the ratio right, because it will look very rich and bloody.
- In deep recesses, add fine lines of 1:1 Doombull Brown and Rhinox Hide . We will be using this mix later in the "Tan Leather" section, so you might want to temporarily switch materials at this point.
- Edge highlight with 1:1 Rakarth Flesh and Pallid Wych Flesh .
- Finally, add selective highlights of Pallid Wych Flesh .
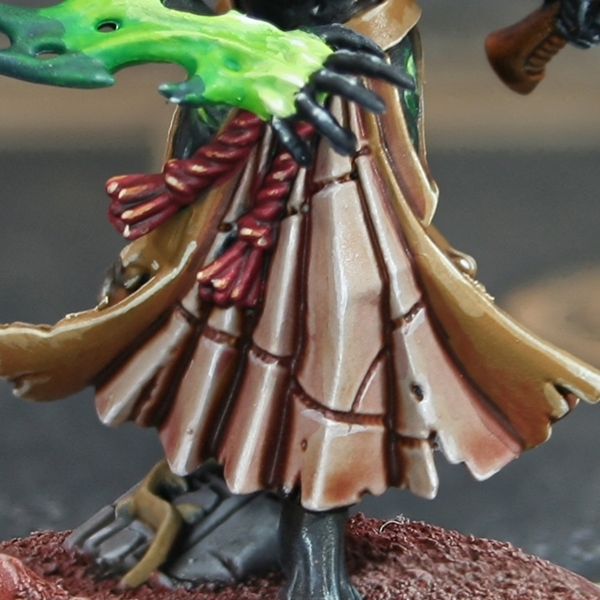
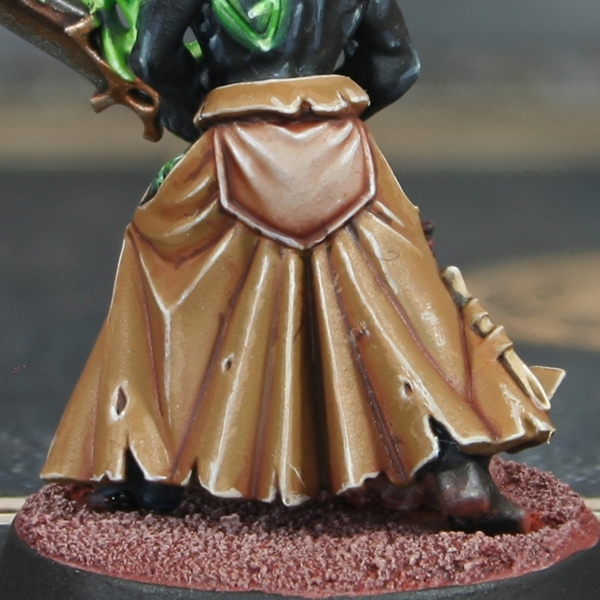 Tan Leather
- Basecoat with XV-88 .
- Glaze/recess shade with Doombull Brown .
- Shade recesses again, this time with fine lines of 1:1 Doombull Brown and Rhinox Hide .
- Add chunky, scratchy highlights of 1:1 XV-88 and Ushabti Bone to edges and curves.
- Apply fine highlights of Ushabti Bone .
- Selectively highlight with Wraithbone .
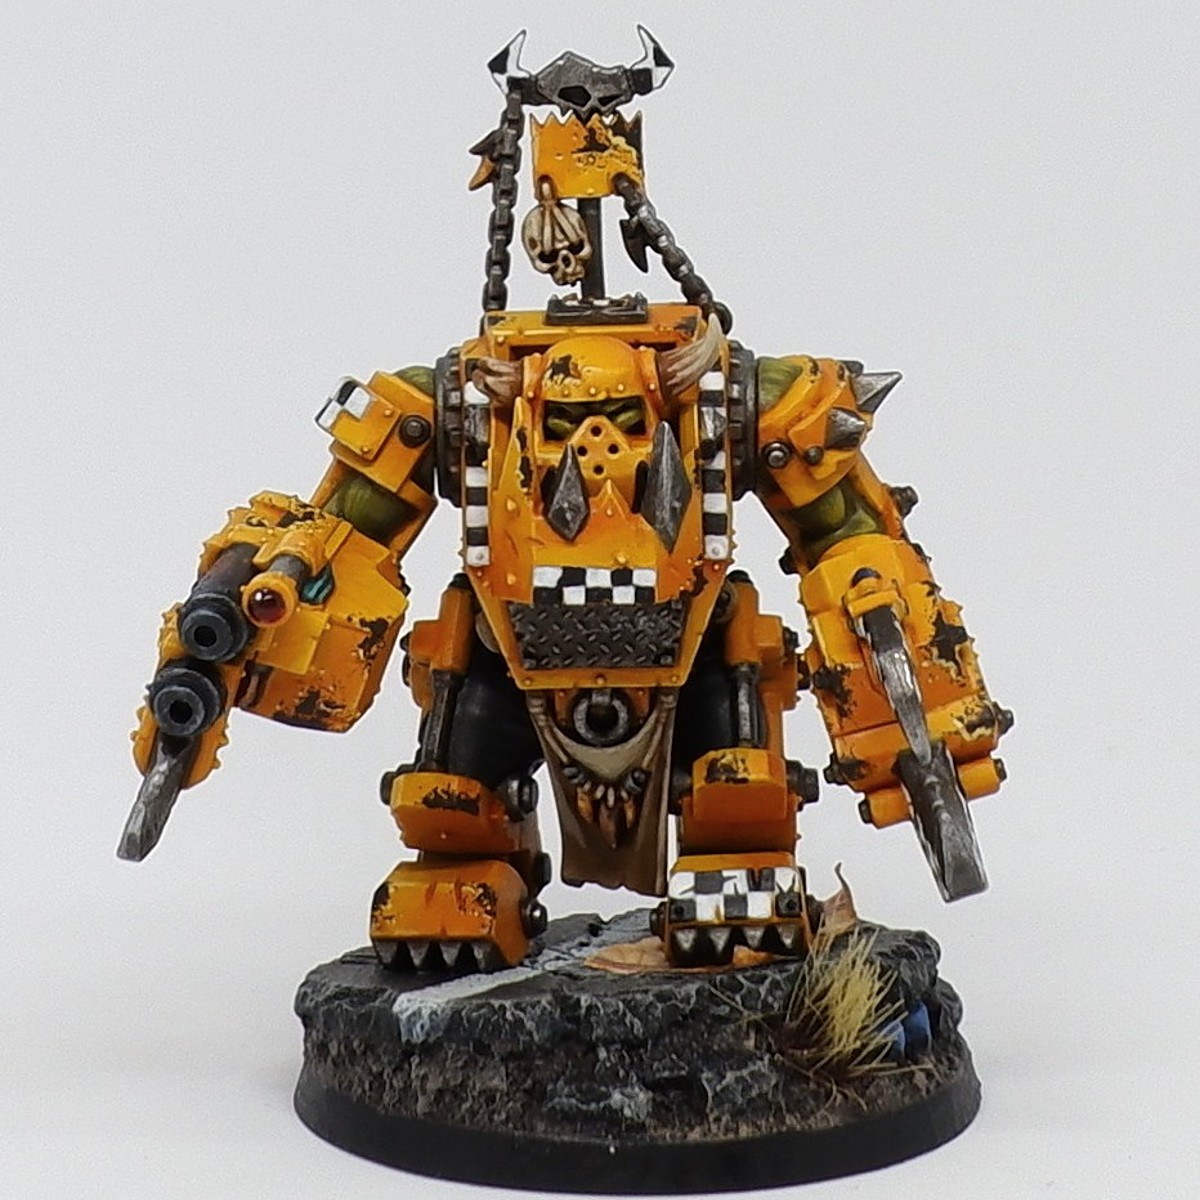
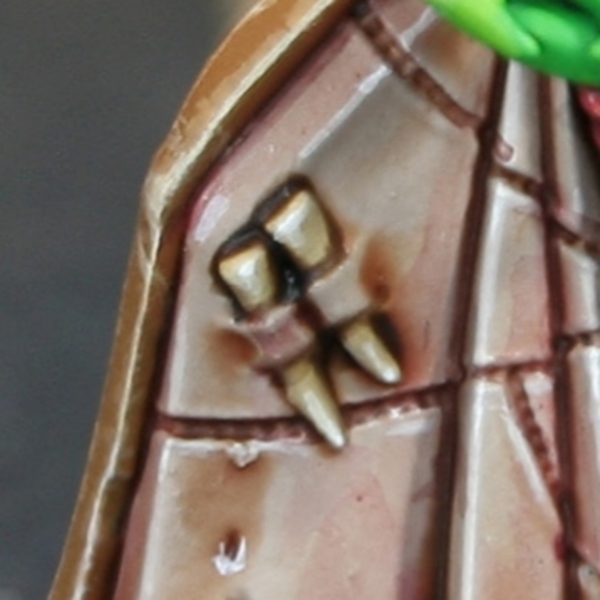 Bone Spikes
- Basecoat with Ushabti Bone .
- Wash with Agrax Earthshade .
- Edge highlight with 1:1 Ushabti Bone and White .
- Finish with selective/specular highlights of White .
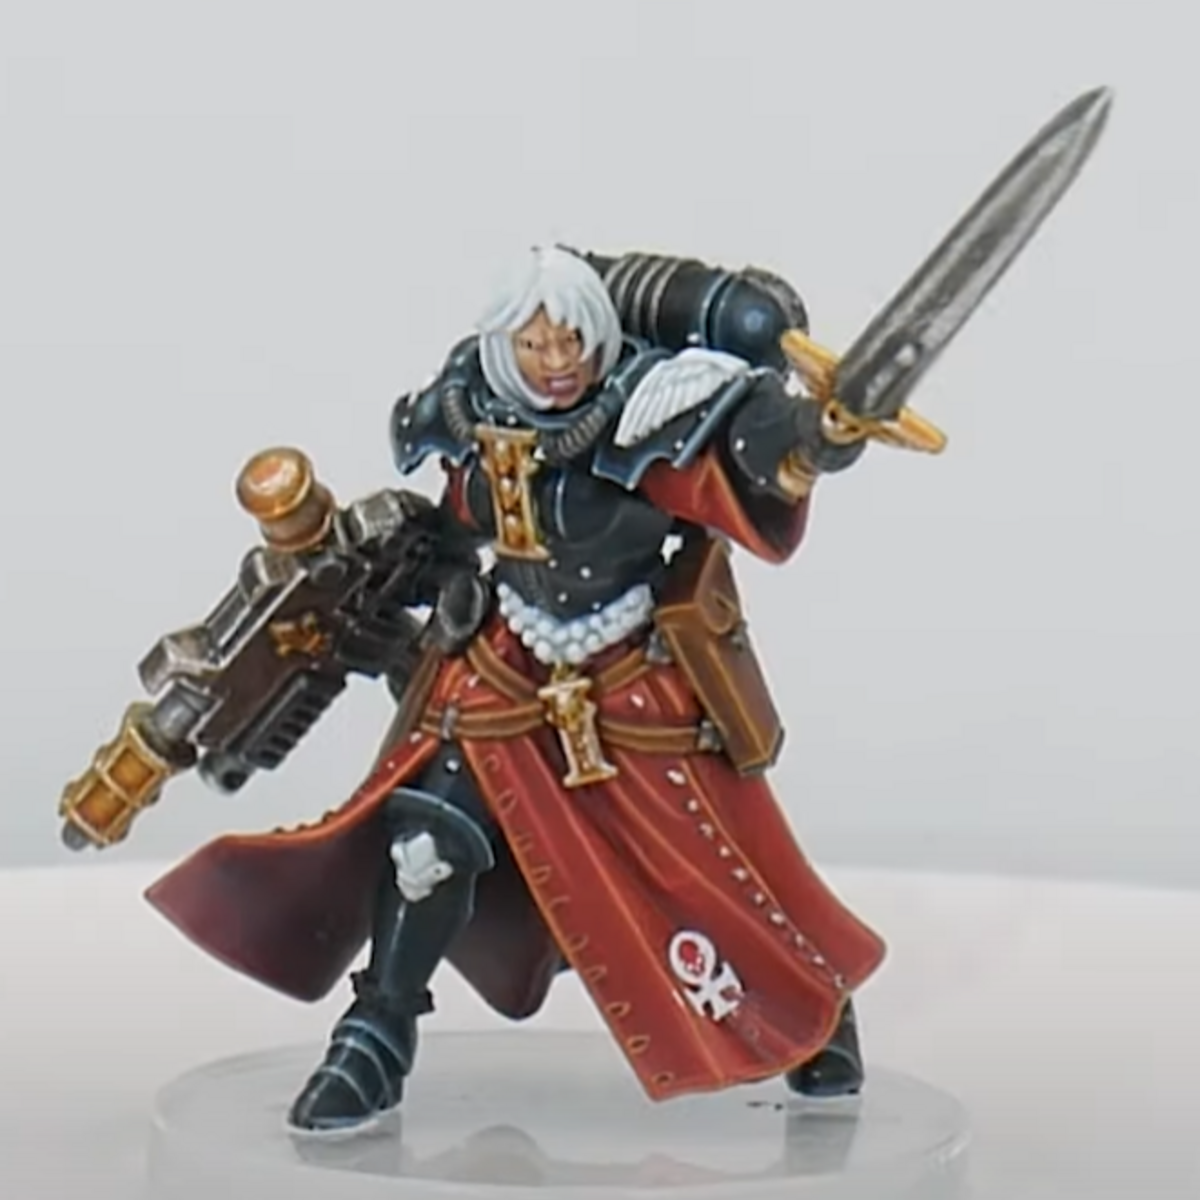
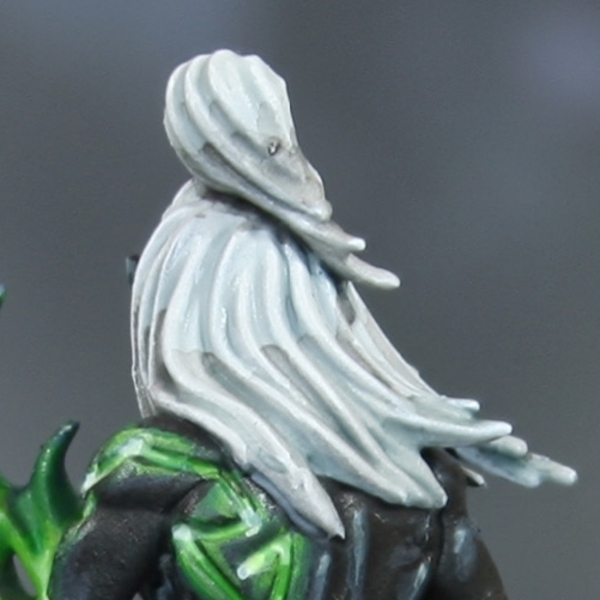 White Hair
- Basecoat with Corax White .
- Wash with Apothecary White .
- Glaze the lower half of the hair with Basilicanum Grey .
- Glaze a smaller abount of the hair with Gryph-charger Grey , towards the bottom.
- Re-establish Corax White with edge highlights on the hair. Focus on creating a halo of highlights towards the top and lightening the strands towards the end of the hair.
- More selectivly edge highlight with White . Addive small highlights to the previously established "halo" and specular highlights on the ends of strands.
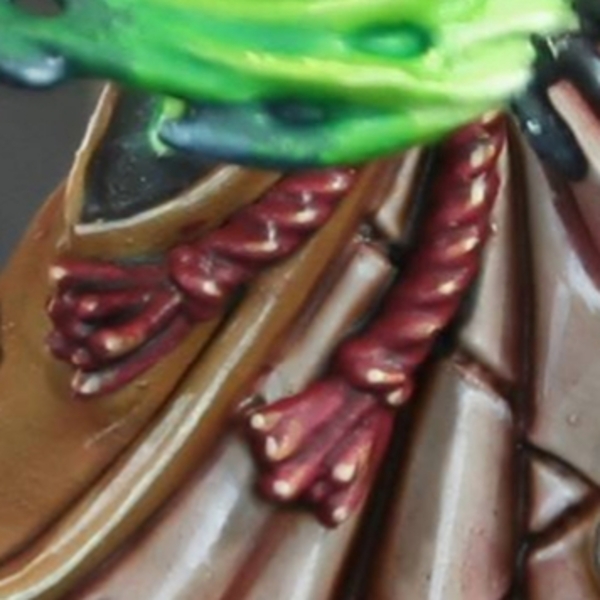 Red Rope
- Basecoat with Khorne Red .
- Wash with Nuln Oil .
- Now paint the ridges and strands with Wazdakka Red .
- Selectively highlight with Tau Light Ochre .
- Mix a little Wraithbone into your Tau Light Ochre and add specular highlights, where needed.
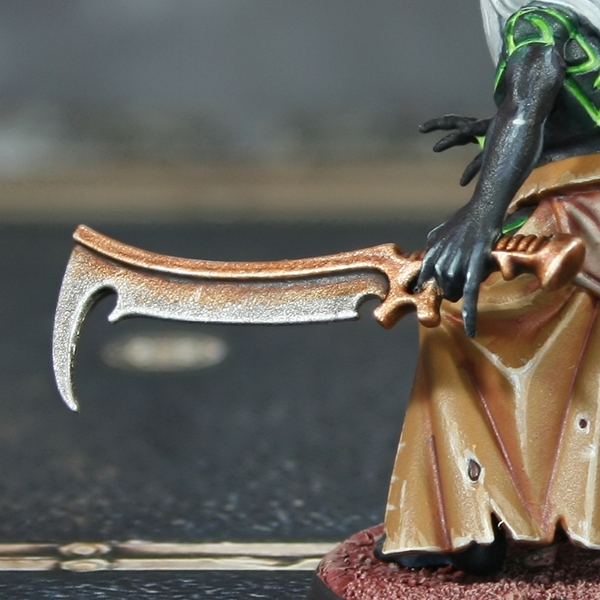 Dirty Blade
- Basecoat with Leadbelcher .
- Wash with Nuln Oil .
- Glaze Gore-grunta Fur into recesses in the blade.
- Mix some Druchii Violet into the thin Gore-grunta Fur and enhance the shading with a small amount in the deepest parts.
- Highlight edges with Ironbreaker .
- Add fine highlights of a very bright silver to edges. You can use Stormhost Silver , but I prefer Silver RLM01 Metallic .
 Brass
Brass
- Basecoat with Brass Scorpion .
- Wash with Agrax Earthshade .
- Highlight with a mix of Brass Scorpion and Silver RLM01 Metallic . Again, you can use Stormhost Silver if you prefer.
- Finish with small/specular highlights of Silver RLM01 Metallic .
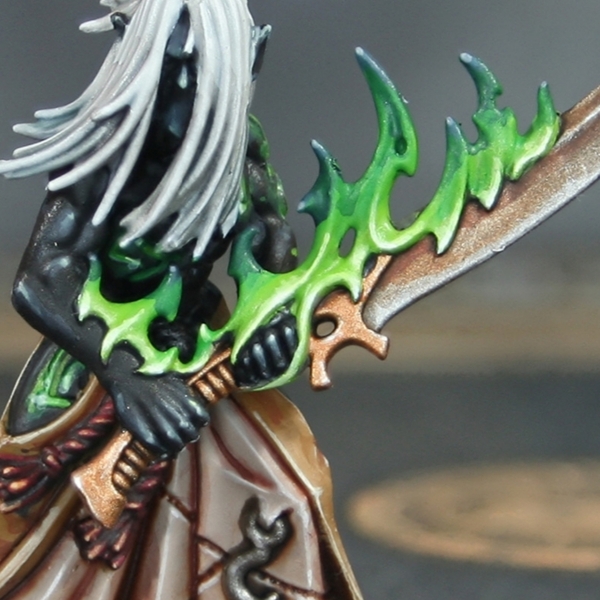 Green Flames
- Basecoat with Moot Green
- Glaze Warpstone Glow towards the tip of the flames, coverring about half of them.
- Repeat with Incubi Darkness , just glazing the tips of the flames, furthest from the heat.
- Mix your Incubi Darkness 1:1 with Administratum Grey and selectively highlight the tips of the flames
- Finish the dark parts of the flames with specular highlights of Administratum Grey at the tip.
- Highlight the lowest parts of the flames with 1:1 Moot Green and Ice Yellow . If you wanted to stick with Citadel paints, feel free to use Dorn Yellow .
- Selectively highlight the lowest parts of the flames with Ice Yellow (or Dorn Yellow ).
- Finish with specular highlights of White .
If you wanted to go the extra mile on your flames, be a little more generous with these final two highlights, glaze the flames with Green Fluorescent , then highlight them again, being as small and neat as possible. This adds a nice (very optional) extra glow.
Shadow Portal/Darkness Weave
Full disclosure, I don't know what this is or what it is called. Looking at the opperatives abilities, I think it is releated to one of these two things though...
- Basecoat with 1:1 Naggaroth Night and Abaddon Black .
- Drybrush with 1:1 Xereus Purple and Khorne Red .
- With the drybrushing done, re-establish shading in recesses where needed, before more selectively sahing with Abaddon Black .
- Mix a little Blue Horror into the previous drybrushing mix, untill the shift in tone is noticable. Now drybrush more lightly, focusing of hitting the edges.
- Now increase the amount of Blue Horror in the above mix until it is roughly 50/50 and apply fine highlights on prominent edges. Use the drybrushing as a guide to where this is needed.
- Add more Blue Horror (so it is probaly two thirds of the mix) then selectively highlight edges and points, where the light would hit the strongest.
- Finish with specular highlights of Blue Horror on points.

Rookie Brushes
RookieBrushes
Aspiring miniature painter and biscuit enthusiast. Here to share my hobby and help where I can.
Citadel Painting System 38
Base 11
- Abaddon Black
- Caliban Green
- Corax White
- Incubi Darkness
- Khorne Red
- Leadbelcher
- Naggaroth Night
- Rakarth Flesh
- Rhinox Hide
- Wraithbone
- XV-88
Shade 4
- Agrax Earthshade
- Druchii Violet
- Nuln Oil
- Reikland Fleshshade
Layer 19
- Administratum Grey
- Blue Horror
- Brass Scorpion
- Dark Reaper
- Dawnstone
- Deepkin Flesh
- Doombull Brown
- Dorn Yellow
- Ironbreaker
- Moot Green
- Pallid Wych Flesh
- Sons of Horus Green
- Stormhost Silver
- Stormvermin Fur
- Tau Light Ochre
- Ushabti Bone
- Warpstone Glow
- Wazdakka Red
- Xereus Purple
Contrast 4
- Apothecary White
- Basilicanum Grey
- Gore-grunta Fur
- Gryph-charger Grey
Vallejo Model Air
Base 1
- 71.063 Silver RLM01 Metallic