Samurai Warrior: Asai Clan
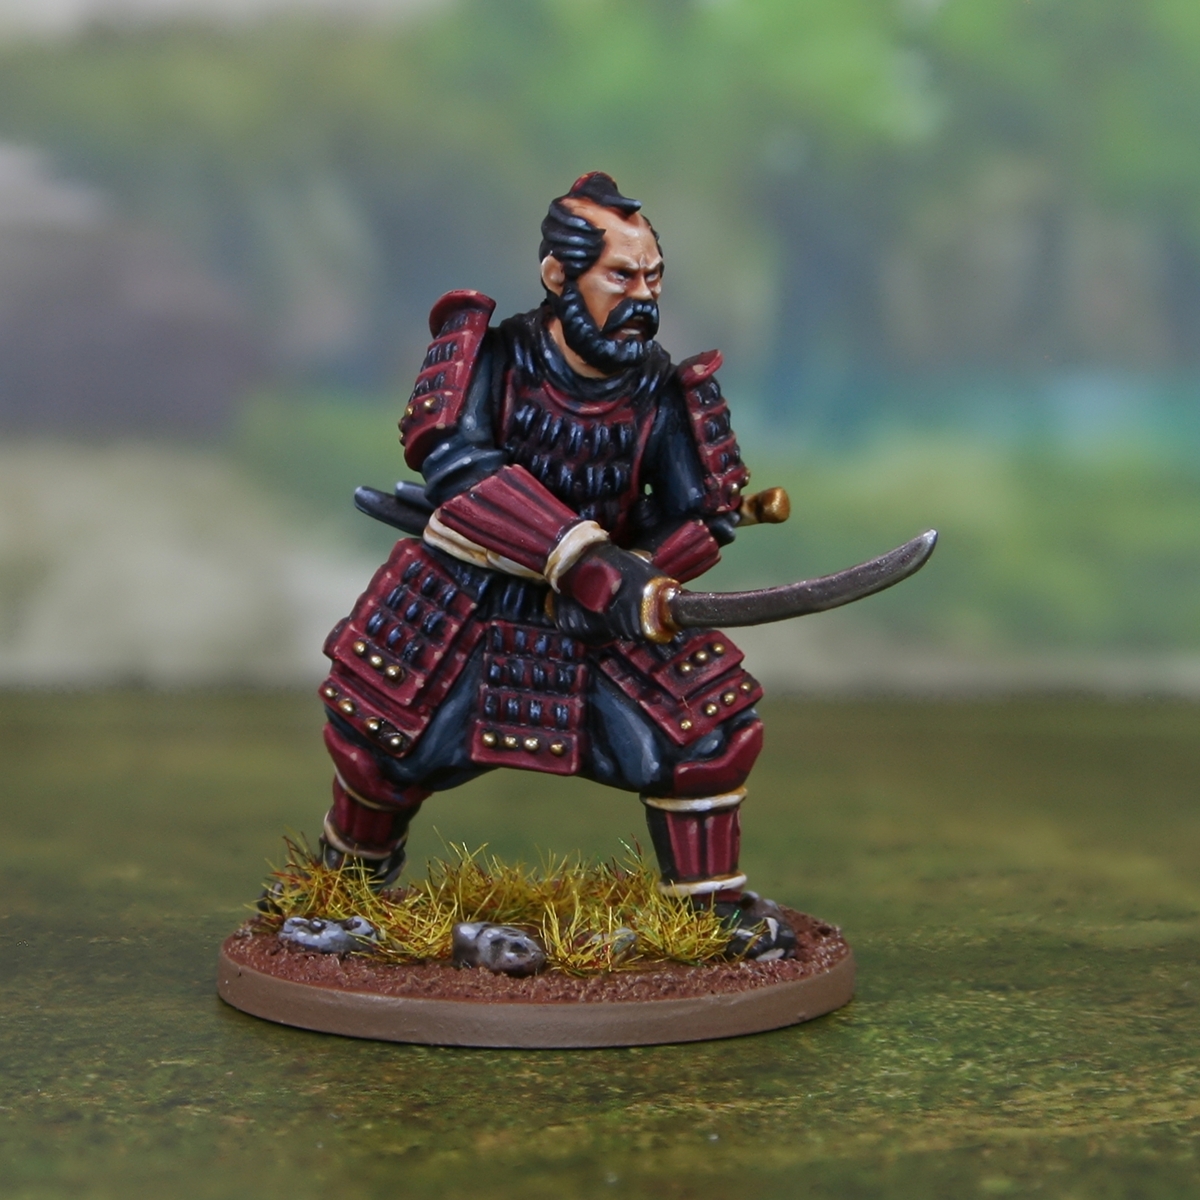
This scheme is based largely around a colour plate I found online, but draws a little inspiration from 'The Last Samurai' too. It is quite involved, but it is intended for a small skirmish force, so I am willing to put in the effort.
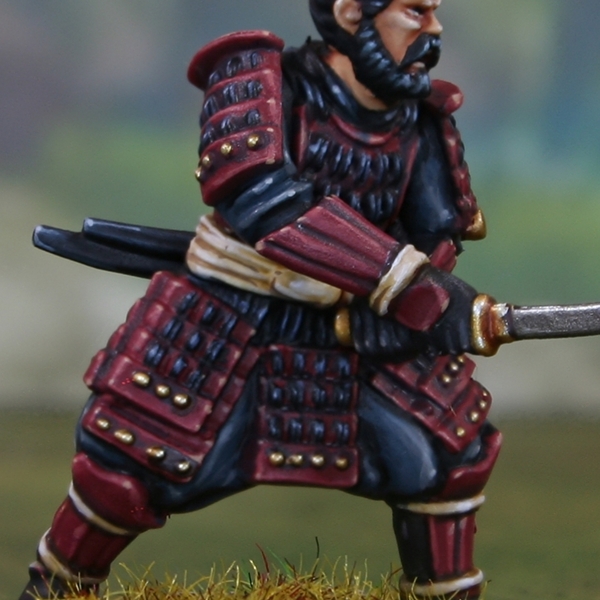 Red Armour
- Basecoat with Khorne Red .
- Drybrush with Wazdakka Red .
- Thin some 2:1 Khorne Red and Incubi Darkness and shade all recesses.
- Mix Wazdakka Red and Ungor Flesh 1:1. Use this colour to add fine edge highlights to the plates.
- Increase the amount of Ungor Flesh in the previous mix, so it is roughly 1:4 Wazdakka Red and Ungor Flesh . Now selectively highlight any corners or exposed edges.
- Finish with :specular highlights of Kislev Flesh .
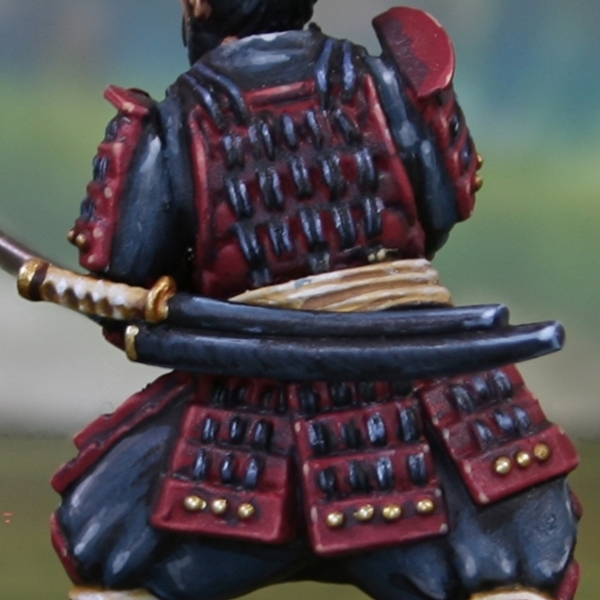 Black Stitching
- Basecoat with Black .
- Run the side of your brush over the stitching with some The Fang , just catching the edges. I would recommend doing this in and upward motion.
- Mix The Fang with an equal amount of Blue Horror and selectively highlight the pars of the stiches that would most catch the light.
- Finish with specular highlights of Blue Horror .
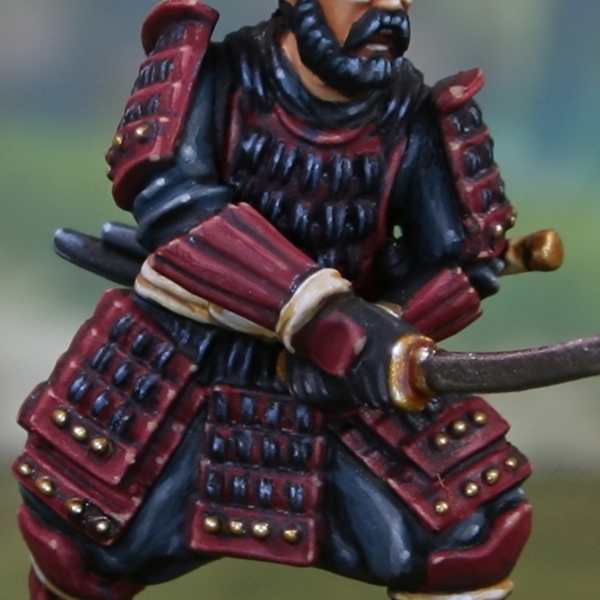 Blue-Grey Cloth
- Basecoat with 1:1 Eshin Grey and Stegadon Scale Green .
- Shade recesses with thin Abaddon Black .
- Mix your base colour 1:1 with Mechanicus Standard Grey and further enhance the volumes with some fat highlights. The difference at this stage is subtle, but it is a great way to tidy up after the shading.
- Apply chunky highlights of Mechanicus Standard Grey .
- Highlight again, with Dawnstone coverring a smaller area.
- Selectively highlight with Administratum Grey .
- Pop specular highlights of Grey Seer where needed.
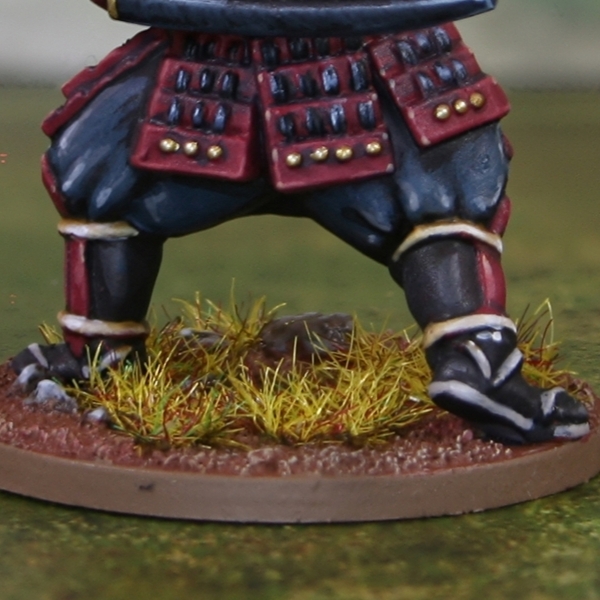 Black Cloth
- Basecoat with Black .
- Glaze and pick out the general shapes with 1:1 Black & Dryad Bark .
- Take the previous colour and mix it 1:1 with Stormvermin Fur . Use this mix to apply some general highlights to raised details.
- Mix the previous colour 1:1 with Rakarth Flesh and more selectively highlight.
- With pure Rakarth Flesh , add small highlights within the previous stage.
For the laces on the sandals, I simply picked them out with :rakarth flesh, then selectively highligghted with Pallid Wych Flesh .
 Cream Cloth
- Basecoat with Screaming Skull .
- Wash with Seraphim Sepia .
- If any parts need extra shading, I would recommend additional shading by hand with 1:1 Tau Light Ochre and Dryad Bark .
- Selectively highlight with 1:1 Screaming Skull and White .
- Pick out very small White highlights to finish the cloth.
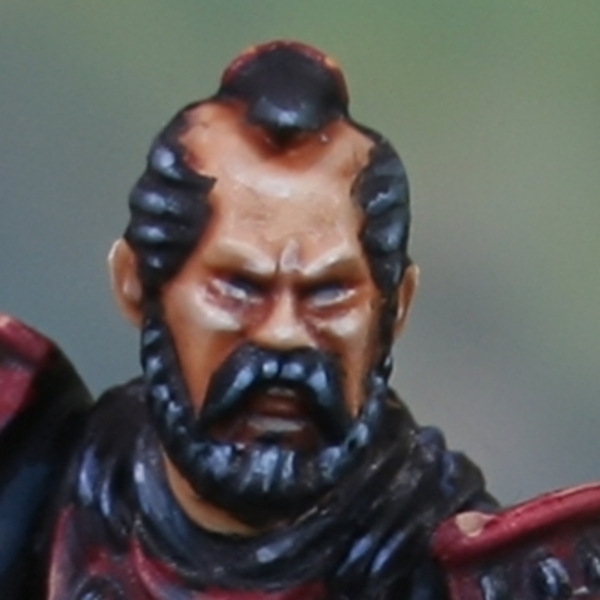 Skin
Skin
- Basecoat with Kislev Flesh
- Wash the skin with Reikland Fleshshade .
- Highlight with Flayed One Flesh .
- Add specular highlights of Pallid Wych Flesh on the tip of the nose and select areas.
 Black Hair
- Basecoat with Black .
- Pick out hair strands with a 1:1 mix of Abaddon Black and Kantor Blue .
- Mix some Kabalite Green into the previous mix and selectively highlight curved edges.
- Now mix in some Fenrisian Grey and pick out an even smaller area.
- Finally, use pure Fenrisian Grey to very selectively highlight curved edges where the light would hit.
 Black Saya
- Basecoat with Black .
- Glaze a highlight of Dark Reaper on raised areas.
- Apply fine highlights of Thunderhawk Blue .
- Selectively higlight Fenrisian Grey .
- Mix some White into your Fenrisian Grey and apply specular highlights on upward facing corners.
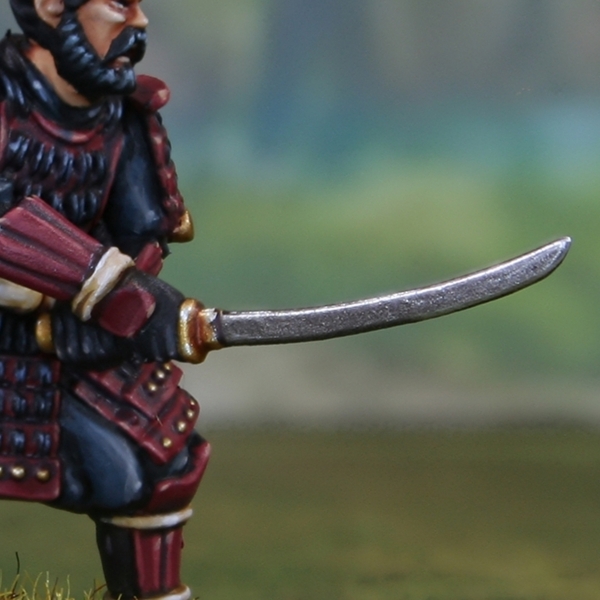 Katana Blade
- Basecoat with Leadbelcher .
- Wash with Nuln Oil , pulling pigment away from the tip.
- Establish a highlight with Ironbreaker , and also edge highlight.
- Add a small highlight of Silver RLM01 Metallic and edge highlight more selectively.
 Gold Details
- Mix a little Silver RLM01 Metallic into Retributor Armour , until you see the colour desaturate to a point when you are happy. Now basecoat all gold details.
- Wash/recess shade with Reikland Fleshshade , where needed.
- Where you want to emphasize deep recesses or a define a change in material, use some Rhinox Hide and a very fine brush. We are aiming for a fine line here.
- Increase the amount of Silver RLM01 Metallic in your Retributor Armour and highlight.
- Finish with some specular highlights of Silver RLM01 Metallic .

Rookie Brushes
RookieBrushes
Aspiring miniature painter and biscuit enthusiast. Here to share my hobby and help where I can.
Citadel Painting System 33
Base 13
- Abaddon Black
- Dryad Bark
- Grey Seer
- Incubi Darkness
- Kantor Blue
- Khorne Red
- Leadbelcher
- Mechanicus Standard Grey
- Rakarth Flesh
- Retributor Armour
- Rhinox Hide
- Stegadon Scale Green
- The Fang
Shade 3
- Nuln Oil
- Reikland Fleshshade
- Seraphim Sepia
Layer 17
- Administratum Grey
- Blue Horror
- Dark Reaper
- Dawnstone
- Eshin Grey
- Fenrisian Grey
- Flayed One Flesh
- Ironbreaker
- Kabalite Green
- Kislev Flesh
- Pallid Wych Flesh
- Screaming Skull
- Stormvermin Fur
- Tau Light Ochre
- Thunderhawk Blue
- Ungor Flesh
- Wazdakka Red
Vallejo Model Air
Base 1
- 71.063 Silver RLM01 Metallic
Vallejo Model Color
Base 2
- 70.950 Black
- 70.951 White



.jpg)

