The Nighthaunt Pyregheists are a hauntingly beautiful and deadly Warcry warband, embodying the vengeful spirits of the Mortal Realms. Rising from the crypts of Shyish, these spectral warriors are bound by Nagash's will, their ethereal forms exuding a chilling, otherworldly glow. This guide will help you bring their ghostly presence to life, with painting techniques designed to highlight their spectral nature, decayed relics, and fiery magic.
From the wispy cloaks that dissolve into nothingness to the flickering flames that burn with unnatural hues, each element of the Pyregheists tells a story of vengeance and despair. This step-by-step guide caters to painters of all levels, offering foundational techniques and advanced methods to achieve stunning results that reflect the eerie beauty of these spectral warriors.
Whether you are painting for display or battle-ready models, this guide ensures your warband will haunt the table with an unforgettable presence.
Full List of Elements for the Nighthaunt Pyregheists Painting Guide
Assembly and Priming
General assembly tips and priming methods to prepare models effectively.
Cloaks
a. Pale Cloaks: Ghostly white with minimal shading for an ethereal appearance.
b. Gradient (Dark-to-Light) Cloaks: Black at the top, transitioning to teal or white at the bottom.
c. Ethereal Blue Gradient Cloaks: Light blue fading to white or translucent edges.
d. Reddish-Brown Aged Cloaks with Dark Fade Accents: Aged reddish tones transitioning to black with teal highlights at the torn edges.
e. Decayed Shroud: Weathered bluish-brown with subtle blue-gray highlights.
Spectral Limbs
Pale, glowing limbs with soft blue-gray shadows.
Exposed Bones
Classic undead bone tones with subtle warmth and highlights.
Green Flames and Ghostly Fire
a. Standard Green Flames: Yellow at the base, transitioning to darker greens at the tips.
b. Ground Flame on Leader’s Base: Multi-color gradient flame moving from dark purples and reds to pale white tips.
Metallic Elements
a. Brass Details
b. Copper Details
c. Steel Elements
Wooden Elements
Aged, decayed wood like fence posts, grave markers, or adornments.
Hair on the Leader Model
Pale, spectral hair emerging from beneath the leader’s helmet.
Bases
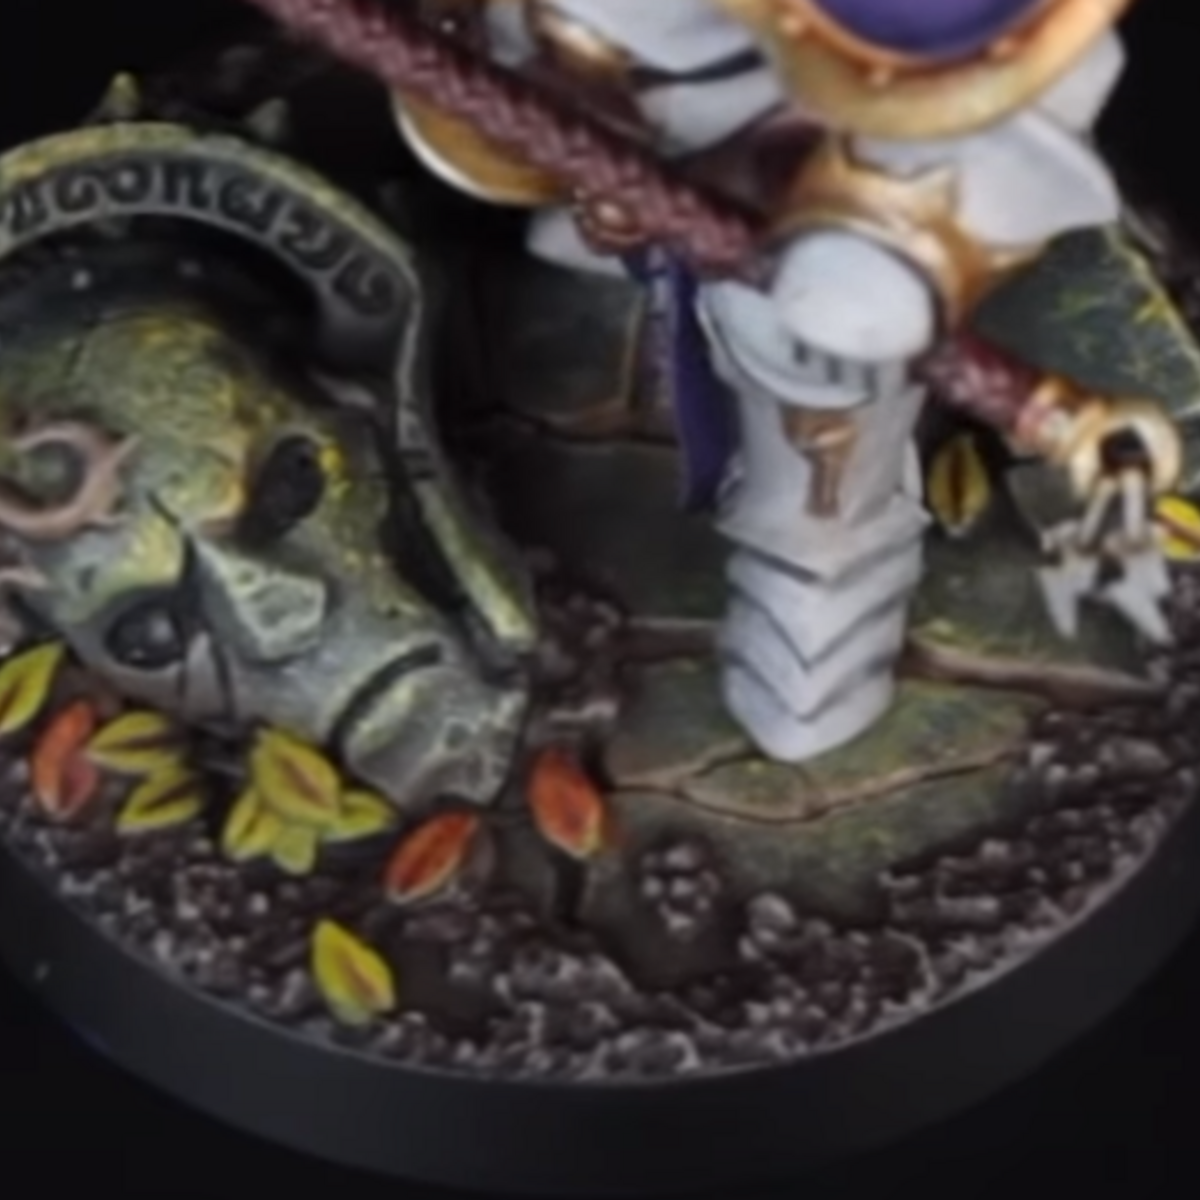
The Mortal Realms basing recipe: textured sand, grey tones, drybrushing, and tufts.
Advanced Techniques (Optional)
a. Ghostly Robes
b. Spectral Limbs
c. Black Robes
Section 1: Assembly and Priming
Key Points for Assembly:
Cleaning and Preparation:
Carefully remove all pieces from the sprue using clippers.
Remove mold lines and sprue attachment points using a hobby knife or file to ensure smooth surfaces, especially on visible areas like cloaks and skeletal faces.
Test-fit pieces before gluing to ensure proper alignment, especially for dynamic and fragile parts like flames or thin connecting points.
Glue and Sub-Assemblies:
Use plastic glue for strong bonds on all plastic parts.
For areas that are difficult to access with a brush after assembly (e.g., the insides of cloaks, flame details, or areas around the leader’s shoulder adornments), consider painting in sub-assemblies:
For example, keep the cloaks and bases separate until after painting, or leave headpieces unattached if flames or helmets obstruct access.
Handling Delicate Parts:
Many Nighthaunt pieces, especially the connecting elements between the body and base, are thin and delicate. Handle these parts carefully during assembly to avoid snapping them.
Key Points for Priming:
Primer Choice:
Start with a neutral primer for flexibility across the range of elements:
Mechanicus Standard Grey: A versatile mid-tone primer, excellent for building both light (pale cloaks) and dark (gradient cloaks, flames) layers.
Use Chaos Black in hard-to-reach or recessed areas to create shadow and depth where lighter colors will not be applied.
Spray Techniques:
Begin with an all-over coat of Mechanicus Standard Grey.
For areas requiring highlights or lighter tones (e.g., ethereal blue cloaks or pale cloaks), follow up with a zenithal spray of Corax White or another white primer from above to create a natural pre-highlight effect.
Ensure thin, even coats by holding the spray can about 12 inches away and using short bursts to avoid overloading the model.
Special Cases:
On the leader model, spray the inside of the shoulder adornments and helmet with Chaos Black before assembling, as these areas are harder to access after gluing.
On models with flames (like heads, hands, or bases), a grey primer is sufficient, but if you want more vibrant greens and yellows, a lighter primer like Corax White on the flames will enhance those tones.
Priming Sub-Assemblies:
Prime each sub-assembly separately to avoid missed spots:
Cloaks (if detached), bases, skeletal faces, and any weapons or adornments.
If parts are difficult to handle, use sticky tack on corks or clips to hold them while spraying.
Section 2.1: Ethereal Blue Gradient Cloaks – Painting Guide
Key Characteristics:
Positioned on the innermost parts of the model.
A smooth gradient effect, transitioning from pale blue at the top to white or translucent at the bottom.
Soft and glowing, giving a ghostly, ethereal appearance.
Step-by-Step Guide:
Basecoat: Establish the Foundation
Thin Ionrach Skin slightly with water or Lahmian Medium to ensure smooth coverage and avoid streaks.
Apply 2–3 thin coats over the entire cloak to create an even base. Let each coat dry fully before applying the next.
First Wash: Add a Ghostly Tint
Mix Nihilakh Oxide with Lahmian Medium (1:3 ratio) to heavily thin it. This ensures a soft turquoise tint rather than a strong, opaque wash.
Apply the wash over the entire cloak, focusing on the upper sections and recesses where shadows would naturally form.
Allow the layer to dry completely, then repeat as needed to intensify the turquoise hue in shadowed areas, like folds or near the top of the cloak.
Second Wash: Build Depth and Shadows
Thin Nighthaunt Gloom heavily with Lahmian Medium (1:4 ratio)to create a transparent glaze. Test it on a spare surface (like a sprue or palette) to ensure it’s not too strong.
Carefully apply the wash into the recesses and upper areas of the cloak to deepen the shadows. This will create a soft gradient from blue shadows at the top to pale, glowing areas near the bottom.
Build up 3–4 thin layers, letting each one dry before adding the next. Gradually focus each layer closer to the top of the cloak, avoiding the lower portions entirely by the final layers.
Clean-Up: Restore Brightness (Optional)
If any areas become too dark or lose the glowing effect, glaze Ionrach Skin back onto the protruding folds or edges. Thin the paint with Lahmian Medium or Glaze Medium to keep it subtle.
Highlight: Enhance the Glow
Highlight the raised areas, edges, and tips of the cloak using Deepkin Flesh. Thin the paint slightly for better control and a smooth finish.
Focus on the edges near holes or torn sections, as well as the folds and tips at the bottom of the cloak.
Edge Highlight: Final Detailing
Apply an edge highlight to the sharpest edges and tips of the cloak using White Scar. Thin the paint to avoid chalky lines.
This step creates a final pop of brightness, especially around the edges of holes and along the bottom hem of the cloak. Be careful not to overdo it—keep the highlights fine and precise.
Final Notes:
For added ethereal glow, you can apply a very light glaze of Nihilakh Oxide over the highlights to soften transitions and tie the colors together.
Take your time with thin layers to ensure a smooth, seamless gradient.
Section 2.2: Pale Cloaks – Painting Guide
Key Characteristics:
Predominantly ghostly white with soft blue-gray shading in recesses.
Smooth, subtle contrast, emphasizing a clean, ethereal appearance.
Step-by-Step Guide:
Basecoat: Establish the Pale Foundation
Apply Corax White in thin, even layers over the entire cloak.
Use 2–3 thin coats to ensure smooth and solid coverage, avoiding brush strokes.
Shade: Add Soft Depth
Use Apothecary White Contrast Paint, thinned 1:1 with Contrast Medium, and apply it to the entire cloak. This will gently enhance the recesses with a subtle gray tone.
For slightly deeper recesses or folds, use a thinned mix of Dark Reaper to create subtle blue-gray shading for additional depth. Apply sparingly and carefully to avoid overwhelming the pale look.
Clean-Up and Brighten
Reapply Corax White to clean up any areas where the shading might have spread too far.
Focus on brightening the raised folds and smooth sections of the cloak, keeping the overall look light and clean.
Highlight: Accentuate Raised Edges
Highlight the edges and raised folds of the cloak with Pallid Wych Flesh.
Focus on areas where light naturally hits, such as the peaks of folds and the edges of torn sections, for a soft glow.
Edge Highlight: Final Touches
Apply a fine edge highlight to the sharpest edges, torn holes, and tips of the cloak using White Scar.
Keep this step subtle and focused to maintain the smooth, ghostly effect.
Final Notes:
The goal for these cloaks is to keep them pale and ghostly, with subtle depth and smooth highlights. Avoid harsh contrasts to maintain the ethereal look.
Section 2.3: Gradient (Dark-to-Light) Cloaks – Painting Guide (Refined)
Key Characteristics:
Smooth gradient transitioning from pure black at the top to a rich teal toward the bottom.
Minimal highlights at the top for a shadowy appearance, transitioning to broader teal coverage and sharp highlights at the lower edges and torn sections.
A crisp white edge highlight gives the cloak a spectral, tattered look.
Step-by-Step Guide:
Basecoat: Establish the Black Foundation
Paint the entire cloak with Abaddon Black.
Ensure even coverage using 2–3 thin layers to avoid obscuring details.
Leave the topmost areas completely black, especially in deep recesses.
First Layer: Subtle Highlights at the Top
Mix Incubi Darkness with a touch of Abaddon Black (2:1 ratio).
Use this mix to lightly highlight the edges and raised folds near the top of the cloak.
Focus on thin edge highlights and subtle texture. These areas should remain dark and shadowy overall.
Second Layer: Build the Gradient in the Midsection
Apply Incubi Darkness more broadly in the midsection of the cloak. Feather this color into the black above to create a smooth gradient.
Use a thin glaze (water or Lahmian Medium thinned) to soften the transition between the black and Incubi Darkness.
Let each coat dry before applying additional thin layers to deepen the gradient as needed.
Third Layer: Introduce Teal in the Lower Sections
Apply Sotek Green to the lower third of the cloak, focusing on broader areas such as folds and edges.
Feather the Sotek Green into the Incubi Darkness above, ensuring the gradient remains smooth and natural.
Avoid covering recesses, leaving Incubi Darkness visible for shadow definition.
Highlighting: Define Raised Edges and Folds
Use Temple Guard Blue to highlight the raised edges and prominent folds, especially in the lower sections.
Apply this sparingly at the midsection but more prominently near the bottom of the cloak.
Use a fine detail brush and thin the paint slightly to keep the highlights precise and clean.
Edge Highlighting: Add Sharp Details
For torn edges and holes, apply a fine edge highlight with White Scar or a 1:1 mix of Temple Guard Blue and White Scar.
Keep the lines thin and sharp, focusing on the tips of torn sections and the sharpest edges.
This step adds a spectral, glowing effect to the most prominent areas of the cloak.
Techniques to Ensure Smooth Transitions:
Feathering:
As you apply each layer, soften the edges with a slightly damp brush to blend the colors naturally.
Glazing:
Thin your paints with water or Lahmian Medium to build up subtle, transparent layers. This is especially effective for blending Incubi Darkness into Sotek Green.
Control the Highlights:
Use a fine-tipped brush for precision. Keep the highlights thin and restrained in the upper sections, allowing the darker tones to dominate.
Final Notes:
The top areas should remain mostly black with only subtle highlights to preserve the cloak’s shadowy appearance.
The lower sections should be brighter, with larger teal areas and sharp, luminous edges to emphasize the torn, spectral look.
Take your time blending to achieve the smooth gradient that gives the cloak its eerie, otherworldly feel.
Section 2.4: Reddish-Brown Aged Cloaks with Dark Fade Accents (Finalized)
Key Characteristics:
Aged, weathered brown-purple cloak, transitioning to black at the lower sections.
Teal highlights restricted to the edges and torn sections for spectral accents.
Smooth blending and subtle weathering effects unify the cloak’s tones.
Step-by-Step Guide:
Basecoat: Establish the Burgundy Foundation
Apply Barak-Nar Burgundy evenly over the entire cloak, using 2–3 thin coats to ensure smooth, even coverage.
Layer: Add Reddish-Purple Richness
Use Screamer Pink sparingly to layer over raised folds and flatter areas of the upper cloak.
Feather the edges of the Screamer Pink into the Barak-Nar Burgundy basecoat to create smooth transitions.
Shade: All-Over Wash for Depth
Apply Agrax Earthshade as an all-over wash to tone down the Screamer Pink and deepen the shadows.
Let the wash pool slightly in recesses but avoid blotches on flat areas by wicking away excess wash with a clean brush.
Shade: Reinforce the Deep Folds
Mix Abaddon Black and Barak-Nar Burgundy (1:1 ratio).
Use this mix to darken the deepest folds and shadowed areas, focusing on where the cloak naturally fades into black.
Apply this as a glaze or controlled line shade for precise depth.
Highlight: Add Weathered Details
Mix Screamer Pink and Karak Stone (1:1 ratio). Use this intermediate tone to highlight raised folds and flatter areas of the cloak.
Apply Karak Stone sparingly to the sharpest edges and peaks of folds, blending it into the intermediate highlights.
(Optional) For torn holes or sharpest folds in the upper cloak, apply a fine edge highlight of Rakarth Flesh for added emphasis.
Dark Fade Accents: Transition into Black and Teal (Edges and Tears Only)
Base the Fade:
Glaze Abaddon Black into the lower sections to establish a smooth transition from the brown-purple base. This layer should dominate the lower folds and shadowed areas.
Torn Edges and Tears:
Apply Incubi Darkness to the edges of torn sections, feathering it into the Abaddon Black base.
Use Sotek Green sparingly on the torn edges and tips, blending it softly into the Incubi Darkness.
Add a final highlight of Temple Guard Blue on the sharpest edges, and finish with White Scar on the finest tips for a crisp spectral glow.
Techniques for Smooth Results:
Feathering: Soften transitions between Barak-Nar Burgundy, Screamer Pink, and Abaddon Black with a damp brush for natural blending.
Glazing: Use thin layers of Incubi Darkness, Sotek Green, and Temple Guard Blue to build up subtle highlights on torn edges.
Control the Wash: Ensure the Agrax Earthshade wash is even across the cloak, removing excess wash from flat sections to maintain a smooth surface.
Final Notes:
The highlights from Screamer Pink + Karak Stone blend naturally into the cloak’s reddish-purple tone, avoiding harsh contrasts.
The spectral teal is reserved for torn sections, keeping the transition into black and teal focused and cohesive.
This streamlined approach eliminates redundant steps while preserving all the necessary details for a balanced and haunting cloak.
Section 2.5: Dark Cloaks with Grey Highlights and Teal Transitions (Revised)
Key Characteristics:
The upper cloak features grey highlights, giving a desaturated, muted effect.
The lower sections fade to teal, with sharp spectral highlights along the torn edges.
The cloak transitions smoothly from black to teal, maintaining a cohesive theme.
Step-by-Step Guide:
Basecoat: Establish the Black Foundation
Paint the entire cloak with Abaddon Black.
Apply 2–3 thin layers for a smooth and even basecoat.
Highlight: Add Grey Details to the Upper Cloak
Use Eshin Grey to highlight raised folds and edges in the upper portions of the cloak.
Feather this into the Abaddon Black basecoat to create smooth transitions. Keep the highlights subtle to maintain the dark tone.
For sharper highlights on the folds and edges, mix Eshin Grey with Dawnstone (1:1) and apply sparingly, focusing on the tips of folds and sharp edges.
Final Highlight: Use Administratum Grey (or mix Dawnstone with Administratum Grey, 1:1) to apply very fine highlights on the most prominent edges and sharpest folds. Keep these sparing to avoid overpowering the grey tones.
Transition: Fade the Lower Sections into Teal
Glaze Incubi Darkness into the lower sections, blending it into the Abaddon Black midsection.
Apply multiple thin layers to create a smooth gradient between the black and teal tones.
Highlight: Define the Lower Teal Accents
Use Sotek Green to highlight the folds and edges in the lower third of the cloak. Feather this into the Incubi Darkness for a seamless transition.
Apply Temple Guard Blue sparingly to torn edges and tips to add a spectral glow.
Finish with a fine edge highlight of White Scar on the sharpest edges and tips of the torn sections for extra brightness.
Techniques for Smooth Results:
Feathering:
Blend transitions between Eshin Grey, Abaddon Black, and the teal tones with a clean, damp brush for soft edges.
Glazing:
Use thinned paints (like Incubi Darkness, Sotek Green) to build up smooth, transparent layers, ensuring natural fades.
Precision Highlights:
Apply Administratum Grey highlights sparingly to avoid over-lightening the upper portions of the cloak.
Final Notes:
The final Administratum Grey highlights on the upper cloak add subtle definition without detracting from the muted, shadowy look.
The spectral teal lower sections retain their eerie glow while blending naturally into the darker upper tones.
Section 2.6: Decayed Shroud – Painting Guide
Key Characteristics:
A dirty, bluish-brown cloak with smooth transitions between shadows and highlights.
Subtle bluish-grey edge highlights for texture and contrast, adding a decayed, weathered look.
Extreme edge highlights enhance the torn, mouldered edges.
Step-by-Step Guide:
Basecoat: Establish the Bluish-Brown Foundation
Mix Dryad Bark and Dark Reaper (2:1 ratio) to create a dirty, bluish-brown tone.
Thin the paint with water for a smoother application.
Apply two thin coats to the entire cloak to ensure even coverage.
Shade: Add Depth to the Recesses
Apply a thinned layer of Nuln Oil to the entire cloak.
Thin the shade with Lahmian Medium (1:1 ratio) to avoid patchy drying and ensure smooth shadows.
Once dry, apply a second coat of Nuln Oil selectively into the deepest recesses to enhance the depth of shadows.
Clean-Up: Reinforce the Basecoat
Reapply the Dryad Bark + Dark Reaper mix to raised areas and protruding folds.
Use a single thin layer to clean up the shading and emphasize the fabric's contours.
Feather the paint into the surrounding shaded areas for a smooth transition.
Highlight: Add Contrast to the Folds
Mix Gorthor Brown and Dark Reaper (2:1 ratio).
Thin the mix with Lahmian Medium for smoother blending.
Apply one thin layer to raised folds and edges, focusing on areas that naturally catch the light.
Edge Highlight: Create Bluish Tint
Mix Thunderhawk Blue and Ionrach Skin (1:1 ratio) to create a pale, greyish-blue tone.
Thin the paint with water or Lahmian Medium to ensure smooth application.
Apply this mix to the edges of folds, tears, and holes in the cloak.
Focus on the most prominent areas, keeping the highlights subtle to avoid overpowering the brown tones.
Extreme Edge Highlight: Add Final Definition
Use Deepkin Flesh sparingly to add an extreme edge highlight.
Thin the paint and use a fine-tipped brush to carefully apply it to the sharpest edges, torn sections, and holes.
Keep this layer minimal, focusing on areas that would catch the most light.
Techniques for Best Results:
Mixing Paints: Use a wet palette to keep paint mixes fresh and consistent, especially for multi-step layering and highlighting.
Controlled Shading: Thin Nuln Oil with Lahmian Medium for smoother shadows, and avoid letting it pool unevenly on flat areas.
Feathering: Soften transitions between highlights and the basecoat with a clean, damp brush.
Precision Highlights: Use a fine brush for the Thunderhawk Blue + Ionrach Skin and Deepkin Flesh highlights to maintain sharpness and accuracy.
Final Notes:
This scheme gives the cloak a dark, weathered, and decayed look with bluish tints that complement the Nighthaunt aesthetic.
The subtle highlights and extreme edge highlights help emphasize the texture and wear of the cloak, giving it a lifelike, ragged feel.
Section 6: Spectral Limbs – Painting Guide (Refined)
Key Characteristics:
Muted pale green-blue base with subtle blue-grey shading for depth.
Smooth highlights using Deepkin Flesh, with the brightest points accented with White Scar.
Ethereal, glowing appearance distinct from other spectral features like the flames.
Step-by-Step Guide:
Basecoat: Establish the Pale Foundation
Apply Ionrach Skin evenly over the limbs, ensuring smooth coverage.
Use 2–3 thin coats, allowing each layer to dry fully before applying the next.
Soft Shade: Add Depth to the Recesses
Mix Ionrach Skin and Dark Reaper (2:1 ratio), thinning the paint slightly with water or Lahmian Medium.
Apply this mix as a soft shade, focusing on recesses such as between fingers, around skeletal details, and other deeper areas.
Feather the edges of the shade into the basecoat for smooth transitions.
Deep Shade: Darken the Shadows
Thin Dark Reaper with water or Lahmian Medium (approximately 3:1 ratio of paint to thinner) and apply to the deepest recesses to enhance contrast.
Use a fine detail brush for precision, applying this to areas such as the undersides of fingers, deep grooves, and along bone structures.
Clean-Up: Brighten the Raised Areas
Reapply Ionrach Skin to tidy up the raised areas and smooth the transitions between the shading and the basecoat.
Feather the edges of this layer into the shaded areas for a seamless look.
Highlight: Add a Subtle Glow
Use Deepkin Flesh to highlight raised areas, such as knuckles, fingertips, and bone ridges.
Apply thin coats, building up the highlight gradually to achieve a glowing, ethereal effect.
Bright Points: Extreme Highlights
Use White Scar sparingly for extreme edge highlights on the sharpest points, such as the tips of fingers and prominent bone edges.
Keep this step minimal to avoid overpowering the subtle highlights.
Techniques for Best Results:
Feathering:
Blend the Ionrach Skin + Dark Reaper mix into the basecoat using a clean, damp brush for soft shadows.
Layering:
Use thin, controlled layers of Deepkin Flesh to create glowing highlights, letting each layer dry before applying more.
Precision Highlights:
Use a fine-tipped brush for White Scar to maintain clean, sharp edge highlights on the brightest points.
Final Notes:
The combination of soft blue-grey shadows and glowing Deepkin Flesh highlights gives the limbs a spectral yet subtle look.
This approach balances the muted base tones with the bright accents, making the limbs distinct yet cohesive with the warband's ethereal aesthetic.
Section 6: Spectral Limbs – Painting Guide (With Contrast Paint Alternative)
Key Characteristics:
A glowing pale green-blue base, with subtle shading for depth.
Smooth transitions and extreme highlights for an ethereal, spectral appearance.
Step-by-Step Guide:
Basecoat: Establish the Pale Foundation
Apply Ionrach Skin evenly over the limbs.
Use 2–3 thin coats for smooth, even coverage.
Soft Shade: Add Depth (Two Options)
Option A: Layered Shadows
Mix Ionrach Skin and Dark Reaper (2:1 ratio), thinning slightly with water or Lahmian Medium.
Apply this mix to the recesses and feather it into the basecoat for smooth transitions.
Option B: Contrast Shadows (Simpler Approach)
Use Apothecary White thinned with Contrast Medium (1:1 ratio) and apply it over the entire limb for soft, glowing shadows.
For deeper shadows, use Basilicanum Grey (thinned 1:2 with Contrast Medium) selectively in the recesses.
Deep Shade: Enhance Depth in Recesses
Option A:
Use pure Dark Reaper, thinned with water (3:1 ratio of paint to water), and apply it to the deepest recesses for controlled shadows.
Option B:
Apply Basilicanum Grey straight from the pot or slightly thinned with Contrast Medium into the deepest recesses.
Clean-Up: Brighten the Raised Areas
Reapply Ionrach Skin to the raised areas and smooth the transitions between the shaded and highlighted areas.
Feather the edges of this layer into the shadows for seamless blending.
Highlight: Add a Subtle Glow
Use Deepkin Flesh to highlight raised areas, such as knuckles, fingertips, and bone ridges.
Apply thin layers, focusing on areas that would naturally catch the light.
Bright Points: Extreme Highlights
Use White Scar sparingly for edge highlights on the tips of fingers, prominent bones, and sharp edges.
Keep the application precise to avoid overpowering the glowing effect.
Notes on the Contrast Paint Option:
Apothecary White creates a soft, glowing effect that complements the spectral theme.
Basilicanum Grey, when thinned, provides natural shadows without harsh contrasts.
Contrast paints simplify shading, but you may need to reapply Ionrach Skin to refine raised areas after application.
Section 7: Hair on the Leader Model – Painting Guide
Key Characteristics:
Pale, spectral hair transitioning from blue-grey tones at the roots to bright, glowing highlights at the tips.
Soft shadows between strands emphasize texture, while sharp edge highlights enhance the glowing effect.
Step-by-Step Guide:
Basecoat: Establish the Hair Tone
Apply Fenrisian Grey evenly over the hair, ensuring all strands are covered.
Use 2–3 thin coats for smooth and consistent coverage.
Shade: Define the Recesses
Apply Drakenhof Nightshade, thinned with Lahmian Medium (50:50 ratio), into the recesses between hair strands.
Use a clean brush to wick away excess wash from the raised areas.
Layer: Smooth the Transition
Reapply Fenrisian Grey to the raised strands, blending it into the shaded recesses.
Feather the edges to create smooth transitions between the shadows and midtones.
Highlight: Brighten the Edges
Use Pallid Wych Flesh, thinned slightly with water or Lahmian Medium, to highlight the raised strands and edges.
Focus on the upper portions of the hair and areas that would catch the most light.
Fine Highlight: Add Glowing Tips
Mix Pallid Wych Flesh and White Scar (50:50 ratio) and apply sparingly to the tips of the hair strands.
For extreme highlights, use pure White Scar to add small dots or lines on the sharpest tips.
Techniques for Best Results:
Blending: Feather the highlights into the basecoat for a natural, glowing transition.
Precision: Use a fine-tipped brush to highlight individual strands or edges without over-lightening the hair.
Layering: Build up highlights gradually to maintain smooth transitions and avoid harsh contrasts.
Final Notes:
The spectral hair complements the glowing elements of the model while maintaining a distinct texture.
The soft transitions and glowing tips ensure the hair feels ethereal and consistent with the warband’s theme.
Section 8: Exposed Bones – Painting Guide
Key Characteristics:
Aged, muted bone tone with subtle weathering.
Shadows in greyish-brown tones for depth.
Pale highlights to emphasize structure and enhance spectral details.
Step-by-Step Guide:
Basecoat: Establish the Bone Foundation
Apply Rakarth Flesh evenly over all exposed bone areas, such as hands, ribs, and skulls.
Use 2–3 thin layers for smooth coverage, avoiding obscuring the details.
Shade: Add Depth to the Recesses
Mix Agrax Earthshade and Nuln Oil (1:1 ratio) and thin with Lahmian Medium (50% paint to 50% medium).
Apply this wash evenly over the bones, letting it settle into the recesses to create shadows.
Wipe away any excess wash from flat areas using a clean, damp brush to prevent pooling.
Clean-Up: Reinforce the Basecoat
Reapply Rakarth Flesh to raised areas, such as knuckles, finger ridges, or the tops of ribs.
Feather the edges of this layer into the shaded areas for smooth transitions.
Highlight: Add Weathered Details
Use Ushabti Bone to highlight raised edges and prominent bone structures.
Apply this to areas like finger ridges, rib edges, and skull details.
Keep the highlights restrained to preserve the aged look.
Fine Highlights: Emphasize the Structure
Use Screaming Skull or Pallid Wych Flesh for fine edge highlights.
Focus on sharp edges like the tips of fingers, cheekbones, and teeth.
For extreme points, such as tips of ribs or claws, use White Scar, thinned with a small amount of water, to place tiny dots or lines.
Techniques for Best Results:
Controlled Washes: Thin the Agrax Earthshade + Nuln Oil mix to prevent overwhelming the subtle bone details.
Feathering: Blend the Rakarth Flesh clean-up into the shaded areas for smooth transitions.
Precision Highlights: Use a fine-tipped brush for Screaming Skull and White Scar highlights, keeping them minimal to maintain a muted aesthetic.
Final Notes:
The muted, aged appearance of the bones ensures they stay grounded and distinct from the glowing spectral elements.
The combination of soft shadows and restrained highlights creates depth without overpowering the model’s ethereal tone.
Section 9: Green Flames – Painting Guide
Flames on Weapons and Models (Updated)
Key Characteristics:
Bright yellow-green at the base transitioning to vivid green at the tips.
Highlights emphasize the hottest areas near the base, while darker greens define the cooler tips.
Step-by-Step:
Basecoat: Establish the Foundation
Apply Warpstone Glow evenly over the flames, covering the entire area.
Use 2–3 thin coats to ensure smooth, even coverage.
Brighten the Base:
Mix Moot Green and Yriel Yellow (50:50 ratio), thinning with water or Lahmian Medium.
Apply this mix to the base and inner areas of the flame, focusing on the hottest parts where the flame meets its source.
Highlight the Hottest Points:
Use Yriel Yellow, blended with Pallid Wych Flesh (50:50 ratio), for precise highlights on the base ridges and brightest areas.
Apply sparingly to maintain contrast.
Add Depth at the Tips:
Apply Caliban Green to the outer tips of the flames, blending downward toward the yellow-green midsection.
Thin with Lahmian Medium to create smooth transitions and avoid harsh edges.
Highlight the Tips:
Mix Moot Green with Pallid Wych Flesh (50:50 ratio) and apply as fine highlights to the raised edges of the darker green areas.
Use White Scar for the sharpest highlights at the very tips of the flames.
Leader Model's Base Flames
Key Characteristics:
Smooth gradient from dark purple/black at the base through red, orange, yellow, and ending in a pale, ghostly tone.
The deeper recesses feature subtle dark blue and green tones, echoing the spectral skin of the models.
Step-by-Step:
Basecoat:
Apply Abaddon Black evenly over the flames as the basecoat.
Ensure even, solid coverage for smooth layering.
First Transition (Dark Purple to Red):
Mix Abaddon Black and Xereus Purple (50:50 ratio) for the first transition layer.
Feather this layer into the black basecoat, focusing on the lower half of the flame.
Blend upward, transitioning into pure Xereus Purple toward the midsection.
Add a layer of Mephiston Red over the purple to smooth the transition into red.
Second Transition (Red to Orange):
Use Troll Slayer Orange, blending it into the Mephiston Red.
Build up the orange tone through thin, controlled layers, focusing on the mid-to-upper sections of the flame.
Third Transition (Orange to Yellow):
Apply Yriel Yellow, blended into Troll Slayer Orange, for the brighter upper areas of the flames.
Focus on the tips of ridges while leaving the highest points for the next stage.
Highlight the Pale Edges:
Mix Ionrach Skin with Yriel Yellow (50:50 ratio) and use this to highlight the uppermost ridges and flame tips.
For extreme highlights, use pure Ionrach Skin sparingly.
Add dots of White Scar to the sharpest tips for glowing points.
Deepen the Recesses (Advanced Detail):
Use a thin glaze of Dark Reaper (blue-grey) mixed with Incubi Darkness (greenish-blue) to shade the inner recesses of the flame, particularly near the darker purple/red base.
Apply carefully to enhance depth without overpowering the warm tones.
Techniques for Best Results:
Blending: Use glazes to create smooth, seamless transitions between colors, especially in the midsection transitions (purple to red and red to orange).
Glow Effect: Thin layers of orange or yellow can be applied to areas surrounding the base flame to simulate reflected light.
Refined Highlights: Keep extreme highlights sharp but minimal to emphasize the ethereal and chaotic nature of the flames.
Final Notes:
The green flames across weapons and models emphasize spectral energy, while the base flames introduce a contrasting fiery aesthetic with a chaotic, magical tone.
Adding subtle shading in the recesses of the base flames reinforces the eerie and ghostly theme of the warband.
Section 10: Metallic Elements – Painting Guide
Key Characteristics:
Aged, tarnished metals with both warm brass and cold steel tones.
Subtle highlights and patina effects to emphasize wear and texture.
Glow interaction to reflect nearby spectral effects.
Brass Details (Lanterns, Helmets, Decorative Flourishes)
Basecoat: Establish the Brass Tone
Apply Balthasar Gold as the basecoat over all brass areas.
Use 2–3 thin layers for even coverage, ensuring no details are obscured.
Shade: Add Depth and Patina
Apply Agrax Earthshade evenly across the brass areas to deepen recesses and create a muted tone.
For areas with more visible oxidation, add Coelia Greenshade selectively into the recesses to simulate tarnishing.
Highlight: Emphasize the Edges
Use Sycorax Bronze to highlight raised edges, such as rims of lanterns, spikes, or helmet details.
Apply sparingly to avoid losing the aged look.
Fine Highlight: Add a Brighter Sheen
Use Runefang Steel to add small, sharp highlights to the sharpest edges and corners.
Focus on areas like the tips of spikes or the rims of lanterns for a subtle sheen.
Optional Glow Effect:
Near glowing flames or spectral elements, apply a thin glaze of Hexwraith Flame or Moot Green to simulate reflected light.
Feather the glaze into the surrounding metal for a smooth transition.
Steel Details (Chains, Weapon Blades, Spikes)
Basecoat: Establish the Steel Tone
Apply Leadbelcher evenly across all steel areas, such as chains and weapon blades.
Shade: Add Wear and Depth
Wash the steel areas with Nuln Oil, focusing on recesses like the links of chains or the grooves in blades.
Apply a second, more targeted wash of Agrax Earthshade into the deeper recesses for a dirtier, aged look.
Highlight: Add Subtle Highlights
Use Stormhost Silver to highlight the edges of chains, blades, and spikes.
Apply sparingly, focusing on areas where light naturally catches, such as chain links or the sharp edges of weapon blades.
Glow Interaction (Optional):
Glaze Hexwraith Flame or Moot Green lightly over steel areas near spectral elements to reflect the glowing effect.
Use thin layers and gradually build up the intensity for a realistic light reflection.
Techniques for Best Results:
Controlled Washes: Use thin washes to avoid over-darkening the metallics while maintaining depth in recesses.
Blending Glazes: When adding glow effects, thin the glaze to maintain the metallic finish underneath.
Precision Highlights: Use a fine-tipped brush for edge highlights to keep the metallic elements crisp and defined.
Final Notes:
The brass and steel tones provide a contrast between warm and cool metallics, enhancing the model’s overall visual interest.
The aged and weathered appearance complements the spectral and ghostly theme of the warband.
Glow effects tie the metallics into the magical energy of the surrounding elements.
Copper Recipe
Basecoat: Establish the Reddish Tone
Apply Screaming Bell as the basecoat.
Use 2–3 thin layers for smooth and even coverage.
Shade: Deepen the Recesses
Wash the area with Agrax Earthshade, focusing on the recesses to create warmth and depth.
Apply a second, selective wash of Nuln Oil into the deepest recesses for extra contrast.
Layer: Build the Warm Copper Tone
Layer Hashut Copper onto the raised areas, leaving the recesses shaded.
Thin your layers slightly to maintain smooth transitions and avoid obscuring details.
Highlight: Brighten the Edges
Use Sycorax Bronze to highlight edges and raised details.
Apply sparingly to preserve the warm, muted copper tone while emphasizing texture.
Fine Highlight: Add Subtle Shine
Mix Sycorax Bronze and Runefang Steel (50:50 ratio) and apply to the sharpest edges, rivets, and small details.
Use a fine brush for precision to keep the highlights crisp but subtle.
Optional Weathering (Patina):
For an aged, oxidized effect, apply a thin glaze of Coelia Greenshade into recesses.
Focus this effect sparingly, keeping the overall look warm and cohesive.
Final Notes:
Screaming Bell provides a vibrant, reddish base that balances well with the warm tones of Hashut Copper and the subtle shine of the highlights.
The shading with Agrax Earthshade and Nuln Oil creates depth and enhances the texture without overwhelming the warm copper tones.
Section 11: Wooden Details – Painting Guide
Key Characteristics:
Aged, weathered wood with muted, earthy brown tones.
Subtle highlights to emphasize dryness and texture.
Minimal contrast to maintain a natural, worn appearance.
Step-by-Step Guide:
Basecoat: Establish the Wood Tone
Apply Dryad Bark evenly over all wooden areas, such as stakes, poles, and grave markers.
Use 2–3 thin coats to ensure smooth, solid coverage.
Shade: Enhance the Grain Texture
Wash the wooden areas with Agrax Earthshade, letting it settle into the grain and recesses.
For deeper texture, apply a second targeted wash to the most recessed areas, such as cracks or grooves.
Clean-Up: Reinforce the Base Tone
Reapply Dryad Bark to raised areas, avoiding the recesses.
Use this step to smooth transitions between the basecoat and shaded areas.
Highlight: Add Subtle Dryness
Use Gorthor Brown to highlight the edges and raised grain of the wood.
Apply thin lines along sharp edges, such as splinters or corners of planks, to create a dry, aged appearance.
Fine Highlight: Emphasize Details
Use Baneblade Brown sparingly to add final highlights to sharpest edges and prominent grain patterns.
Focus on areas like the tips of splinters or the edges of cracks for a subtle but realistic effect.
Optional Glow Effect (Near Flames):
Near glowing elements, apply a thin glaze of Moot Green or Yriel Yellow to the wood’s surface.
Feather this glaze into the surrounding wood to simulate reflected light.
Techniques for Best Results:
Layering: Keep highlights subtle, gradually building up brightness to avoid an unnatural appearance.
Controlled Washes: Use thin layers of Agrax Earthshade to preserve details and prevent pooling.
Feathering Glazes: When applying glow effects, thin glazes to maintain the wood texture while adding subtle color shifts.
Final Notes:
The muted, desaturated wood tones complement the spectral aesthetic of the warband, keeping the focus on the glowing magical elements.
Subtle highlights ensure the wooden features look aged and natural, blending seamlessly with the model’s overall theme.
Section 12: Bases – Painting Guide
Key Characteristics:
Dark, rocky bases with muted tones to reflect the bleak, barren landscapes of the Mortal Realms.
Drybrushing techniques bring out texture, while subtle vegetation adds contrast.
Step-by-Step Guide:
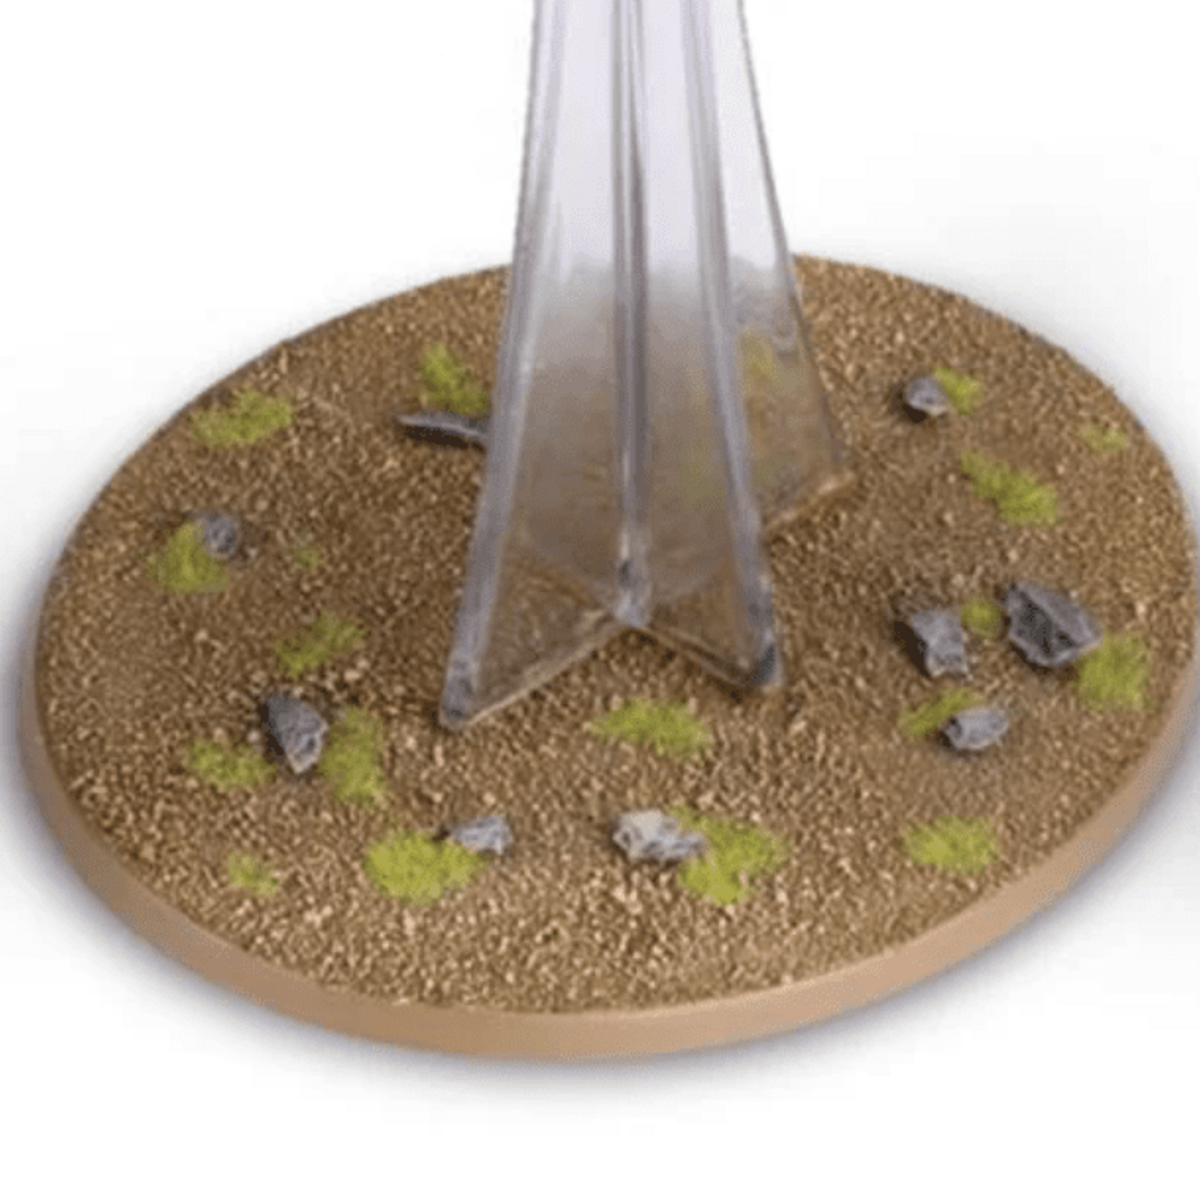
Texture the Base:
Apply sand or texture paste (such as Citadel's Astrogranite) to the base using PVA glue.
Allow to dry completely before priming.
Basecoat: Establish the Groundwork
Apply Mechanicus Standard Grey evenly across the entire base, including textured areas.
Ensure full coverage in 2–3 thin coats.
Shade: Add Depth
Wash the base with Nuln Oil, letting the wash settle into the texture.
Use a clean brush to wick away excess wash from flatter areas, ensuring it doesn’t pool unevenly.
Drybrush: Bring Out the Texture
Drybrush the base lightly with Karak Stone, focusing on raised areas to emphasize the texture.
Follow this with a second, lighter drybrush of Screaming Skull for additional contrast.
Rim the Base:
Paint the rim of the base with Stormvermin Fur for a neutral, consistent finish that matches the tone of the warband.
Add Vegetation (Optional):
Use Mordheim Turf or similar static grass tufts, attaching them with PVA glue.
Place tufts sparingly to avoid overwhelming the desolate appearance of the base.
Techniques for Best Results:
Drybrushing: Use a light touch to avoid overloading the texture with paint. Build up the effect gradually.
Wash Control: Remove excess wash from flat areas to keep shading consistent and natural.
Placement: Position vegetation in natural clumps or around rocky areas to create visual interest without overcrowding.
Final Notes:
The subdued tones of the bases ensure the models remain the focal point, while the subtle details enhance the overall theme of the warband.
This method is versatile and can be adapted for larger dioramas or terrain to match your warband’s aesthetic.
Advanced Techniques
Advanced Technique 1: Ghostly Robes
Key Characteristics:
Smooth, spectral gradients transitioning from shadowed folds to glowing, ethereal tips.
Intricate blending for realistic transitions, with glowing edges to enhance the ghostly look.
Step-by-Step:
Basecoat:
Mix 50% Incubi Darkness and 50% Ionrach Skin for a desaturated greenish-blue foundation.
Apply 2–3 thin layers for even coverage, ensuring the color is opaque and smooth.
The basecoat should be richer near the folds and slightly lighter on flatter surfaces.
Transition Layers (Building Smooth Gradients):
Mix 66% Incubi Darkness and 33% Ionrach Skin, thinned with 50% Lahmian Medium.
Use a glazing technique to pull the color toward deeper recesses.
Visual Cue: Imagine the folds of the robe catching faint light at the edges while remaining shadowed toward the center.
Work systematically, layering 3–5 thin glazes to build a smooth gradient.
Let each layer dry before adding the next to avoid streaking.
Refining Darker Areas (Deepening Shadows):
Use 50% Incubi Darkness and 50% Lahmian Medium for a semi-transparent glaze.
Focus on the darkest recesses, such as the undersides of folds and inner areas where fabric gathers.
Feather the edges into the mid-tones to ensure no abrupt color transitions.
Apply controlled layers, repeating as necessary to achieve a deep, rich shadow.
Brighten the Robes (Enhancing the Glow):
Mix 33% Incubi Darkness and 66% Ionrach Skin, thinned with 50% Lahmian Medium.
Paint the raised sections and transitions near the ends of the robes to brighten these areas.
Key Tip: Pull the brush strokes toward the lighter edges for a natural glow.
Refining Tips (Soft, Pale Ends):
Use pure Ionrach Skin, thinned with 50% Lahmian Medium, for the very tips of the robes.
Gradually blend this into the mid-tones for a glowing, ethereal finish.
Check for uneven transitions, using light glazes of previous colors to smooth out the gradient.
Chunky Highlights (Defining Edges):
Mix 90% Ionrach Skin and 10% Lahmian Medium for chunky highlights.
Paint highlights approximately 1mm wide along the torn edges, folds, and any raised details.
Use a detail brush for precision, ensuring highlights follow the fabric’s contours.
Fine Highlights (Adding Glow):
Apply a mix of 90% Deepkin Flesh and 10% Lahmian Medium for fine highlights on raised folds and tips.
Follow with 50% Deepkin Flesh and 50% White Scar, focusing on extreme edges like torn tips or fabric holes.
Add tiny dots of White Scar at the sharpest points for a spectral pop.
Visual Cue: The glowing tips should mimic light emanating outward, emphasizing the ethereal nature.
Advanced Technique 2: Spectral Limbs and Skin
Key Characteristics:
Luminous, glowing pale skin with subtle transitions and depth.
Shadows blend seamlessly into highlighted edges, mimicking supernatural energy.
Step-by-Step:
Basecoat:
Mix 50% Incubi Darkness and 50% Ionrach Skin to create a muted greenish-blue base.
Apply in 2–3 thin coats, ensuring smooth, consistent coverage.
Focus on areas like skeletal fingers, bone ridges, and raised muscle structures.
Shading Transitions:
Mix 66% Incubi Darkness and 33% Ionrach Skin, thinned with 50% Lahmian Medium.
Apply as a glaze to recesses, such as between fingers, knuckles, and other grooves.
Key Tip: Use thin layers to maintain control, darkening gradually for a realistic depth effect.
Focused Wash (Adding Contrast):
Use the same 66% Incubi Darkness / 33% Ionrach Skin mix, thinned further with Lahmian Medium.
Wash over larger areas, like hands and skulls, to enhance texture and detail.
Avoid letting the wash pool on flat surfaces to maintain brightness.
Deep Recess Shading:
Use 50% Incubi Darkness and 50% Lahmian Medium for precise shading.
Target the deepest shadows, like finger joints or undersides of bones.
Apply thinly and build up the depth gradually.
Brighten the Skin (Highlight Layers):
Use Ionrach Skin, thinned with 50% Lahmian Medium, for highlights on raised areas.
Apply multiple thin layers to build brightness, ensuring the glow appears natural.
Chunky Highlights (Adding Definition):
Use 90% Ionrach Skin and 10% Lahmian Medium for broader highlights along edges and bone ridges.
Fine Highlights (Adding the Glow):
Highlight with:
90% Deepkin Flesh and 10% Lahmian Medium for subtle detail.
50% Deepkin Flesh and 50% White Scar, thinned, for extreme tips.
Use White Scar sparingly to add tiny, glowing points at the sharpest edges, like fingertip bones.
Advanced Technique 3: Black Robes
Key Characteristics:
Bold transitions from shadowy black to muted blue-gray edges.
Highlights focus on folds and torn areas, creating a crisp, spectral look.
Step-by-Step:
Basecoat:
Mix 90% Abaddon Black and 10% Lahmian Medium for a rich matte black.
Apply in 2–3 thin layers, focusing on full, even coverage.
Chunky Highlights (Defining Folds):
Use 90% Incubi Darkness and 10% Lahmian Medium for broad highlights along raised folds and edges.
Apply 1mm wide highlights with steady strokes, blending them softly into the black base.
Layered Highlights (Smooth Transitions):
Add depth and richness with progressively smaller highlights:
90% Stegadon Scale Green and 10% Lahmian Medium for the first layer.
90% Thunderhawk Blue and 10% Lahmian Medium for a second layer, applied sparingly.
Feather the layers into each other for smooth gradients.
Crisp Edge Highlight:
Use 90% Fenrisian Grey and 10% Lahmian Medium for a fine, sharp edge highlight.
Focus on torn edges and prominent folds to create stark contrast.
Dot Highlight (Adding Sharp Accents):
Place tiny dots of 90% Blue Horror / 10% Lahmian Medium on the tips of tears and folds.
Follow with White Scar for the sharpest, glowing tips.
Final Glow (Optional):
Apply a thin glaze of 50% Lahmian Medium and 50% Thunderhawk Blue to blend transitions and unify the spectral glow.
Final Notes:
Use a wet palette to maintain consistency in mixed tones.
Feathering and glazing are key to achieving smooth gradients and a spectral finish.
Dot highlights should remain precise and minimal to emphasize the ethereal feel without overwhelming the black.
Closing Summary for the Nighthaunt Pyregheists Painting Guide
Congratulations on completing your Nighthaunt Pyregheists warband! Through meticulous layering, blending, and highlighting, you’ve captured the essence of their spectral menace and macabre elegance. From the luminous cloaks and ghostly flames to the tarnished metals and decayed wood, every detail contributes to their ethereal, haunted aesthetic.
By following this guide, you’ve created models that stand out on the tabletop while honoring the rich lore of the Nighthaunt. Whether you used the foundational techniques or advanced methods, your Pyregheists now exude the chilling majesty of Nagash's spectral legions.
As you deploy these ghostly warriors on the battlefield or display them proudly, remember that each model tells a story of unrelenting vengeance and supernatural power. Thank you for letting this guide accompany you on your painting journey—may your Pyregheists haunt your opponents’ dreams and dominate the Mortal Realms!





.png)