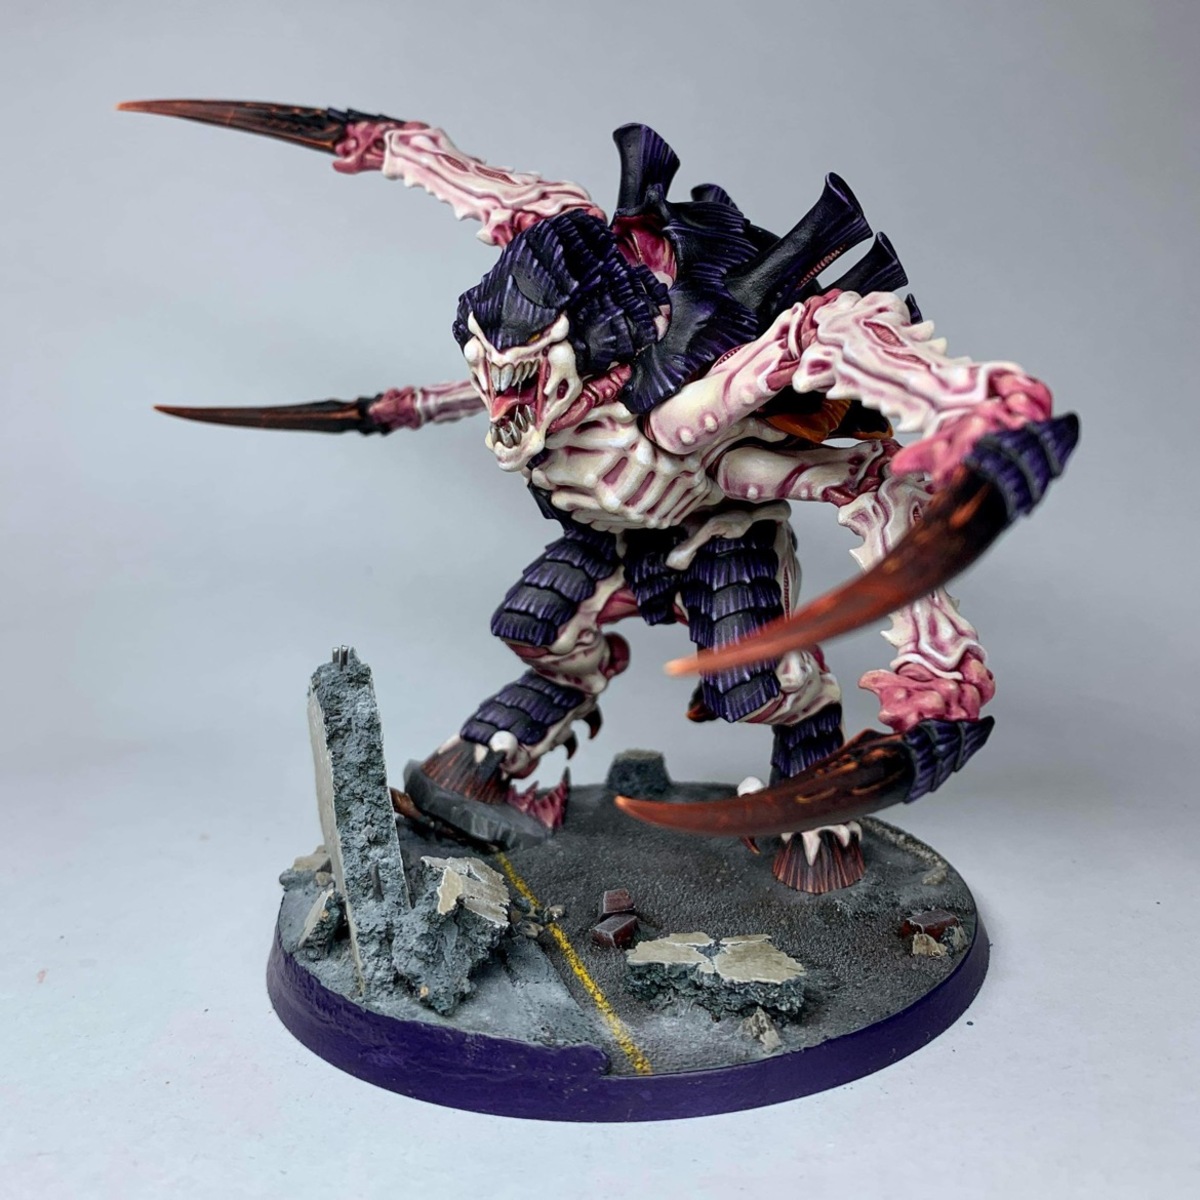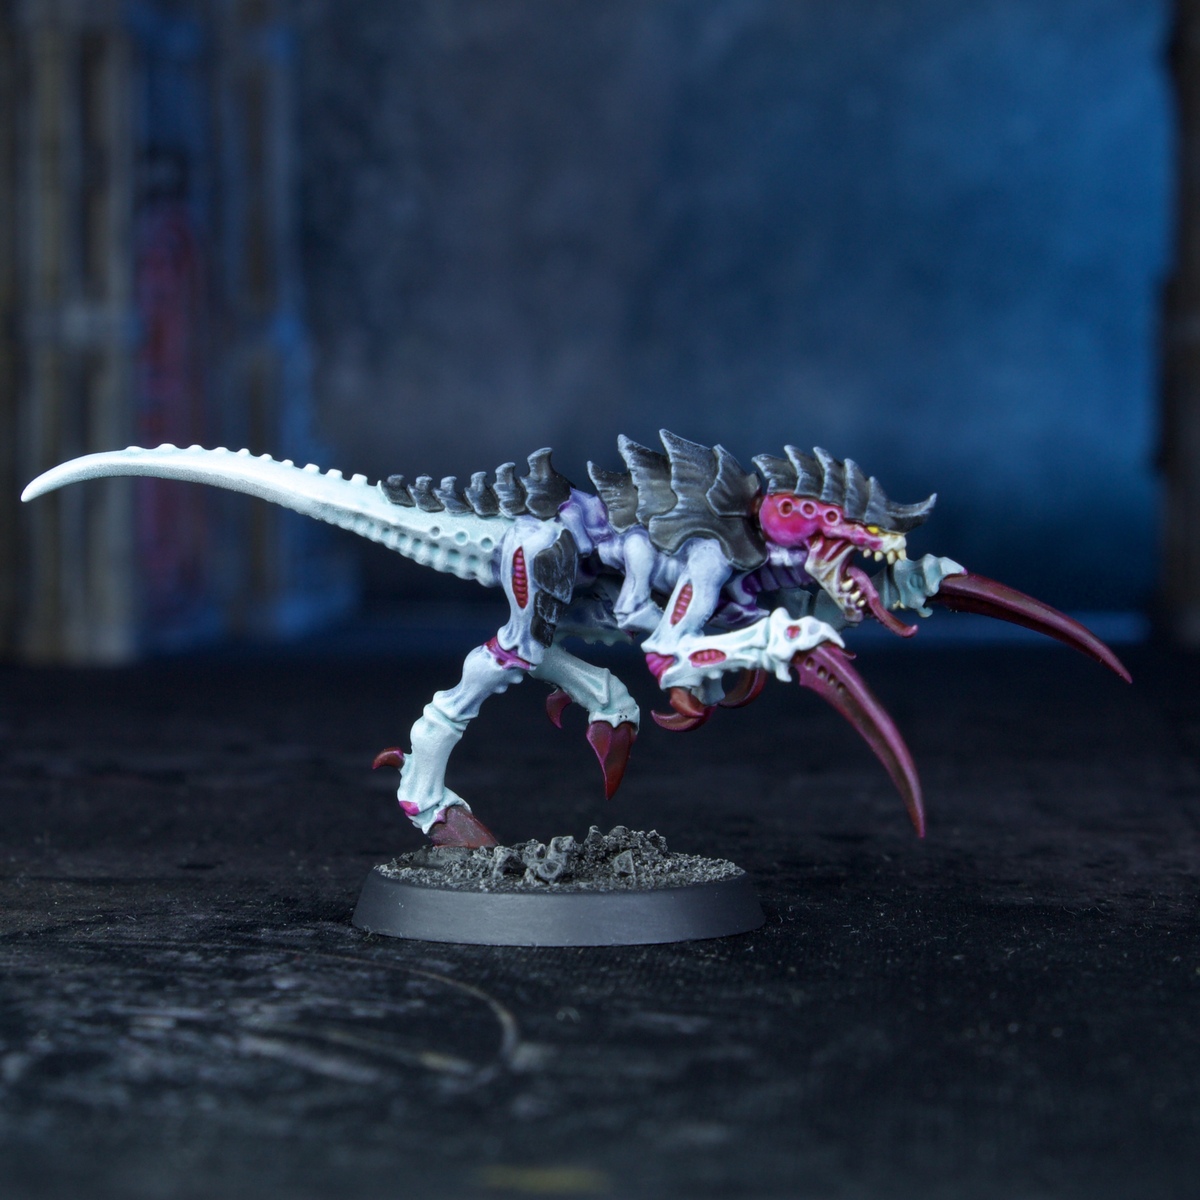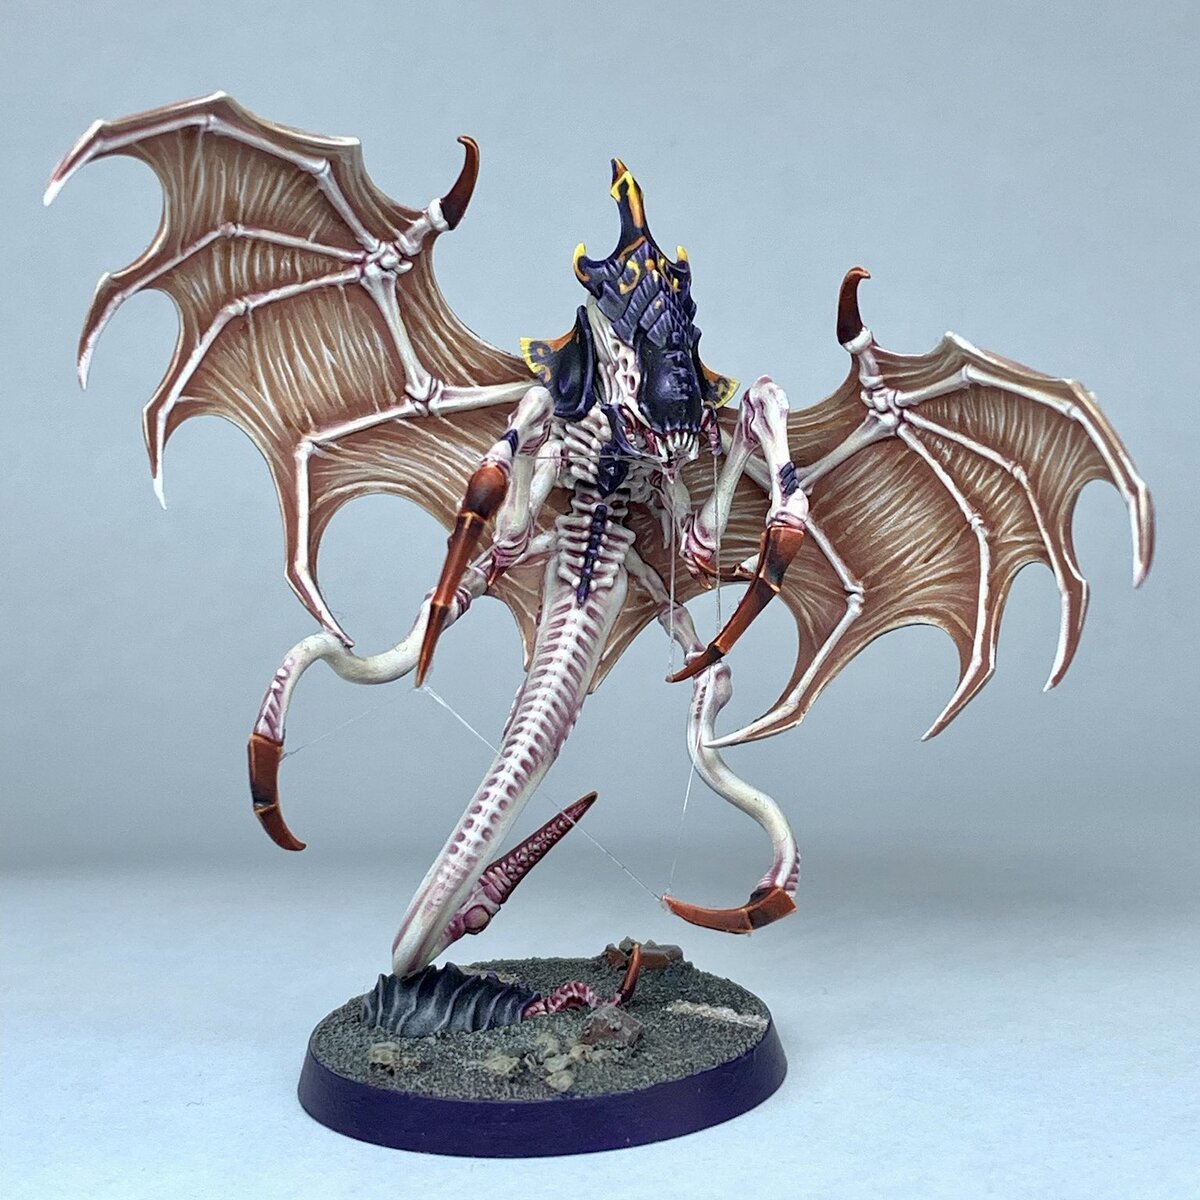

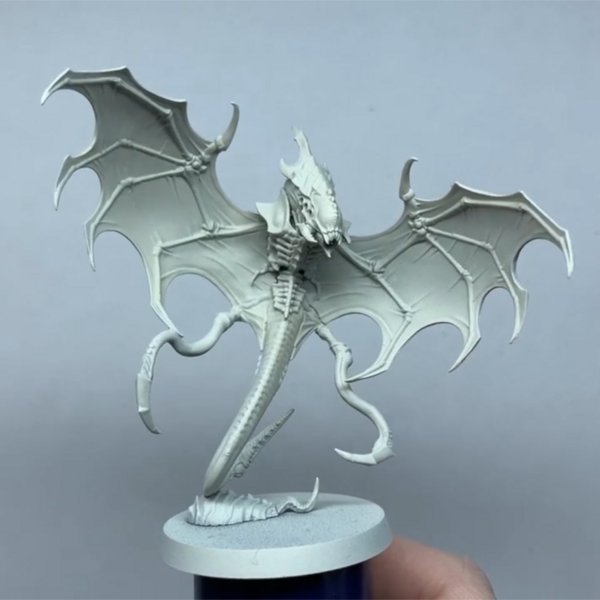
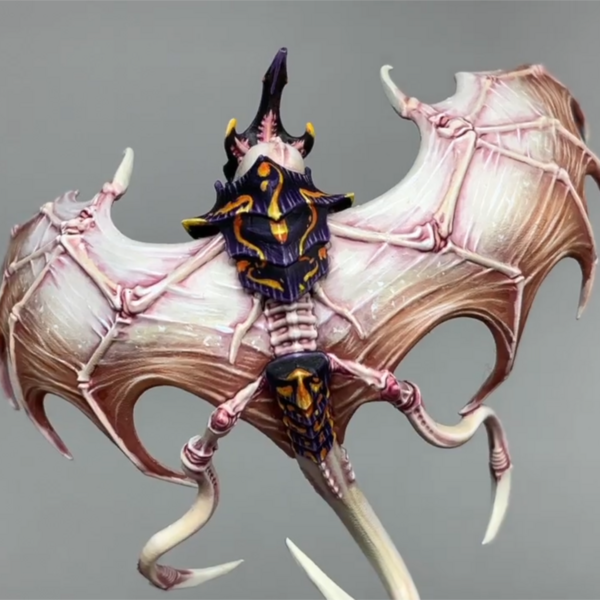
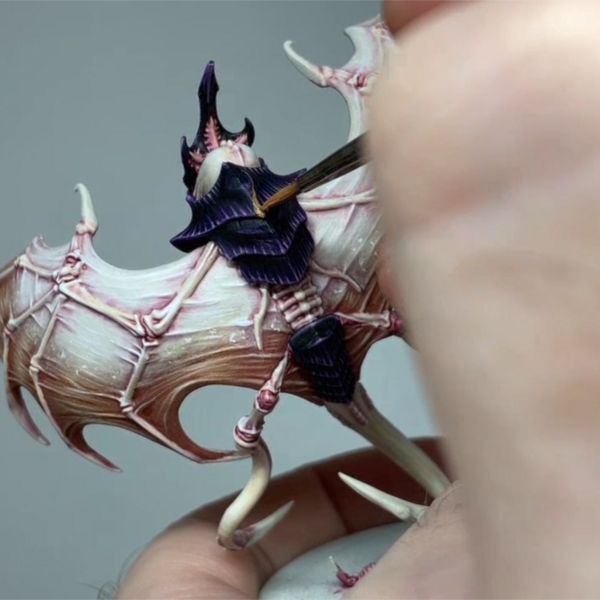
Step by step on how I painted my Parasite of Mortrex
Cream Flesh
 Basecoat the skin with Wraithbone . I used the spray can to coat the whole mini, but feel free to use a pot and brush.
 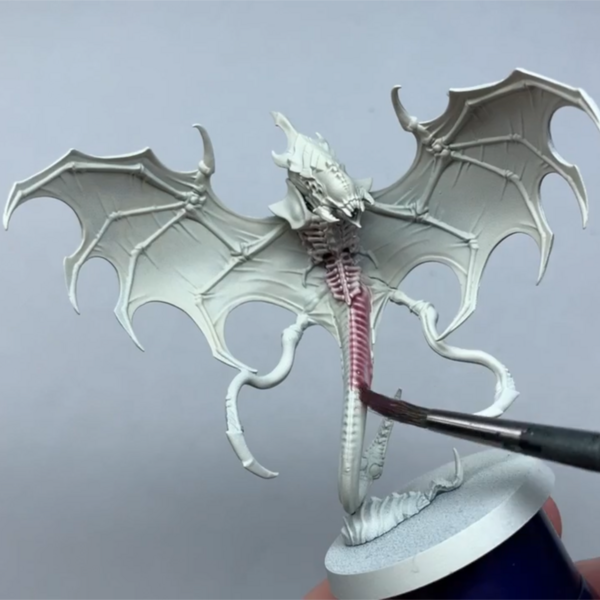 Wash the skin with a 1:2 mix of Magos Purple and Contrast Medium . Be aware of pooling too heavily, but be liberal.
 Work your way around the with Screaming Skull , relayering over the skin but leaving the Contrast in the recesses. Watering down your paint more than usual will help to make an easier gradient from the shade.
 Highlight with Pallid Wych Flesh . Focus on hard muscles, edges and glazing where necessary to mimic where light falls on the skin.
 Last highlight with a white of choice, I use White .
Internal Flesh
 Wash splits in the skin or any areas of flesh that you don't want to be cream with a 2:1 mix of Volupus Pink and Contrast Medium . Careful with pooling and be as accurate as you can, tidying up with white paints is a pain!
 Highlight with Kislev Flesh , just picking out raised areas. Final dot highlight of white (Again, using White here) to mimic a shinier flesh.
 Wing Leather
 Base all the wing areas with Bugman's Glow , being careful up around your finished cream areas.
 Cadian Fleshtone next in a couple ways. Firstly, I drybrush around the center of each wing segment to start to brighten the middles. I then glazed around the drybrush area to smoothen out the chalky look.
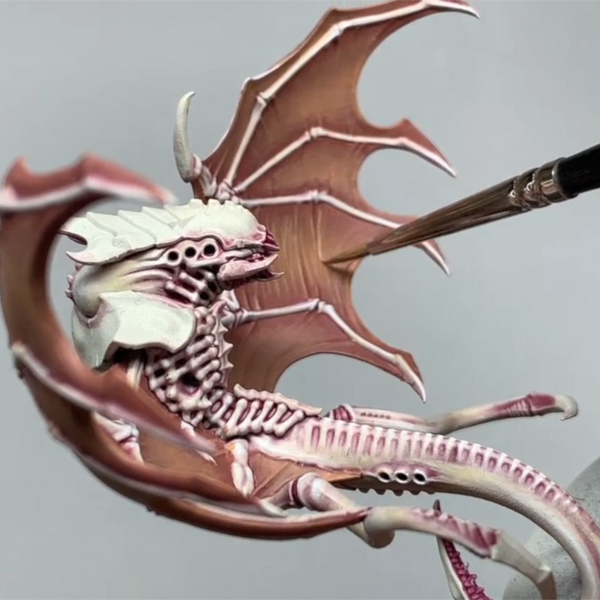 Use Kislev Flesh , thinned down with water more than usual layering consistency, and paint lines across the membranes. There's no thought process here, just trying to get a ridged, stretched skin look to the insides of the wings.
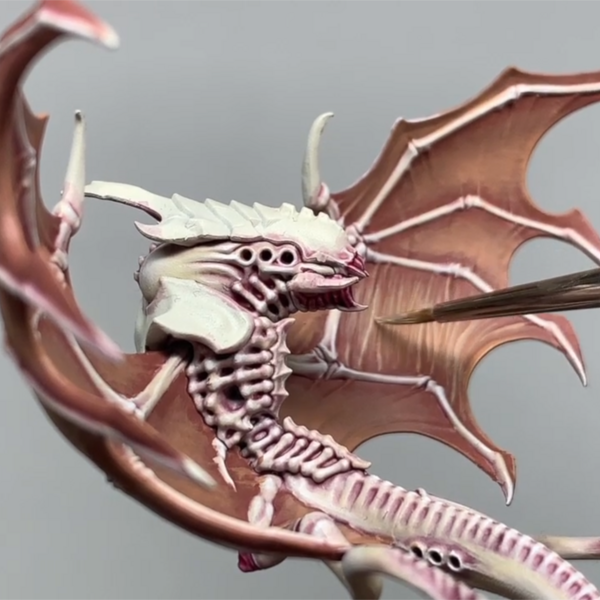 Again with Flayed One Flesh , covering a smaller area than the last step to build in a highlight.
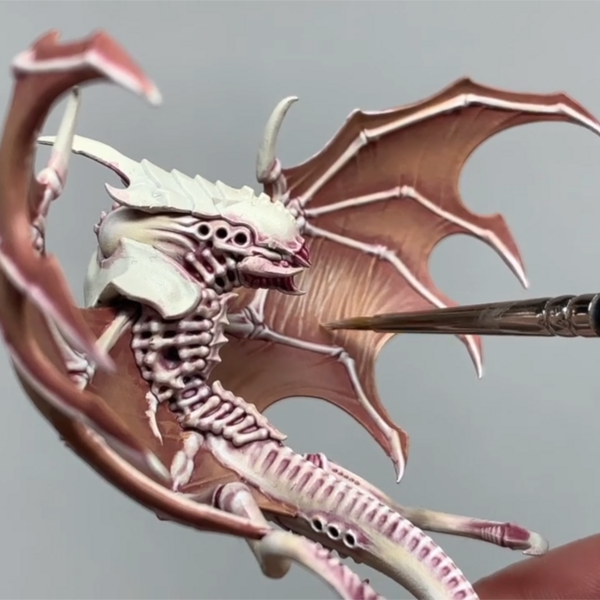 Once more with Pallid Wych Flesh .
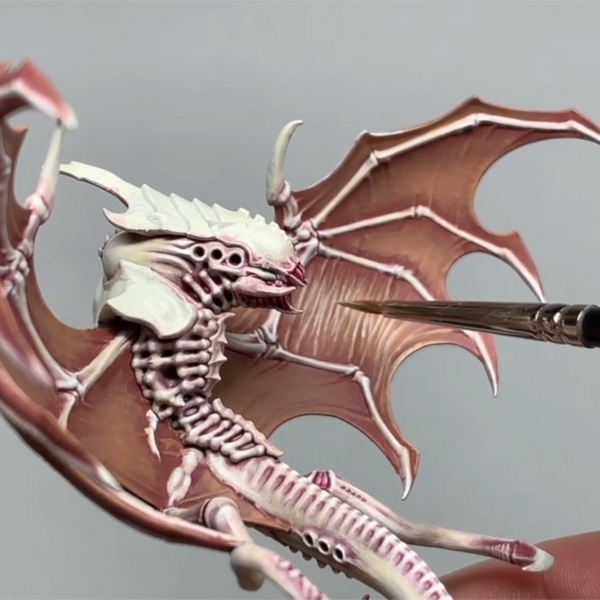 Final point highlight with White .
 Tie the colours together with a wash around the outside of the membrane and between with drawn stretches with Reikland Fleshshade .
 For mine here, I added a cream gradient to the top half of the back of the wings using the same colours and steps from earlier. For a quick repeat - Based with Screaming Skull this time (Glazed up from half way-ish), washed with Magos Purple / Contrast Medium 1:2 mix, relayered with Screaming Skull , then Pallid Wych Flesh , lastly with White .
 Purple Carapace
 Carefully base all the carapace areas with your black of choice - I used Matt Black in the video but use whichever you like best.
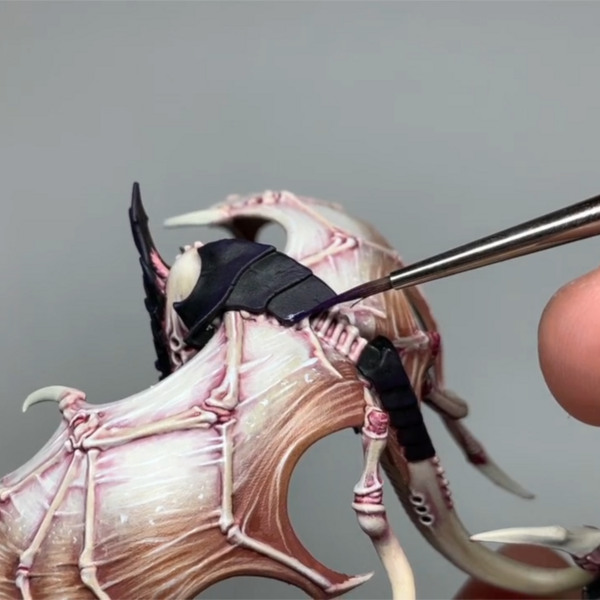 Naggaroth Night next, firstly to glaze a gradient from about half up each plate to give the effect that these are a really dark purple and not black. Then as a thick edge highlight all the way around the plates. And finally draw striation lines towards the edges. Vary up the length of these lines as you go to make it look more like natural growth!
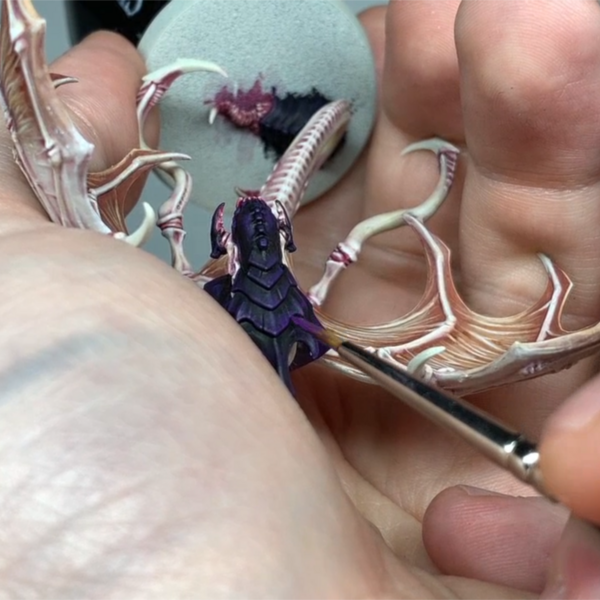 Edge highlight with Xereus Purple , following the edges and keeping inside the drawn striations from the last step.
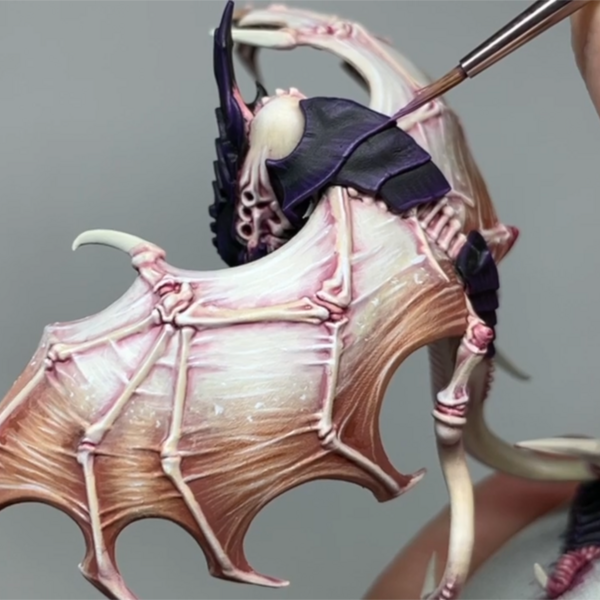 Repeat again with Genestealer Purple , covering less area than the last highlight.
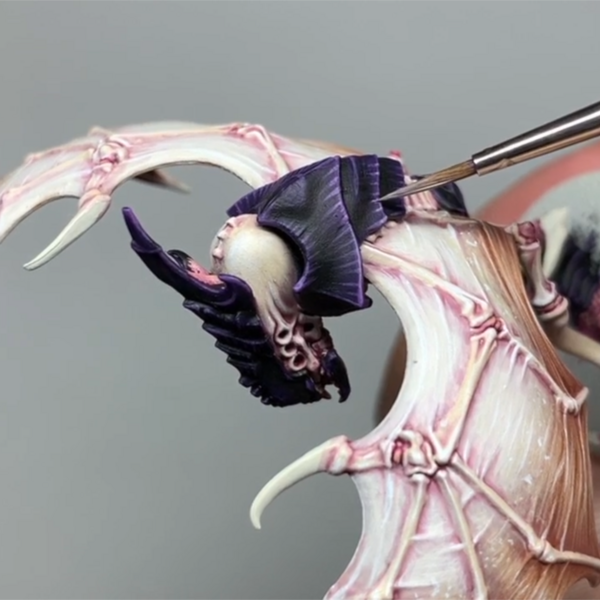 Last point highlight with Slaanesh Grey at the sharpest points.
 Yellow Markings
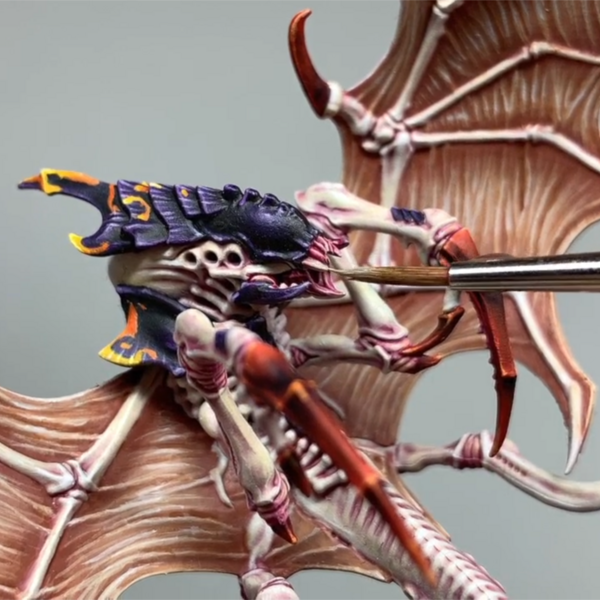
 Draw on the marking patterns with Jokaero Orange . Use references if you want a starting point, keep your paint thin, and draw on the pattern, thickening it out as you need. Take a couple passes with the paint to get a nice strong base for the next steps.
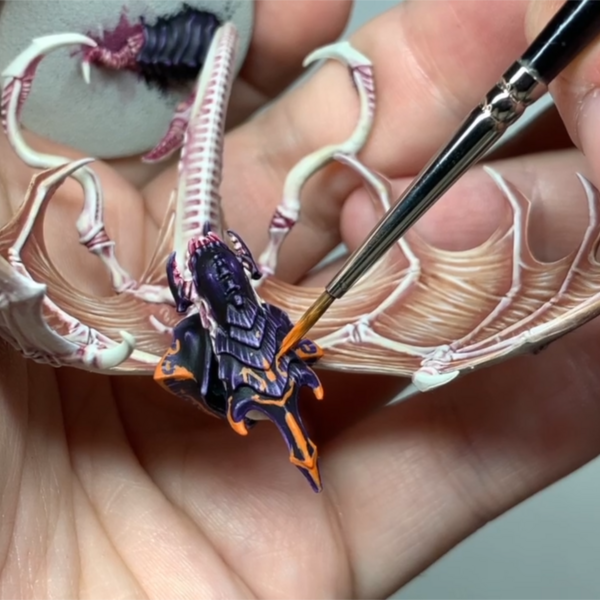 Relayer with Troll Slayer Orange to bump up the colour.
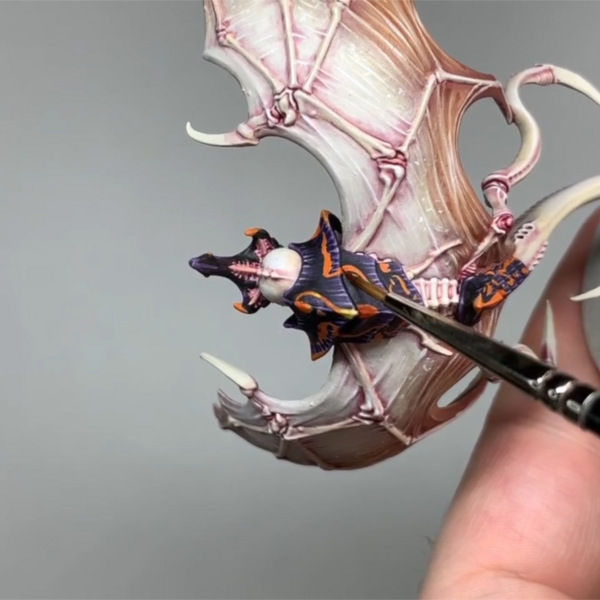 Washed the patterns with Fuegan Orange towards the back half-or-so of the plates.
 Highlight the sharp edges and any striations with Fire Dragon Bright , then with Lugganath Orange covering a smaller area.
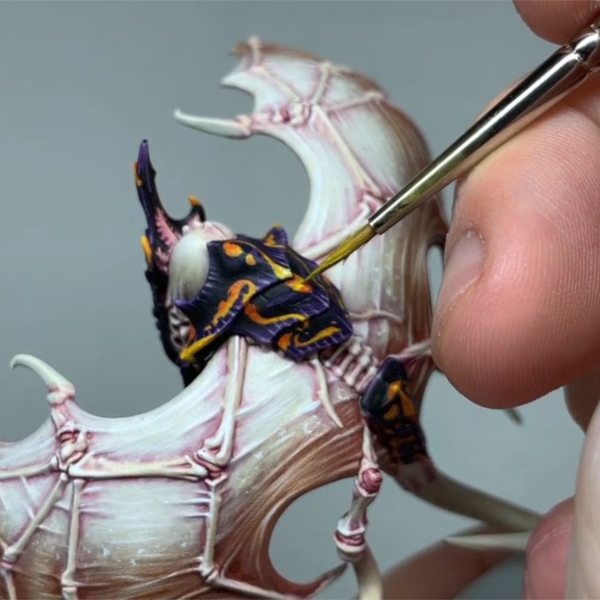 Glaze Yriel Yellow on the patterns towards the bottom halves of the plates, taking care to 'paint within the lines'. Same after that with Flash Gitz Yellow covering a smaller area.
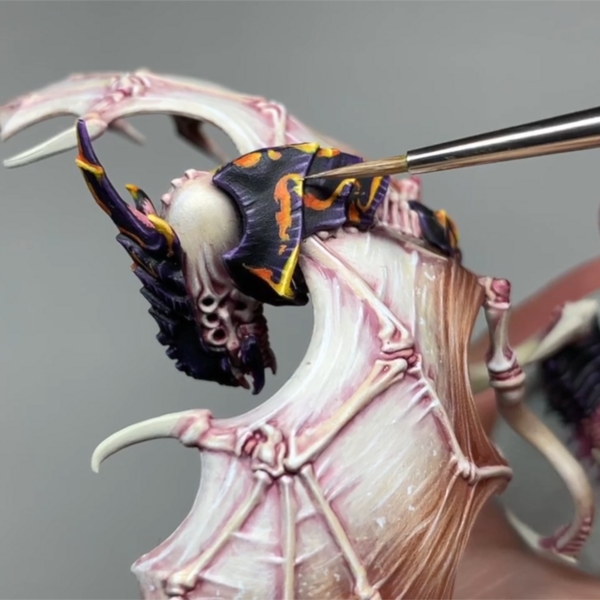 Edge the sharp points and any striations painted over with Moon Dust , then a last point highlight with Pallid Wych Flesh .
Claws
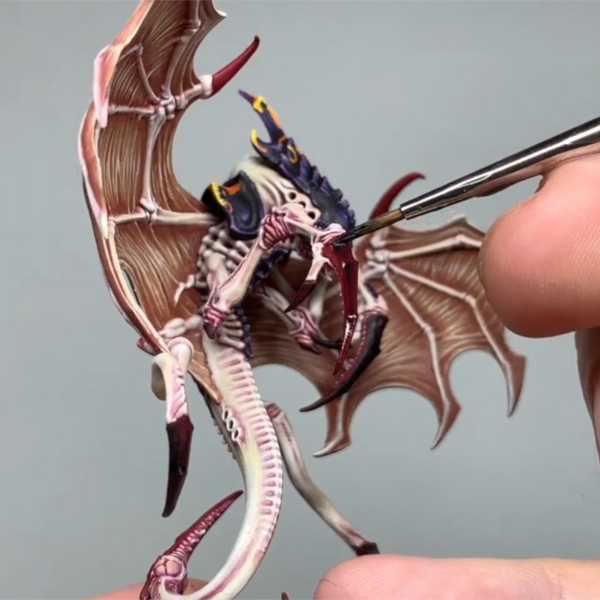 Base the claws and any 'weapons' with Khorne Red before washing them all over with Black Templar . Wash from the tip back towards the back end to make the points brighter when it dries in.
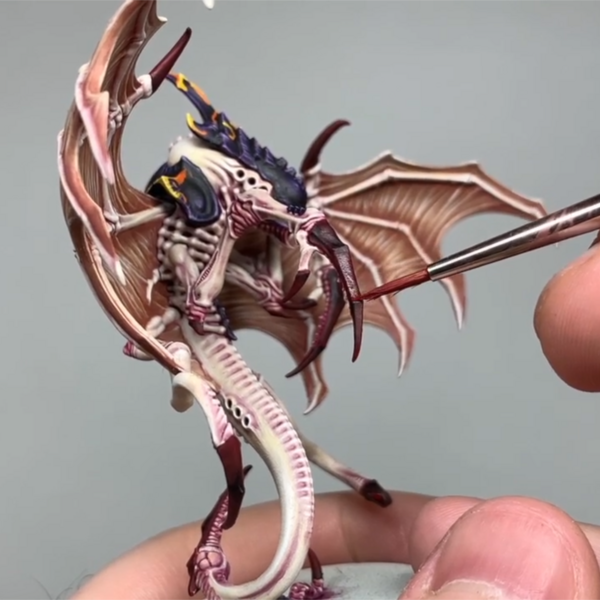 Glaze Khorne Red back over the the claws towards the sharp ends.
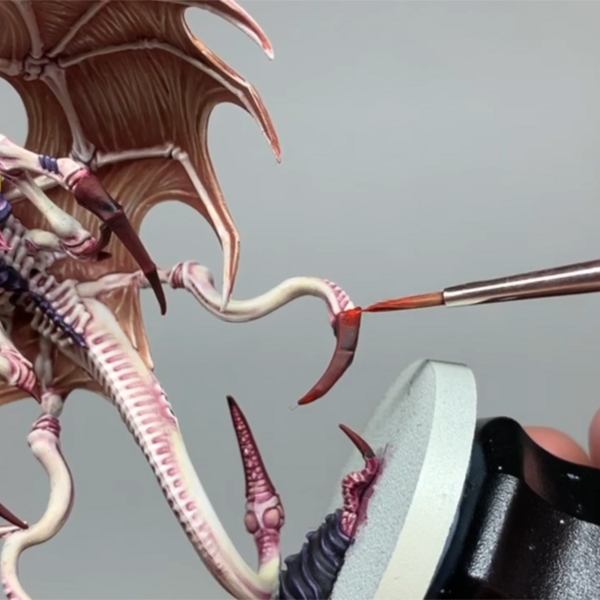 Glaze again with Evil Sunz Scarlet , as well as edge highlighting the hard edges.
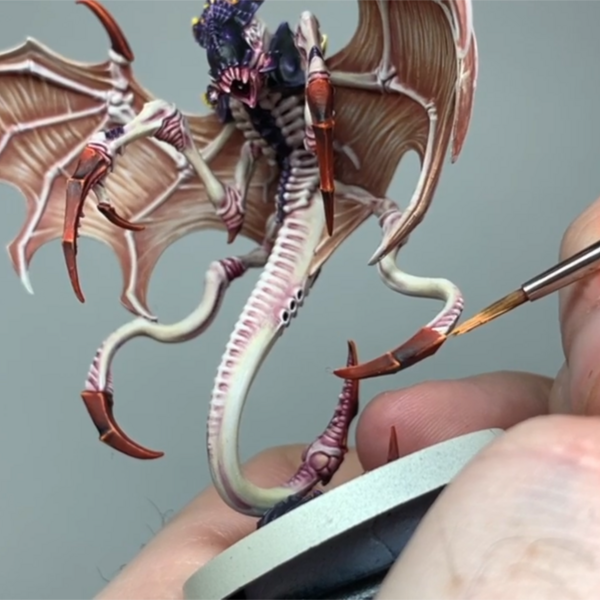 Another edge highlight with Wild Rider Red , another smaller edge with Fire Dragon Bright , then a last point highlight with Lugganath Orange .
Teeth and Spikes
 Based the teeth and any smaller spikes with Rakarth Flesh .
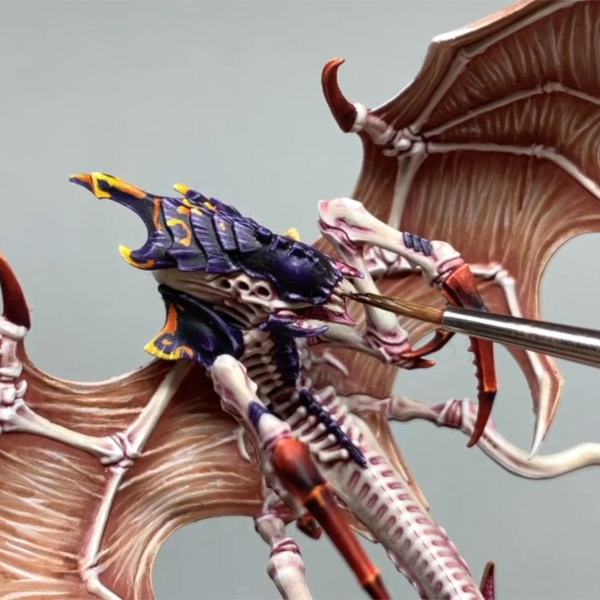 Wash down with Agrax Earthshade .
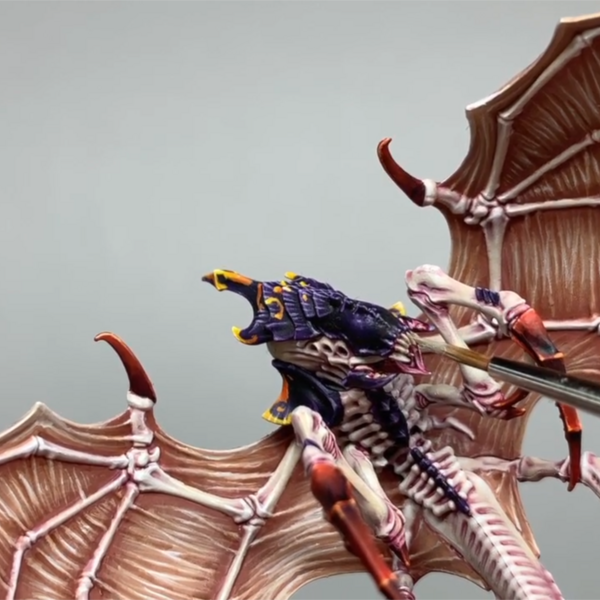 Relayer with Rakarth Flesh , mostly focusing on edges and ridges.
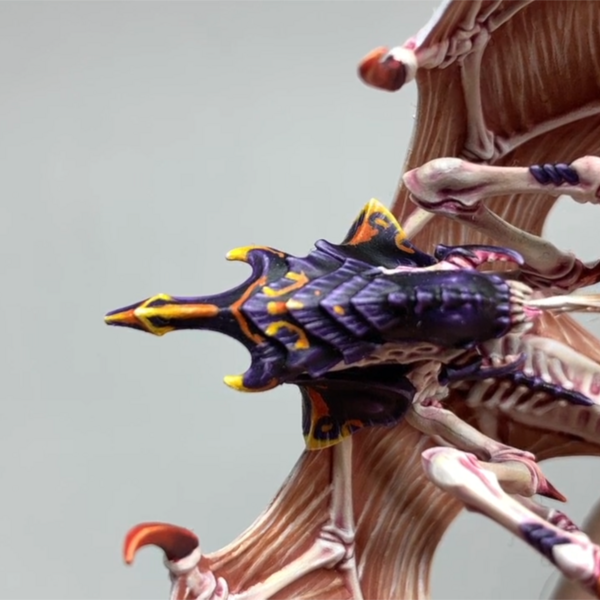 Final highlights with Pallid Wych Flesh , following your last highlights, then a point highlight with White .

Adz
HowAdzPaints
I'm a casual mini painter who's fallen into the tutorial space. Documenting my progress and recipes as I go!
Citadel Painting System 28
Base 5
- Bugman's Glow
- Jokaero Orange
- Khorne Red
- Naggaroth Night
- Rakarth Flesh
Shade 3
- Agrax Earthshade
- Fuegan Orange
- Reikland Fleshshade
Layer 15
- Cadian Fleshtone
- Evil Sunz Scarlet
- Fire Dragon Bright
- Flash Gitz Yellow
- Flayed One Flesh
- Genestealer Purple
- Kislev Flesh
- Lugganath Orange
- Pallid Wych Flesh
- Screaming Skull
- Slaanesh Grey
- Troll Slayer Orange
- Wild Rider Red
- Xereus Purple
- Yriel Yellow
Technical 1
- Contrast Medium
Spray 1
- Wraithbone
Contrast 3
- Black Templar
- Magos Purple
- Volupus Pink
Daler-Rowney
FW Acrylic Ink 1
- White
The Army Painter Warpaints
Acrylic 2
- Matt Black
- Moon Dust
.jpg)