Our Martyred Lady: for Maxi
This is a beginner recipe, assuming you are doing things in batches. I personally don't like to paint this way, but it's the most efficient way to put an army together.
Basing Prep
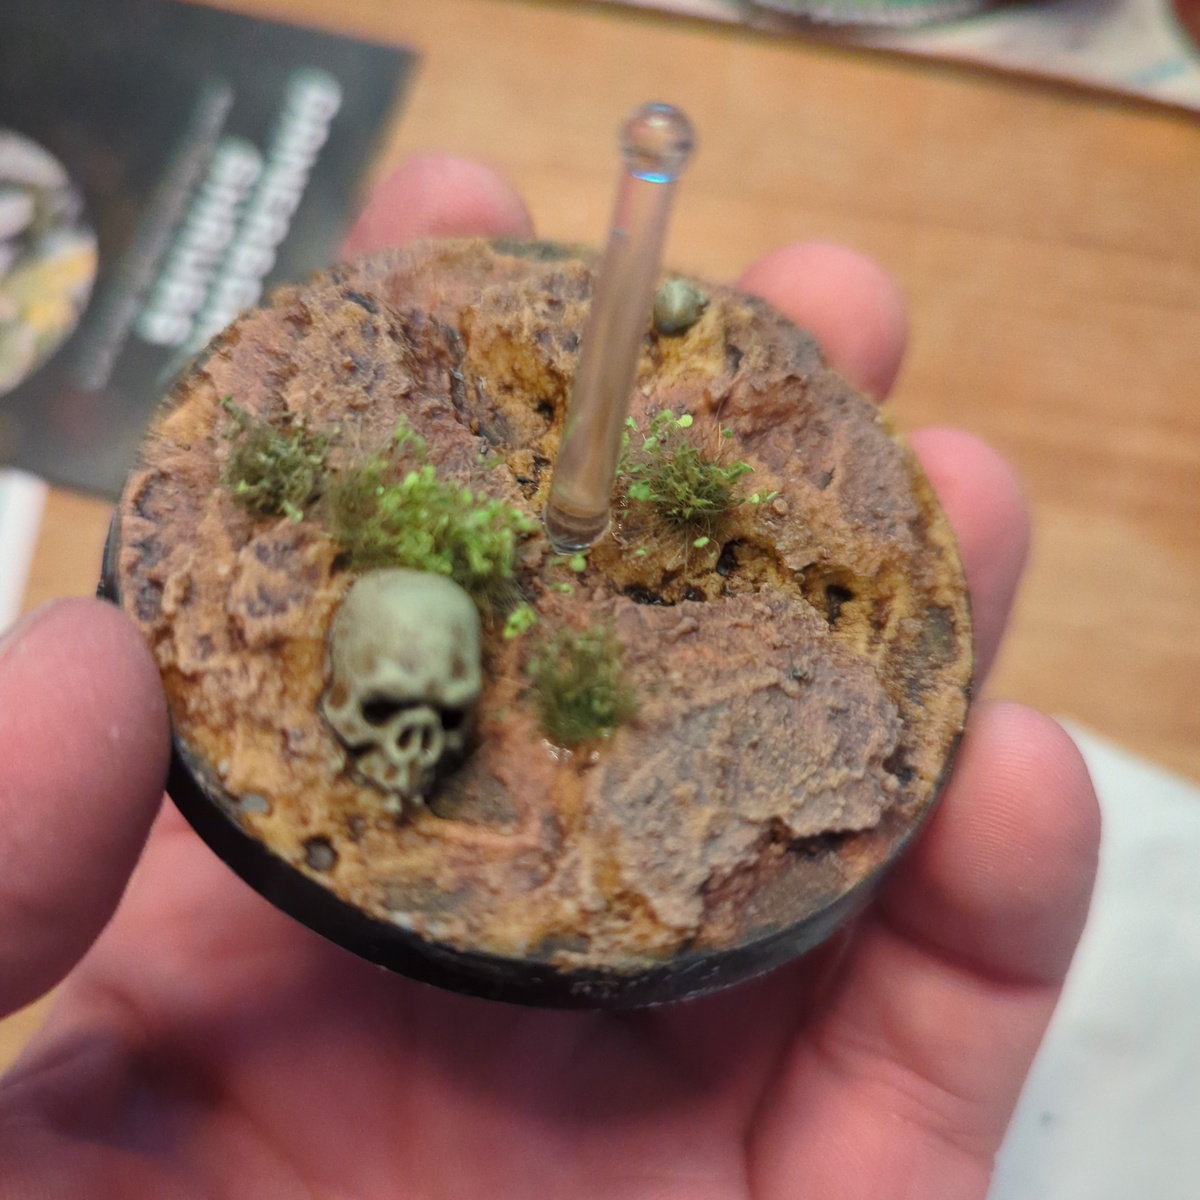
- I’m going to recommend you don’t attach your mini to your base right away. Assemble your mini completely, then super glue your basing bits to the base, then add your texture paint around it.
While the texture paint is half dried (you’re able to leave an impression) place your mini’s feet so that you can see how everything will look and if you like the composition. Remove the mini so that you can still see their footprints, this is important so that you know where to super glue them down once everything is painted.
Using blue tack, you can stick the mini down on a handle of your choice (shot cup, pill bottle, spray can lid, etc), and your base on another. We do this so that you can paint your mini without having to dodge around the basing bits you’ve placed, and so you don’t get texture paste on your mini.
Priming
- After everything is assembled and bases put together, shake your primer can like crazy, you may even want to warm the can in hot water for a minute and then shake. Shake the can for two minutes. Not 'like, two minutes'. Two minutes.
- From 30cm away, do light passes on the minis. Start your spray off the mini, sweep over it, then end the spray off the mini. Get every angle, but don't overdo it. Let them dry and cure for at least an hour, preferably over night
Black Armour
- Basecoat the Armour with Heavy Charcoal
- Mix Heavy Charcoal , Neutral Grey and Prussian Blue on your palette in a 4:1:1 ratio. Use this colour to layer the highlights on the armour, or if you'd rather not layer, you can edge highlight instead. Not every edge needs to be highlighted, just the edges that would catch the light. For a guide on where to place your layer highlight, I'd look at some GW artwork of the sisters, especially if the armour is mostly matte (Non-Metallic Metal painting will come later in the career)
- If you'd like to edge highlight after layering, using the same colours, mix them in a 4:2:1 ratio.
Red Robes
- Basecoat the inner face with Violet Red
- Basecoat the outer face with Red
- Wash both faces with Oblivion Black Wash Make sure it doesn't pool anywhere on the model, just wick it way with a damp brush if it does. If you need two layers of wash, so be it. No need to drown the mini in wash.
- For the Inner face, re layer the inner robe with Violet Red avoiding the recesses and where the light wouldn't reach.
- Do the same for the Outer face, with Red . Avoid the recesses, but most of the robes will be in light, still dodge those deep folds where the wash settled
- Highlighting the inner face; mix Violet Red and Ivory 2:1. Place this highlight on the apex of the folds that will see any light, there shouldn't be that many. Leave most of the last layer visible, and avoid the recesses, we're aiming for the most light-catching parts.
- Edge highlight the inner facing robes with Violet Red and Ivory with a 2:1.5 ratio
- Highlight layer the outer facing robes with Red and Bright Orange 2:1
- Edge highlight the outer face with Red and Basic Skin Tone 2:1
White Armour Plates, Fleur de Lis, Wing Reliefs, etc
- Basecoat the parts you want 'white' with Neutral Grey
- Layer up from there with White Grey This may take a few layers to get a solid colour. Painting white is a pain in the ass, so we have to make it easy by starting from grey and move up to white. We want to completely cover all the bits we painted grey
- Once you're happy with the coverage of the white, add the Space Grey Xpress colour to your palette and add some water to it 1:1. Take that mixture and apply it like a wash to the white parts. You want to be careful to not touch other areas you've painted, as these types of paints stain quite easily. Change the ratio as you like if you want more or less contrast
- Once the Space grey has dried; re layer with White Grey We want to leave the recesses alone, leaving that space grey as some definition to separate the white.
- From here; edge highlight with White
Leather
- Base coat with Flat Earth
- Edge highlight with Flat Earth + Basic Skin Tone 1:1 Feel free to keep these edge highlights jagged, add a few scratches here and there for some texture.
- Wash with Archaic Sepia Wash
Bolters and other Dull Metal
- Basecoat with Gunmetal Grey Careful, this range is very fluid, but goddamn it covers well
- You could try and replicate this kind of bolter: https://i.etsystatic.com/20755521/r/il/e60e92/5165494038/il_fullxfull.5165494038_cfgt.jpg, for that, I would follow the outer face robe recipe on those panels, or use the black armour recipe, your call
- Carrying on, wash everything with Oblivion Black Wash
- Edge highlight with Gunmetal Grey
Gold Bits and Embellishment
- Basecoat a mixture of Gold and Copper 3:1 Adjust this ratio how you like.
- Wash everything in Archaic Sepia Wash
- Re-layer with that basecoat mixture, avoiding recesses and areas around rivets, etc
- Edge highlight with Gold
Bronze Shields and other Embellishments
- Basecoat with Copper , Gold and Silver 4:1:1
- Wash with Archaic Sepia Wash
- Re-layer with the basecoat mixture, avoiding recesses
- Edge highlight with Copper , Silver and Gold and 3:2:1
Power Weapons
- This might be tricky, but I know you can do it. We're working in reverse, shading down rather than highlighting up. We're replicating this effect: https://assets.paintpad.app/rails/active_storage/representations/proxy/eyJfcmFpbHMiOnsibWVzc2FnZSI6IkJBaHBBaVl5IiwiZXhwIjpudWxsLCJwdXIiOiJibG9iX2lkIn19--e5f6e4d281a4990c7096821e9010f1606e14fdeb/eyJfcmFpbHMiOnsibWVzc2FnZSI6IkJBaDdDRG9MWm05eWJXRjBTU0lJYW5CbkJqb0dSVlE2RTNKbGMybDZaVjkwYjE5bWFXeHNXd2RwQXJBRWFRS3dCRG9RWVhWMGIxOXZjbWxsYm5SVSIsImV4cCI6bnVsbCwicHVyIjoidmFyaWF0aW9uIn19--7e4ff7de9033db0b03c6297d2714f8cab5fac899/tmm%20blade.jpg
- Basecoat the power weapon blades, hammers, axes, whatever, in Silver
- This is the tricky part, we'll be doing something called glazing. It's not hard really, but it does take practice. You may want to practise on a bit of spare sprue if you like.
We'll be using Oblivion Black Wash as a glaze. Add it to your wet palette and add some water, maybe 2:1 wash to water. Load a bit onto your brush, and dab it off on a tissue we want to avoid seeing any pools of paint wen we do this, hence the dabbing. Now you want to lightly sweep your brush from one end of a face to the end. The direction you sweep is very important, where you end your brush stroke will be where the most paint is deposited. If we look at that picture, we can see how one end of the face of the blade is darker than the other, they ended their sweep at that end. Now do it again on the next face in the opposite direction.
This will take multiple goes, and it's important to let the glaze dry completely between applications. When you start your next application you want to start your brushstroke further along than the last, sweeping over a smaller area. If this is hard to visualise, I highly recommend looking up a tutorial on youtube, there's heaps. - Once you're satisfied with the contrast, edge highlight with Silver . Try and get it between the different faces on the flat side of the blade like our example has.
- Fun part. We want to do another glaze but we'll be tinting the surface a cool blue green colour. Add Xpress Colour Caribbean Turquoise to your palette, and thin it 1:1 with water. Load our brush the same way we did with the last glaze (dab it, for real), and starting at the dark parts of the weapon face, sweep towards the opposite end. Do this as many times as you like until you're happy, remember to let the last layer dry.
- You've just done a fun technique called 'Sketching'; we set the light and shadow with neutral tones, then tint it with our desired tone using a transparent colour/glaze
Plasma Coils
- For the exposed plasma coils on plasma pistols, etc, we'll basecoat with White
- On the ridges of the coils, paint Blue Green leaving the white in the recesses
- Closer to the corners of the coils, paint a mix of Blue Green and Sky Blue 1:1
- Right on the corner points add a dot of Sky Blue
- Get your Caribbean Turquoise Xpress paint, thin it 1:1 with water, and wash it over the coils, we want to get everything, including the white in the recesses. Do until happy.
Purity Seals
- For the wax, mix Violet Red and Red 2:1 and base coat the wax
- Wash them with Oblivion Black Wash
- Edge highlight/layer with your original basecoat mix
- For the Paper, basecoat with Ivory
- Get a thin brush, thin some Black and do little scribbles along the paper to give the idea of writing.
- Wash the paper with Archaic Sepia Wash
- Edge Highlight up with Ivory
Hair
- Copy the white embellishments recipe, but instead of washing with the Xpress Space Grey, use Oblivion Black Wash
Faces
- Basecoat the faces with Basic Skin Tone
- Mix Archaic Sepia Wash and Red on your palette 4:1. We want a slightly red tinted wash.
- Delicately apply the wash over the face, let it settle in recesses.
- Come back with Basic Skin Tone and lightly layer up the cheek bones, chin, bridge of the nose, and eyebrow area. Legit, look up some make-up tutorials to see where they apply the highlights. I use them all the time, and we're doing exactly the same thing, sculpting the face with colour.
- Mix Basic Skin Tone and Red 3:1. Use this to sperate the lips from the rest of the skin. Try and keep some wash in the recess between the top and bottom lip to help define them
- We will be progressively highlighting the parts I mentioned earlier with a mixture of Basic Skin Tone and Ivory . Start 3:1, highlighting less and less of the face as you progress. After the 3:1 is done, move to a 1:1 mixture, then finish with a 1:2 mix. Have some reference up on your monitor, it goes a long way to make sure you're doing this right.
- Take some Flat Earth and Black 1:1 and draw on some eyebrows.
White-Gold Trim
- Looking at the leader model, her trim is a different gold to the rest of her sisters. We'll Mix some Gold and Silver 2:1 and base coat those trims with that.
- Wash it with Oblivion Black Wash
- Re-layer up with the basecoat, dodging the recesses and areas around bolts, reliefs, etc
- Edge highlight with Silver
AK Interactive 3rd Generation Acrylics
Metallic 1
- AK11197 Copper
Two Thin Coats
Wash 2
- Archaic Sepia Wash
- Oblivion Black Wash
Vallejo Game Color
Extra opaque 1
- 72.155 Heavy Charcoal
Vallejo Metal Color
Base 3
- 77.720 Gunmetal Grey
- 77.724 Silver
- 77.725 Gold
Vallejo Model Color
Base 13
- 70.808 Blue Green
- 70.812 Violet Red
- 70.815 Basic Skin Tone
- 70.851 Bright Orange
- 70.918 Ivory
- 70.926 Red
- 70.950 Black
- 70.951 White
- 70.961 Sky Blue
- 70.965 Prussian Blue
- 70.983 Flat Earth
- 70.992 Neutral Grey
- 70.993 White Grey
